Douglas B-26K Counter Invader in 1/48th

Started by Chuck A. Villanueva · 125 · 1 week ago
  • Profile Photo
    John vd Biggelaar said 1 year, 5 months ago:

    Very good progress indeed, Chuck @uscusn

  • Profile Photo
    Chuck A. Villanueva said 1 year, 3 months ago:

    Thanks Spiros, with a bit of time available over the holiday weekend time to get this going again.
    Tom. with most of the AM parts now at hand back to work.
    Thanks John, the Eduards and Quinta Studio updates will really help in the cockpit area.

  • Profile Photo
    Chuck A. Villanueva said 1 year, 3 months ago:

    To start the New Year with an ongoing project in progress, is to start work on the flight deck. Starting with center console.

    3 pieces make up the console and are quickly assembled. Next is to remove the details before attaching the Quinta detail bits. Put aside for now.

    Next is the cockpit floor, plain but correct for the "K" variant. Provision for dual controls.

    Next to attach the PE floor inserts to add some details that are lacking on the kit provided floor. Amazing how a simple upgrade enhances the floor.

    Once the PE bits set, next is to install the center console.

    Next a pair of boxes are folded into shape and attached against the L and R side of the console on the deck. The seats will sit over these boxes.

    A set of pedals are now folded and attached to the co-pilots position.

    Then I airbrushed NATO Black over the PE components.

    Once dry, I then added the Quinta details. Very easy to attach, much easier than the PE which can be stubborn and fiddly at times. Still take your time and enjoy the incredible details.

    The front console quadrant panel is then attached and conforms to the compound shape easily and form into the shape of the forward section of the console.

    A test fit of the floor into the LH side of the fuselage just to get the feel of how it looks to this point. A quilting is also attached to the rear lower part of the bulkhead.

    Next to work on the levers and other details, seats and RH side of the cockpit wall.

    More to follow...

  • Profile Photo
    Spiros Pendedekas said 1 year, 3 months ago:

    Great progress, my friend @uscusn! Indeed the PE floor pieces rock!

  • Profile Photo
    John vd Biggelaar said 1 year, 3 months ago:

    That interior is defintely improving with the PE, Chuck @uscusn
    Also the Quinta IP makes it look very realistic.

  • Profile Photo
    Chuck A. Villanueva said 1 year, 2 months ago:

    Thanks Spiros, John, not only the PE enhancements but the addition of the Quinta studios details really pop.

  • Profile Photo
    Chuck A. Villanueva said 1 year, 2 months ago:

    Today will complete the rest of the rear compartment detail bits. Attaching the First aid kit and Axe in their stowage space on the forward bulkhead.


    Next on the RH rear fuselage half, the rear reinforcement brace is installed, then an Eduard's PE enhancement piece is attached over that. Quite an improvement.

    The rear operator's seat is then detailed by installing the Quinta lap belts. The seat support post is painted Tamiya Black

    After the belts set, the post is attached to bottom of the seat. Not a very good contact point.

    Now to finish up the details in the flight deck.

    The B-26K is dual control unlike the previous variants were single. The RH control column is assembled and placed on the RH side cockpit flight deck.

    Next to assemble the instrument panel.

    The lower front control panel is attached to the lower edge of the IP on the pilots side. Then put aside for now.

    The pilots control panel is assembled and installed.

    Back to the IP, Nato Black is painted around the edges, dash panel and pedals.

    Flat black edges the co-pilots gauges and that panel is then applied.

    The Quinta details are really nice, the details on the IP are excellent. The main gauge panel is carefully applied. I place a small dab of white glue under each panel as a cautionary step that these pieces won't fall of over time. You never now a few years from now.

    Then the lower switch panel has another Quinta detail panel installed.

    Next is to install the IP.

    Finally the panel is installed to the flight deck. Looks real good.

    Next to assemble the seats, and the details along the RH front side wall in the fuselage half.

    More to follow

  • Profile Photo
    Spiros Pendedekas said 1 year, 2 months ago:

    That's a fantastic interior, my friend @uscusn!

  • Profile Photo
    John vd Biggelaar said 1 year, 2 months ago:

    That Quinta panel looks amazing, Chuck @uscusn
    Amazing interior.

  • Profile Photo
    Chuck A. Villanueva said 11 months, 1 week ago:

    Thanks Spiros and John the Quinta details are exquisite. Makes a normally dull black interior pop. Nice stuff.

  • Profile Photo
    Chuck A. Villanueva said 11 months, 1 week ago:

    Time to get back into getting this project going. The Counter-Invader is modified to be a dual control aircraft compared to the single pilot WWII/Korean War era brethren. This session will assemble the seats and more interior details.

    Three pieces make up the seat, base, upper seat back and pedestal. The seat assembles with no issues.

    Next the Quinta shoulder harnesses are attached over the upper seat back.

    Next the seats are installed with the LH side seat in place.

    Before installing the flight deck to the LH fuselage. Couple of items to prepare and attach.

    The rear cockpit divider is attached to the LH side fuselage.

    Quinta quilt padding installed as well as some components really changes the rather bland panel.

    Next the same quilting material is installed on the RH side fuselage half. Big difference in an otherwise all black cockpit interior.

    Finally the RH seat is installed. Then the flight deck is installed into the LH side fuselage, despite all the extra details, none bothers the alignment and fit of the kit parts so far.

    Next up is to add some final detail bits to the RH fuselage side and then button it all up,

    More to follow...

  • Profile Photo
    Spiros Pendedekas said 11 months, 1 week ago:

    The interior looks superb so far, my friend @uscusn!

  • Profile Photo
    John vd Biggelaar said 11 months, 1 week ago:

    Amazing detailing on the interior, Chuck @uscusn

  • Profile Photo
    Chuck A. Villanueva said 10 months, 2 weeks ago:

    Thanks Spiros, the Quinta details really pop within an otherwise could be a bland black interior.
    John, thanks the interior is more eye friendly to view even when the canopy is installed as the build progresses.

  • Profile Photo
    Chuck A. Villanueva said 10 months, 2 weeks ago:

    Next with the interior completes, before that moment we mate the fuselage halves, the rear compartment window is installed into the RH side of the fuselage. ICM has corrected the size and shape of this window.

    Once the fuselage is assemble, it is put off to the side to set, next up is too assemble the horizontal stabs.

    As the previous build of the B-26B, the stabs have separate elevators that can be posed. These parts go together well, no warpage of the pieces.
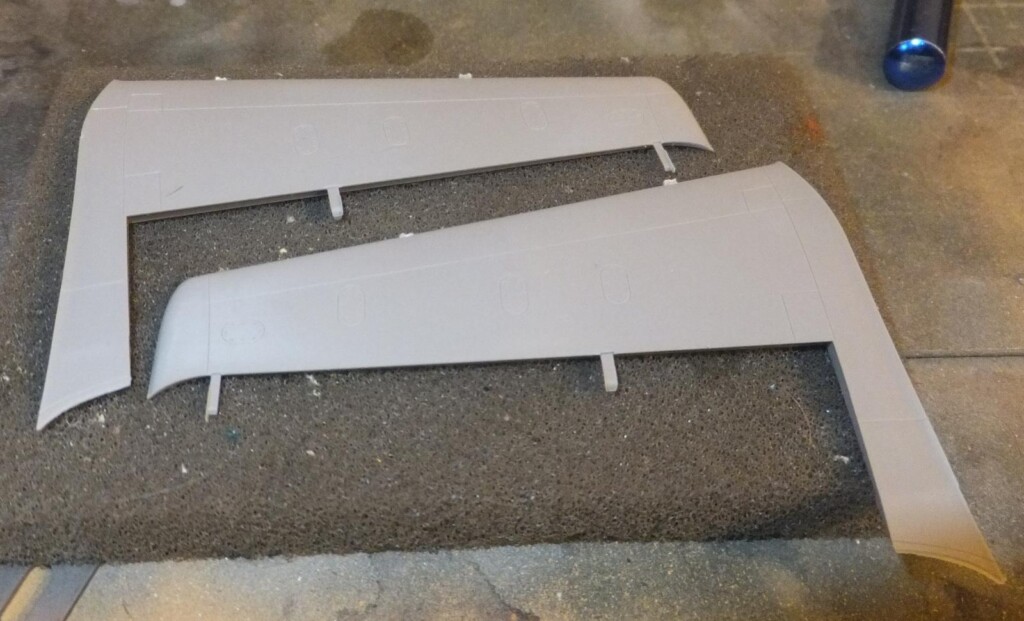
    Next is to install the stabs.

    The correct angles are set with tabs inserted into slots on the tail section of the fuselage. A slight V-angle when viewed from any point of view. Contact point is excellent and provide a solid sturdy attachment.

    Meanwhile some weight is placed in the open space in the nose. Using lead fishing weights.

    The rudder is a bit larger on the "K" that what is used on the earlier variants of the B-26. It is also poseable if so chosen. It is assembled then attached to the vertical tail.
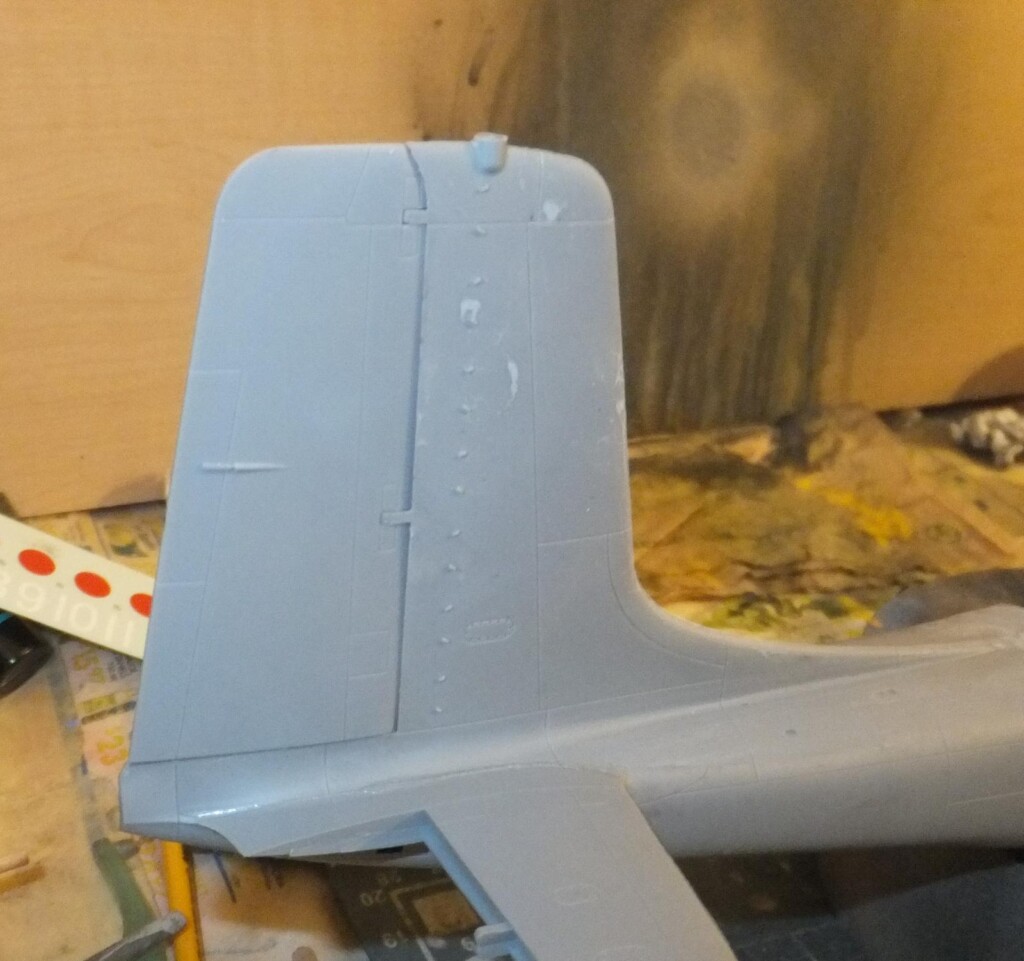
    Another detail that is unique to the "K" is the avionics bay cooling scoop attached to the RH side of the fuselage.

    Now on to the wings. ICM supplies the correct wings for the Counter Invader, which details the stiffeners that strenghen the wing to support more weight and stresses that air frame would encounter while operating low level.

    The lower wings have the weapons pylons contact points ready to install the pylons, pre-drilled. Also squared off for the wingtip tank. The orginal wings are in the kit so be careful to not get them mixed up.
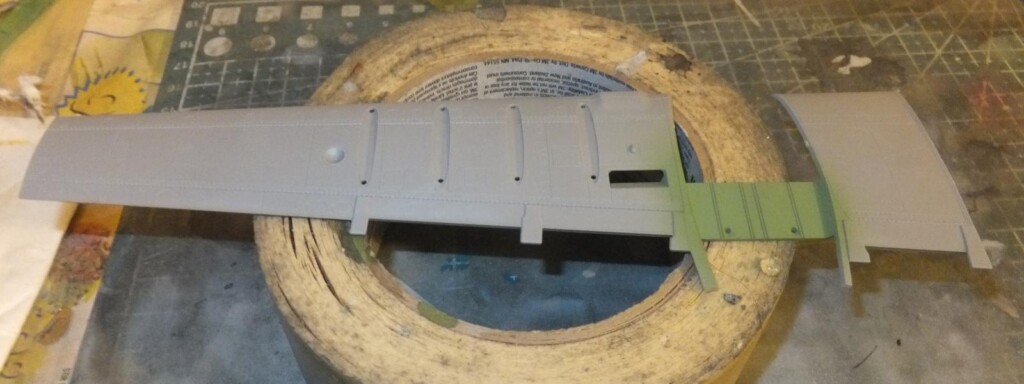
    The intake grille is attached at the back of the intake slot on the leading edge of the wing.

    Next is to assemble the wings.

    The top wing panel has the stiffeners to strenghten the wing, making this different from the earlier wing panels. Then both halves are assembled. The wings have separate ailerons and flaps.

    The wing tip tanks are assembled. 4 pieces make up the set.

    Next up the nacelles and the nose.

    More to follow.

    2 additional images. Click to enlarge.