1/48 Revell F-86D Sabre in Hellenic Air Force Colors

Started by George R Blair Jr · 45 · 3 years ago · 1/48, F-86D, Hellenic Air Force, Revell
  • Profile Photo
    George R Blair Jr said 3 years, 9 months ago:

    I sprayed the gloss this afternoon, and then I give it 24 hours to harden. Before I had this rule, I once decided to apply decals just a few hours after applying the gloss. The MicroSol and MicroSet reacted very creatively with the less-than-completely-cured gloss. It was impossible to fix without removing everything down to the plastic and starting over. I decided to leave the model just like it was and put it in my model case to remind me of a lesson learned.

    I thought I might try something new with the gloss coat. I usually use Tamiya X-20 Thinner to dilute my Tamiya paints for the airbrush, but I had read that you can also use Tamiya Lacquer Thinner to dilute the paint. A friend of mine said that the lacquer thinner will give you even better results with Tamiya, and I already like using Tamiya paints as it is. So, I took Tamiya clear gloss and thinned it with their lacquer thinner and got a really nice, shinny surface. You may look at the picture and say that you get results like this all the time, but for me, the results can be somewhat unpredictable.

    The model is now drying overnight and will get its decals tomorrow. I let then let the decals dry for 24 hours, then the clear flat seals everything in. Another 24 hours of drying and I will get some weathering and modulating done. Getting close to the end.

    1 attached image. Click to enlarge.

  • Profile Photo
    Spiros Pendedekas said 3 years, 9 months ago:

    Looks great, George @gblair!
    I have to say I'm waiting even more so eagerly tosee those HAF decals on this NATO scheme.
    They will look cool for sure!

  • Profile Photo
    George R Blair Jr said 3 years, 9 months ago:

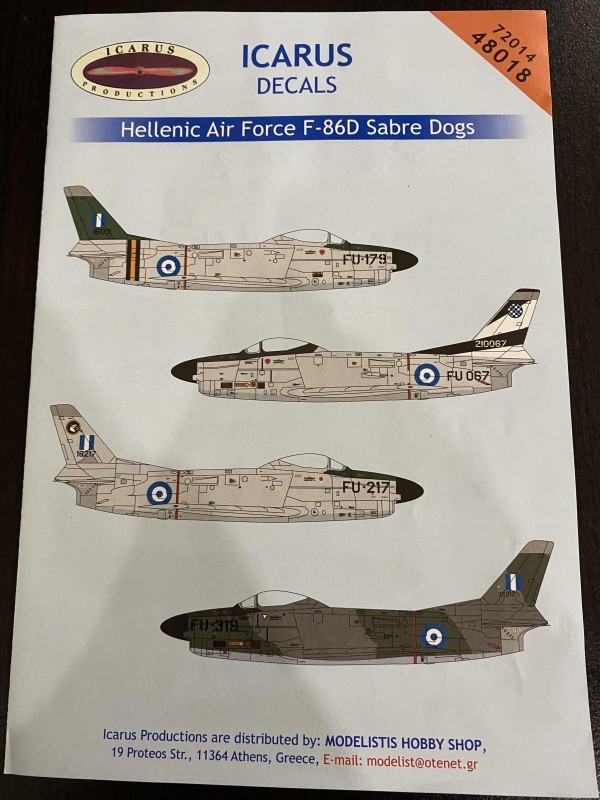
    Yesterday was supposed to be my day for decals, but it turned into a marathon that lasted two days. I used Icarus decals for this build, which I had never used before. The decals proved to be very thin and well-printed. The color instructions were well done, with numbers identifying the decal and its location on the model. When I use decals from a manufacturer that I have never used before, I like to start with a very small decal that will be located underneath the airplane. I do this in case the decals are hard to manage or don't react well to MicroSol and MicroSet. The decals are awesome, but were resistant to repositioning if you use MicroSol first. I found that, when using MicroSol first, the decal was permanently stuck wherever it made first contact with the model. When this happens, I try using water first, and then add the chemicals later. This worked fine. I wet the model surface with water, place the decal and slide it wherever it needs to go, then add MicroSol after the decal is positioned. After it dries a while I brush on some MicroSet. This seemed to work fine and I noticed silvering only on one decal.

    I have always thought that F-4 Phantoms were the most decal intensive models to build, but the F-86D is a close second. There were 134 numbered decals, but many of the numbers included more than one stencil. For instance, there was only one number identifying the "No Step" decals, but there were 8 "No Step" decals to place on the model. I would estimate there were probably 160 individual decals or more to place on the model.
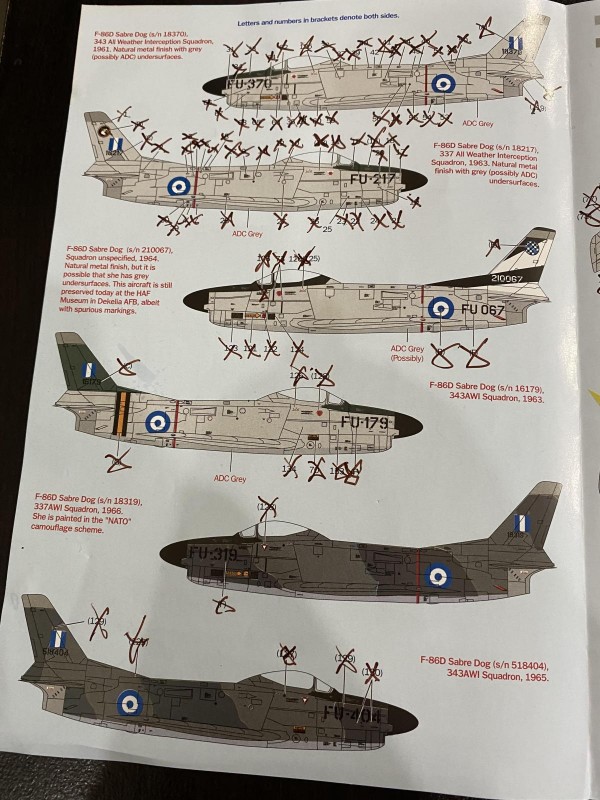
    Before I move on to sealing everything with clear flat, I need to take care of any silvering that might turn up. The model, and myself, are resting for 24 hours before we seal everything in with some clear flat. I like to give the decals a day to dry completely. It has been really humid in Central Texas, so I may need to wait until the humidity drops below 80% before I spray the clear flat. Ask me how I know it is bad to spray clear on a really humid day. :o)

    Cheers and stay safe.

  • Profile Photo
    Spiros Pendedekas said 3 years, 9 months ago:

    Hi George @gblair.
    What a fantastic progress! What a trillion of decals! Practically all the maintenance manual is stencilled! -lol-
    The HAF insignia contrast beautifully with the NATO...or is it just me?
    Ikarus decals are printed by cartograf, meaning excellent.
    Glad you had a good (but a lot!) time with them.
    This is a cool looking HAF bird!

  • Profile Photo
    Robert Royes said 3 years, 9 months ago:

    I'm late in commenting on this , but it looks great, it seems like a nice kit as well, too bad they hadn't downsized it to 1/72 like they did with their Phantom.

  • Profile Photo
    George R Blair Jr said 3 years, 9 months ago:

    Thanks everyone.

    Spiros (@fiveten): That's why I built this kit. I think the blue and white insignia is so classy on either a camouflage or natural metal. I would bet that the blue is traditional in Greece and it reminds me of the roofs on some of the coastal towns we used to fly over when I was flying C-141s. I plan to do some other models in Greek markings at some point. I want to do an F-104, an F-84, and perhaps a T-2 Buckeye. I have to admit that the research and building this kit has been fun. Keep your fingers crossed for the flat clear and weathering.

    Hi Robert (@roofrat): Good to hear from you again. You are right about wishing for a downsized version of this kit. I think it may be one of the best from Revell/Monogram. I checked my stash and found I have a 1/72 F-86D from both Airfix and Hasegawa. I think I will probably tackle the Hasegawa version first.

  • Profile Photo
    Spiros Pendedekas said 3 years, 9 months ago:

    Hi George @gblair!
    Yes, blue and Greece are interconnected in such traditional way (the Big Blue movie comes to mind now...)
    I'm glad you plan to do those Greek planes. They will look splendid made by you. Should you decide upon, I will be more than happy to provide any info I can get .
    Good luck with your coating and weathering!
    Eagerly waiting to see this beauty proceeding!

  • Profile Photo
    Erik Gjørup said 3 years, 9 months ago:

    George @gblair, this is looking splendid already. Fingers crossed that the humidity will go down in Texas soon - I'm really looking forward to the finals on this build. Going to be awesome!

  • Profile Photo
    George R Blair Jr said 3 years, 9 months ago:

    Today I started putting the finishing touches on the F-86D. The painting is done, and everything has been given a coat of Matt Lucky Varnish (I love that name) by Mig. Once the clear is dry, it is time to do a little work on the painted surface. I have been playing around with a technique that uses artist's oil colors to highlight the panel lines and to carefully add some grime to the plane's surfaces. This is similar to the technique used by armor modelers called "paint filters". It is really pretty simple, quick, and relatively forgiving. There are two things you need to remember when you use this technique: first, some oil paints are toxic, so you will need to protect your skin, and second, be sure your clear coat won't react with oils. I use clear acrylic to seal the color coats.

    If you are interested, here are the steps:

    1. Create a slightly diluted mix of artist's oil colors. I used Payne's Gray for the F-86D. I dilute it with Mineral Spirits.
    2. Using an old brush, paint the oils on your panel lines and recesses.

    3. Let it dry for a few minutes. Some people will let it dry for as long as 30 minutes, but I only wait 5 minutes. Remember that oil paint dries very slowly, sometimes taking days to dry on a painting.
    4. At this point, I take a paper towel and carefully start wiping the paint off. From this point on, always go in the direct of the air flow. Armor guys don't do this step, but I like the way it works.

    5. Take a clean paper towel very lightly wet with mineral spirits and continue to wipe the oils in the direction of the air flow. Don't work too long or press too hard or you might cause your clear coat to fail.


    6. If you need to add some more oils somewhere, simply repeat the process.
    7. If you can't get into nooks and crannies with a paper towel, simply dampen a wide brush with Mineral Spirits and remove the trapped paint. Be careful not to use a brush that is too wet or you will be pulling up a lot of your oils, as well as begging for you clear coat to fail.
    8. Once you are done with the overall process, you can add oil or hydraulic streaks. I use anything dark brown for oil streaks, and I use Burnt Sienna for hydraulics.


      And that's it. It is really helpful to wear latex gloves when you do this. They keep your hands free of the oils and mineral spirits, and the surface is susceptible to finger prints until you let the oils dry for a day or two. Some modelers like to put another coat of clear on afterward, but I usually don't.

      I plan to let the plane dry for a day or two, and then it will be time to add the canopy, external tanks, missiles, etc and call it done. Stay tuned for the finale. Stay safe.
  • Profile Photo
    Spiros Pendedekas said 3 years, 9 months ago:

    Hi George @gblair!
    Your Sabredog looks splendid!
    Loved the weathering tutorial and the result!
    Waiting for your next installment!

  • Profile Photo
    Robert Royes said 3 years, 9 months ago:

    Looking good, George!

  • Profile Photo
    Erik Gjørup said 3 years, 9 months ago:

    @gblair, George, I can litterally see the speed of this jet by now. Great stuff indeeed. I might even give it a go one day after seeing this - thank you for sharing!

  • Profile Photo
    George R Blair Jr said 3 years, 9 months ago:

    Done! After everything going so smoothly all week, today the model decided to fight for completion. But it finally relented and allowed me to glue the last bits on and take some photos. It's only after I take the photos that you see things like a big smudge of tape adhesive on one corner of the canopy and dust bits all over the place. Fun build overall.

    12 attached images. Click to enlarge.

  • Profile Photo
    Erik Gjørup said 3 years, 9 months ago:

    Well done! - I'm off to headlines to give it a like 🙂

  • Profile Photo
    Spiros Pendedekas said 3 years, 9 months ago:

    Excellent! I'm off to the headlines too!