Academy 1:48 P-38M Night Lightning

Started by David A. Thomas · 15 · 6 years ago · Aviation
  • Profile Photo
    David A. Thomas said 6 years, 9 months ago:

    About 15 years ago I was fresh back in the country after years abroad, and, trying to get settled in, I wanted to get my family a dog. I saw a Scotty pup someplace, thought he was great, and within the week found one through breeder. After a month or so I decided to do some research on the critter because, well, he was turning out a beast. I quickly read something to the effect that popular sentiment notwithstanding, a Scottish Terrier is bred to be as much high-octane dog in as small a package as possible. Hhmmm. Loved him, great dog, but he soon found a new home with a friend of mine who ran a Beagle ranch in Kentucky horse country.

    There is a modeling point to this tale. As I neared completion on my Tamiya P-51B (http://imodeler.com/2017/06/tamiya-148-p-51b-of-the-486th-fs-352nd-fg/), I thought a project to sharpen my surface skills would be good for me. I weighed my options, pulled an Academy P-38M Night Lightning (1:48) from my modest stash and, after looking it over, figured that if I did it wheels up it would be fairly straightforward (I already have an Academy stand for it). Besides, I am more a fool for the P-38 than I am for Scotty pups. I built the Monogram one (cough) 40 (cough) years ago, and in spite of the grief it gave me I simply love the plane. I visited Glacier Girl in Middlesboro, Kentucky as she was being restored about 20 years ago, and it was really something walking in between her booms and look into her landing gear bays as the techs tooled minute parts out around me. I had dreamed about doing the Night Lightning version way back when, but never got to. So I thought now was my chance.

    Turns out I just bought a beast. As with my pup, I did some digging after starting in. My research, ironically, led me to IModeler as I stumbled across Chuck Villanueva’s bird (http://imodeler.com/2017/02/academy-148-lockheed-p-38m-night-lightning-usaaf/), which he posted a few months ago. Other research has led me to conclude that while the P-51, and P-47, and Bf 109 and others have all gotten more than their fair shake through various manufacturers, the P-38 has yet to be graced with a scale model iteration worthy of her legend, at least in my preferred scale. Some say Hasegawa is better than Academy, others say Monogram/Revell is as good any anyone else’s. In truth, someone needs to convince an independently wealthy tycoon to fund a really good Lightning model and relieve the general frustration I have perceived over the issue. In any case, the bottom line is I am fairly committed to the project and I realize that Tamiya she is not. Tom Cleaver called his Hasegawa P-40 “comfort food for modelers” (http://imodeler.com/2017/07/hasegawa-148-raaf-p-40e-1-kittyhawk-i/). Well, I have a kale salad here, with low cal vinaigrette and pine nuts. On the side.

    I have become philosophical about the whole thing. Modeling is a kind of recreational discipline, and that means pressing on. But thanks to IModeler I can get some feedback as I go. So I am posting this article as an “in progress” thingy, and hope for some counsel as I go. This first installation will detail what I have done and why so far, along with current challenges and victories such as there are. I admit the risk. Doing it this way means I am committed to glory or shame, with little room for middle ground. I only do one bird at a time, meaning this is it until she’s done. So here goes.

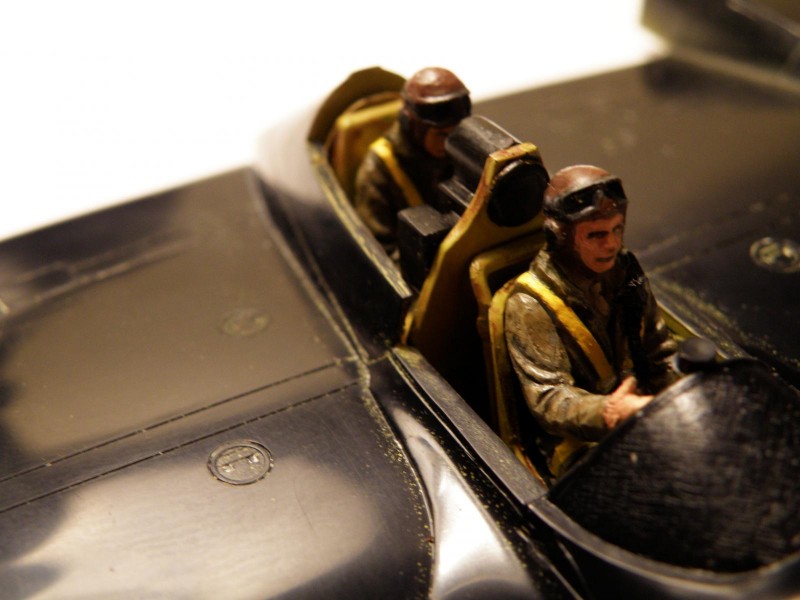
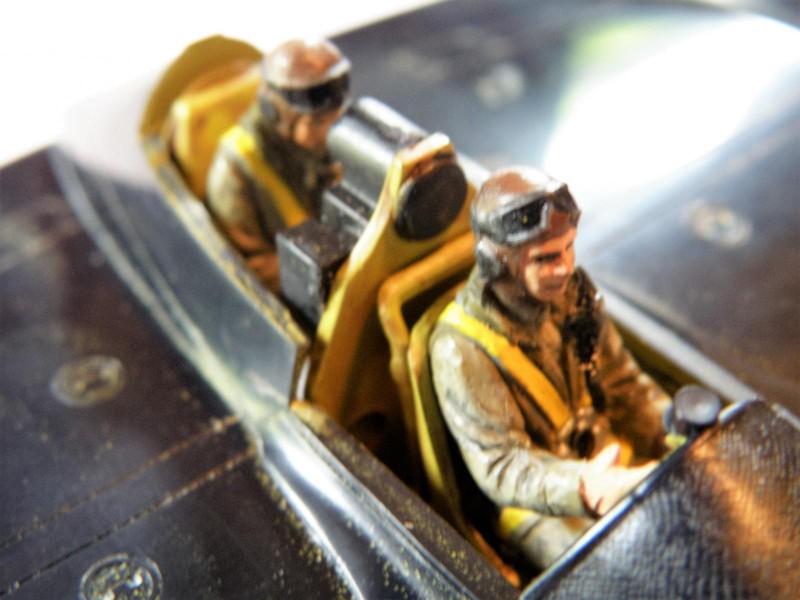
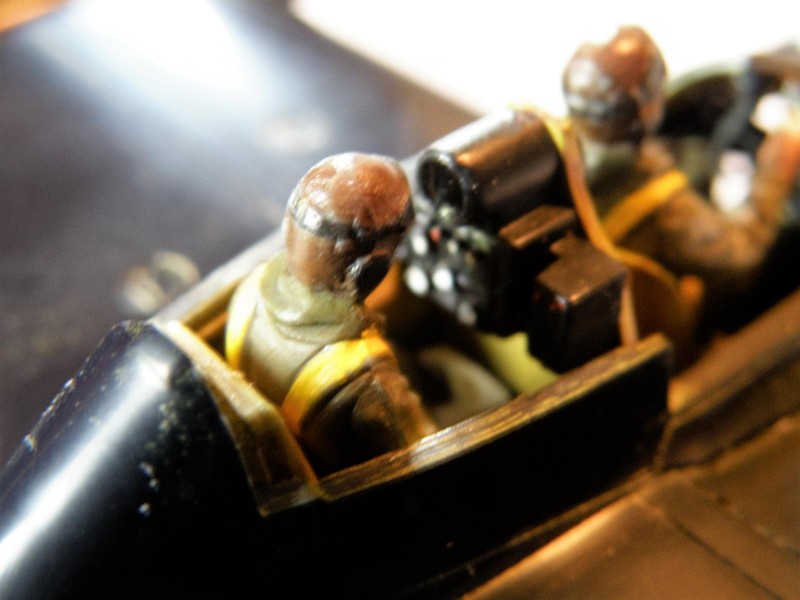
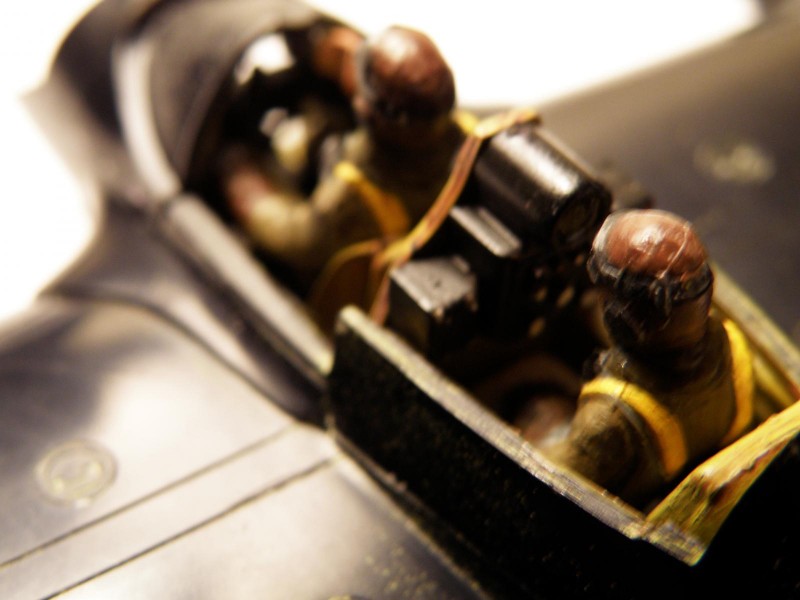
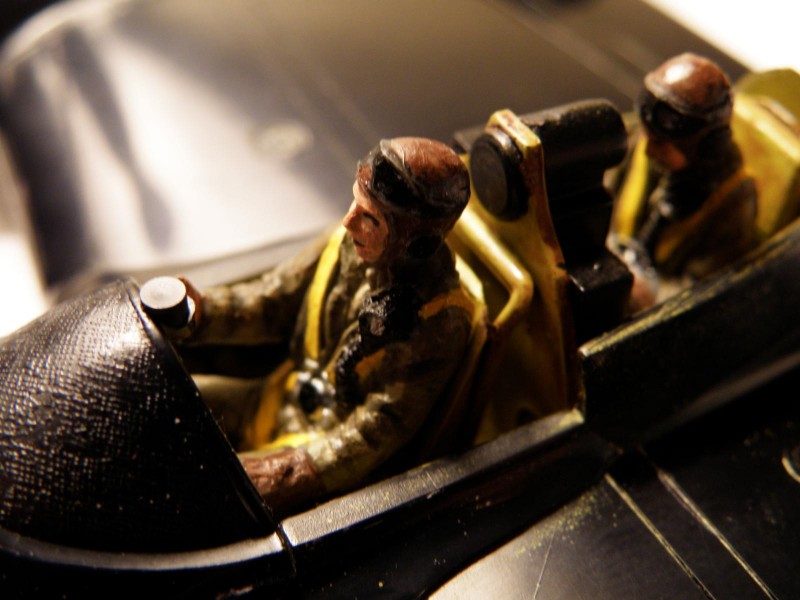
    What you see here above (and below) is how far I have gotten so far. Since I am going to paint the entire thing gloss black, and I am going to skip the drop tanks and rockets and stick with the minimalism of the P-38’s already stunning silhouette, I realize that the cockpit will be a focal point. Since I am not featuring landing gear either, I figured I’d better include crew members. Problem: Academy’s kit doesn’t come with crew figurines. So I pirated these guys from another kit in my stash that I plan on doing with no crew. To make these figures work I had to grind down his backside and cut the legs off the pilot below the knees and reposition them. I filed and filled with Perfect Plastic Putty and repainted. The radar man had to have his legs amputated entirely below the knees to get him to fit, and I am counting on the illusion that they would have been crammed in the recesses underneath his radar unit, rendering them unseeable anyway. I had to use a Dremel to remove the seat of the radar guy as well, so he would fit. Additionally, while the interior walls of the pilots cockpit are assembled from separate piece, the interior of the radar man’s space is actually in the upper wing/pod piece. To had to paint the inside with chromate green (hence a bit of overspray onto the wings that will be covered by primer anyway), and I added some structural sprues for interest’s sake, again taking some artistic license.

    [By the way, apparently only one of these Night Lightnings is still around with the rear radar seat still intact, and I think it’s in Arizona; I had read it was here in Seattle, but that bird has been reconverted to the P-38L (http://www.museumofflight.org/aircraft/lockheed-p-38l-lightning.%5D

    The entire cockpit assembly turned into a royal pain when it came to making it fit and having the top wing/pod unit join properly with tits lower half counterpart. I don’t know if it’s just my kit (there is no doubt it is a bit warped), or the nature of Academy’s manufacturing (likely a combo of both), but I had to do lots of grinding and sanding to clear the way for assembly.

    As of these photos I have not glued the upper to the lower.

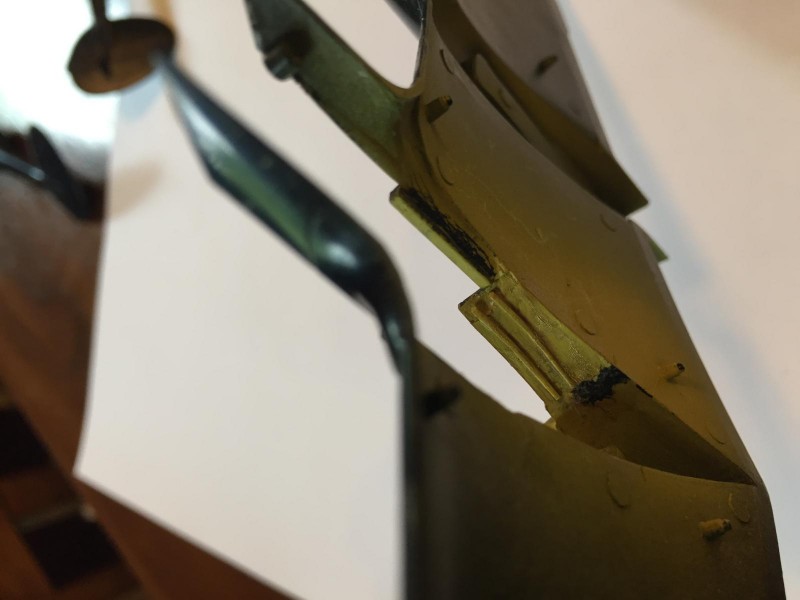
    As you can see from the boom assemblies, I had to do a fair amount of putty and sanding work. Again, some of this is the nature of the kit I am working with, and some was required by my own missteps because I was fresh off and Tamiya, and I assumed. And we all know where that leads us.

    So there we are so far. Next I will rev myself up and glue the top assembly to the bottom, and clamp the daylights out of it. Once that is done I will be able to proceed with the booms, nose, and tail. From that point on it will be all about filling, sanding, and priming until the paint phase comes.

    I am more than open to tips and critiques.

    .

  • Profile Photo
    Chuck A. Villanueva said 6 years, 9 months ago:

    Your off to a great start Dave. Adding the flight crew for this I would believe would be difficult. As it is very tight in that cockpit even in the real P-38. I think the radar operator was not much over 5' tall to fit in the radar compartment. Which kit did you get the aircrew that would even remotely could be modified to fit in the P-38. Watch out when you start assembling the nose, a lot of pieces here. Take your time and get everything aligned. The booms were ok, I placed them loose and then set the center stab between the booms and then worked my way forward. This I did with the recently completed with Academy's P-38E. Once you get the booms and wings together it goes together rather quickly. Have fun. Looking forward to the rest of the build.

  • Profile Photo
    David A. Thomas said 6 years, 9 months ago:

    Thanks, Chuck.

    Some folks won't like it, but I copped the figurines from Tamiya's Mossie kit. I painted them in U.S. colors, obviously, but the uniforms will be off. When it comes right down it it, though, once the canopy is on there they'll serve their role as well as the figures from the Monogram kit do, maybe even better because I just don't care for those ones. I agree with you on the jockey-sized radar operator--he would have had to have been a physically small man. I think I accomplished that by simply taking the poor guy's legs off entirely. Fortunately, the radar gear hides that anyway. The pilot had to be seated and his backside ground down until he would sit properly and the canopy would go on with appropriate space. The legs below the knees had to be glued back on and the putty job done after he was glued in his seat. Not that it really matters--you can't see down there anyway.

    If you could explain a bit more fully your building protocols for the booms I would appreciate it. I get that you use the rear stabilizer to assure proper spacing buy man oh man, the way they actually fit up front! I test fit them last night sans the glue and Jiminy they are a mess; lots of gaps and no easy fit. The rest of it I have proceeded precisely as you advise--nice and slow, fill and file as I go, stay focused on one area at a time so I don't get overwhelmed later and miss something. Currently I am finalizing the gluing of the main wing and I am fairly satisfied. As a kid I would have been lost...

  • Profile Photo
    Jaime Carreon said 6 years, 9 months ago:

    Looking good so far, David.

    Just for fyi's, here's a good article on the P-38:

    http://www.ausairpower.net/P-38-Analysis.html#mozTocId107283

  • Profile Photo
    Chuck A. Villanueva said 6 years, 9 months ago:

    Jaime that was a great article thanks for the link

  • Profile Photo
    Tom Bebout said 6 years, 9 months ago:

    Looks like you've got a good start on her David. Always liked the P-38, have build the Revell, Academy and the Minicraft F-5 kit. Don't recommend the Minicraft, the overall fit was quite trying. Did put a True Detail cockpit in her and it really helped the overall appearance. My brother and I drove from Cincinnati to Middlesboro, to see Glacier Girl fly at their little air show. Was quite a site to see a P-38 that had been under the ice for so long in the air again. Looking forward to seeing your progress.as I have the same kit in the stash.

  • Profile Photo
    David A. Thomas said 6 years, 9 months ago:

    To tell you the truth, Tom, this thing is a nightmare as well as a Night Lightning. Perhaps it is my particular kit, but for a perfectionist like me...yow. Really rough. Practically every joint needs major scraping, filing, filling, then more scraping, filing and sanding. I'm almost there, but the next time I do a P-38 (likely years down the road--I have a stash of many other worthy kits waiting for me), it will be the Hasegawa. I wish badly that Tamiya would produce a P-38, or Airfix.

  • Profile Photo
    David A. Thomas said 6 years, 9 months ago:

    OK, here's the update.

    Obviously, I've resorted to cannibalism, plundering my Academy P-38L kit in order to make the present project work. The rear stabilizer and the nose of my "M" kit were faulty, and I am actually wishing I had tested out other parts as well because as you can see, I've had to do quite a bit of prep work with the putty. (I don't feel too badly about plundering the other kit; if I do another P-38 it will be many models hence, and I will likely do it with Hasegawa rather than repeat with Academy.) The booms themselves were actually warped, even assembled. I've spent a great deal of time scraping seams with my X-Acto, filling, sanding, and rescribing lines. I am finally at the stage where I can prime this bad girl, isolate remaining surface flaws, and move on to the final paint job.

    A note on the landing light in the port side wing:

    I was not satisfied with installing the stock clear lens. My solution was first to use my Dremel (round-headed cutter bit) to sink a round depression in the center of the light bay. I lined the light bay with Bare metal foil as a reflector, then I placed a drop of Krystal Klear into that depression and let it dry for a lens. I polished the daylights out of the stock lens and glued it in place with more Krystal Klear. My camera doesn't do it justice, but it isn't done yet, either. I will tape it off and prime/paint over the seam and shoot for a smooth look.

    Wish me luck.

  • Profile Photo
    David A. Thomas said 6 years, 8 months ago:

    The ugly beast raises her thorny head...

    I have filled and sanded and scribed and restored rivets until I can stand no more. This one has been a battle. But I am ready for the paint now...

    3 attached images. Click to enlarge.

  • Profile Photo
    Greg Kittinger said 6 years, 8 months ago:

    I'm lovin' your work David! I build a lot of both old and lesser-quality kits, so know what it's like to have to do all that manipulation with parts, extra styrene, putties and fillers, etc! The Lightning is coming along nicely - can't wait to see the final product.

  • Profile Photo
    David A. Thomas said 6 years, 8 months ago:

    Thanks much, Greg. I appreciate the encouragement!

  • Profile Photo
    Tom Bebout said 6 years, 7 months ago:

    David , I recall you stating you had paint on the 38. Inquiring minds want to see the results of your efforts. How about a pic or two?

  • Profile Photo
    Lee Fogel said 6 years, 6 months ago:

    Looks terrific so far, Dave! Got any updates for us?

  • Profile Photo
    David A. Thomas said 6 years, 6 months ago:
  • Profile Photo
    Lee Fogel said 6 years, 6 months ago:

    Cool thank you David!