Airmodel 1/72 Heinkel P.1078C Resin

Started by Spiros Pendedekas · 142 · 3 years ago · 1/72, Airmodel, Heinkel, Luft '46, P.1078C, resin
  • Profile Photo
    Spiros Pendedekas said 3 years, 8 months ago:

    Oh dear! It's a resin!

    Hi everyone!

    This is my 1/72 Airmodel Heinkel P.1078C Resin kit.

    The Heinkel P.1078 (He P.1078) was a projected single seat interceptor developed for the Luftwaffe by Heinkel aircraft manufacturing company under the Emergency Fighter Program during the last years of the Third Reich.

    The project had three quite different variants. All of them were a single-seat fighters with polyhedral swept wings. The wings were swept back at 40 degrees and included wood in their construction. All of the projected aircraft had the wing tips angled downwards and all of them would be powered by a single Heinkel HeS 011 turbojet.

    The first variant, P.1078A, was the most conventional-looking of the three designs submitted for it was the only one having a tail. Its armament was two MK 108 cannons, as in the following two variants.

    The P.1078B was a tailless asymmetric jet-powered interceptor with a short fuselage in which the air intake of the engine was located in the middle between two gondolas. The cockpit was located on the gondola of the left side, while the right side gondola contained the front undercarriage leg and cannon armament.

    The P.1078C was a tailless interceptor project similar to the P.1078 B but with a single short fuselage. Both the He P.1078BB and P.1078C had wing tips angled downwards at a more pronounced angle than the P.1078A.

    The high-altitude fighter designs brought forward by other German aircraft makers were the Messerschmitt P.1110, Focke-Wulf Ta 183 Huckebein, Blohm & Voss P 212 and the Junkers EF 128, the official winner of the competition. After being subject to severe criticism, the project was cancelled by Heinkel at the end of February 1945.

    This small resin kit was given to me as a present from my "usual suspect" friend who had given me the same company's 1/72 Messerschmitt Me-261 Adolfine Vac, that I recently have finished.

    A vac beauty! Messerchmitt Me-261 ”Adolfine”, V2 Prototype (BJ+CQ), Airmodel, 1/72
    It is in my plans to have an ongoing resin and a vac kits as "Work in Progress". So here is this little beauty of a kit: There are some nice cast resin parts and a vac canopy. All are excellently packed in 4 separate sections of a common base bag, to eliminate the risk of breakage of those delicate resins. Instructions are good, providing a detailed history and specs of this never materialised project, a 3-view diagram and a two step construction process. I think they will be sufficient for most of the potential resin kit builders (meaning not beginners). Decals are not included, but any moderate decal dungeon will come up to the task. As this was a paper project, you can go as wild Luft '46ish camo styled as you like. I think I will try to restrain myself and finish it as an emerged prototype...in RLM02 with some visible different shade panelling maybe? I love this kind of kits; upon viewing them in the box, a mysterious urge to build them surpasses me! Next session will be unpacking and cleaning...maybe some glueing also? All the best, my friends!
  • Profile Photo
    George R Blair Jr said 3 years, 8 months ago:

    You are a brave man, Spiros (@fiveten). Resin kits can be tough. This should be an interesting build. It will be really small in 1/72.

  • Profile Photo
    Spiros Pendedekas said 3 years, 8 months ago:

    Thanks George @gblair! Indeed it is very small in 1/72!

  • Profile Photo
    Spiros Pendedekas said 3 years, 8 months ago:

    This plane definitely falls in the famous category of Luft '46.

    So, I paid a visit to my beloved Luft46.com site, a site for the Luft '46 afficionados that I strongly recommend to all aviation enthusiasts. In there you can find all German WWII project ideas, from the practical to the bizarre, with every available info stated, schematics, specs, artistic renditions, relative models info etc. The site is owned by Mr. Dan Johnson, a really nice and polite guy. Dan granted me permission to use parts of the P.1078c section, including some amazing Ronnie Olsthoorn's @skyraider3d He P.1078C artistic images. A big THANKS, Dan!

    In the following Hanns von Rolbeck schematic, you can get an idea of the projected design:

    Next are some amazing Ronnie Olsthoorn's He P.1078C artistic images:

    Oh dear, doesn't it look absolutely stunning in those whatif schemes?

    So long (I think...) RLM02 whatif prototype...

    And an update.

    Here are the kit parts, nicely cast.
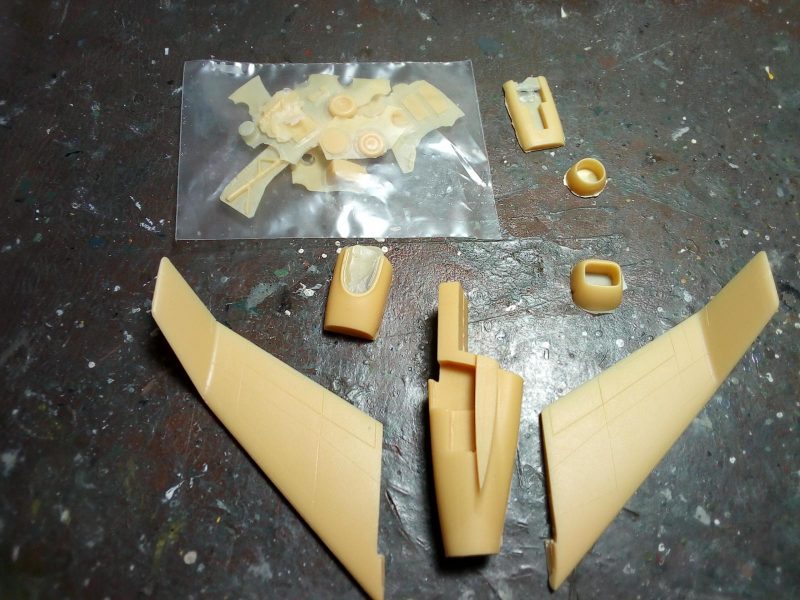
    QC1 gave a smiley thumbs up. I nave to say he was quite impressed by the rarity of the subject and the cast quality:
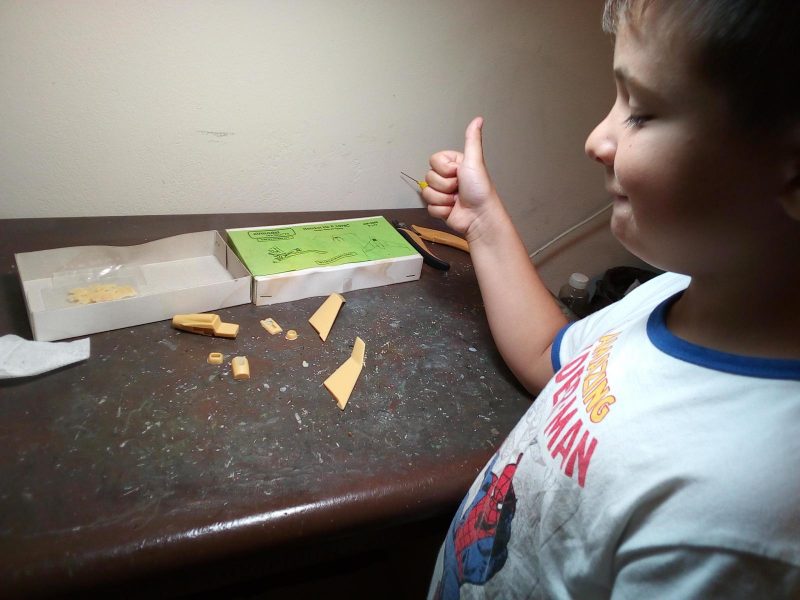
    After initial cleanup, the main pars of the fuselage were glued together:

    This is how the fuselage looks after the first coarse sanding:

    Upon viewing those long resin wings to be hanged at good dihedral to the fuselage, in order to avoid horror sessions, I drilled two holes at each wing root and two at the corresponding fuselage mating surfaces, and installed pin pieces in them, The wings have a nice positve hold now!
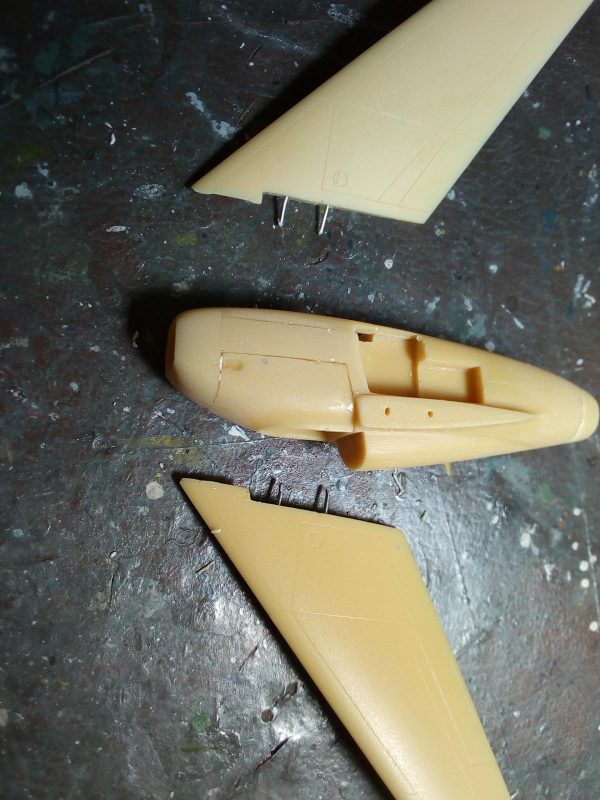
    I didn't like the blant intake, so decided to give it some depth. After some test drills with my microdrill...
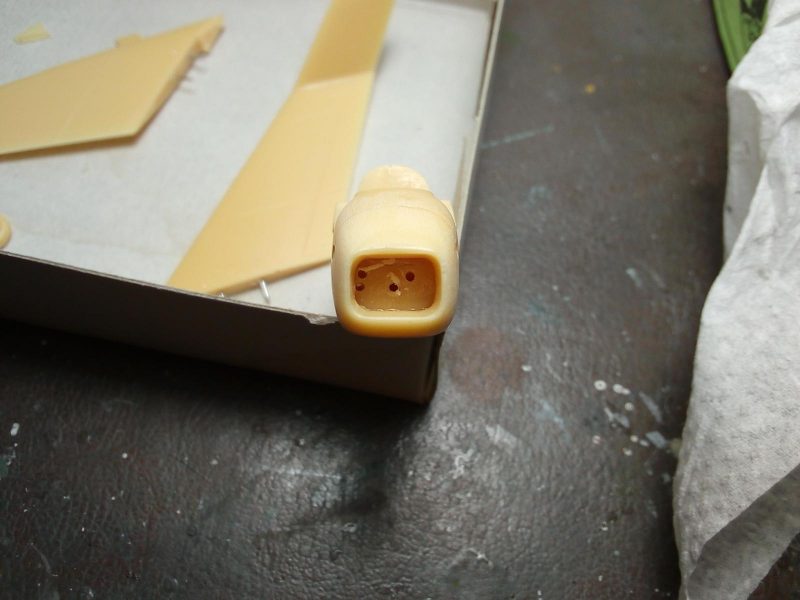
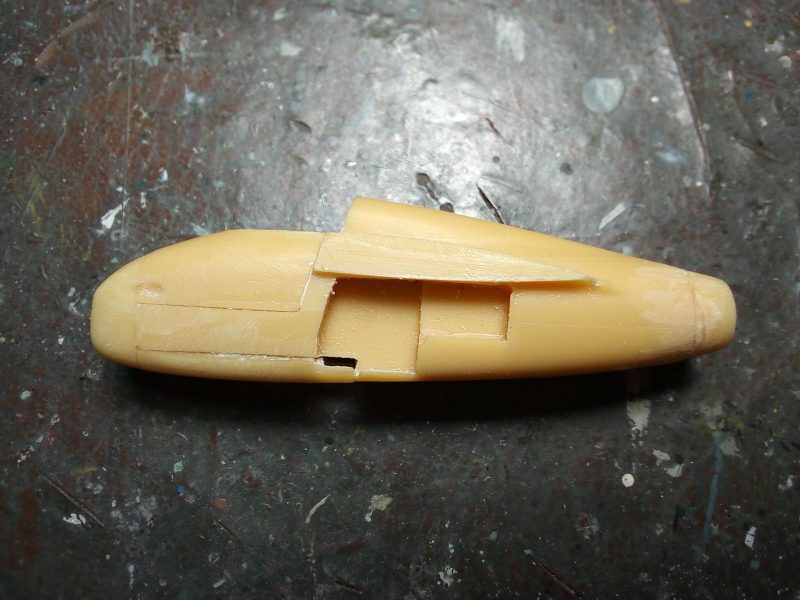
    ... I used my Dremel style tool and carved well inside:

    After that, the cockpit floor and a part of the front wheel well wall disappeared.
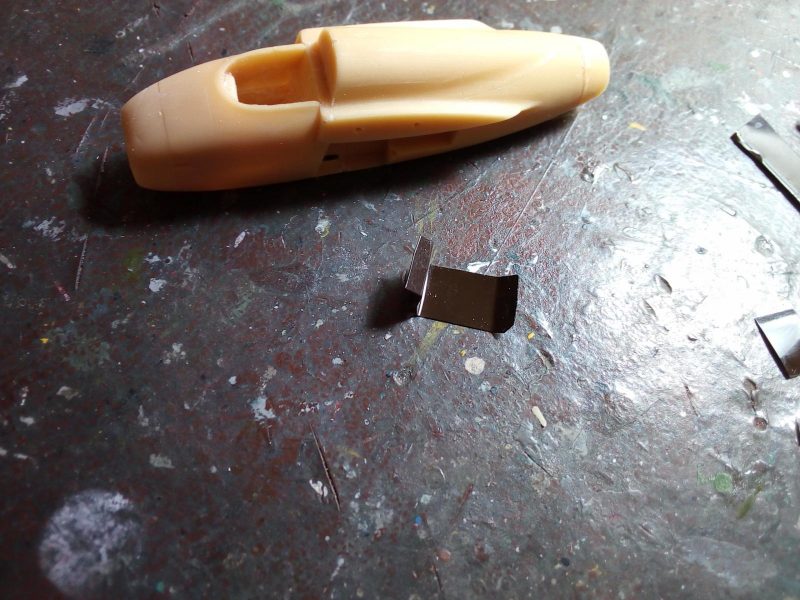
    Those areas are taken care of by using styrene sheets cut from my sons' ice creams plastic trays.
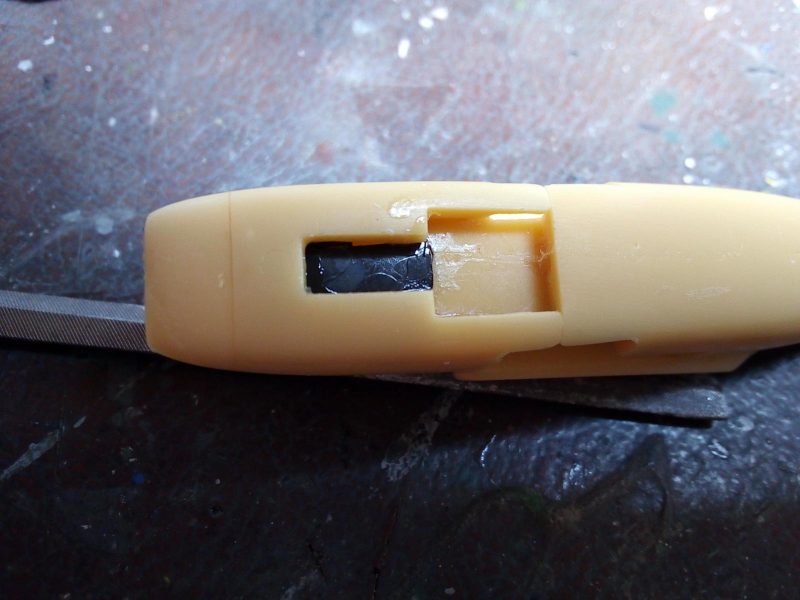
    Needs a lot of shaping, but looks more believable now:

  • Profile Photo
    George R Blair Jr said 3 years, 8 months ago:

    This will be awesome, Spiros (@fiveten), especially when your supervisor also approves. I like planes with a nose intake that is oval rather than circular.

  • Profile Photo
    Spiros Pendedekas said 3 years, 8 months ago:

    Thanks George @gblair! It indeed is a beautiful intake!

  • Profile Photo
    Erik Gjørup said 3 years, 8 months ago:

    Just visited a very good friend yesterday and we had a look at some resin kits. Not being brave enough to go the full length yet, I shall be strapped in for this build my friend @fiveten! Who knows what inspiration may come from this 🙂

  • Profile Photo
    Spiros Pendedekas said 3 years, 8 months ago:

    Thanks my friend @airbum!
    I am more than happy if my work can offer any positive inspiration!

  • Profile Photo
    Louis Gardner said 3 years, 8 months ago:

    Spiros, @fiveten
    What a tiny little jet... This one has slipped under the radar. It does look like a great little plane to build. I personally have never built a complete resin kit. I commend you for doing this. The pictures you posted as a "What If" looked promising. Can you imagine B-29's encountering these over Europe ? Things "could" have been much different... had not the Allies been victorious when they were.

    History... You gotta love it.

  • Profile Photo
    Spiros Pendedekas said 3 years, 8 months ago:

    Thanks Louis @lgardner!
    She's a little cutie, isn't she?
    It's my first full resin kit, so I chose a not very complicated kit...build process will tell!
    So far things go smooth.

  • Profile Photo
    Allan J Withers said 3 years, 8 months ago:

    Interesting project Spiros, I'm not a big fan of resin but sometimes it's the only option !

  • Profile Photo
    Spiros Pendedekas said 3 years, 8 months ago:

    Thanks Allan @kalamazoo!
    I used to steer clear from resin kits, until a friend started to give me resins and vacs as presents...
    My nature of wanting to build every kit I see in a box became my temptation.
    As build proceeds, an interesting (and maybe understandable) resin affection is built up...
    You are right about the options; and this can be another motivating factor to go resin.

  • Profile Photo
    George R Blair Jr said 3 years, 8 months ago:

    I agree with the previous comments, Spiros (@fiveten). I have always steered clear of resin kits, basically because you have to cut the parts from the casting sprues and the lack of attachment points. The hazardous nature of the sanding residue is also a concern. But as I watch your build I am starting to think that I might try a full resin build in the future. Looking forward to the rest of the build.

  • Profile Photo
    Spiros Pendedekas said 3 years, 8 months ago:

    A simple looking resin kit, like this one, might be a good choice to start, George @gblair. Thanks for following along...I hope I will deliver (lol)...

  • Profile Photo
    Spiros Pendedekas said 3 years, 7 months ago:

    Hi everyone!

    With so many projects "in work", I left this lttle fellow untouched for a week.

    So, here is an update!

    Glued a cockpit floor (that had been vanished after the intake deepening) made from a piece of my sons' party plates.

    There were no side consoles provided, and the semi bulbuous vacanopy looks wonderfully clear, so...two small side blocks were glued (to be decorated accordingly in due time).

    The wings were glued. Dihedral and general appearance are ok, but the root/fuselage gaps are big. Nothing that multi session gap filling cyanoacrylate cannot handle.

    All it takes is a bit of patience...