Bf-109 J / Ha-1109 conversion, SBS-model 1/48 FINISHED

Started by Erik Gjørup · 125 · 1 year ago · airbum, Bf109, Ha1109, sbsmodel, Tripala
  • Profile Photo
    Spiros Pendedekas said 3 years, 3 months ago:

    This gray looks very nice'n'uniform, my friend @airbum!

  • Profile Photo
    Erik Gjørup said 3 years, 3 months ago:

    Thank you gents

    John (@JohnB), I will be ready for decals any day now.
    John (@j-healy), you wont regret buying one – it is such a great conversion kit.
    Spiros (@fiveten) Thank you my friend.

  • Profile Photo
    Erik Gjørup said 3 years, 3 months ago:

    Not for this one!

    A parcel arrived from SBSmodel with a few goodies

    One of them was a new kit to make the armament – and therefore a Ha-1112.K1L


    The small box is loaded with some of the high-quality items I have come to expect from SBSmodel

    Very crisp and clean resin parts


    The rockets are made up of two pieces, and there are another two to mount the launchers to the wing

    A very nice PE sheet


    And the launchers are cast in brass, no less. WOW.

    Of course all these goodies will not be used here as the 1109 was unarmed, but I have bought one more Tamiya 109G-6 to make the Ha-1112! VERY tempted to get that one started, but it will have to wait for some space to become available

  • Profile Photo
    John vd Biggelaar said 3 years, 3 months ago:

    That for sure is a lot of WOW, Erik.

  • Profile Photo
    Spiros Pendedekas said 3 years, 3 months ago:

    Nice extra stuff, my friend @airbum!

  • Profile Photo
    Erik Gjørup said 3 years, 2 months ago:

    I can't wait to get going on that conversion-kit my friends. I have the donorkit and the two conversion kits at the ready as well as a book (in a language I am completely unable to read - but it has great pictures), so the itch is strong! Anyway, a small update on the 1109 in a minute John @johnb and Spiros @fiveten.

  • Profile Photo
    Erik Gjørup said 3 years, 2 months ago:

    Small bits

    Before adding the next layer of grey, a few small items were added

    The nose has a two-stage intake that is made up of one of the major resin parts and a small fairing to be added
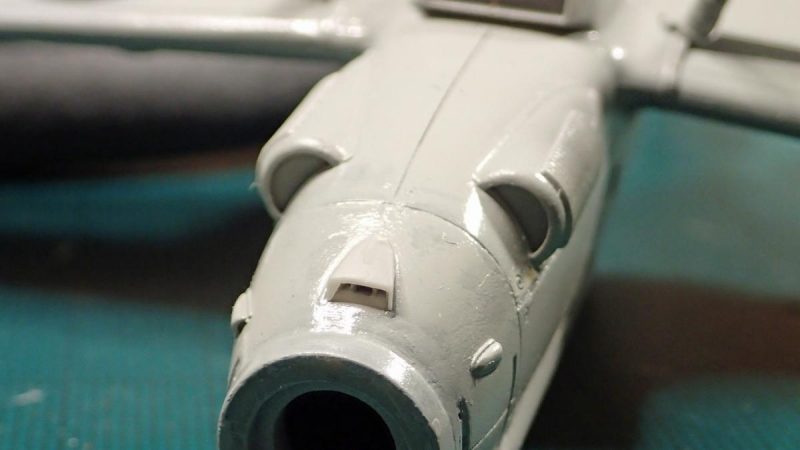

    I had decided to leave it for the first layer of paint, and had to install it now, before the next visit at the paintshop.

    Also the oilcooler needed some attention


    It has a strengthening rod in resin that lost out to the monster, and a small piece of conduit was drafted for the job

    The exit is very small and also had to be added now
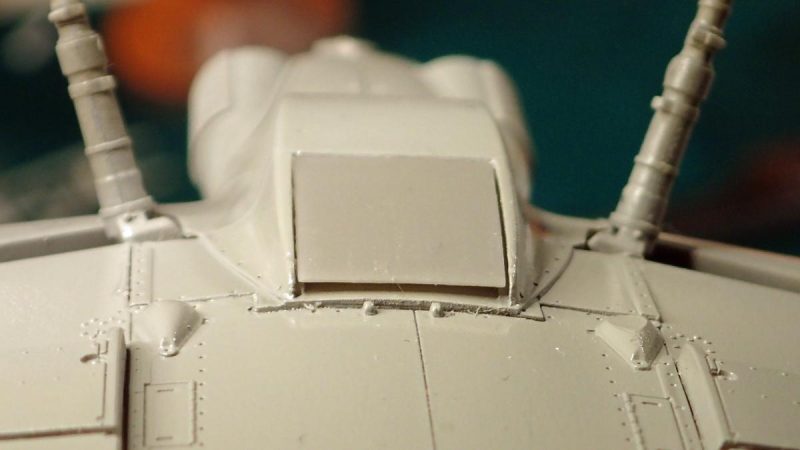

    This is of course to avoid too thick paint on the opening.

    As can seen in the previous picture, I accidently sanded one of the covers for the wingbolts flat
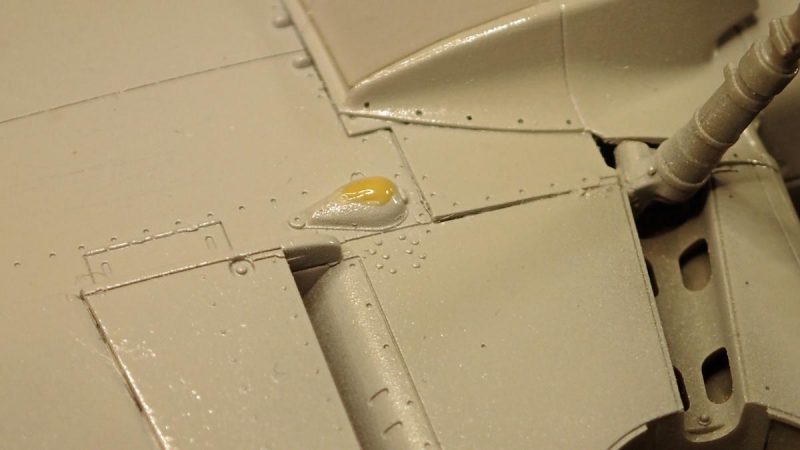

    And that was reshaped with some LqS

    And with that it is now ready for the next visit to the painters – next post may be with decals, unless it will be with more parts added. You have to stay tuned to find out!

  • Profile Photo
    John vd Biggelaar said 3 years, 2 months ago:

    Sanding errors are always painful, Eric @airbum
    However with LqS as a cure it will be healed in no time.
    I'm getting closer to the point that I also will give it a try.
    Well done.

  • Profile Photo
    Spiros Pendedekas said 3 years, 2 months ago:

    I love the small intake and the oil cooler entry a lot, my friend @airbum!
    In fact, I love ALL those details around!

  • Profile Photo
    Morne Meyer said 3 years, 2 months ago:

    Awesome work Erik. Can't wait to see the end result! All your 109's are masterpieces!

  • Profile Photo
    Erik Gjørup said 3 years, 2 months ago:

    And decaling has commenced gentlemen. An update in just a few minutes @fiveten, @johnb and @mornem

  • Profile Photo
    Erik Gjørup said 3 years, 2 months ago:

    Decals!

    With the second layer dry, it has become time for decals

    The decals included in the conversion does not include “stencils”, and I have to triple-check which ones were used on the Tripalata.


    The fuel-triangle has come from the Tamiya decal sheet, everything else from SBSmodel

    Generally the decals sets well, except the relatively thick ones with extra color.


    One or two rounds of sol, perhaps some manipulation with the cocktailstick. . . .

    A small omission in the kit is the inscription on the tail, as there are none for 1109, only 1112. I suppose it is a matter of some finetuning of the printer to make some that will replace them, but for now, they will be the ones supplied. Some more micro sol and then it will be on to a spray or two of clear (semimatt?) and the last details

  • Profile Photo
    Morne Meyer said 3 years, 2 months ago:

    The markings look very nice against the grey colour scheme! Looking forward to the final reveal. Awesome build as usual Erik!

  • Profile Photo
    John vd Biggelaar said 3 years, 2 months ago:

    Getting together nicely, Erik.
    Finish line of another great looking 109 insight.

  • Profile Photo
    Spiros Pendedekas said 3 years, 2 months ago:

    Love those Spanish markings, my friend @airbum!