The not-quite-finished plane
Promises promises – well, you can’t win them all
But at least I am getting there. This build was, after all, just to test the kit, and more twotters has now been added to the stash for future use.
And with that, here you have the plane after de-masking and with first round of detailing
-
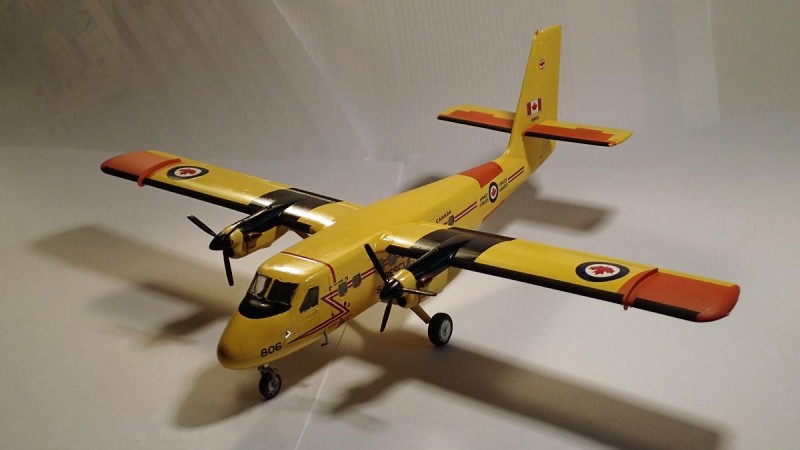
1. Will have to re-visit the high-viz here as it is too low.
-
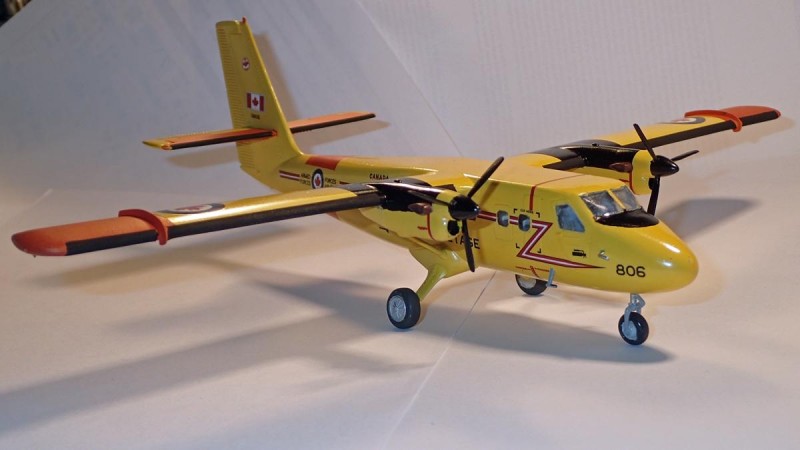
1. Needs a few touch-ups and last details to be added such as antennawire and aerials.
2. opened up the scissorlink, but will have to do better next time
There are many hours left in this one. It is not nearly as good as I had planned, but that only gives a taste for more.
I am happy with how the interior is visible though, and with the improved windows on OY-POF that is now in progress hopes are high for that one!
One small detail that really improves the kit is the propellers that has been set at idle, and the wingfences that are made from a piece of evergreen. One thing to remember is the main gear that has to be refined, as it gives it a wrong stance here – the tail is simply too high compared with how a Twin Otter usually looks on the ground.
Thank you for following this build, I had a lot of lessons for the next build, and this one will be having the last details and then be parked, and so this was the last post on this build