Going German, High Planes 1/72 Me 262 V3

Started by Magnus Fridsell · 33 · 8 years ago · High Planes, Messerschmitt 262
  • Profile Photo
    Bernd MΓΌller said 8 years, 11 months ago:

    Good job on these not too easy kits, Magnus. Wish you all the best and happy modelling !

  • Profile Photo
    Magnus Fridsell said 8 years, 11 months ago:

    Thanks for your well-wishing!

    I've had a nice family weekend but now I'm back at it once again!


    The seat... This is, as far as I understand, not an ejection seat (I think the V1 was so equipped but I have to read up on that one!), it is just an odd-looking fixed seat πŸ™‚ ! I've been working from photos, adding some kind of shroud extending rearwards, a cushion (Fritz Wendel does look kind of skinny in photos so I suspect he needed one) and a set of belts from an old ExtraTech etched sheet I found in the etch dungeon...

    Regards

    Magnus

  • Profile Photo
    Magnus Fridsell said 8 years, 11 months ago:


    Nacelles and lower surfaces of wings "primed" using Gunze RLM 76. No reason to make things complicated! I'll need to touch-up some blemishes at the rear end of the nacelles but otherwise things looks just fine! Seat is ready for detail painting - stay tuned!

    Regards

    Magnus

  • Profile Photo
    Magnus Fridsell said 8 years, 11 months ago:


    Seat painted. I went for a bit of contrast since I will leave the canopy closed! Red leather headrest felt right! The buckles were painted silver using W&N silver pencils, easy and safe.


    Seat installed!


    Canopy attached using JB Kwik epoxy. It doesn't fog the clear parts, it's strong and it can be sanded. It is also dark grey in colour rendering a rather discrete seam when seen through the canopy.

    Regards

    Magnus

  • Profile Photo
    Magnus Fridsell said 8 years, 11 months ago:

    After some rather tedious (and risky) sanding around the canopy things are now finally moving forward again.


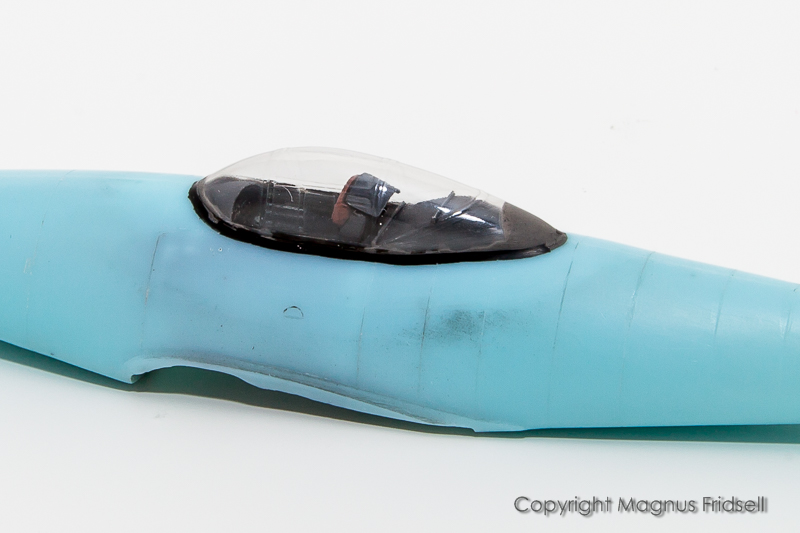
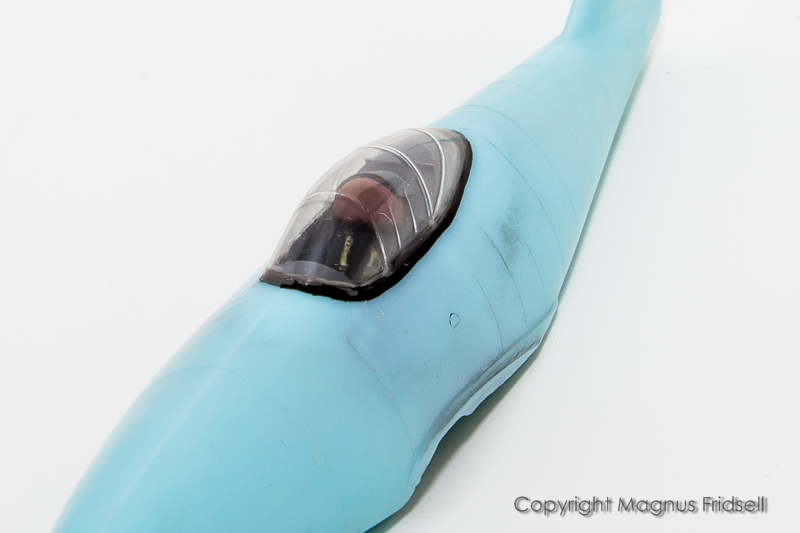
    Canopy epoxied in place and carefully faired in using CA glue where there wasn't enough of the epoxy to get an even seam. Using epoxy, ensuring that the gap between canopy and fuselage is thoroughly sealed, enables using CA to level the seam later on since the fogging caused by the CA will be restricted to the outside, which can be easily cleaned and polished.


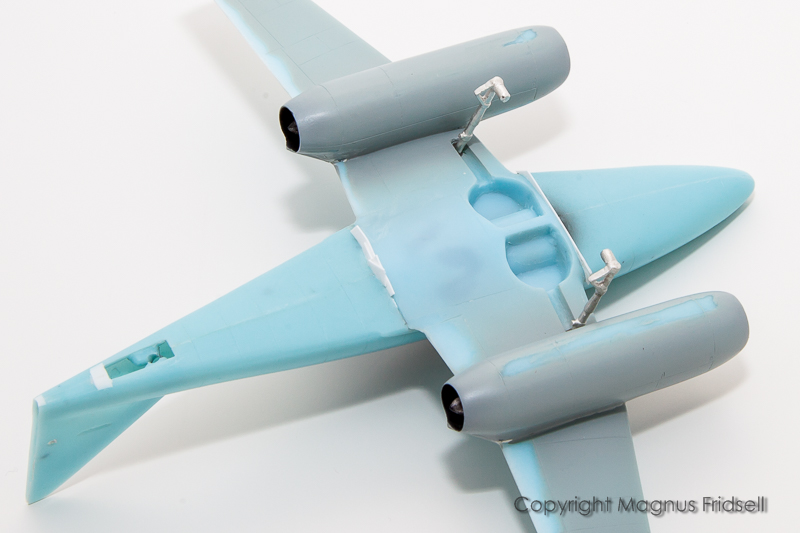
    While I was at it, I installed the landing gear using epoxy as well. It gives a strong joint and can be adjusted but I will try to get myself a faster brand for this kind of job! I went to bed before it had set thoroughly so this morning I had to use another of the handy white-metal properties: it can be bent and twisted slightly for adjustment πŸ™‚ !


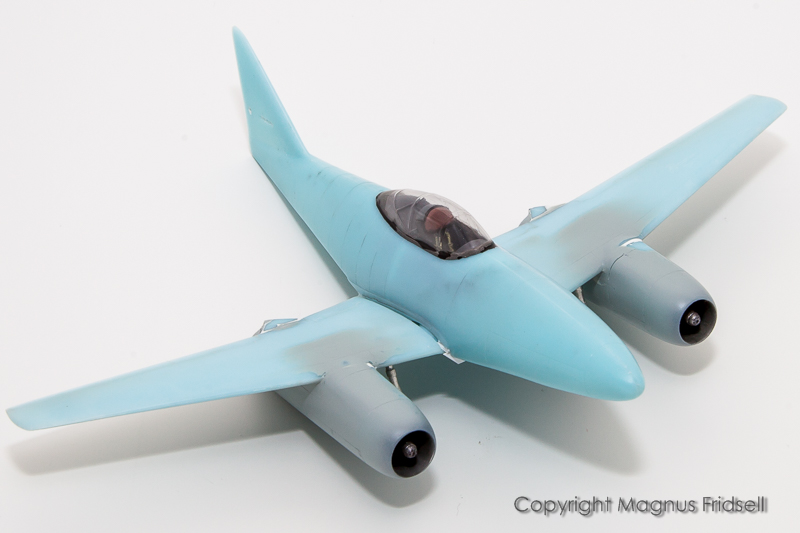
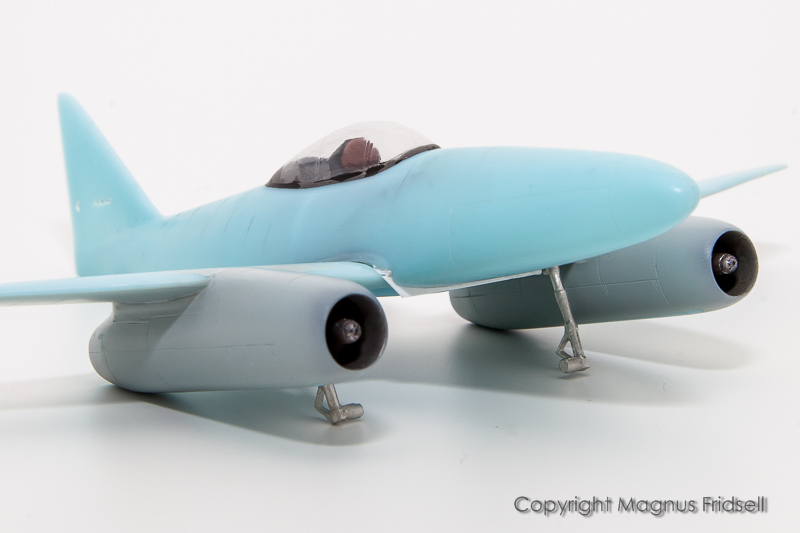
    And finally, an ill-fitting wing was attached to the fuselage with some of the gaps filled in using plasticard scraps. The upper wing roots will be filled and sculpted using Milliput later today.

    Regards

    Magnus

  • Profile Photo
    Magnus Fridsell said 8 years, 11 months ago:


    Once again, using Milliput and the magic little rubber-tipped sculpting tool, I managed to fill the rather substantial seams along the wing roots. Final tidying was done using a Q-tip dipped in water, resulting in a slightly concave seam but I'll do a final fine-filling tonight instead of over-filling it in one go!

    Regards

    Magnus

  • Profile Photo
    Simon Whitney said 8 years, 11 months ago:

    She is looking good Magnus, , things are blending in quite nicely so far.

  • Profile Photo
    Ken Hanson said 8 years, 11 months ago:

    Great looking Stormbird Mangus, the cockpit and canopy look especially nice!

  • Profile Photo
    Magnus Fridsell said 8 years, 10 months ago:

    Simon and Ken! Thanks!


    Canopy masked using Bare-Metal foil.


    Rudder with an added trimtab and actuator and stabilizers with dropped elevators and new "endplates" where they attach to the fin!

    Regards

    Magnus

  • Profile Photo
    Greg Kittinger said 8 years, 10 months ago:

    I'm following eagerly, as I'm waiting for HPM to come out with their next 1/72 Cheetah, and have never built a High Planes kit. Fun to see what you're needing to do to get a respectable build out of the HPM kit.

    OK - plus the fact that it seems there are just a few of us who build in 1/72, especially small single-engine aircraft!

    By the way - great work so far!

  • Profile Photo
    Magnus Fridsell said 8 years, 10 months ago:

    Hi Greg!

    With a bit of luck, the HPM kit you are waiting for might very well be mainstream injection kit making the build a lot easier. After producing quite a substantial range of 1/72 limited run kits, HPM now seems to concentrate on steel-tool mainstream Mirages. They had a bunch in their initial range but a few years ago they were remade into "ordinary" kits, the old ones were nice but the kit standard still meant it was quite a handful of work to finish them!

    Here is a build-blog of mine for one of the old kits.

    Sorry for the slow progress, I'm away on holiday so nothing useful will be done before mid-July!

  • Profile Photo
    Simon Whitney said 8 years, 9 months ago:

    Enjoy your holiday Magnus.

  • Profile Photo
    Magnus Fridsell said 8 years, 7 months ago:

    I've been rather into summer stuff for the last two months but with the onset of autumn I've found the urge to do some plastic again πŸ™‚ !


    A bit of a soft start, simply painting the wings to get into airbrushing mood once again. After the rest of the splinter stuff I think I can graduate to mottling level soon!

    Regards

    Magnus

  • Profile Photo
    Magnus Fridsell said 8 years, 7 months ago:


    Lots of masking for very little painting... Fuselage next (tomorrow maybe?)!

    Regards

    Magnus

  • Profile Photo
    Magnus Fridsell said 8 years, 7 months ago:


    The best part when building things Luftwaffe...


    ...the mottling! Still the engines to do and then I'm going to add some RLM02 as well (as per my Smith & Creek references and who am I to distrust them?) !

    Regards

    Magnus