Manufacturer: Airfix
Scale: 1:24
Product Code: A19002
Product Title: Hawker Typhoon MkIB
As I write this, I'm aware of at least four other WIP build threads online for this kit, but hopefully mine might be a little different. Also, I'm meandering into this build, so there will probably be a few time breaks; if you're expecting a lightning build, look away now...
Apart from the kit, I've invested in Radu Brinzan's [RB Productions (Ireland)] seat belt set RB-P24006 Sutton Harness and his Typhoon radiator cover set.
The instructions are in the form of a 47-page A4 (colour) book, with exploded views. There are four decal options, and paint callouts are Humbrol only (Airfix and Humbrol are both owned by Hornby).
As the scale implies, it's a big kit. It reminds me of the VFS P-47. The parts are moulded in light grey styrene and detail is crisp. No flash in evidence, but there are a few sink marks, often in awakward-access areas. In my case, I have an idea for exposing detail that isn't on offer in the instruction manual, so I've probably had to in-fill a few more recesses that someone else who might be approaching the kit as a straight build.
I'm interested in the Sabre engine as a detailed model in its own right, although naturally displayed in situ, and so deviated from the plans and began with Step 39. Here is the main engine block. There are several other smaller parts - ignition harness, pipes, and cables, that will be added when the engine is in place.
The instructions call for black/aluminium finishes, but the Napiers I've seen are in a glossy dark green, so my version will incorporate a different colour set.
Steps 1-35 deal with the cockpit cage and principle spars, with a number of smaller bits and pieces. There's some debate about cockpit finishes. Generally, it's accepted that the cockpit from waist level up is matt black, and aluminium in lower areas. Some sources have the lower area as cockpit grey-green (RAF interior green). The seat is either plain aluminium, green, or matt gull grey, depending on sources.
The seat is nicely detailed, There's a cushion provided separately but I'm not using it, so had to clean up the bucket area a little.
Looking over these pieces, I need to get some colour on them, as there are a growing number of small individual items that need to be in place so that the next stages can be addressed. However, a delay: bad weather has limited spray time in the shed, and I'm also away a few days this week, so instead have concentrated on various sub-assemblies, although strictly these are out of the build-sequence.
A photo of busy sectional builds.
The tail halves are fixed to the fuselage halves with a neat rebate. This version is used for three of the four options, and a second is available for the fourth.
A view of the tail plane assembly and aileron trim tabs.
Here are the RB Production grilles in place.
A shot of one of the removeable cockpit side panels, well-representative of the actual section.
I posted an image earlier of the engine block. There are in fact about 80 pieces to the engine (Sprue C), but part C-14 seems not to have a home. I've looked over the instructions several times but can't locate the fixing point. I imagine when the engine area is complete the placement will make itself known, unless it jumps out at me before then!
The mysterious C-14.
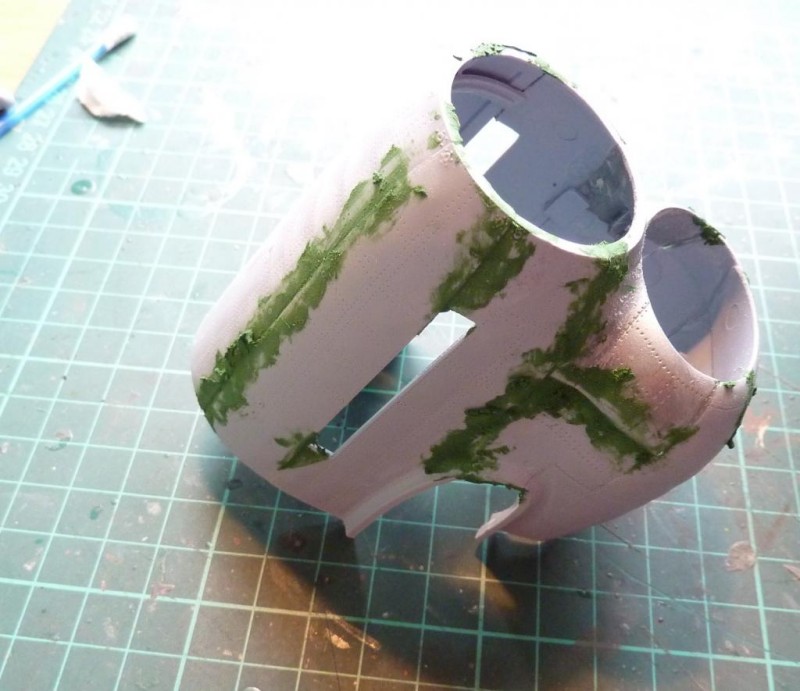
I mentioned previously the presence of sink marks.There are several, and some in awkward places, but you just have to accept it as part of the prep. On the inner face of the undercarriage covers, I had joined the two main pieces of each side together before I noticed this one.
I've just noticed sprue 'R' is missing from the kit, which has all the misc crystal parts, including the control panel backing, which means I'm delayed in completing the cockpit. I'd already had to contact Airfix because of a faulty canopy (sprue Q) - it was cracked. Airfix acknowledged that the crack developed in early production kits after the part was moulded and began to cool. I had an email from Airfix about 'R' and it could be up to 28 days before a replacement is issued!
The kit includes a pilot figure, which I'm not using, but popped together anyway to make it easier to store.
Here's the starboard removeable panel pictured earlier, now painted and weathered. I've added a couple of map sections to the side pocket. The Typhoon cockpit is actually quite plain - and dark. I think the light is misleading on this photo, as the black in fact looks more opaque than it appears here.
Here are photos of the single-piece lower wing. I've filled the sink marks port side as I plan on leaving this without the top port wing in place, to show all the internal kit detail, which I'm going to enhance. Also shown are the fuselage sections altered and painted, and a few other minor sub-assemblies.
I mislaid a small control box piece for the cockpit, but made a new one using spare etch and resin rivet decals. Also shown is the RB harness completed. I used sepia acrylic ink heavily diluted as a wash for the paper belts for that lived-in look, and used a little ali paint to kill the shine on the etch buckles.
With the exception of the main control panel, which I'll complete when the missing sprue arrives, the central frame, engine, and cockpit are complete. The work shown here is about 150 parts. To date, I've completed or am working on about 110 build steps which covers 20 pages or so.
Here are a couple of shots of the wheel wells. The inner walls are built up from the inside with a series of well-detailed profiles, to which are added four further individual cabling details. As you can see there is good three-dimensional depth on view. I still have to apply a light wash to 'pop' some of the detail.
The lower wing plane is in place, and the starboard wing top. I'm leaving off the port wing top and cutting back the port fuselage still more to leave the cockpit cage exposed. The shots here give an idea of the overall size of the model.
Here are the wheel covers, with hydraulic lines. I test-fitted the tyres and they needed a little work. They use a kind of mortice-and-tenon joint for the connection, but the post needed a little fettling.
A shot of the port wing, with cannon, feeds, and control surfaces in place. There's still an inboard flap to fit, but I needed to fit the underside of the fuselage first. I intend to add cables and hydraulics within the open wing to set off the kit parts, which are good, but I think can be improved.
Fuselage sections fitted, and the starboard cockpit panel.
These are the inner faces of the cannon bays. There's a choice between these, which are posed folded out forward over the wing top, and a single piece fitted to cover the bay. For effect, I'm retaining the section of port wing forward of the bay so that these pieces can be posed as noted.
A shot of the rudder and tab articulation.
I had an issue with the ventral fuselage joint where the piece met the under-wing edge. The joining faces are 'toothed' (tab-space-tab-space), which are OK, but the tolerances are 1-2mm, and even when fettled down there was a small gap. I taped either side of the joint to keep the detail clean, face-filed it with green putty, worked it down, rescribed, and then added a strip of Archer's resin rivet decal (I'm finding more and more uses for this item).
Apart from the missing parts as noted previously, the model is ready to mask and prime; other sub-assemblies are also complete, or nearly so.
I've prepared the eight RP3s. Decals are seen from a plan view, port or starboard. The decals are spot-on for the technical detail. I've added the electrical 'pigtails', leaving port side unplugged in keeping with the 'under the skin' look; starboard view is as an aircraft ready for operations, with the pigtails plugged into the rails.
Now a problem, unforeseen. All decals are printed by Cartograf (Italy), so usually the quality is assured. When I applied the main decals - roundels, letters - I found that they are quite thin, and brittle, which presents a problem when applying them to a surface ridged with various panel lines.
As I intend on distressing the decals to show wear, I can make them work, but otherwise be aware. Further, the blue-and-white chequerboard doesn't want to line up properly. It works OK starboard, but not port, and the top mating line is a little off, when considering the top-half c/b placement where it butts up to the lettering on either side of the fuselage. You could probably make the topline adjustment to match, but I didn't see it in time and the decals had begun to set. Again, the area is being worked over with a fine sanding stick to expose ridges and create wear, but they were awkward sods.
I used Mr Mark softener, and where it lay on the surface (it needs to, so that the decals will relax into all the pits and valleys), the decal began to dissolve completely in those areas. I just happened to notice it and acted quickly to add water to the surface, but it's most unusual to see this with Cartograf. Perhaps consider an aftermarket set...
I should add in Cartograf's favour that once dry the decals looked as thin as the paint skin they were set on, so if you can manage them at the wet stage without them tearing they are remarkably realistic.
I'm wondering if I may have had an early production model - damaged canopy, missing sprue, gossamer decals...
I'm aware of the 50-image limit to a thread, and so will only add a couple of more images here, as everything is coming together, pending the arrival of the missing clear-parts sprue, and once the final varnish coats are completed, the undercarriage and rocket rails are in place, and the canopy set, I can spend some time detailing the exposed area of the port wing as a separate job. Effectively, though, this is the end of the construction stage.
Here are the parts not used, mainly bombs and drop tanks, with other items specific to the other build choices in the kit.
You may have noticed that I'm using none of the forward cowls and fuselage panels. This version has the option of a 'shark's mouth' motif around the radiator intake, and I had an idea that I could piece together the odd bits, and finish them with the scheme's camo and the shark's mouth decals, to display as a single unit beside the aircraft, for effect, but after the expereince with the standard decals I decided against it. You can see here how well the individual sections mate-up (not well), but Airfix does state in the intro to the instructions that the kit is designed so that the engine can be showcased by degree, and if the modeller does this, certain panels will not fit as with a simpler build scheme. Also, I've further complicated things by exposing yet more of the infrastructure than is advised.
-
Excepting the clear parts for the instrument panel back and the nav lights, here's a parting shot of the model nearly completed. The prop and a couple of other pieces are finished and set aside for now.
In this photo, too, some of the additional wing detail can be seen (Detailed photos will follow in due course as a Headline article.). Initially, I was going to replicate the kit's wing spars from plastic profile, in descending scale from the outer cannon bay area to the wing tip. The outer third of the wing is a single piece attached to the main under-wing section. It's attached along a butt-joint with only a 2mm width of rebate along the centre section of the jointline - quite fragile. Normally, this wouldn't be a problem, as the top of the wing would sandwich overall and hold everything in place. I was concerned that even a few additonal grams of weight of plastic/glue/paint/detailing might be enough to affect the integrity of the joint in the long term. As a compromise, I opted for a more impressionistic take on the spars, using etch profile spares. Not strictly accurate I know, but I was, quite literally, "winging it"!
Final thoughts.
An interesting kit, with many fine details. The modeller faces a few challenges to achieve the level of detail depicted, and double-checking/dry-fitting are the order of the day. The engineering is good, with no overly fussy sequences, but it's important to be aware of the scheme you're building because of the variations between the four schemes on offer, as set against other items in common with all schemes.
The instructions are a step forward for Airfix, but can be a little confusing with the bold font highlighting of parts to be fitted and those same parts shown in the following step in a different colour, the purpose of which is to make the steps clearer, but which I found confusing in places, at first.
The build sequence is in about 230 steps across 40+ pages (large format), and is graded as skill level 4, on a scale of 1-4.