Messerschmitt Bf 109G-6, Hungary V.8 63, Zvezda 1/48

Started by Erik Gjørup · 101 · 1 year ago · 1/48, 109, airbum, Bf109, halfworks, hungary, Messerschmitt, quarterscale, zvezda
  • Profile Photo
    Erik Gjørup said 3 years, 6 months ago:

    Thanks my friend @fiveten. Getting closer, and now back on the workbench brings promises of more progress to come 🙂

  • Profile Photo
    George R Blair Jr said 3 years, 6 months ago:

    Getting close to painting time, Erik (@airbum). Looking forward to the Hungarian paint scheme and decals.

  • Profile Photo
    Tom Cleaver said 3 years, 6 months ago:

    Thanks for doing this, Erik, so I don't have to. I had been thinking of getting one of these kits if I ever could find one, but watching you do this, I'm confirmed in sticking to Eduard for 109s.

    Having done their F, I know how fiddly the design is, so - great work on a difficult project!

  • Profile Photo
    Erik Gjørup said 3 years, 6 months ago:

    George (@gblair), yep, and me too 🙂
    Tom, My pleasure.

    I have one F on the bench https://imodeler.com/groups/work-in-progress-aircraft/forum/topic/messerschmitt-bf-109-f-4-spanish-af-zvezda-1-48/ and lots more in the stash, with AM products to ease the pain. There are a few things that are done a lot better that the Ed kits, and a lot that is far worse. The defining factor may be the price - the eduard basic kits are cheaper where I get mine!

  • Profile Photo
    Erik Gjørup said 3 years, 6 months ago:

    EJECT!

    well – ejectortubes that is – for the MG’s

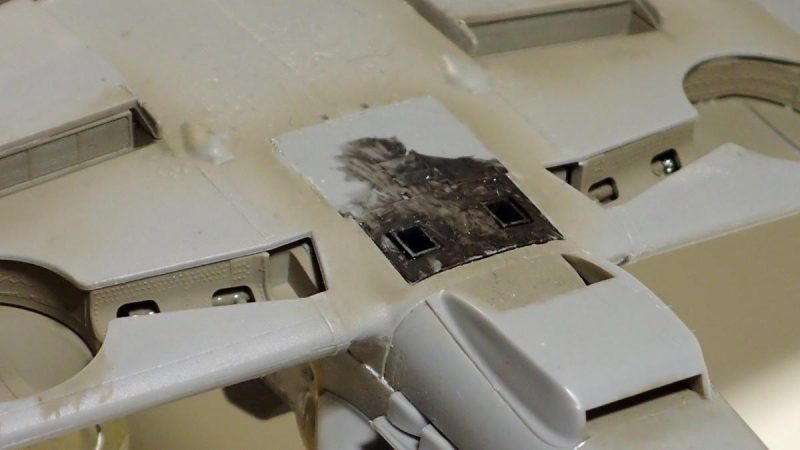
    I decided to add some ejectortubes in the lower fuselage. The original part just has a pair of recesses to simulate these, and a pair of resin parts for a Eduard 109 was pressed into service
    First the openings were made


    I forgot to take pictures as I used my brake at work to do some of the digging

    I added a pair of Evergreen plates to glue the openings to
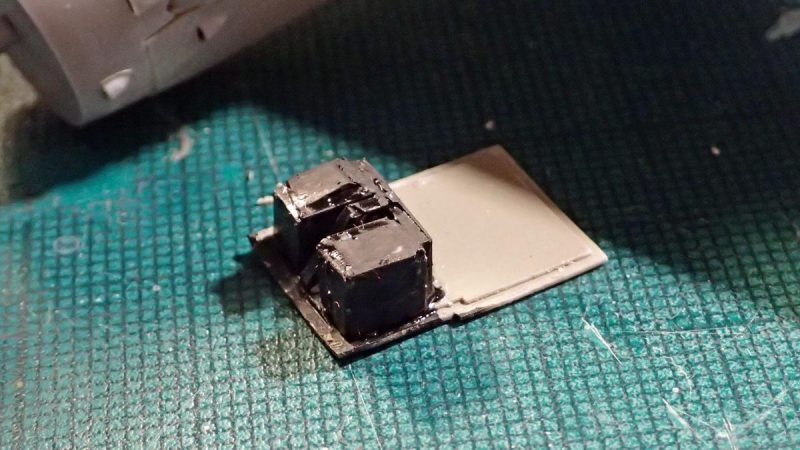


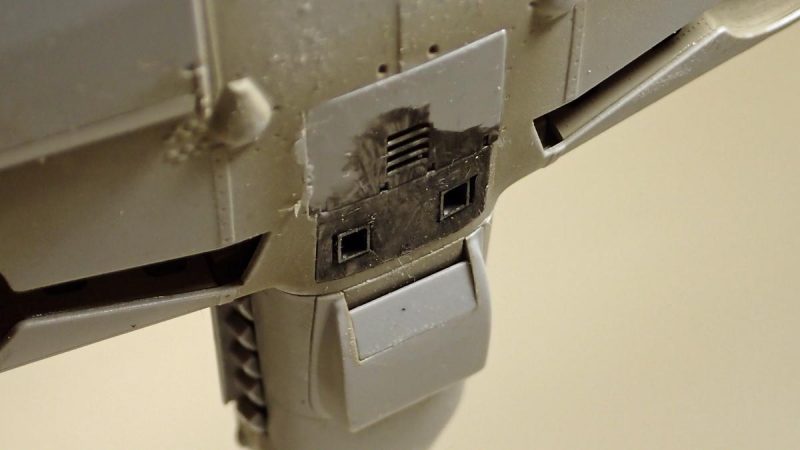
    As the kit parts has a lot of internal detail it was necessary to dig out some of the firewall to make room for the parts. Not the finest job – should anyone want to do the same, do make the space before assembling the nose!


    But with everything in place it looks OK

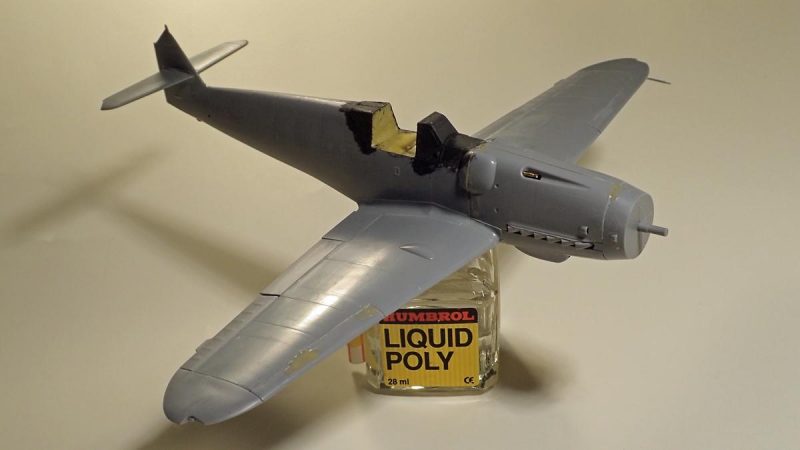
    I added the adjustable parts of the cooler and radiatorintakes


    That is it for now. The LqS will dry and harden, get scraped and it is off to the primershop

    Starting to look like a 109?

    off to the painters and some finishing to the Liquefied Styrene, then it may just be paint next – stay tuned

  • Profile Photo
    George R Blair Jr said 3 years, 6 months ago:

    It's amazing what a difference the ejector ports make, Erik (@airbum). Nicely done.

  • Profile Photo
    Erik Gjørup said 3 years, 6 months ago:

    Don't they just. It is one of these details that you hardly notice on the finished plane, untill someone does. Often when we meet around here we palce our latest creation on a mirror, and the most amazing details comes to light - that makes it worth all the effort.

  • Profile Photo
    Spiros Pendedekas said 3 years, 6 months ago:

    Those ejector ports look indeed amazing, my friend @airbum!
    All those details really make an already great model standing apart.

  • Profile Photo
    Erik Gjørup said 3 years, 6 months ago:

    Thanks Spiros. I may try to make some myself just a bit thinner for future builds, but these QB AM ones are the best around - imagine if Rexx made some like they have done exhausts, now that would be something!


    (did a review on a set of exhausts some time ago, and they are amazing)

  • Profile Photo
    Spiros Pendedekas said 3 years, 6 months ago:

    Wow! Lost of words, my friend @airbum!

  • Profile Photo
    George R Blair Jr said 3 years, 6 months ago:

    It is amazing the aftermarket stuff that is out there, Erik (@airbum). To use something like this, I would have to raise my modeling skills a bunch so that the plane would match the level of the exhausts. :o)

  • Profile Photo
    Erik Gjørup said 3 years, 5 months ago:

    Another one primed

    LqS sanded, airframe primed

    Yesterday I sanded down all the Liquified Styrene (LqS) filler and primed the plane


    As with the F-4 posted in another topic here, it was the victim of too thick a mix

    But after thinning the second round all was well. The propeller had some rather pronounced sinkmarks


    These had also been treated with LqS, and now it looks better, but still needs work. The propeller for the G from Zvezda looks very thick and crude, and I may source another one. I have a lot of eduard ones lying around that may be modified for use here.

    As always comments and constructive criticism is welcome

  • Profile Photo
    Spiros Pendedekas said 3 years, 5 months ago:

    Nice priming and nice use of LqS, my friend @airbum!

  • Profile Photo
    George R Blair Jr said 3 years, 5 months ago:

    Once again, Erik (@airbum), primer brings all the parts into one unifed whole. Looks great. Now, for the rest of the paint.

  • Profile Photo
    Erik Gjørup said 3 years, 5 months ago:

    Basepaint

    In preparation for the Yellow areas some white is airbrushed

    As we all know, Yellow is one of the more unforgiving colors to paint, and in order to get it to work, a can of 30 years old Humbrol Matt White is opened.


    So far all is joy and happiness – Now it is off for a proper long curing in the box before yellow is airbrushed.

    and once again this one will be set aside for a lot of days before the next round