Special Hobby 1/48 Martin Model 167F-A.3 (Martin Maryland)

Started by George R Blair Jr · 97 · 3 years ago · 1/48, Martin 167, Martin Maryland, Special Hobby
  • Profile Photo
    George R Blair Jr said 3 years, 8 months ago:


    I have wanted to build this kit for a long time. It was one of those seemingly-mediocre planes used early in WW2 to slow Hitler down until better machines could be designed, built, and moved into combat. I think this is one of those planes that is so ugly that it looks really cool. I don't want to give the impression that it was a bad airplane. It was a fairly good airplane that unfortunately became nearly obsolete when it encountered the Luftwaffe. I became interested in this airplane when I was doing some reading on the Battleship Bismarck, but more on that later. Before I bought this kit, I had discovered several build articles on various sites from modelers who had varying degrees of dislike for this kit, but I decided to give it a try. That was several years ago. Having just finished my previous WIP build, I was trying to figure out what I wanted to build. I have 5 or 6 models that I want to build right now, which is probably impossible, but I was waiting for various deliveries to bring decals, photoetch, or masks for all the other kits, so the Maryland moved to the front of the line.

    Background:
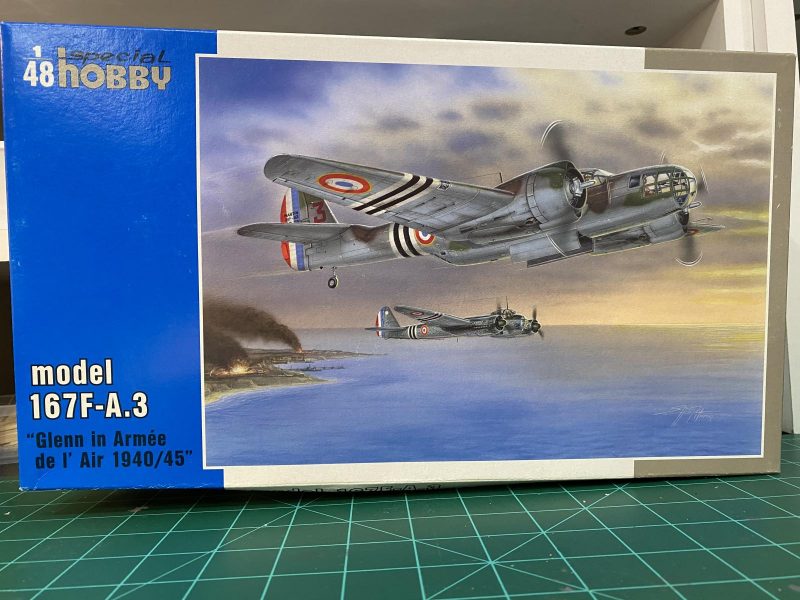
    First, a little history on the Martin Maryland. This plane was designed by the Glenn Martin Airplane Company in 1938 as an entry into the US Army Air Corps request for designs for a light bomber. The Martin Model 167, as the plane was called, eventually lost out to the Douglas DB-7, which became the A-20 Havoc. Martin eventually sold 450 of these bombers to foreign customers, including France, South Africa, and Great Britain. The performance of the Model 167 was comparable to other light bombers of the time, but it was interestingly armed with 6 .303 caliber machine guns, 4 of which were fixed, forward firing guns in the wings, similar to that found on fighters. It could also carry 2000 pounds of bombs.

    France placed an initial order for over 200 of the Model 167, most of which were delivered by 1940. As you might guess, the deliveries stopped when Germany invaded France. Some of the French planes escaped to North Africa, where they fought against the Afrika Corps, but others remained in France where they fought against the British. The 75 undelivered aircraft were diverted to Great Britain, where most of them fought with the RAF. The first 32 planes of the 75 had already been built to French specifications, but the last 43 were upgraded to meet RAF needs. The Model 167 was known as the Maryland I in early RAF service. The Maryland was further upgraded, and an additional order was placed for another 150 planes, which were called the Maryland II. All of the Maryland I's and II's went to the RAF, except for 3 airframes that went to 771 Squadron of the Fleet Air Arm where they were used for photo reconnaissance.

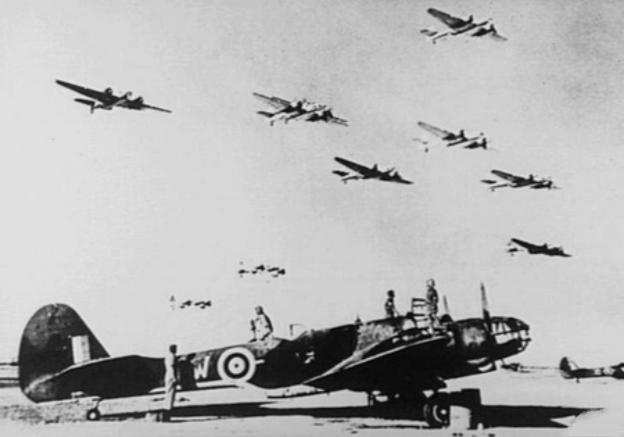
    The Maryland took part in a great deal of action in Europe and North Africa during the early years of the war, but two incidents bear mentioning. In the first incident, a Maryland flown by Adrian Warburton flew reconnaisance missions both before and after the British raid on the Italian fleet at Taranto. During his career in the Maryland, Warburton had five confirmed air-to-air kills using the fixed, forward-firing guns, which is pretty cool. The second incident is what brought me to this build. In 1941, the battleship Bismarck and and cruiser Prinz Eugen were hidden in a Norwegian fjord waiting for an opportunity to break out into the Atlantic. The British knew the warships were there and were flying reconnaissance flights to keep track of them. It was a Maryland, serial number AR720, of 771 Squadron, that discovered the Bismarck and Prinz Eugen had departed the fjord on a run to the Atlantic. Knowing that the Bismarck was attempting a breakout led the British to intensify reconnaissance flights which led to the discovery and destruction of the Bismarck. This was just too cool to ignore, so I decided I wanted to build AR720.

    Research:
    Of course, I always seem to pick subjects where the information is a little conflicted. And so it was with AR720. I couldn't find anything to identify whether it was a Maryland I or II, but from what I can find out, I suspect it was a Maryland I. As a former history instructor, I should be more impartial, but my belief that it was a Maryland I was probably influenced by the fact that the model kit I had was a Model 167, aka Maryland I. The next problem was the paint scheme applied to AR720. Color sources are not really plentiful, and the ones I could find are all different. I couldn't find any photos of the actual plane, nor could I find any historic descriptions of the colors carried on the plane. So I am depending on illustrations drawn for fairly recent books. One source shows the plane in a standard RAF camouflage of dark brown and dark green over light gray, while a second shows the same camo pattern in dark green and gray over sky. A third illustration shows the plane in an overall dark gray, perhaps dark sea gray, over sky. I suspect it is one of the two-color patterned camouflages, but I am still researching which one might be correct. I would be willing to bet that someone on iModeler already knows the answer to this, so any help would be greatly appreciated.

    The Build
    I started this build forewarned by other modelers and build articles that detailed the problems with this kit, but so far my foreboding is unwarranted. I like the way this kit looks in the box, it is well-detailed, has photoetch to detail various areas of the plane, and has a ton of resin, which is mainly for the two engines (all of the cylinders are separate parts).


    The only additional thing I got for this kit was a set of canopy masks, which I bought a year or two ago. I plan to rob some markings from my decals for other planes, probably from a Mosquito or similar.

    The build starts with the cockpit, which is no big shock. One of the first things I did was identify the parts I needed, cut them off the sprues, and corral them in a container. This would usually be simple, but there are no part numbers on the sprues, and a lot of the parts look similar. Constant contact with the parts diagram has hopefully insured I have the right parts.
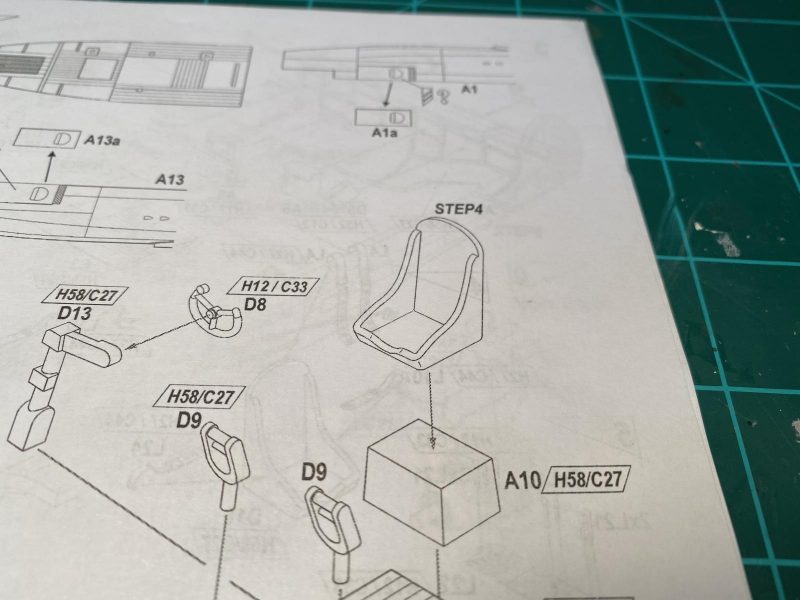

    The parts were cleaned up using a hobby knife and sanding sticks. Some the parts looked a little "clunky", so I thinned them using a sanding stick with four grits.
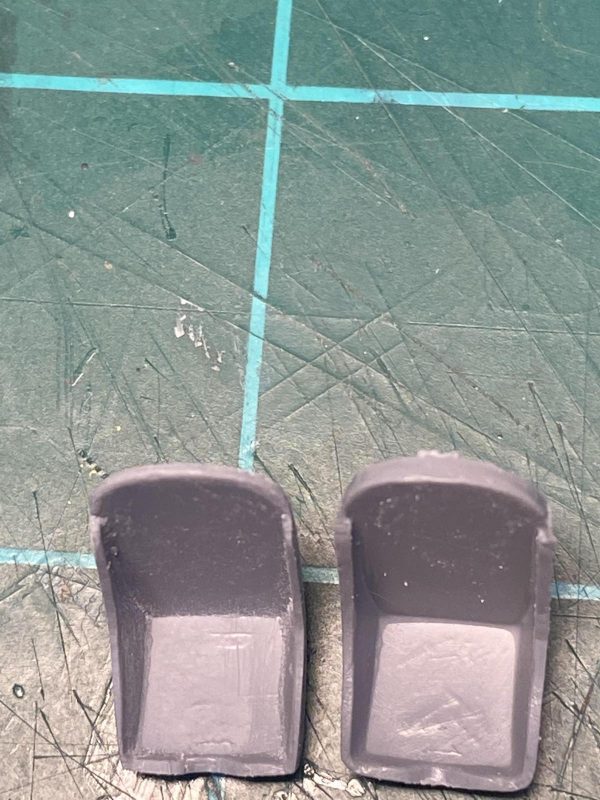
    The next task was to cut out part of the cockpit floor in preparation for adding a photoetch piece. The diagram showing what to cut is easily misinterpreted, so I spent some time making sure I was cutting the right area before I got out my razor saw. My normal philosophy of measure twice and then cut it with an ax won't work here.
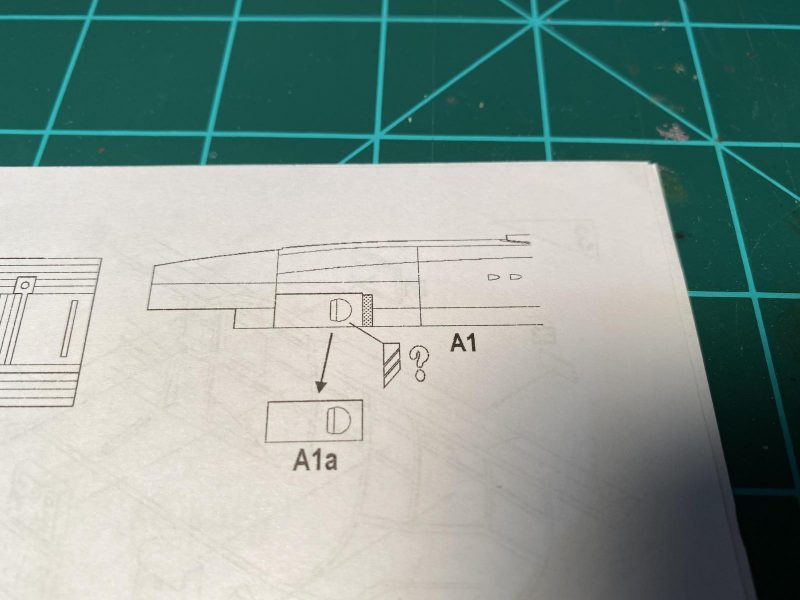


    I got the photoetch part cut out and glued to the cockpit floor, but there were some small reinforcements to add. These were very, very small triangular pieces of photoetch that were barely visible to my 70 year old eyes.
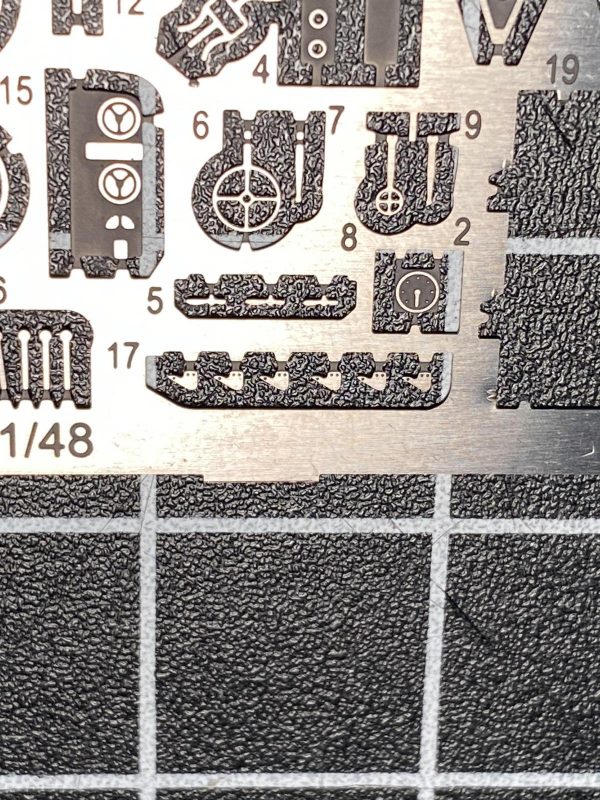
    I have a pair of 4X reading glasses from the pharmacy that I use for cases like this, so armed with my 4X glasses and some needle-nose tweezers, I managed to prove yet again that super glue and microscopic photoetch don't work for me. I only got one in place before I gave up. I decided to cut my own plastic replacement pieces and try them instead. So, here I am trying to glue microscopic plastic pieces because I couldn't successfully glue the microscopic photoetch pieces. You should probably be sensing my frustration by now, but it actually worked. I got the plastic pieces cemented in-place, and I think it looked OK once I painted the floor.
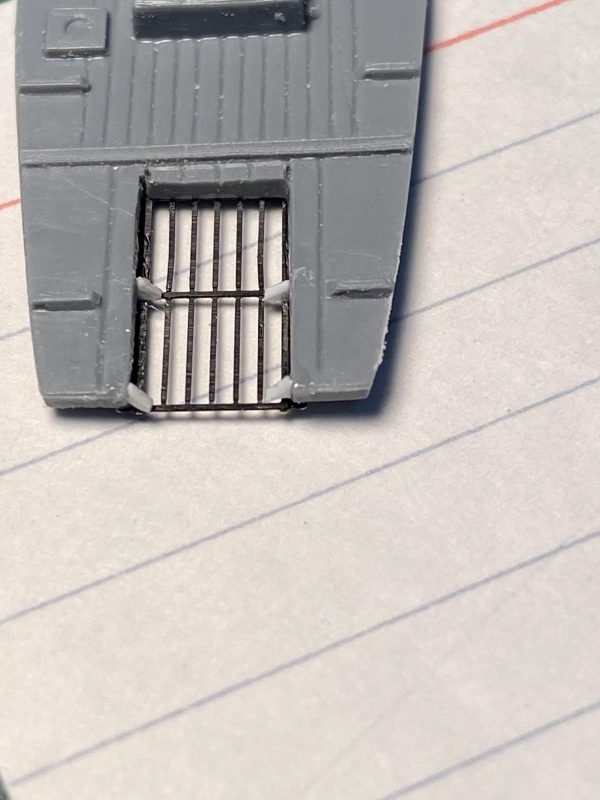
    I painted the applicable pieces with US interior green from AK Real Colors. That's the color the instructions call for, and I think it sort of makes sense. The walls of the fuselage have some decent detail, but I will try to busy up the area to match the photos that I have. That's about it. Hopefully some more work tomorrow on the cockpit. So far, I am pleased with this kit. I was expecting a lot of problems, which haven't materialized. Of course, I haven't started on the fuselage and wings, which have no locating pins, so there is still time for panic, but that will come another day.

    Stay safe, everyone.

  • Profile Photo
    Spiros Pendedekas said 3 years, 8 months ago:

    That's such a cool choice, George @gblair!

    I've always liked the Maryland looks. It just looks great. In fact I've got the 1/48 Fonderie Miniature in my SoD, to build one day. I like your progress and your appoach so far, especially the little triangle PE approach. Your solution is efficient and miles ahead easier. This is going to be a super build. Waiting for your progress and possible (probable?!) solutions upon this beautiful but not necessarily easy kit.

  • Profile Photo
    Chuck A. Villanueva said 3 years, 8 months ago:

    By George, you got a nifty project going on here. Rather ambitious and one that will be a challenging one at that. A very interesting subject, The Maryland is one subject seldom seen or even mentioned, yet was quite prominent in the early part of the war. I myself do not know how effective they were reading on them a bit during the Kasserine Pass GB a couple of years ago in French service. The summary you presented sets up your project nicely. Your off to a good start. I also struggle at times with PE and cyno cement. I prefer to use Testor's clear cement on PE bits where there is no stress, mostly in the cockpit panels. Looking forward to the next installment.

  • Profile Photo
    Erik Gjørup said 3 years, 8 months ago:

    What a great choice George! Chuck and Spiros made some very appropriate comments, and I can only agree to those. The sanding of the seats make them look a lot better. To quote you on the colors;

    I would be willing to bet that someone on iModeler already knows the answer to this
    So would I - it worked perfect when I asked for some advice on a build of mine (thank you).

    I have a weak spot for the early WW II planes too, and there are many that I would like to build as well. I'm tuned in here and looking forward to the ride!

  • Profile Photo
    Louis Gardner said 3 years, 8 months ago:

    George,
    This is a great one to follow. I have been looking at getting this kit, as I have most of the Army twins with the exception of this one. Please let us know if you run into any bumps along the way. I'll be following along for updates. I can only echo what has been stated above... Rock on buddy...

  • Profile Photo
    George R Blair Jr said 3 years, 8 months ago:

    Thanks, Louis (@lgardner), Erik (@airbum), Chuck (@uscusn), and Spiros (@fiveten). I have spent the last couple of days painting the interior bits and doing some detail painting. I found a photo of a portion of the interior of the Maryland, and the first thing you notice is a large number of wires, conduits, pipes, and so on. I think I will try to add these to the interior, as well as some of stuff to make things look a little busier. This is especially true up front, where there is a lot of glass. The rear section has some kit detail, but will be largely invisible. I think I will experiment with some of my detail in the invisible rear, just in case it doesn't work very well. I hope to have a post ready this afternoon. Stay safe.

  • Profile Photo
    Spiros Pendedekas said 3 years, 8 months ago:

    Waiting for your interior improvements, George @gblair!
    This is going to be an epic build!

  • Profile Photo
    George R Blair Jr said 3 years, 8 months ago:

    I think I am in the Twilight Zone. I have been working for two days on the interior and it doesn't feel like I am any closer to closing the fuselage. In my defense, my wife is staying at my daughter's Monday thru Friday helping her with the new baby, and she leaves me a long "honey-do" list before she leaves. If you aren't familiar with this list, it is the list of the work around the house that she wants me to do while she is gone. Before I launch into my journey into the Twilight Zone, I have a cringe-worthy picture of my workbench. Perhaps you will see why things go slowly sometimes. The Maryland and an N Scale oil dealer are both working on the bench. I never clean or straighten until I am done with a model, otherwise I lose things.


    In the midst of working on the interior of the Maryland, I have also been trying to finally resolve what colors I will paint this plane. As I mentioned previously, I am trying to model the Maryland that discovered that the Bismarck had slipped out of the Norwegian fjord, which launched the events that led to the sinking of the Bismarck. I have not found any photos of this plane, nor can I find any period description of the colors. There are three different illustrations in three different sources that each has a different paint scheme for the plane. One is dark brown and dark green, one is dark green and dark gray, and one is dark gray overall. I have a master's degree in history, and it bothers me that I can't find any info, so I decided to search outside the box. This plane was one of a handful of RAF Marylands that went to the Fleet Air Arm (FAA). I was able to eliminate the overall dark gray scheme, since the source says this scheme was carried in 1942. The early Marylands were originally part of a French order that was diverted to Britain when France surrendered in the summer of 1940. Three of these planes were sent to the Fleet Air Arm. Assuming that they were painted in the RAF camouflage when turned over to the FAA, it is possible they were brown and green. But the mission that discovered the Bismarck was missing wasn't flown until the summer of 1941. It seems logical that these planes could have been repainted in FAA colors between 1940 and 1941, but what were FAA colors at the time? I discovered that the FAA researched a standard camouflage scheme in 1939 that was adopted for their aircraft in April, 1940. This new scheme was Extra Dark Sea Gray and Dark Slate Gray over Sky Gray. When you look at color chips for these colors, they look like dark gray and dark green, which matches one of the illustrations that I have for my Maryland. So, unless someone has other information, that is my plan for the paint scheme.

    Ok, enough academics. It is time to go into the Twilight Zone. This model, between the plastic, resin, and photoetch pieces, is actually fairly detailed. No nice Eduard colored photoetch for this plane, so everything needs to be painted to bring out the detail. I would love to tell you that I am a wonderful painter of detail, but that just wouldn't be true. So, this has been a struggle. In addition, I have gone overboard. For instance, I used nine different colors of paint on the steering column and control yoke, as well as simulating a warning sign on the column.


    I began by painting the interior fuselage surfaces using AK Real Color Interior Green. I then pre-painted the various detail that would be added to the fuselage interior. Some were quite detailed, including a resin radio stack and various boxes and pouches. I accomplished a sub-par paint job on the radios, but moved it into the marginally acceptable category with a wash of dark brown panel liner from Tamiya. I have found a good, dark wash will cure many ills.


    Everything was finally attached to the left side of the fuselage. I was getting ready to add the detail to the right side when I realized I should have done a wash over the fuselage interior, followed by a drybrush of some light green before I added all of the detail. Duh! It would have been so much easier to apply the wash without all of the detail added. The right side was given a wash before I added any detail.


    At this point, I was staring at the long, thin fuselage that has no locating pins. I decided to add some thin strips of plastic to aid in aligning and gluing the fuselage sides. These were simple to add and should work well, when the time comes.

    The next detailed piece to deal with was the main instrument panel. It has a lot of raised detail that I had absolutely no confidence I could paint in a convincing manner. The other detailed pieces so far will be almost invisible in the aft part of the plane, but the instrument panel will be very visible under the main canopy. I decided to go with a plan that would be easier than doing the detail painting, which turned into a real quest for completion. My first plan was to sand off the detail and create the instrument panel using decals. Back in the day, Monogram created sets of instrument panel decals for a variety of aircraft in a variety of scales. I'm not sure why, but I have a bunch of these. They are basically black decals with the instruments depicted in white. I pieced together pieces from a B-17 panel and a B-24 panel.

    It looked suitably busy, but also noticeably flat. I decided to use a set of photoetch bezels from Airscale to put some hills on the flat land.


    I had never used these before, but I found them relatively easy to use. The only problem I encountered is that they are more difficult to separate from their "sprues" than Eduard items. With something as fragile as a 1/48 scale bezel, they are easy to distort. I would get 5 or 6 bezels cleaned up, stuck on some cardboard with tape, and then painted with black primer. After that, I added them to the panel using white glue. I have to say that the bezels really add to the appearance of the panel, so all of the extra work seems to be worth it.


    That's about it for now. Once everything is glued to the interior of the fuselage, I plan to add some details that are visible in the few photos I can find of the cockpit of the Maryland. I suspect that things will move much quicker once I finish the interior details and bring the fuselage halves together. Until then, everyone stay safe.

  • Profile Photo
    Spiros Pendedekas said 3 years, 8 months ago:

    Hi George @gblair!

    Your interior looks wonderful, pity that a lot will be hidden after fuselage closure.

    The alignment strips are a good move. After having learned my bitterish hard lessons, I try to reinforce every questionable area at my models: it's easy, fast and puts you on the safe side.

    And I like very much those bezels: they liven up that instrument panel.

    I agree with your scheme choice, too, seems the wisest choice.

  • Profile Photo
    Erik Gjørup said 3 years, 8 months ago:

    To quote you, if I may;

    I would love to tell you that I am a wonderful painter of detail, but that just wouldn’t be true.
    I think you have proved yourself wrong. It is very good work, truly wonderfully painted. (OK, not as a master, but really good anyway)

    The alignment strips will help a lot - very useful additions in many "short run" or vac-form kits.

    I like the raised detail on the IP a lot, that work just makes it stand out! And to end with the start - very well researched! You know how to do this in a thorough and very informative way, reflecting your background. Well done George (@gblair).

  • Profile Photo
    George R Blair Jr said 3 years, 8 months ago:

    Thanks, Spiros (@fiveten) and Erik (@airbum). I would like to say that I have trouble painting details because I am almost 70 years old, but that wouldn't be true. I had trouble painting details when I was in my 20s also. So you learn to work around things. Picking up the AK Real Colors I need for the model today, so I should be suitably equipped for the last bits of the build.

  • Profile Photo
    Tom Bebout said 3 years, 8 months ago:

    Just catching up on your progress George. Great subject, always wondered why a decent model company hadn't produced a state of the art rendition of the Maryland, would love to do one. More than likely it's due to it's lack of glory or press during the war. She's looking good and I'll be watching your progress.

  • Profile Photo
    Spiros Pendedekas said 3 years, 8 months ago:

    Hi George @gblair!
    By all means your painted details, among others, look great!
    Waiting for your progress on this amazing subject.

  • Profile Photo
    George R Blair Jr said 3 years, 8 months ago:

    That's the problem, Tom (@tom-bebout). So many planes, so little time. I have to admit that doing some of the more obscure subjects is sort of fun, right up to the point you realize that there may not be a lot of info on them.

  • Profile Photo
    George R Blair Jr said 3 years, 8 months ago:

    I took my wife back to my daughter's house in Austin (4 hours round-trip) so she can help with the new baby till next weekend. I am still mired in the detail work on the Maryland, which really slows things down. I cleaned up a couple of resin pieces that will become a panel and the throttle quadrant on the fuselage sides in the cockpit. Both of the pieces have photoetch panels that provide the surface detail on the casting, as well as a number of levers that must be added. I glued the photoetch detail to resin and then painted both pieces with interior green. Once this was dry, I painted the surface of the panels black, and then did some detail painting to bring out the features. I pre-painted the levers to be added with black spray paint, then painted the knobs white. I glued the levers in place using Gator Glue.

    Once this was done, I set about adding the three bulkheads that form the various compartments within the fuselage, as well as provide a little stability to the long and thin fuselage. I was smart enough to do some dry-fitting and testing on these bulkheads, and found that none of them would fit without adjustment. Each bulkhead required careful fitting and sanding before the fuselage would close around the it. This process took a while, but I was finally able to successfully close the length of the fuselage around the bulkheads. They were glued in-place and the fuselage halves were taped together to allow the bulkheads to dry in their final position.

    That's all for today. Everyone stay safe.