USN Douglas A-1H Skyraider Tamiya 1/48th

Started by Chuck A. Villanueva · 96 · 3 years ago
  • Profile Photo
    Stellan Schroeder Englund said 3 years, 9 months ago:

    Funny how quickly the paint and decal bit goes after the initial build period. Your model will look great once you are done. Wonder how Brengun missed the tail fins in their toilet package?

    1 attached image. Click to enlarge.

  • Profile Photo
    George R Blair Jr said 3 years, 9 months ago:

    Getting close to the finish line, Chuck, looks great. I have always built my Skyraiders in the blue paint scheme. I think the blue finish is more formal, like a tuxedo, while the gray/white finish is like a utility uniform. But nothing spices up the gray/white like some really bright markings. I just picked up a 1/72 Hasegawa A-1H with the special bomb included. It was a consignment at a local hobby store that I got for $8. Thanks to your build I have a blueprint for mine.

  • Profile Photo
    Robert Royes said 3 years, 9 months ago:

    Looks great!

  • Profile Photo
    Chuck A. Villanueva said 3 years, 8 months ago:

    Stellen, I think what happened as I also made the same mistake is lot of the pics are in black and white, and don't show the whole toilet bowl with the tail unit on it. While researching this particular mission, the reason behind it, and a lot images of the aircraft itself as it was configured that day, you can make out the tail unit and even the photographer interviewed one of the pilots in the squadron points out the angle of the image and the background hid the tail unit mounted behind the toilet bowl and was mistaken for a bomb mounted on one of the stations. I will get into more detail when I do the presentation.

    Thanks George, I did the Monogram kit in the GSB, about 5 years ago. At the time there was not much around for that scheme. The bombs in the Monogram kit are for the Vietnam era, so had to scrounge through the armory for WWII/Korean war era ordnance to load it up. I have that Hase kit too in 72nd scale. Don't use the bombs on that kit they are incorrect. But I have built a Hase AH-1, very fun to build.

  • Profile Photo
    Chuck A. Villanueva said 3 years, 8 months ago:

    Robert, thanks, I loved your P-40. Like to see those unusual schemes. Don't worry about the town crier, just think CNN (Cleaver News Network, false news). If there is no definitive facts on a particular scheme then run with it.

  • Profile Photo
    Robert Royes said 3 years, 8 months ago:

    Thanks Chuck, ultimately it's what pleases the modeler. I was just interested if there was more info out there then what I came up with. I still would have painted it gray.

  • Profile Photo
    Chuck A. Villanueva said 3 years, 8 months ago:

    Now time to weather a well used in theater Skyraider while operating on the boat. Can easily go overboard as these Skyraider's were worked hard.
    Using a variety of washes, engine stains and just plain dirty thinner. Pin washed the center section of the fuselage. Engine oil leaks, hydraulics, fuel stains, gun vents.


    Using Tamiya Smoke to represent those very distinctive exhaust streaks along each side of the fuselage.

    The 1000lbs bomb are pressed in. Love this idea of the ability to remove the bombs and center drop tank using Tam's famous poly caps.

    Flat coat applied over the top of the air frame. Leaving the white surfaces glossy including the top white sections.

    Next up the landing gear and the rest of the detail bits. Almost there!

  • Profile Photo
    Spiros Pendedekas said 3 years, 8 months ago:

    The Skyraiders just love weathering, and you've done a great job on it, Chuck!
    I also like very much the connection of the bombs and the C/L wtlith polycaps. This is so Tamiya!
    Nice flat coat, too!

  • Profile Photo
    Erik Gjørup said 3 years, 8 months ago:

    . . . . well used . . . . worked hard . . . . and just plain dirty . . . .
    what can I say.

    Well done!

  • Profile Photo
    Louis Gardner said 3 years, 8 months ago:

    Chuck, @uscusn
    This build is looking excellent ! It's been a while since I have left a comment, but that's not to say I have not been stopping by to see what's going on...In the past, I have been around a few Skyraiders as they were having their annuals done. What you said about them be well used and just plain dirty is spot on... They get filthy in the blink of an eye, and talk about oil leaks...man they definitely have a few drip pans stationed under them when they're parked in the shop.

    I will keep your trick using a red marker in my little bag of modeling tricks. It looks very good.

    Your "Special Bomb" looks great, and that's a good catch with the missing fins. Rock on brother !

  • Profile Photo
    George R Blair Jr said 3 years, 8 months ago:

    Great looking plane, Chuck (@uscusn). These planes were always dirty when I used to see them on the flight line, especially the engine exhaust on the sides. The Navy should have left them dark blue...they would have hidden the dirt, streaks, and leaks better. Looking forward to the finish.

  • Profile Photo
    Chuck A. Villanueva said 3 years, 8 months ago:

    George, I have a GSB Monogram Skyraider on the shelf. They are just as impressive in that color. Most the aircraft in theater got the well used but not abused look.

    Time to get this war horse on it's legs.

    Tamiya makes it quite simple in assembling the main gear struts. Great contact point when getting them installed as well. Very sturdy.
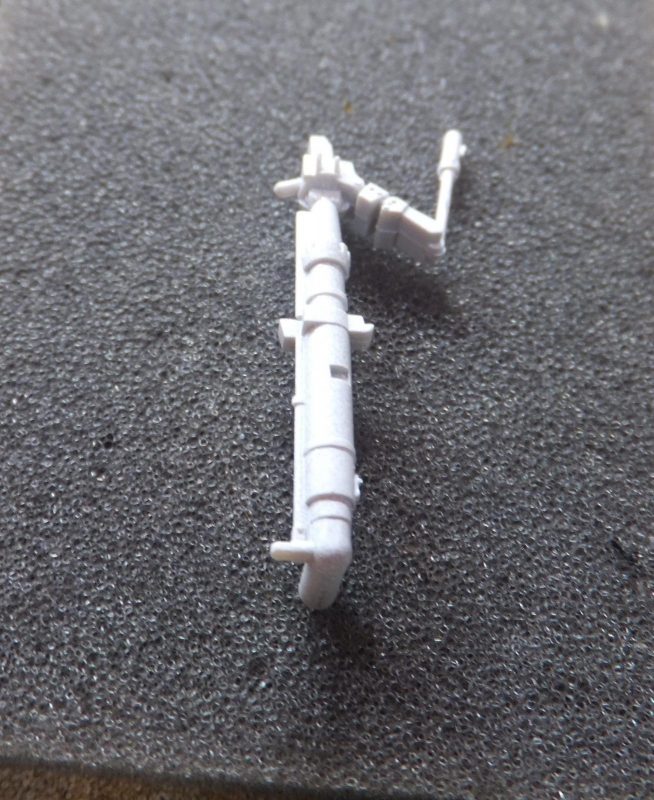
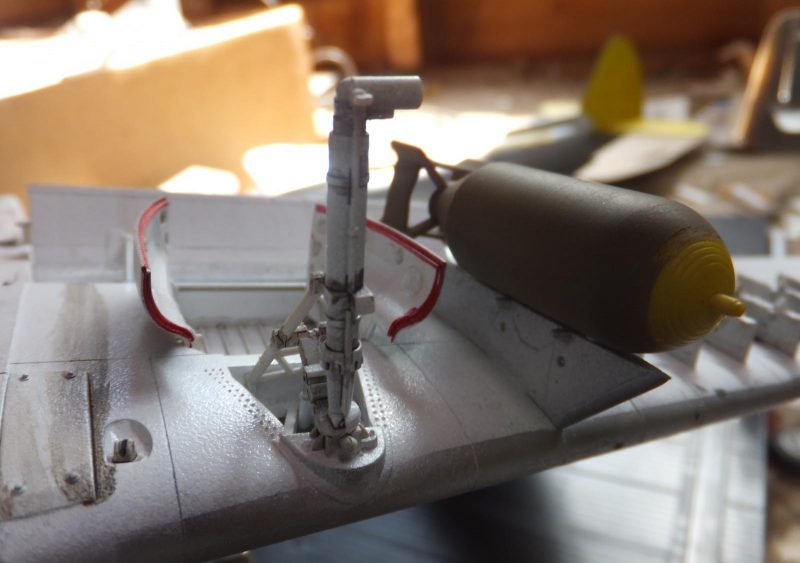
    Then the forward gear doors are attached. Also edged in Red.

    Next up the main wheels. I decided to go with the very good kit wheels as they have the brake calipers molded into the rear hubs. The resin wheels do not have this rather distinctive feature on the backside of the wheel assy.
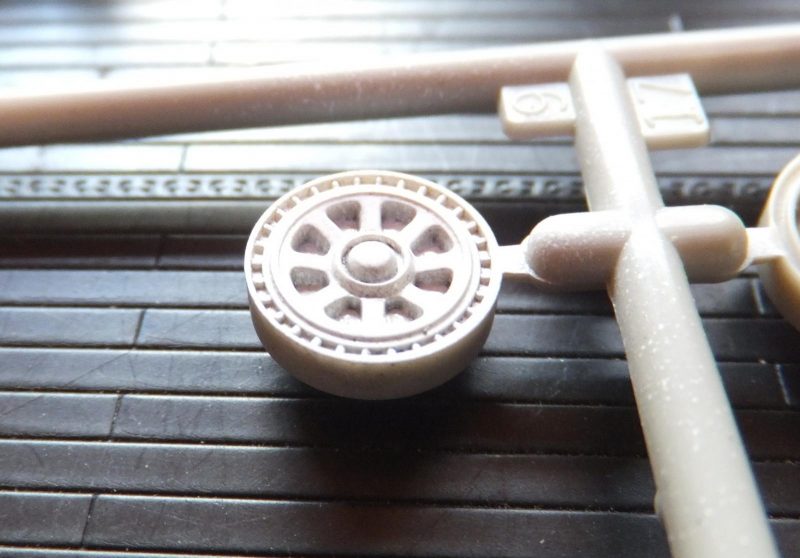
    The front and back side of the wheels get a wash.

    Now to assemble the wheels and and attach them to the struts. One way fit as the rear hubs are notched to spindles.
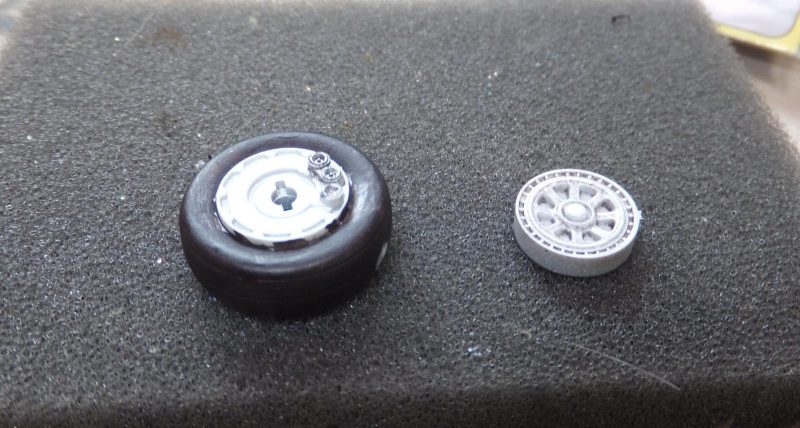
    Next the wheels are attached to each strut.
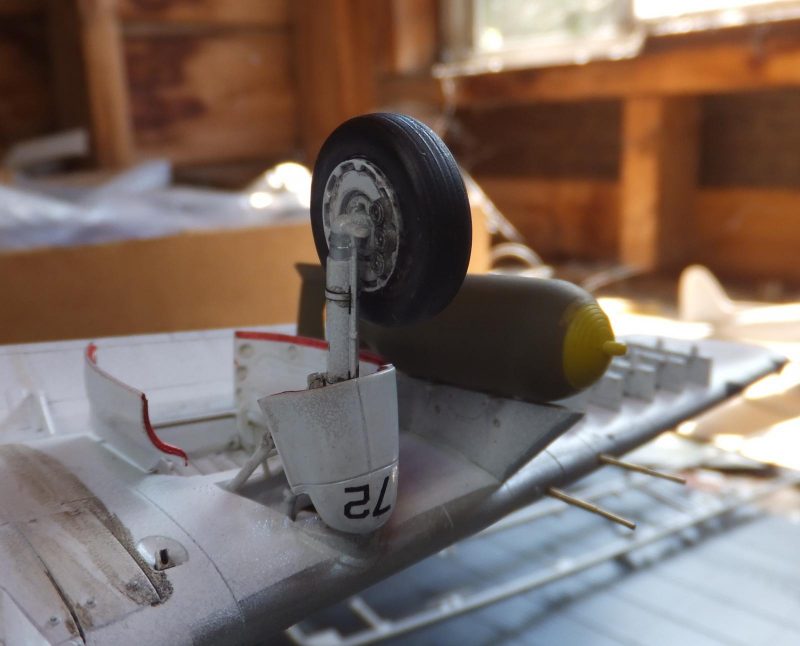
    Next to assemble the tail wheel assy and attach under the tail.

    Now we got her standing on her gear. Nice and level.

    Next is to get some staining and grime on the center drop tank.

    I will use the cool set of Master brass gun barrels in place of the kit provided ones. These are nifty little jewels which fit and assemble very nice no hassle or struggle.

    First you insert each outer barrel into the gun openings with Cyno cement to keep them in place. Just a little dab will do ya!.

    Then insert the gun barrels into the main covers. And now these are ready to paint gunmetal.

    Finally the tail mounted pitot.

    Next the special bomb install.

    More to follow.

    1 additional image. Click to enlarge.

  • Profile Photo
    Spiros Pendedekas said 3 years, 8 months ago:

    This is a wonderful progress, Chuck @uscusn!
    Quality work allover!
    Glad to see that Tamiya engineering helps.
    Having built tje same bird a decade or more ago, I cannot but completely agree with you.

  • Profile Photo
    Erik Gjørup said 3 years, 8 months ago:

    Chuck (@uscusn), I hate to tell you, but your plane looks rather dirty. . .

    Well done - and those Master barrels just adds the final touch to a great build!

  • Profile Photo
    Chuck A. Villanueva said 3 years, 8 months ago:

    First with the prop, after a coat of Future clear setting overnight.


    i applied the stencils and the kit provided Red/White tip stripes.

    Let sit overnight, a coat of Vallejo Flat varnish is applied.

    And for some doggone reason the prop did not want to go into the polycap in the crankcase. After several tries of twisting and wiggling to the point the stub almost broke off. I ended up triming it and cementing the prop in place. That has never happened before.

    Next is Brengun's resin toilet bowl and rack.

    Bending the rack and angle each side rails. Take your time and it builds quite easily. After bending into shape, painted flat black.

    The bowl is placed into the rack using Super Glue to hold it in place.

    Then the tail unit is attached to the back of the rack and bowl.

    The spinner and bracket is attached to front of the Special bomb unit and attached to the #1 RH outer pylon.

    The Special bomb is now done and ready for action.

    Next some more thingy's to hang under the wings.

    more to follow.