HMCS Huron as HMCS Haida, Trumpeter 1/350

Started by Colin Gomez · 18 · 2 years ago
  • Profile Photo
    Colin Gomez said 2 years, 8 months ago:

    I really need some inspiration and hopefully some guidance on this one. I originally posted the build on the Armada GB but things were a bit slow over there and I guess this is the new ship builder's forum to go to. I actually have a A LOT of ship models in 1/350 and 1/700 still unbuilt as well as plenty of dedicated and general use photo-etch. I got pretty far on this kit but two things brought it to a temporary halt. One was perfectionism about the finish of the hull. I modified it quite a bit to make the Canadian version of the Tribal Class destroyer, which had far fewer scuttles (portholes) as a major diagnostic feature. I also fixed the bow to give it more curvature and reverse edge along the top edge (forget what this is called in nautical terms).
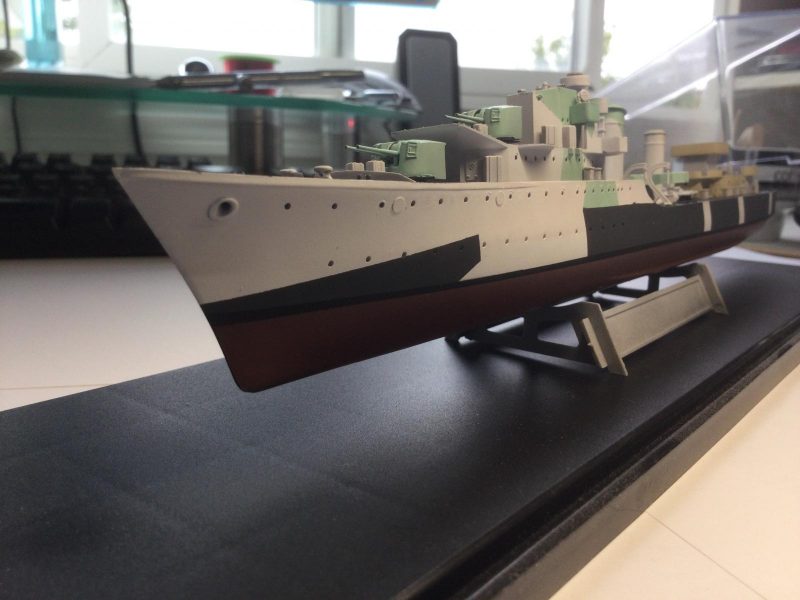
    The kit is packaged as HMCS Huron but has a hull based on the Royal Navy HMS Eskimo. Anyway I couldn't quite get the surface perfect where I filled portholes, so the ghost image of SOME of the holes can be seen here and there.
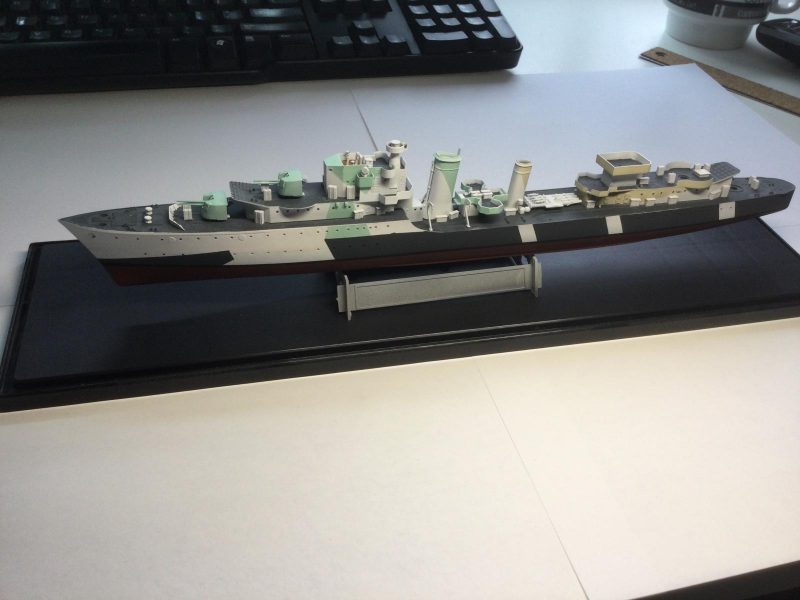
 I had hoped that painting and weathering would fix things but learned otherwise (although no weathering yet). The second (more serious) thing was the photo-etch railings. I cannot for the life of me find a You Tube video of how to most effectively apply these around the main deck of the ship. Demos on line always show work on the railings for the superstructure, which is far easier to do in short sections. Experts SAY that you should always do the railings in short sections (say, four spans maximum) but never SHOW this being done or how to join the sections together smoothly. I should probably just try it but i almost can't afford to waste any bi of the railing on this model, since it has a particular shape to it with the upturn in the forecastle (bow).
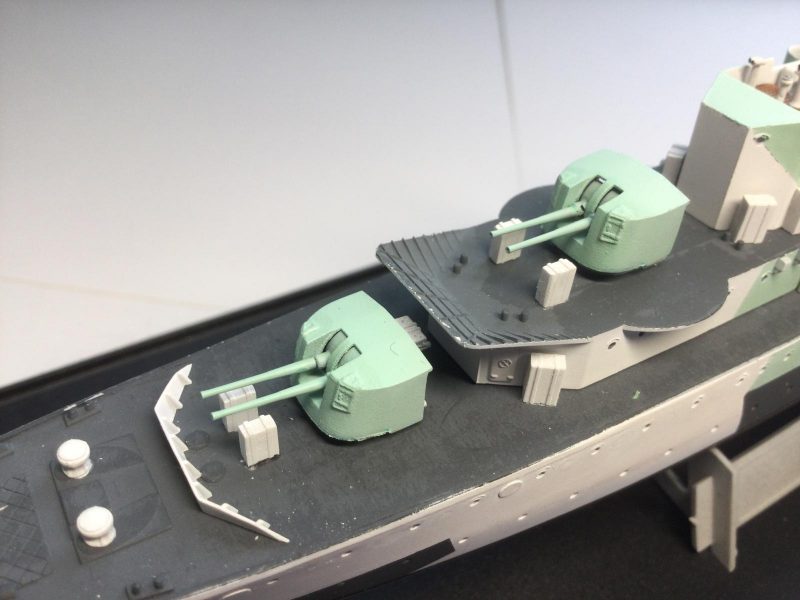
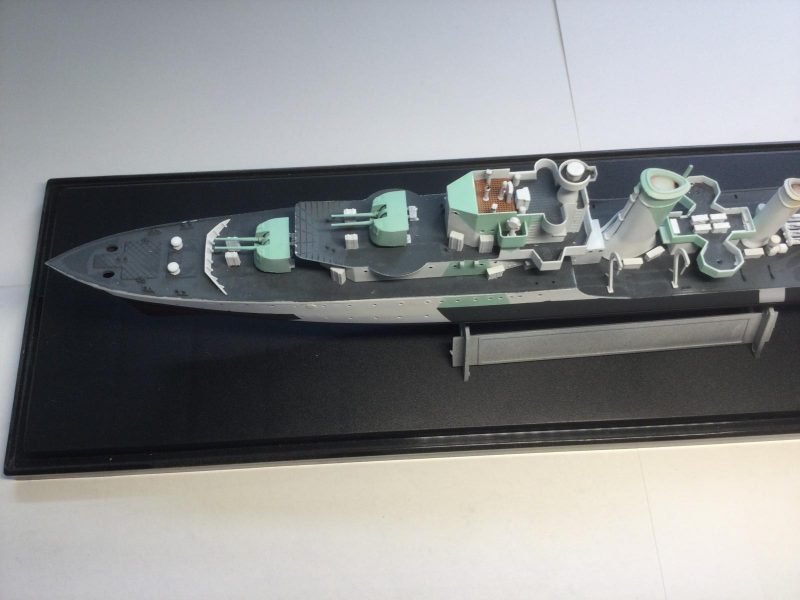
    Anyway, I followed the technique of painting the hull, deck and superstruture before the etch is attached. My favorite builds on line took this approach, arguing that it is safer to pre-paint the etch, attach it and touch it up after gluing than airbrush the whole model with etch while masking, etc. The colors are from the Life Color Western Approaches set, somewhat modified for a Royal Canadian Navy scheme. As to detailing already done or anticipated, I have also replaced the main turrets with 3D Printed versions, further modified with brass barrels.
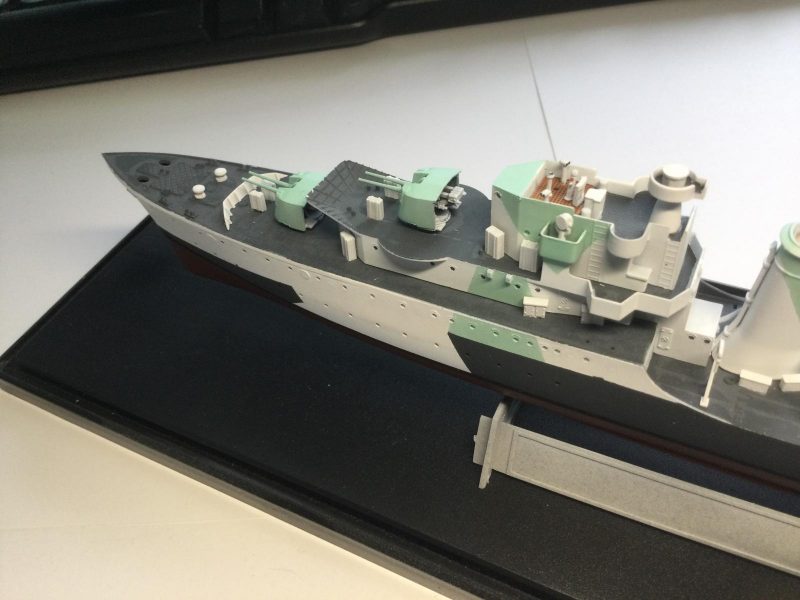
 This still need a bit of cleaning and touching up I see but are otherwise very nice. I have all the correct boats also 3D printed by Model Monkey and a huge sheet of White Ensign etch. Lots of money as well as research and thought invested already.

    Any thoughts or recommendations? I think this could look pretty good if I could get out of my slump on ships. Comments welcome.

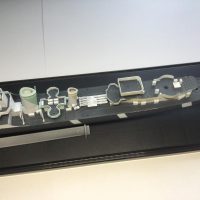
    1 additional image. Click to enlarge.

  • Profile Photo
    John vd Biggelaar said 2 years, 8 months ago:

    Wow, Colin @coling
    I'm not really into the boat thing, with the exception of trying a Uboat currently, but I have to say that your build looks awesome.
    Especially the camo looks awesome.

  • Profile Photo
    David Kopielski said 2 years, 8 months ago:

    For the railings, I usually cut the length I need. I then use thin CA glue and apply it with a Glue Looper. I tack one end down and slowly work my way along the railing. This allows you to make sure the rail stays on the edge. Here is a link to what I use https://davidsscalemodels.com/tips-and-tricks/photo-etch-tools/

    If the span is longer than the full rail I overlap the vertical supports at the joint so it looks like one continuous run. If the railing turns, I make the bends/curves first and test fit the rail then start working along with the glue. The glue looper causes the CA glue to flow along the edge and covers about 2 sections wide to give you an idea on where to place the drop of glue. Once the railing is in place I typically paint a thinned clear matte with a brush first. This acts like a primer on the photo etch. I then paint the top coat color with a brush. Keep the paint thinned a little so it does not build up on corners or fine detail.

    As for you model, It is looking fantastic. As John stated, the camo is awesome!

  • Profile Photo
    John Healy said 2 years, 8 months ago:

    Looks great, Colin. Your model looks really good. I have an Eskimo in the stash too. The plan is to finish it as HMS Nubian someday. I love ships too. I do not love PE though. I did full railings on a 1/700 USS Maryland and remember doing them in small sections and using CA and a pin.

  • Profile Photo
    Spiros Pendedekas said 2 years, 8 months ago:

    Looks an amazing project, my friend @coling!

  • Profile Photo
    Colin Gomez said 2 years, 8 months ago:

    Thanks, John. I really struggled with correct colors, until I got the Lifecolor set, which is a great starting point IMO. It is clear that the tones varied a lot according to the availability of paints and weathering effects in very harsh sea conditions. Both Haida and Huron served as escorts on the Arctic convoys to Murmansk and also battled (and sank) German destroyers off Normandy. I have studied the surviving black and white pics carefully for the number of colors used and their pattern as well as the color ships and discussions on-line, so I think I have made a pretty good guess about the camo, at least as of 1944. I am glad it looks aesthetically nice. I really appreciate your kind words. Getting going on a kit can sometimes be a matter of generating interest amongst fellow modelers.

  • Profile Photo
    Colin Gomez said 2 years, 8 months ago:

    Thanks, David! Great to have a talented and experienced ship modeler to consult. The Glue Looper device looks like exactly what I need. I see it is available on eBay Canada, so I will order it soon. I am happy to hear that the camo looks good, so far. Here is the etch and 3D printed stuff I will be working with.

    The metal is mostly White Ensign, plus some quite good kit stuff from Trumpeter. The 3D printed stuff is from Shapeways/Model Monkey. I think I will finally have the energy to get on with this. I really like the Tribal class and have a bit of patriotic pride in the Canadian types. Thanks again for the support and inspiration. I will be taking some serious time to look over the stuff on your website. Lots of great expert modeling there.

  • Profile Photo
    Colin Gomez said 2 years, 8 months ago:

    Thanks, John H. Nice to have another Tribal Class fan on board. I am very wary of etch. I have an aversion to all processes in modeling that are irreversible. At least I have Gator glue to make some repositioning of parts easier as I go. I'd love to see pics of your USS Maryland, if you have them.. I have a bunch of Japanese battleships, cruisers and carriers in 1/700, most with etch and metal barrel sets. They were just too expensive to do in 1/350. Have you tried to do artificial water? I have the tools and bases to give it a try. I plan to have some of my models so they can be fitted inside such a base without ruining the finish or cutting the hull down. Styrofoam cut to shape should do the trick (as I have seen done on-line).

    A Canadian modeler/photographer named Chris Flodberg has some of the most incredible dioramas of ships at sea that I have ever seen. You will probably have to right click the title and "open in new tab" to see the first link (it's worth it!).

    Chris Flodberg’s Academy 1/350 USS Indianapolis
    http://www.modelshipgallery.com/gallery/bb/hms/Howe-350-cf/index.htm http://www.modelshipgallery.com/gallery/ca/hms/Belfast-350-cf/pages/05HMSBELFAST.htm
  • Profile Photo
    Colin Gomez said 2 years, 8 months ago:

    Thanks, Spiros, So glad to see you like ships, too. They are long-term projects for sure. Given the size of dust motes in 1/700, I didn't get motivated to do my ships until I found some good, inexpensive clear cases to protect WIPs and finished models. The ones I have from Trumpeter fit my purposes very well.

  • Profile Photo
    John vd Biggelaar said 2 years, 8 months ago:

    Those parts are indeed very detailed, Colin @coling
    Like said before, seems better to have the large parts cut into several fragments before applying them.
    Looks of the 4.7in guns is great.

  • Profile Photo
    John Healy said 2 years, 8 months ago:

    Here’s the Maryland, Colin. I just took these pics. I also have an article on it here from 2015 but the pics aren’t as good. I used 3D printed cage masts from Freetime Hobbies. Much nicer then rolled PE. I need to redo the rigging on this. The base is a craft store sign board with Liquitex gel and paint for the water. I think it turned out ok but I’m honestly not pleased with the size of the finished project. These ocean bases kind of defeat the whole point of 1/700 in my mind. They take up too much space and overwhelm the ship visually. I’ve been thinking of finishing these in the future in one of two ways: 1.). Build them on a very small wooden rectangular base with a footprint not much larger then the ship. 2.). Build them ID model style. Accurate paint jobs, no PE at all. These could be simply displayed in one of my cabinets with no bases. The advantage here is that they are far less fragile and many more can be displayed. I think that was the original idea behind the Waterline series 50 years when the Japanese companies launched it.

    3 attached images. Click to enlarge.

  • Profile Photo
    Colin Gomez said 2 years, 8 months ago:

    Thanks John (v B). I appreciate your interest. I have had the kit stored away for so long that I had forgotten how much I had invested in it. Probably worth finishing.

  • Profile Photo
    Colin Gomez said 2 years, 8 months ago:

    The Maryland looks fantastic, John (H). You have really achieved something in this scale. I think the water diorama you did is very neat and technically accomplished. It does not overwhelm the ship in my view, since I think these tiny models really benefit from taking up more space (but I am a 1/32nd airplane guy, largely). The calmer seas you chose are also a plus in some respects as rough seas would definitely dwarf the ship (as they do in real life for sailors). The 3D printed cage masts really work this scale (surprisingly). I don't think PE would capture that fine detail or bend in the right way. The rigging and etch railings also look great. Thanks for sharing.

    Besides the Chris Flodberg stuff in 1/350 that I shared above I really like the diorama stuff that Won Hui Lee does, a lot of it in 1/700. He has some stuff on this website. He often portrays much larger expanses of water but has very dramatic action sequences to focus the interest of the viewer. He's even done a 1/350 sinking submarine exploding underwater you can see on iModeler (but you have probably seen it):

    1/350 U-boat VII/C “The beginning of the End.”
    Anyway, thanks for sharing your work and providing some real inspiration. I do want to get on with my destroyer. Glad to see your interests and talents also extend to ships, since sometimes I think my meager abilities are spread too thin (even if it is fun to try to branch out).
  • Profile Photo
    George R Blair Jr said 2 years, 8 months ago:

    I am glad to see I am not the only one that sometimes struggles with the detailing and photoetch on ships, Colin (@coling). Your assembly and detailing are first class. I have a lot of unbuilt ships, along with a lot of photoetch, that seem to get pushed farther down the build list by other builds. I really like all of the detail on ships, right up to the point that I think of all the work necessary to build and paint all of the detail, then I pull out a plane and build it instead. Glad to see you are doing a ship.

  • Profile Photo
    Colin Gomez said 2 years, 8 months ago:

    Thanks for the kind comments, George. I have taken a lot of time and care with the model, just having some difficulty getting over my dissatisfaction with aspects of it. I hope you do some of your ships. I am sure they will inspire quite a few of us on this site who have maritime subjects in the stash. This is exactly the site where we can get up the gumption, since there is so much genuine interest and support for Group Build projects from fellow modelers. After the Haida/Huron, I will probably work on my Aoshima Takao in 1/350.

    I really like the lines of the Japanese cruisers, which were also very tough and successful warships. Same challenges with etch but at least the hull is fine and already together, filled a bit and sanded. I worked out how to do the brass tie downs on the linoleum deck, so I have nothing standing in my way to get it done. Here is a pic. There is some scratch-building work done on vanes for the funnels. Good thing I have lots of detail refs for these bits. The superstructure and unfinished turrets are just friction-fitted with no glue yet. That's one nice thing about ships, you can fit them together as you go to test fit and alignment issues. It also helps when doing the etch that you can pop off the superstructure and work on it separately.