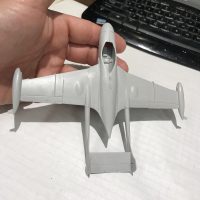
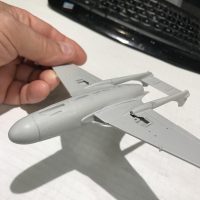
1/72 DH112 Sea Vemon FAW Mk.53 RAN

Started by George Schembri · 26 · 3 years ago · 1/72, DH112, RAN, Sea Venom
  • Profile Photo
    George Schembri said 3 years, 9 months ago:

    Decided to give this old bird a try, hopefully won't take too much time (famous last words)

    This SCAT kit F295 is a Ukrainian release of the old Frog kit.

    This kit seems to be 100 years old, never mind the DH company being 100 yrs old - but looks like it will provide a model which will pretty much look like a Sea Venom.

    A floor and 2 seats for the cockpit - ugh. The SCAT decals look terrible but I do have a set from a FROG kit, gonna go with the RAN version. Box indicated FAW Mk53, 724 Sqd, HMAS Melbourne 1962.

    1 attached image. Click to enlarge.

  • Profile Photo
    George R Blair Jr said 3 years, 9 months ago:

    You are a brave man, George (@georgeswork). I have an old Frog Beaufort that I want to build, but now that Airfix has released their 1/72 Beaufort I am wavering on the build. These old kits still build into nice models with some TLC. Looking forward to the build.

  • Profile Photo
    Allan J Withers said 3 years, 9 months ago:

    Nice one George, I have a couple of EE kits, will I build them ! you need to change RAAF to RAN !

    1 attached image. Click to enlarge.

  • Profile Photo
    Tom Cleaver said 3 years, 9 months ago:

    Too bad Aeroclub isn't still around - John Adams did a white metal cockpit for this with the right ejection seats and it all had enough weight to make it a nose-sitter.

  • Profile Photo
    Spiros Pendedekas said 3 years, 9 months ago:

    Great choice, my friend @georgeswork! I just love seeing old molds coming to life, especially by great modelers!
    Looking forward to it!

  • Profile Photo
    George Schembri said 3 years, 9 months ago:

    Thanks again guys (@gblair) (@kalamazoo) (@tcinla) (@fiveten)

    I have a soft spot for the old FROG kits and their east European cousins, respectable models for their time. This GB is an excellent excuse to try this kit out, but next build will probably be a Tamiya Mosquito.

    Thanks for catching the typo Allan (maybe I was thinking Royal Australian Aquatic Forces?)

    The Cockpit area seems fully accessible so I was thinking of progressing with the build and if things look good I'll spend some time on the cockpit.

  • Profile Photo
    George Schembri said 3 years, 9 months ago:

    Getting the initial components together and the plastic is very soft, I'll need to be careful with the Exacto blade as the plastic is very easy to cut.

    1 attached image. Click to enlarge.

  • Profile Photo
    George R Blair Jr said 3 years, 9 months ago:

    It always seems that the plastic in old kits is either really soft or really hard, with nothing in between. I'm sure that's an exaggeration, but you always remember the ones that give you trouble.

  • Profile Photo
    Spiros Pendedekas said 3 years, 9 months ago:

    Good start, my friend @georgeswork!
    At least soft plastic is workable, a so desired feature when putting together these not necessarily well fitting oldies...

  • Profile Photo
    John Healy said 3 years, 9 months ago:

    Great start, George. That’s not an easy kit.

  • Profile Photo
    Erik Gjørup said 3 years, 9 months ago:

    Nice save on the RAAF thinking George 🙂

    These early kits are a lot faster to build, and with your usual passion thrown into the build it is something to look forward to @georgeswork. I shall be following as best I can!

  • Profile Photo
    George Schembri said 3 years, 9 months ago:

    Thanks for following, John and Erik (@j-healy) (@airbum)
    Made some progress... just say 'boom' and the booms are all lined up.
    The wing tanks and tail pods were just blobby ends but with some careful slices they took their proper shape.

    6 attached images. Click to enlarge.

  • Profile Photo
    Erik Gjørup said 3 years, 9 months ago:

    Wham Boom Bang, a Venom it is! Nice re-shapings of various tanks and pods.

  • Profile Photo
    Allan J Withers said 3 years, 9 months ago:

    Coming along nicely George.

  • Profile Photo
    George Schembri said 3 years, 9 months ago:

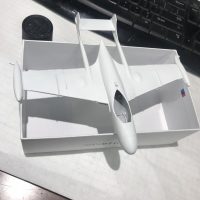
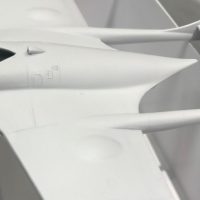
    Got all the sanding done - well, I thought I did...

    All visible cracks filled in and sanded down with 320 and 600.

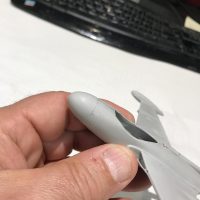
    I was able to save the raised detail just behind the radome.

    I wash the complete model with Windex & water using a soft tooth brush to get rid of any oils and loose putty residue.

    I sprayed the oil base 'high adhere' primer and things looked great until I noticed a couple of tiny pinholes on the port side wing root - DANG! I guess the tiny holes must have had some putty residue the the holes were not noticed BEFORE the Windex wash and I missed them after the wash was finished.

    I'll let the primer cure for a day or two before handling and figure how to cover the pin holes.

    5 attached images. Click to enlarge.