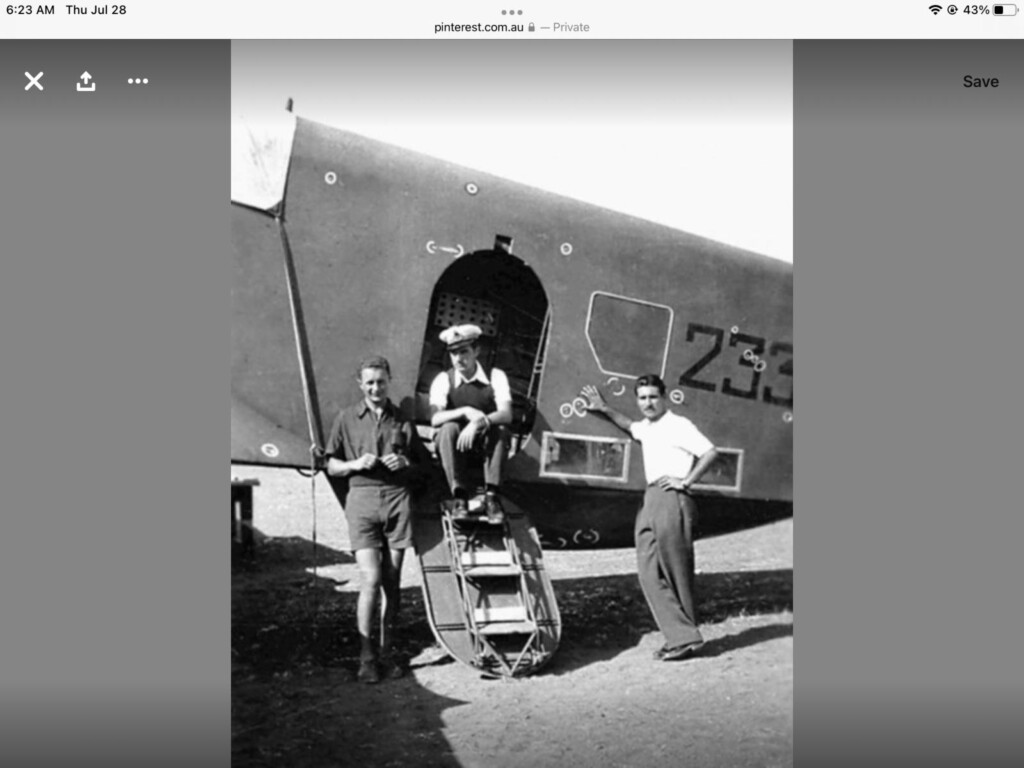
Well, it has been more than a year since I last updated this one. I have done a fair bit in the meantime. The main issue was deciding whether to go through the trouble of opening up the rear windows and crew access door, necessitating scratch-built detail in the fuselage. It took awhile to get enough photos to figure out how it should look back there. I also kind of dreaded carving out that much plastic and keeping proper shapes for doors and windows. Anyway, I took the plunge. The first pics shoe the violence of the surgical procedure to carve out the door. A complete door is provided in the kit, but you have to make the opening yourself.
-
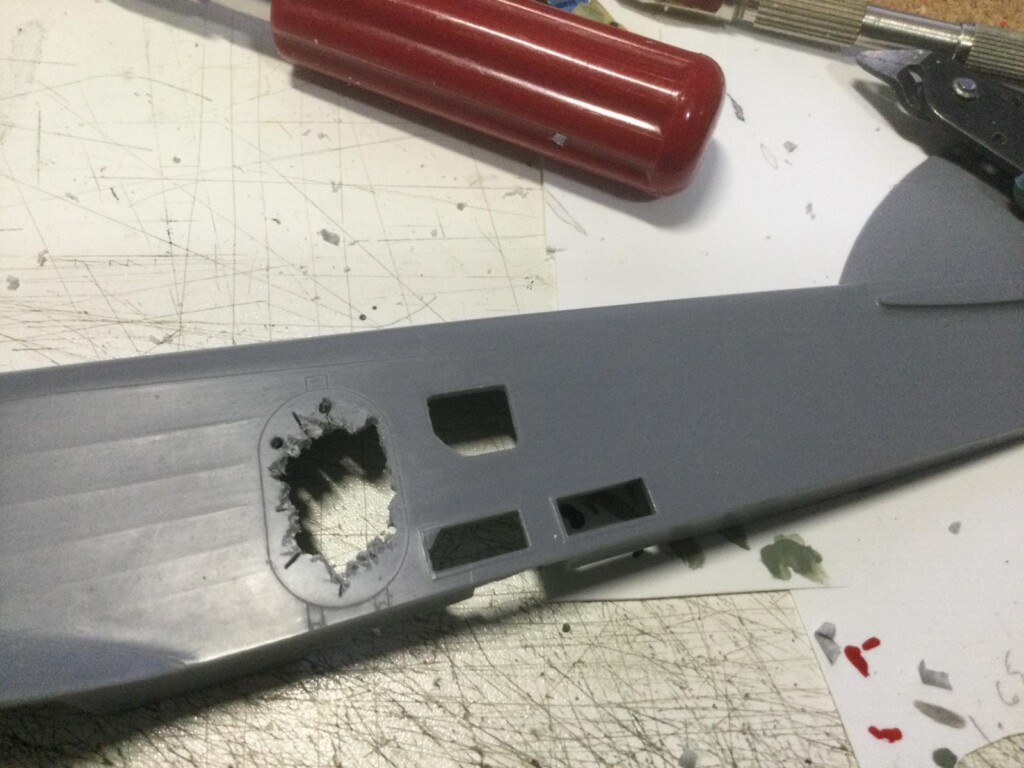
1. i had already cut out and sanded smooth the gunners doors on both sides first.
The entire interior was built up slowly with strips of evergreen sheet plus rod, scrap photo-etch, and salvaged bits from other kits. I had thought that not too much would be needed when the only view was through the rear doorway, but I ended up doing quite a bit.
The photos show how I did the side and top ribbing and built up the details of the gondola which was going to be seen pretty clearly though the open door.
-
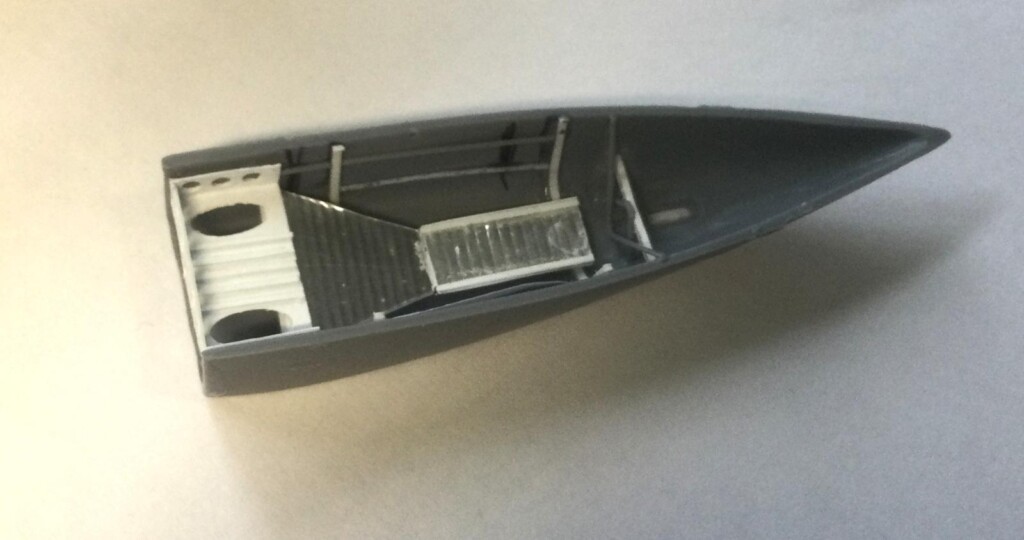
1. I was glad I had good photos of how to build up this detail in the gondola authentically
-
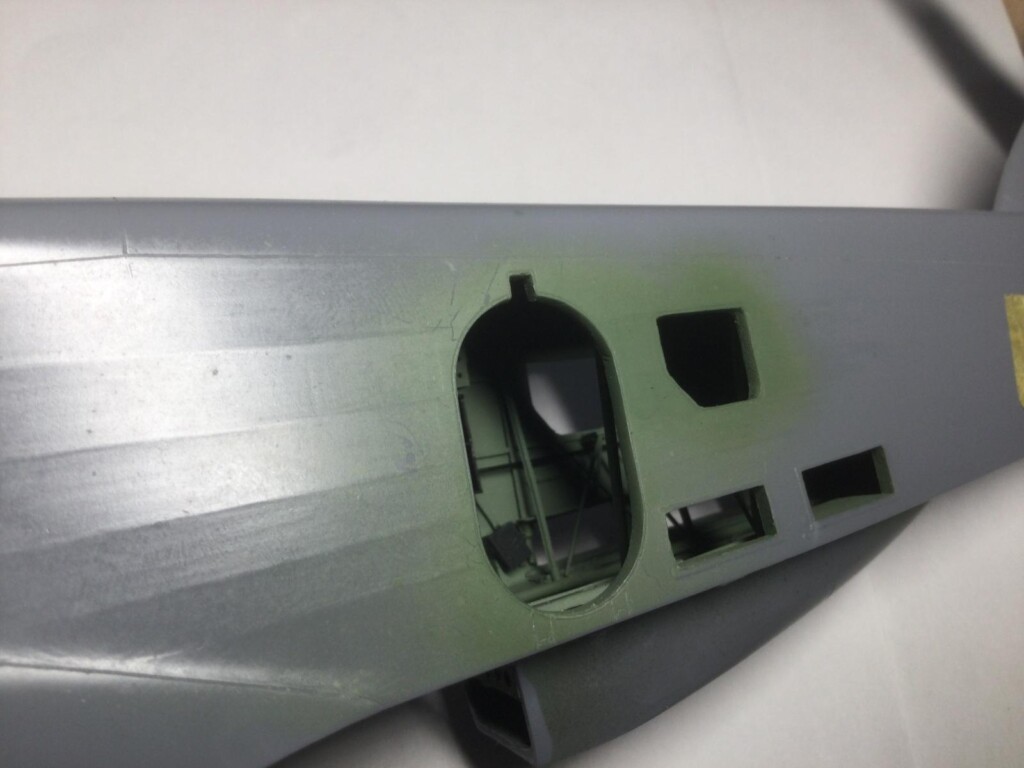
1. This pic shoes how detail will be visible through the open door.
Also done carefully were the perforated box and rectangular shelf-like thing underneath.
-
1. The visibility of this thing forced me to take special care to recreate it.
Getting the perforations to line up well was a challenge that took a couple of tries, discarding the first version.I don't know what it is but it is very visible through the open door. I made more or less authentic-looking ribbed walkway strips by embossing strips of wine bottle foil with a ribbed piece from a stencil cutting knife. I then cut the foil to shape and glued it to plastic strips.
-
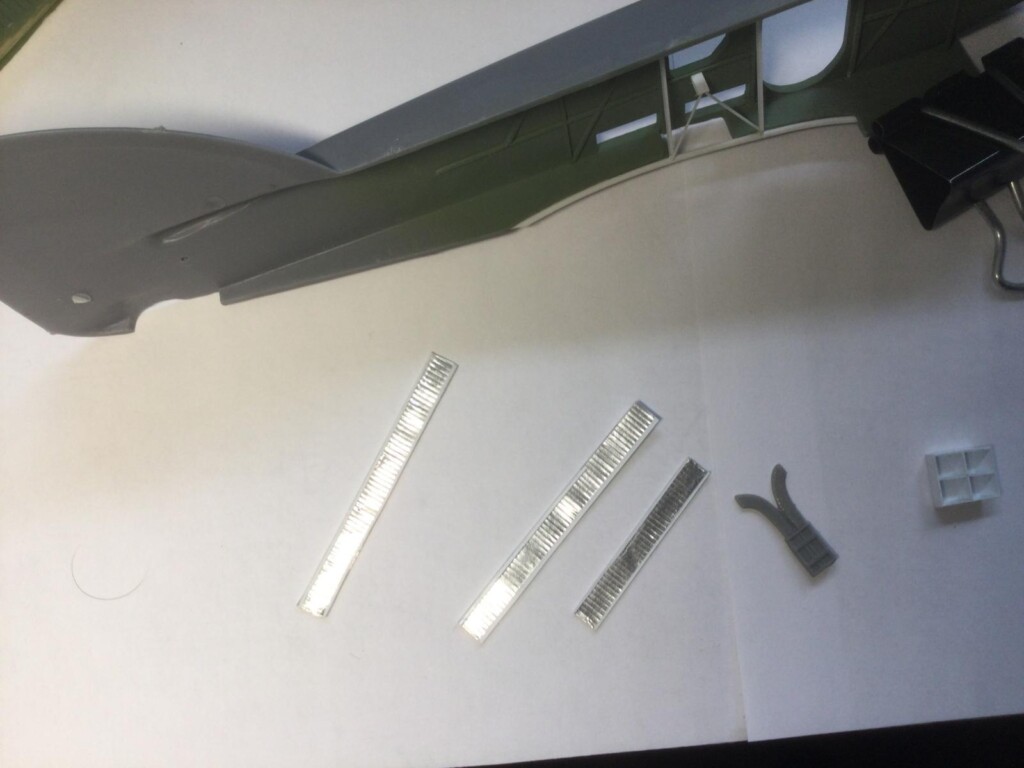
1. embossed strips of lead foil from a wine bottle for ribbed walkways
So, not to be too long-winded, the pics of all this speak for themselves. With most of the interior work done, I just have to paint and add the tail wheel and the supplied details in resin for the rear gunner's position. The waist machine guns will be fitted inside after the fuselage is assembled, otherwise they will break off in the masking and painting process.
BTW, I also added some detail to the resin cockpit, much of which will be invisible when everything is zipped up (oh well). I replaced the resin rudder pedals with scratchbuilt versions because I had lost two of these along the way. The incredible IP is from Yahu as the kit version was pretty crude and useless, even though it was resin.
-
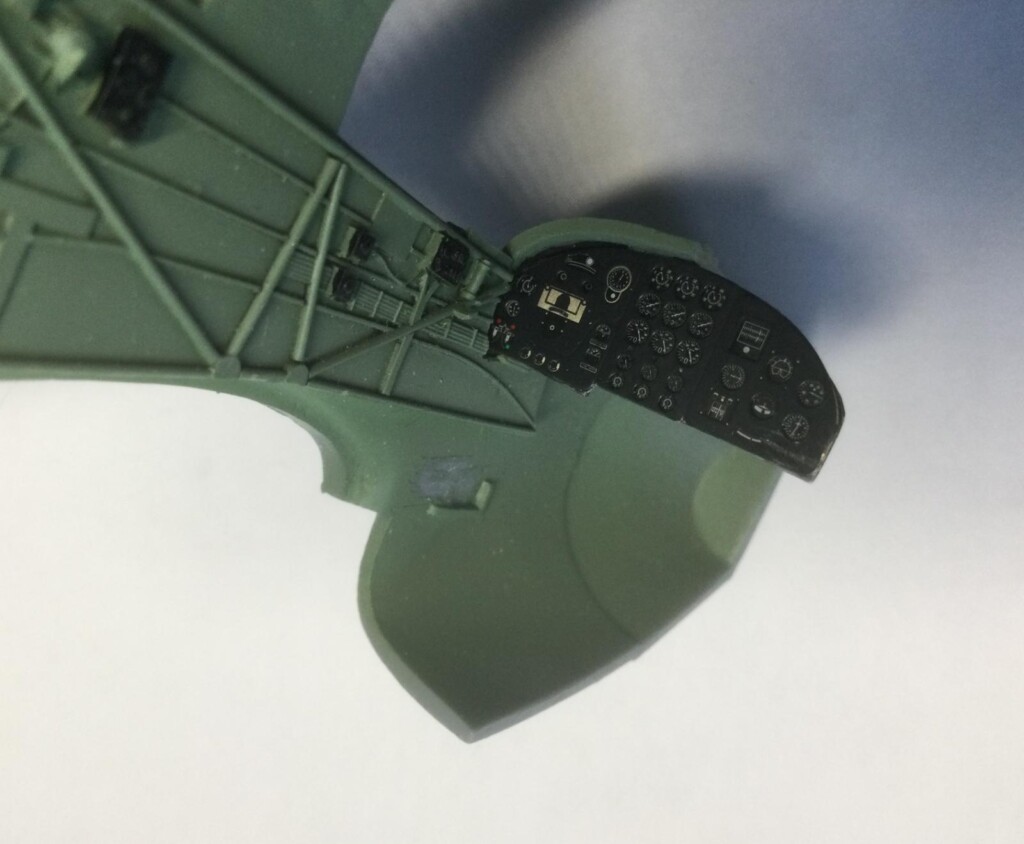
1. The dial details on this Yahu panel are amazing!
I added the seatbelts to the resin seats from spare etch.
The belts are nicely detailed although, once again, they won't be all that clearly seen through the limited windscreen area.
It had a bit of a nightmare experience when I had completed the fuselage interior work. I decided to move on to the engines and cowlings for a change of pace and discovered that two of the cowling halves were severely short shot! Suddenly the kit became effectively unbuildable!
-
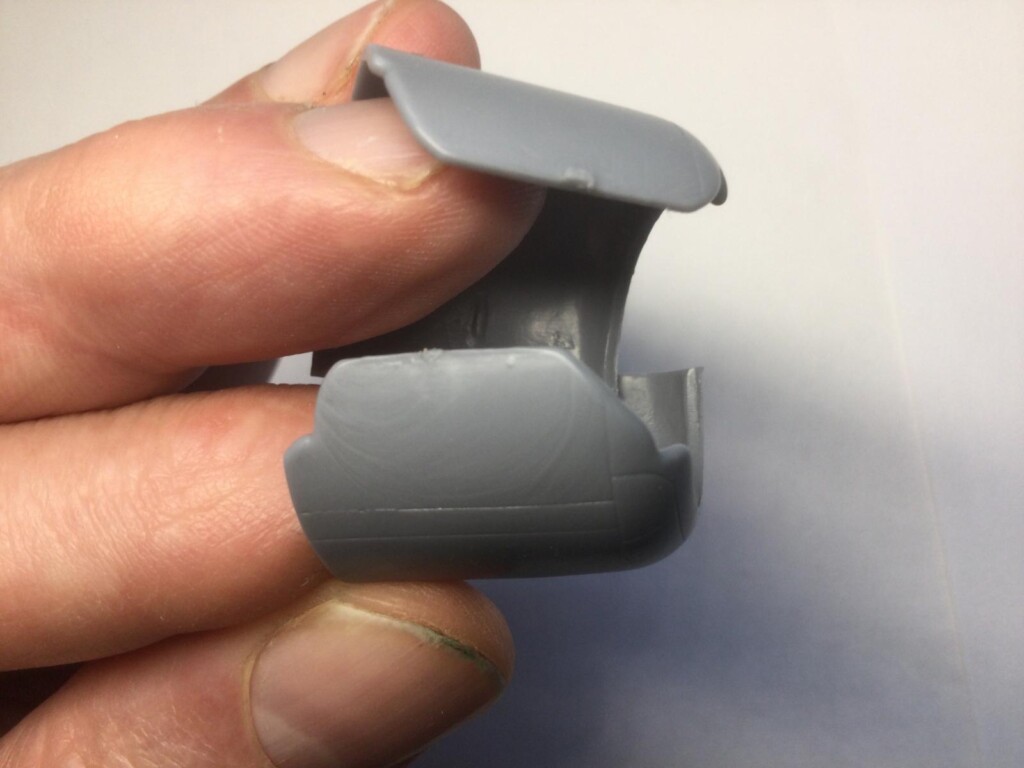
1. short shot molding leaves irreparable chunks missing at both ends of two cowling halves!
-
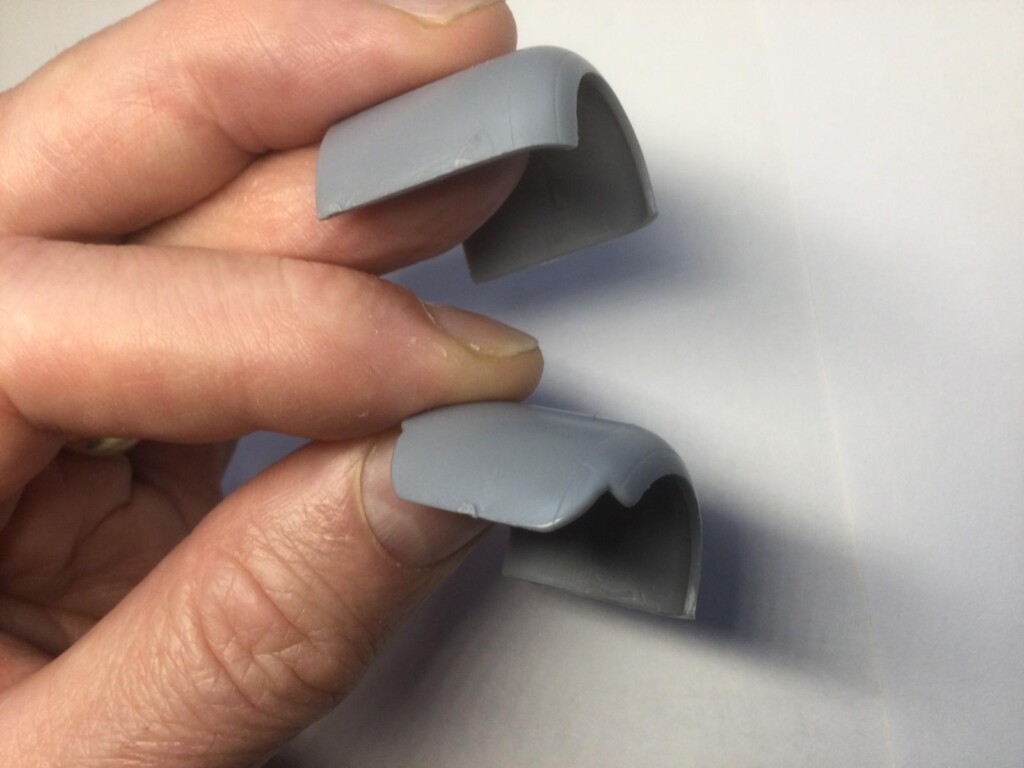
1. Gaps like these are impossible to fix, IMO.
Classic Airframes is, of course, not around anymore so I had no manufacturer to appeal to. Anyway, some searching on eBay finally turned up a relatively inexpensive CA SM-79 kit that was missing all the resin bits. All I cared about was the cowlings so I bought it to rescue the current build. Now I am back on course with an all new sprue of cowling pieces, all properly molded.
So, that's it for now. I hope to get this assembled fairly quickly now. My Macchi from this GB is ready for paintwork and I will paint both together to make efficient use of my Italian Regia Aeronautica color set. Hope you like this work so far.