Messerschmitt Bf 109 V-13, 1/48, Tamiya and scratchbuilding

Started by Erik Gjørup · 46 · 1 year ago · 1/48, 109, airbum, Bf 109 V-13, Bf109, Haldværk, me109, Messerschmitt, scratchbuilt, speed record, Tamiya
  • Profile Photo
    Erik Gjørup said 1 year, 11 months ago:

    Balance and air

    As in my V14 build the horns gets faired in

    The aileron horns got an aerodynamic fairing on the special versions


    and with the aid of some LqS they look a little more aerodynamic.

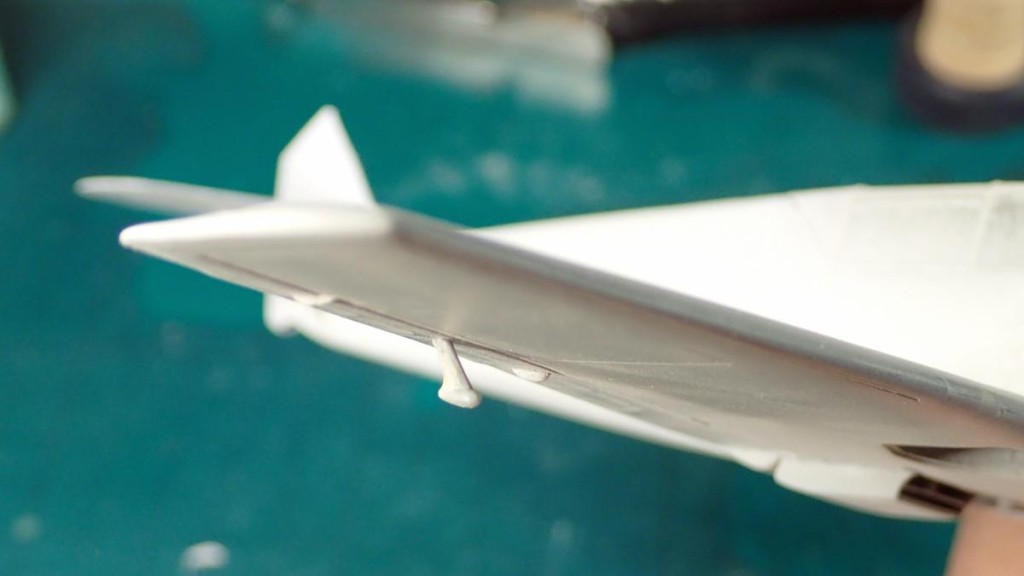
    The kit-pitot is quite large and somewhat overscale


    in this build I think it will be just the modified kit-pitot I use, but for the V14 I may use one made from brass tubing.

    it would appear that the plane is a step closer to paint? Even though only 2 fellow imodelers have commented on this build, I shall continue to post progress - and probably start a new blog once the Special Hobby Bugatti becomes available in 1/48. Perhaps some of the silent followers could indicate if this so far away from their interests. Should we make a new group to include all race- and recordplanes? Lets hear from you!

  • Profile Photo
    Spiros Pendedekas said 1 year, 11 months ago:

    Nice steps and, yes, getting closer to the paint shop, my friend @airbum! Not sure if the pitots are overscale, but they look very good!

  • Profile Photo
    John Healy said 1 year, 11 months ago:

    Looking good, Erik. These Tamiya 109s are solid kits and are a great basis for conversions like this.

  • Profile Photo
    John vd Biggelaar said 1 year, 11 months ago:

    Very nice progress, Erik @airbum.
    The scratchbuild pitots do look great.
    A group of record breaking planes sounds interesting.

  • Profile Photo
    Erik Gjørup said 1 year, 11 months ago:

    Thank you @fiveten, @j-healy and @johnb. The small addition of a tube to the pitot looks just a bit better. And indeed these “old” Tamiya 109’s are great basic kits, plus there are lots of AM-items for them, giving you a very wide range of possibilities.

    02

    RLM 02!

    And the day came for the RLM02 to be painted


    I did give it a first coat of very thin paint in order to get it as smooth as possible. I think it ended well

    next up a few more coats, then decals and final details – exciting!

  • Profile Photo
    Spiros Pendedekas said 1 year, 11 months ago:

    Nicely progressing, my friend @airbum!

  • Profile Photo
    John vd Biggelaar said 1 year, 11 months ago:

    Very decent progress, Erik @airbum
    RLM02 looks great on it.

  • Profile Photo
    Erik Gjørup said 1 year, 10 months ago:

    Thanks @fiveten and @johnb – thanks for your continued support in this very quiet group

    Second round

    I did try to thin the paint a bit more.

    to avoid the “Orange peel” effect.


    No such luck. Well, it will need a third layer anyway, and I can let it cure fully and gently sand the paint before adding a third (and fourth?) coat of extremely thinned paint, perhaps with some sort of retarder?

    and if that is successful, then it is decals and gloss clear next – most likely a few more details first though.

  • Profile Photo
    Spiros Pendedekas said 1 year, 10 months ago:

    Pity for the persistent orange peel effect, my friend @airbum! You will surely sort it out!

  • Profile Photo
    John vd Biggelaar said 1 year, 10 months ago:

    Some improvement on the rudder is visible, Erik @airbum
    I think the thinned paint will eventually level out the orange peel.

  • Profile Photo
    Erik Gjørup said 1 year, 9 months ago:

    @fiveten, @johnb and @j-healy, small update on the 109 speedster

    vacuum

    The reason for me to start this conversion in the first place was due to the falcon vac-hood available for the Tamiya kit

    My last vac-form adventure did not go well at all (for the G-12 with a very complicated shape), and it was with a shaky hand I started fitting this one.


    I took my time, and though it is not yet finished it looks close to home. Next challenge is to make masks and glue it in place! Fortunately I had ordered two sets of the Falcon 109 set that contains some 12-14 different hoods!

    next up I shall try not to make a mess of installing, masking and painting the glass

  • Profile Photo
    Spiros Pendedekas said 1 year, 9 months ago:

    Amazing skills on fitting that vacanopy, my friend @airbum! Masking an already glued vacanopy is, for me, a hair raising process, but your amazing skills are what is needed to obtain a good result.
    Looking forward to it!

  • Profile Photo
    John vd Biggelaar said 1 year, 9 months ago:

    It does seem to fit quite nicely, Erik @airbum
    Looking forward to the final steps of it.

  • Profile Photo
    Erik Gjørup said 1 year, 2 months ago:

    I am not at all sure how to proceed with this racer. Probably I shall try to add some "gum" to the inside to stiffen the hood, then mask and paint, but that will make a hairraising removal of gum when the paint has cured.

    Any thoughts on how to do this?

  • Profile Photo
    Spiros Pendedekas said 1 year, 2 months ago:

    The gum sounds plausible, though it will test your patience upon removal, my friend @airbum!