”Fury”………. 1/35 Tamiya Sherman and DML / Dragon Tiger I

Started by Louis Gardner · 74 · 4 years ago
  • Profile Photo
    Louis Gardner said 4 years, 10 months ago:

    Hey there Rick !
    @fuzzmann

    What an excellent eye ! I never caught this before, and I have studied the pictures I have a lot... Sure enough, it is there. Just like you said, under all the dirt, mud and dust, you can see traces of the OD and Black disruptive camouflage.


    Brilliant ! My hat's off to you Sir !

    Thanks for the tip... now I will be painting it in this manner... 🙂 Before I never had a clue.

    Happy Father's Day weekend my friend ! 🙂

  • Profile Photo
    Louis Gardner said 4 years, 10 months ago:

    Last night and earlier today I was full speed ahead at the Iron Werks / Detroit Arsenal / Ford...

    I have completed all of the assembly work on "FURY", other than building up the tracks and the Commander figure. Then I have to figure out all of the odd bits of storage on the engine deck... but that's another story.

    "FURY" has a .030 Browning MG mounted on a pintle on the roof of the turret. This was a fairly common modification that was often done in the field. I had an old Tamiya M1919 in the stash from a previous M-5 "Stuart" build. I also had a MG mount in the spare parts bin too.

    So I added them to the roof, next to the gunner's ballistic shield. There's a hole in the turret roof that is for another part that I will not be using. So this worked out pretty good...

    In case you're wondering about the part that I omitted: It's a small metal tab on the real tank, that is located in the same spot where I decided to install the .030 MG. The tab is used as a quick reference aiming sight for the Commander to get the main gun tube into a position where the Gunner can see the target through his own set of sights, or the ballistic vision block.

    If the Commander can see the target close to the metal sight bracket, then the gunner should be able to see the target too. The gunner has a limited field of vision through his optics.


    "FURY" did not have a roof mounted search light. So I plugged the opening with a small bit of round plastic rod. You can see the plug in this next photo.

    The next thing to tackle was the wooden plank that goes across the front slope. On the real tanks, wooden planks were occasionally added on the front slope to help the crews climb up onto the tank. Front slopes can become slick when they are wet or muddy. This helps the crew from falling. It also added a place for additional storage. (This is something that we did on our old M-60 tanks too...). it helps considerably when the front slope is wet.

    FURY also had a small bracket that was used to secure the tow cable when now in use. The Korean War kit has this part, but the WW2 / ETO version did not. So I had to scratch build one... It's made from white Evergreen plastic strip and rod.


    These next photos show "FURY" just before it goes to the paint shop...


    I opted to close all of the hatches except for the Commander's Cupola hatch. I'll be using the figure that Tamiya provided as "War Daddy"...


    I also completed a little work on it's cousin the Korean War variant. Hopefully I will get all of the building done on this one too over the weekend.


    Then maybe... just maybe I can spray on some colors !

    Hope you all enjoy the Father's Day weekend.

    Thanks for stopping by, and as ususal,
    "Comments are encouraged".

  • Profile Photo
    david leigh-smith said 4 years, 10 months ago:

    That was a great read on the seam work on the turret. Louis. I did have concerns about where you were going with the process and how it’d look...should have known better. And the call on the disruptive paint was a great catch @fuzzmann

    I have no idea how you cram so much modeling into such a short time. Different strokes, I guess, but it takes me all my focus and concentration to put together one subassembly and then I have to lie down for a while. Also, the quality of your photos just gets better and better.

    Go Wardaddy!

  • Profile Photo
    Rick Wilkes said 4 years, 10 months ago:

    Same to you Louis. Run a search on Fury and you’ll find some builds that show off the paint scheme hiding under the grunge.
    Keep up the good work my friend, hope to see you in Chattanooga this August, we can swap a few lies lol.

  • Profile Photo
    James B Robinson said 4 years, 10 months ago:

    Louis @lgardner, These are looking great. I plan on spending some time with my closest children tomorrow, short of my son because he is working but we've made plans and had a good evening last night. Here's something to make you smile...

    , she's almost finished with upgrades (the few I needed), Flowmaster American Thunder Dual Exit Cat-back exhaust and next a Araid Intake upgrade. She's going to be pushing 415 hp soon. I'll wait until I need to replace tires before I mess with installing a new PCM.

    David @dirtylittlefokker, Louis works from home, not trains or schedule. Living The Dream! 🙂

    All the best to both of you!

  • Profile Photo
    Tom Cleaver said 4 years, 10 months ago:

    Louis:

    Great work and a super education for someone who knows a lot less about creepie-crawlies than I do about airplanes. You have tripled my knowledge of the genre. Perhaps I will build some of those tank models over there on the Shelf Of Doom. Thanks much!

    I love this place. No matter how much you think you know, there's always more to learn, and here, there is always a teacher.

  • Profile Photo
    Louis Gardner said 4 years, 10 months ago:

    Hello David, @dirtylittlefokker

    I have been fortunate to spend some good time at the work bench over the past few days. Sometimes things go as planned and you can get in the groove, while other days it seems that each part will fight you on every step of the way. These two Sherman kits have been an absolute joy to build so far. No fit problems (other than the turret seams) or other drama, so that's part of the reason I have made so much progress so far.

    Thanks for the compliments on the photos and the little "How to" article that I included recently. I have been attempting to take pictures using a solid poster board as a back ground, so that clutter from the work bench doesn't take away from the actual build photos. The problem I have encountered with this method is that I get busy with the building, and taking pictures is less of a priority now, since it's a little more effort to get things ready to photograph.

    I hope you enjoyed your Father's Day weekend over on your side of the pond... Those are some amazing pictures you posted that were taken during the filming of the movie ! Thanks for sharing them ... 🙂

    Hey Rick @fuzzmann

    I'll do some searching on the Black and OD color schemes. I did a quick check earlier today and found a drawing... but it didn't match what I see in the "FURY" pictures. I'll keep digging...

    It would be nice to meet you In Chattanooga, but my wife is still undergoing chemo, and probably still will be at that time. If not for that, I might take you up on the offer... It would do the misses and I both some good to get out a bit. Thanks again and I hope you enjoyed your Father's Day weekend.

  • Profile Photo
    Louis Gardner said 4 years, 10 months ago:

    Hey there James.

    Now that's a great rear window sticker ! It's the perfect picture. The US Flag waving in the window reflection, a window sticker making reference to a radial aircraft engine and a Dodge truck... You covered all the bases.

    It sounds like you will be needing some new tires soon. I installed a set of Mopar Performance headers and "High flow" catalytic converters / Y pipe on my Hemi Ram about 4 years ago. At the same time, I installed a Flowmaster muffler and mandrel bent exhaust system. It definitely perked the old truck up a little...

    I'm sure the power enhancers you have planned for your truck will wake it up a little too. Not that it needs it. The new Ram's are impressive box stock.

    Your new Ram truck is awesome ! LOVE it...
    and it looks like you're living the dream too. 🙂 I hope you enjoyed your Father's Day with the family.

  • Profile Photo
    Louis Gardner said 4 years, 10 months ago:

    Hello Tom @tcinla
    Thanks for the compliments. You nailed it with your comments about this place... Imodeler is a great place to learn things. There's not a day goes by that I don't learn something new by reading a post that someone made on here. There are some great people we have as members.

    I spent 4 years as a "Tanker" in the US Army. I think this "life" experience has helped with my Armor builds. The thing that amazes me is how some current parts on our modern military vehicles can trace their lineage right back to a WW2 vehicle.

    A prime example is the tail lights... look at the tail lights on this Sherman, and then compare them to a tail light set on a modern Humvee or M-1 Abrams. The lens appears to be very similar if not the same. I guess if it's not broken, you don't fix it !

    Go ahead and dig out some of your "creepie-crawlies" from your shelf of doom... Building armor is addictive to "airplane" guys... I call it "Crack on Tracks". 🙂

    Thanks again.

  • Profile Photo
    Louis Gardner said 4 years, 10 months ago:

    Things went almost to plan today... I finished the building portion on the Korean War Sherman.


    There are some minor variations and upgrades between the ETO version of the "Easy 8" and the Korean War kit.

    Please follow along and I'll explain.

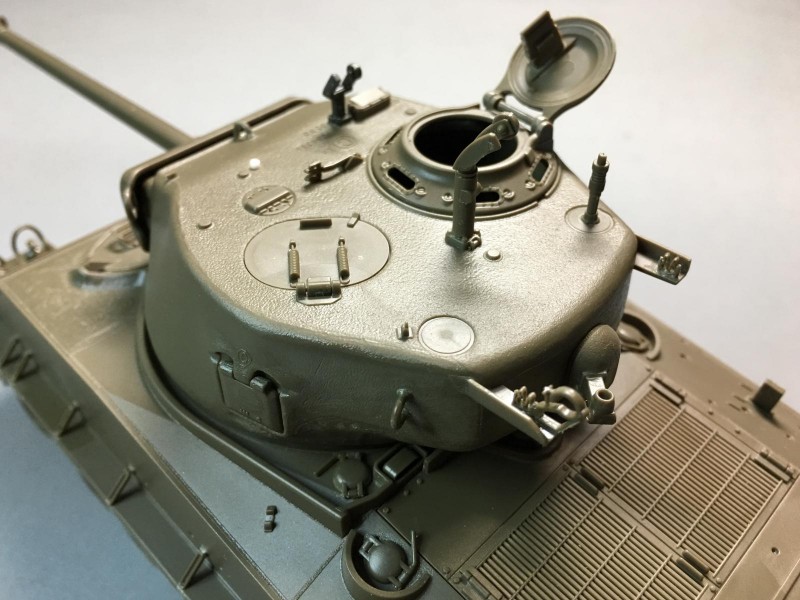
    Here's the Korean War Sherman. I decided to leave the turret hatches open. The most obvious visible difference is the main gun dust mantle cover.
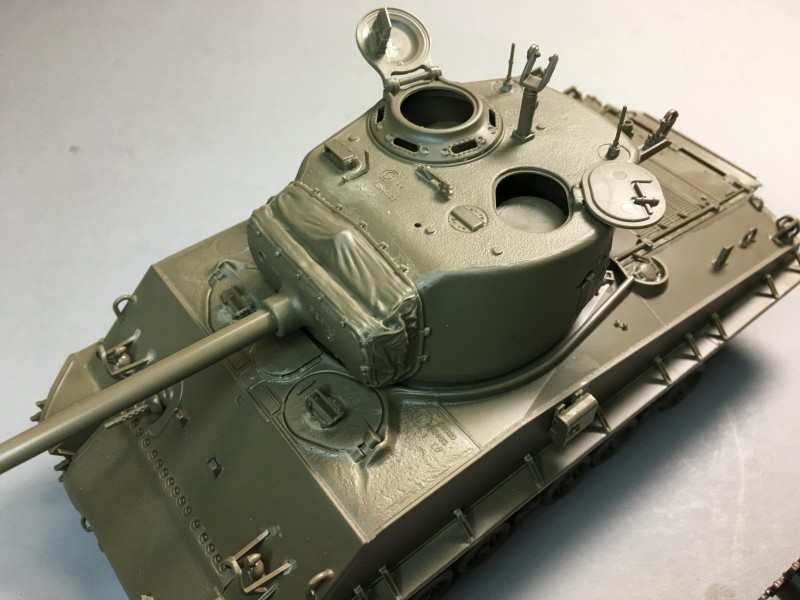

    Here's the turret roof for "FURY". You can see how I blanked off the area where the search light would be positioned. This still needs to be trimmed down a little shorter. You will see there is no main gun dust cover here. There is also a roof mounted .030 caliber Browning M1919 MG.
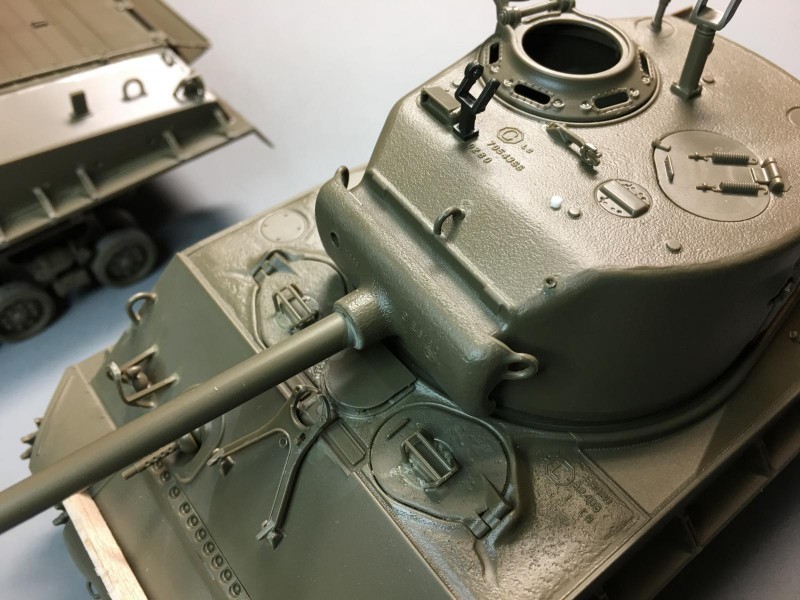
    The Korean War Sherman has a box that is mounted on the side of the hull. The kit instructions have you drill out two holes from the inside and mount it further forward than what I have done. I found several pictures online that show this box located where I have it installed. Some tanks had this, others did not.

    I'm not 100 percent sure about this, but I believe this box was storage for an Infantry style portable back pack PRC type radio. If someone knows for sure please chime in as I'd like to know...
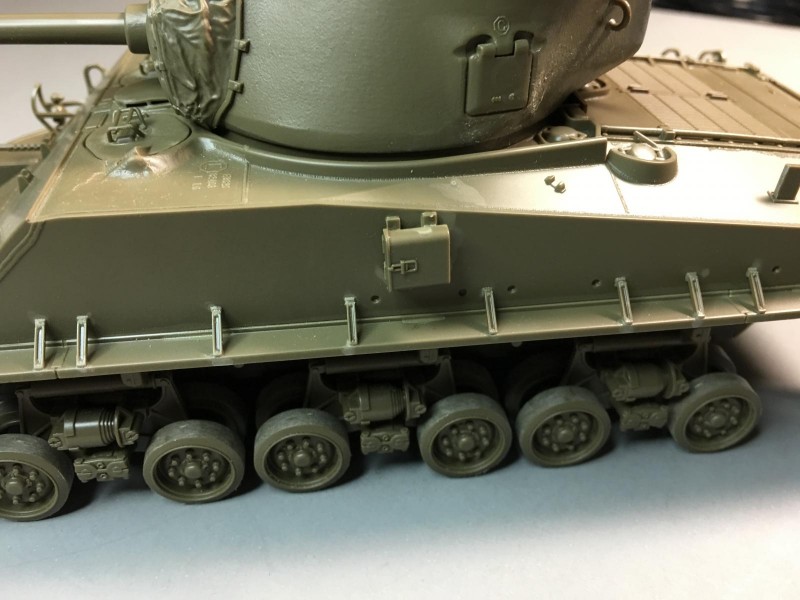

    Here's an Infantry phone box. This allowed the "Grunts" to talk directly to the tank commander... It's something we had on some of our old M-60's when I served.
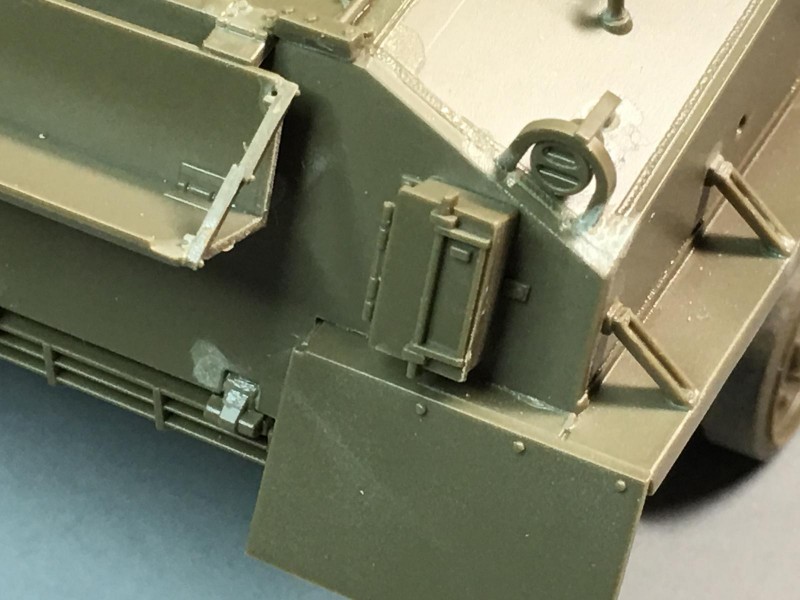
    This next picture will show you a rear view of the two Sherman's. "FURY" is on the right. I'm not 100 percent certain, but I think that "FURY" had the later style rear fenders...
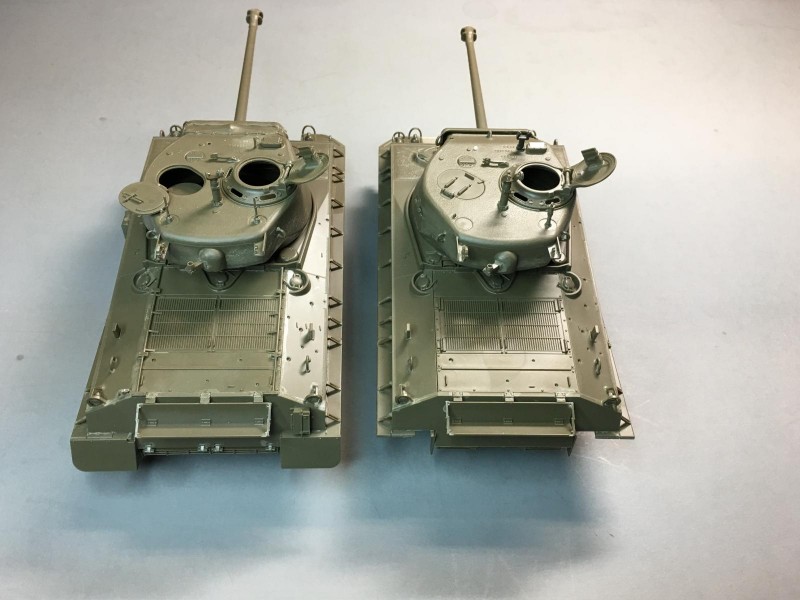
    Here's the rear of the Korean War Sherman. You can see the larger rear fenders and the "improved" exhaust deflector.


    Here's the back side of FURY.


    The turret roof of the KW tank. It has two radio antennae's, and both hatches are open.

    While "FURY" has a single antennae and only the TC's hatch is open.

    ON the KW Sherman, it has an improved system for the upper rear deck doors. These things were heavy... so they added a set of torsion bars that were attached to the doors. These torsion bars assisted with supporting the weight of the doors. It made life a little easier for the crew since the torsion bar supported some of the weight of the doors. It also helped considerably when the doors were closed.
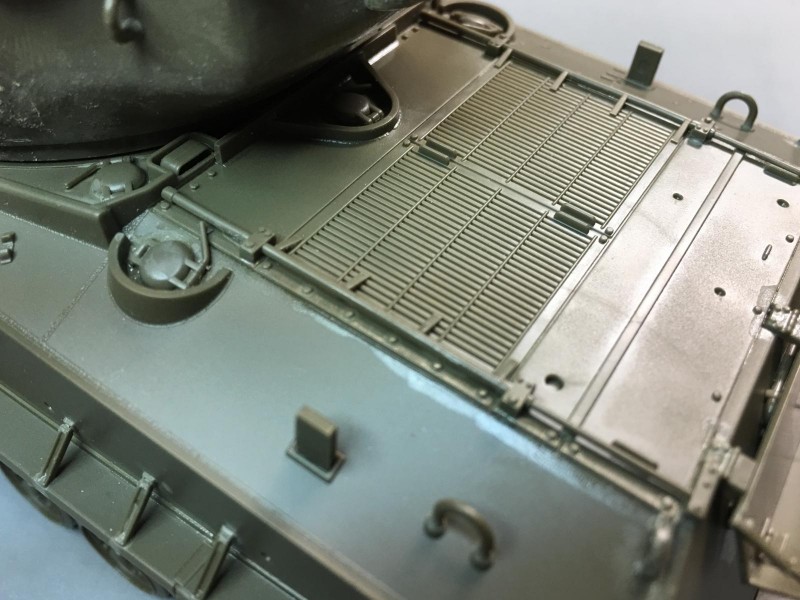
    Here's "FURY's" rear deck. There are no torsion bars here. The crew had to manhandle the doors and lift the full weight of the doors without the spring assistance offered by the torsion bars... each time they opened or closed them. Most of this area will be covered by crew provisions and extra storage of boxes, etc. .

    "FURY" had an actual mount for the turret .030 MG. In Korea, often they would simply take an Infantry style tripod mount and sit it on the roof ! Field expedient method... it worked in a pinch. I had a water cooled .030 so I had to cut off the barrel. Now I'll simply glue on an air cooled barrel and the roof mounted MG will be perfect for the tank I have a photo of as a reference...
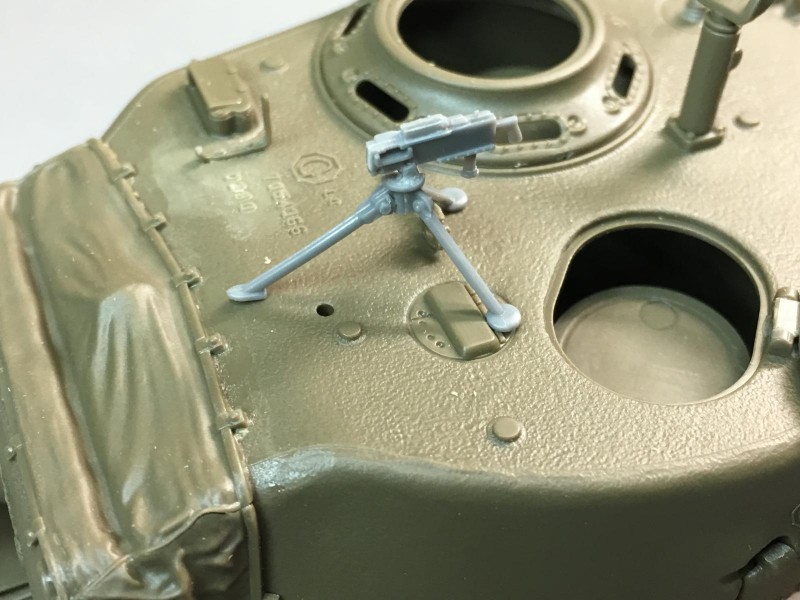
    One last visible difference was made on some Sherman's. It's in regards to the main gun travel lock. During WW2, they had a lock that utilized a round "pull pin" that unlocked the hinges. This pull pin was also used to unlock the travel lock from the stowed position on the front slope. This older type of travel lock had two hinges, one on each side, that secured the clamps for the main gun.

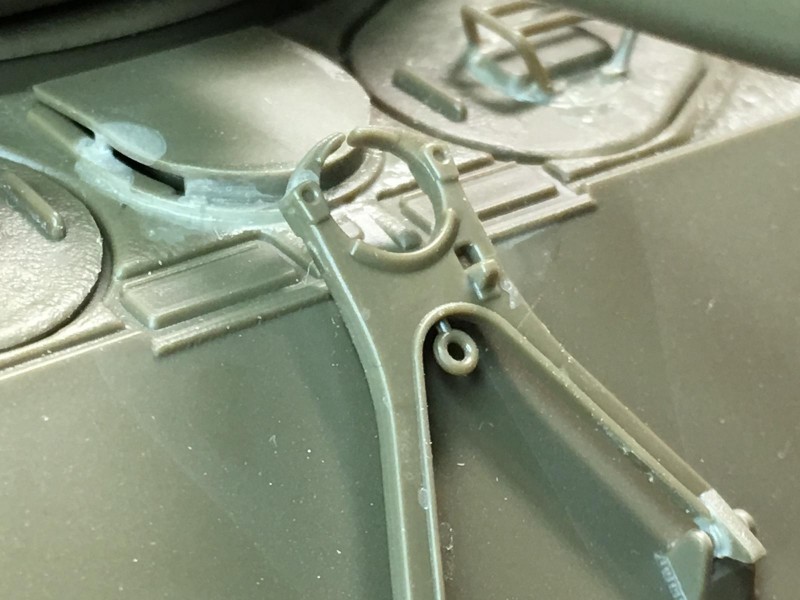
    Often when Sherman's went to a repair depot, or as time permitted at the outbreak of the Korean War, a newer "improved" style of travel lock was used. This was easier to operate and produce. It simply relied on a hand crank that screwed the clamping portion of the lock around the main gun barrel. This is very similar to the type we had on our M-60's.

    Hopefully tomorrow I will start spraying on some paint... Time for some colors on these bad boys...

    I hope you all had a great father's Day weekend. I wanted to get this work done and posted as a tribute to my Dad... we lost him almost 7 years ago. Not a day goes by that I don't think about him.

    My Dad cut his "Tanker Teeth" in these old "Easy 8's".

    "As always,
    Comments are encouraged".

  • Profile Photo
    david leigh-smith said 4 years, 10 months ago:

    Louis, you certainly got the ‘Crack on Tracks’ going on. This is serious model work; you got some mojo on you, brother.

    I especially like 5he tail light observation. Call me a geek, but it’s things like this that really catch me as a modeler. It’s also great that things from that generation endure.

    Superb thread, Louis.

  • Profile Photo
    Louis Gardner said 4 years, 10 months ago:

    David @dirtylittlefokker
    I guess I'm a geek too...and I appreciate the comments. Here's a picture of the tail lights to show you what I mean. First up is the old M-60 series like I served as a crewman in. The tail light and housing are very similar to the ones used on the Sherman. There's a right and a left side, and each are a little different.


    The M-1 used a different style of housing, with a larger red lens / brake light. But the lower and middle lens portion is probably still the same.

    We called these "Cat Eyes" and they lit up very, very dimly when you operated in "Blackout Drive". You used them to judge distance in between the vehicles. As the distance between you and the tail light increased or diminished, the "Cat Eye" would appear differently. At one point two tiny spots were visible on each tail light. As the distance changed, the one spot became two... or vice versa.

    One thing that has not changed since before even the Sherman existed... and that's the M-2 .050 caliber "Ma Deuce". She's still going strong even today. When "Ma Deuce" speaks people listen... some not for long.

    Taking care of bad guys since 1933, but her design started towards the end of WW1.

  • Profile Photo
    Louis Gardner said 4 years, 10 months ago:

    Today was a very productive day. I sprayed on the colors...

    Here's a quick rundown of what I did.

    I started out by spraying the turret interiors using Flat White. Our tanks had a Glossy White surface on the interior, but it's not going to be noticeable once it's all completed.


    Here you can see how some overspray crept out from around the main gun mantle.

    This was one of the reasons why the Army added a dust cover on the real thing. It kept excess dirt and debris from entering the turret from around the mantle. It also kept out water... Tanks leak like a sieve. Not so much the newer M-1, but all of the M-60's I served on did. I'm sure the old Sherman leaked just as much when it rained...

    While spraying the white, I also sprayed the front slope on the Korean War Sherman. This will serve as a good base for the upcoming red color.


    and I painted the travel lock too...

    Once the white dried sufficiently, I sprayed on the red. I used Model Master enamel "Insignia Red", FS 31136


    This is how the front slope looked after the red was sprayed on...


    I sprayed the travel lock, just as before. This time I used red.

    Then it was time to see how my "custom Mix" of Dark OD Green would look. This is what I have been waiting for...

    This next picture shows the difference between the kit plastic and the darker Olive Drab . The unpainted plastic is on the left. I'm very happy with the results.


    I sprayed both tanks. Now "FURY" and the Korean War Sherman are both now wearing the Dark OD Green. Here you can see the red paint on the front slope is still masked off.

    There were some small parts, like sprockets, return rollers and idlers that needed painting. This next photo shows them drying afterwards.

    Finally I removed the masking tape from the front slope on the KW Sherman. I am very pleased with how this turned out 🙂 These next photos will show you how things look at the moment.


    Now all of the small parts, like OVM tools need painting and installed. The tracks will also have to be assembled. The crewmen and various bits of equipment will be added... so there's still a lot left to do. Painting crew figures is not one of my strong points.

    I feel like I made a good bit of progress today.

    As usual,
    "Comments are encouraged".

    Thanks !

  • Profile Photo
    david leigh-smith said 4 years, 10 months ago:

    Some kind of ‘progress’, Louis. I’d be happy with that in a month. This thread is rapidly becoming the ‘manual’ for Sherman builds. And a joy to read. To steal from another ‘Sherman movie...

  • Profile Photo
    Louis Gardner said 4 years, 10 months ago:

    After looking at the next few pictures, I know what you’re thinking ...

    “Did I fire six shots ... or only five ? To tell you the truth in all this excitement I forgot myself... Being this is a .44 Magnum, the most powerful hand gun in the world ...”.

    No wait a minute ! Wrong movie...

    He’s gone bonkers I tell ya. Totally nuts.


    There’s a method to the madness.

    As always, comments are encouraged.

    Thanks...