Kelly’s Heroes 1/35th scale M4A3 Sherman and Friends

Started by Chuck A. Villanueva · 110 · 3 years ago
  • Profile Photo
    Chuck A. Villanueva said 4 years, 2 months ago:

    Thanks D-L, hanging ten!

    Back to the halftrack, this step will see me assemble the road wheels and bogies.

    The bogie wheels, are OD and Tamiya Tire Black

    Each bogie wheel are removed from the sprue and assembled. The attachment points will be be painted over once the wheels are mounted on the trailing arms.

    Next the track arms are removed and 2 set of wheels are placed in each one.

    4 sets are assembled, 2 on each side.

    20 additional images. Click to enlarge.

  • Profile Photo
    Chuck A. Villanueva said 4 years, 2 months ago:

    Now to basically complete the Sherman. Detail bits such as the pioneer tools and hatches.'

    The track tools and handle are place on the RH side of the hull.

    The shovel, pick axe and hatchet are painted and ready to placed on the hull.

    They are placed on the RH quarter of the hull near the taillight and lift point.

    The large mallet and bolt wrench are painted and attached to the rear upper deck.

    With that the basic tank is completed. Now to clear coat and add the decals and weathering. And then the extra goodies to attach to the tank that will show how this particular tank appeared in the movie. More to follow.

    Next up apply the decals.

  • Profile Photo
    david leigh-smith said 4 years, 2 months ago:

    Loving this, Chuck - looking forward to more, baby.

  • Profile Photo
    Chuck A. Villanueva said 4 years, 2 months ago:

    Back on the GMC 6x6, still working on the cab.

    Attaching the rear lower cab back panel to the cab floor.

    The back window glass is removed from the clear sprue. Then installed into the back of the cab.

    The RH front door has the interior panel in OD. Then attached to the cab in the closed position.

    The LH side hood side panel is attached to the forward edge of the cab.

    After attaching the RH side hood panel, noticed a sizable gap between the leading edge door hinge area to hood panel. This would be easy to solve, when attaching the cab assy to floor. The gap was due to minor warpage on the upper cab roof. But once the cab was attached to floor and aligned the gap went away with no trouble.

    Next is to work on the grille and radiator.

    The grille is painted Tamiya Flat Black. And the grille is OD.

    The radiator is attached to the grille.

    Then the grille assy is attached and aligned to the front edge of the hood panels.

    Then the forward cab section is test fitted to the frame before the floor is installed to the cab.

    Then the floor is installed into the cab. Aligned and then permanently cemented in place on the frame. The LH door will be displayed open, The gap on the RH side door has now been resolved as well.

    Next the detail bits on the cab..more to follow.

  • Profile Photo
    Louis Gardner said 4 years, 2 months ago:

    You have been very busy my friend ! These are coming right along... I'll be looking for another installment soon.

  • Profile Photo
    Chuck A. Villanueva said 4 years, 2 months ago:

    Thanks Louis, still rolling along with this long term project.

    Next up is the Jeep.


    First is to paint fold down windshield frame.

    Again crystal clear pieces from Tamiya

    Now to carefully insert each window pane in place on the frame. With Tenax 7 this was easy as you let capillary action to attach the panel. But even with the similar Squadron liquid cement, I still get a bit to get into the glass.

    next both wiper motors are attached to the upper frame rail.

    Then the Garand rifle is painted and attached to the windshield frame.

    At this time I also attached the jerry can and mounted it on it's rack on the rear panel.

    Next to work on the hood.

    The hood can be displayed open, but for this build it will be closed. Too bad, really nice detail under the hood.

    Once the hood is in place. I will then paint it OD

    At this time I place the back seat in place in the rear compartment.

    Next up the wheels. More to follow.

  • Profile Photo
    Chuck A. Villanueva said 4 years, 2 months ago:

    More work on the frame. Will write catch you up on the details, Very detailed portion of the drivetrain.


    First up the steering linkage. Which goes from the gearbox to the steering knuckle.

    Next to install is the rear differential, with the driveshaft and emergency brake disc. The short driveshaft slips into place in the rear of the transfer case.

    18 additional images. Click to enlarge.

  • Profile Photo
    Chuck A. Villanueva said 4 years, 2 months ago:

    With Oddballs Sherman basically assembled. Time to start work on the mods that were specific on his tank. Notably the speakers. I will use an exhaust nozzle from a 1/72nd scale F-14 to serve as the speaker mounted on the LH side of the turret.

    The decals are applied as well as the individual serial number used on this tank.

    Another odd mod to the tank were German steel helmets resting over each headlight guard.

    A quick wash as well over the drive sprockets, idlers and bogies. And unfortunately already tossed a track on the LH side in several places just sitting on the bench. More to follow with added details, on the tank. Cargo and other goodies that will appear around the tank.

    Also a special thanks to Luis Gardner for a replacement track.

    Track not installed yet.

  • Profile Photo
    Chuck A. Villanueva said 4 years, 2 months ago:

    Next up on the GMC 6x6, just a quick temporary look with a set of wheels mounted on the axles.


    The airbrushed OD over the cab.

    Clear coat is applied for the decals and let sit overnight

    The stars are applied to the hood and doors.

    Then the individual serial id numbers are applied on the side of the hood. This set as seen in the movie. The stars are from the extra sheet from the Tamiya Sherman.

    The set of numbers are applied each side of the hood. Set for a couple of hours then Lifecolor Flat coat is applied. Good stuff dries very flat.

    Next up to assemble the bed.
    More to follow.

  • Profile Photo
    Chuck A. Villanueva said 4 years, 2 months ago:

    This installment will have the basic assembly of the Jeep completed. Lifecolor OD was used as the basic overall color used on the Jeep.


    Future was used to clear coat the Jeep and let it sit overnight.

    in the meantime to weather the road wheels. Mud wash, Mig enamel wash slathered all over wheels and tire really pop the details. After going over with a damp Qtip with white spirits.

    Wheels are attached, about ready to roll now with the Jeep up on all 4 wheels.

    The spare is mounted up, it too with a bit of wear.

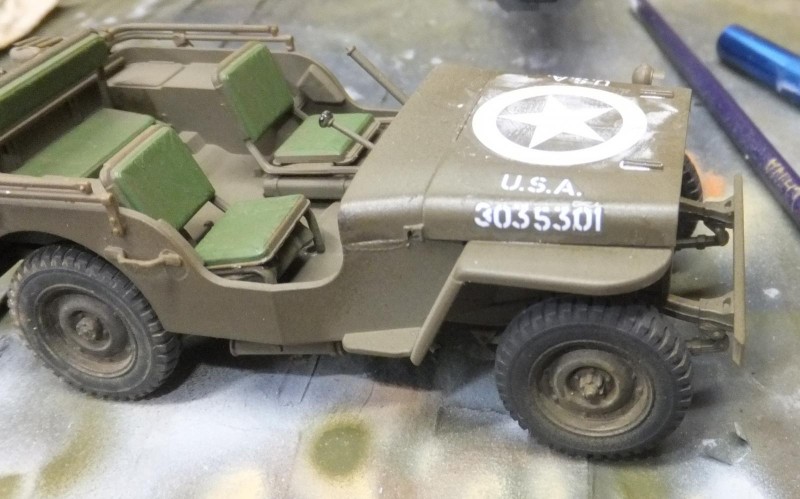
    Pioneer tools painted and installed just below the drivers side of the Jeep.


    After sitting overnight, It was at this time I started to apply the markings. Using decals from the kit and Tamiya was good in having extra numbers on the sheet. But I might have some remnants of wash or thinner on the brush I used to apply the decals that left a white residue on the hood.
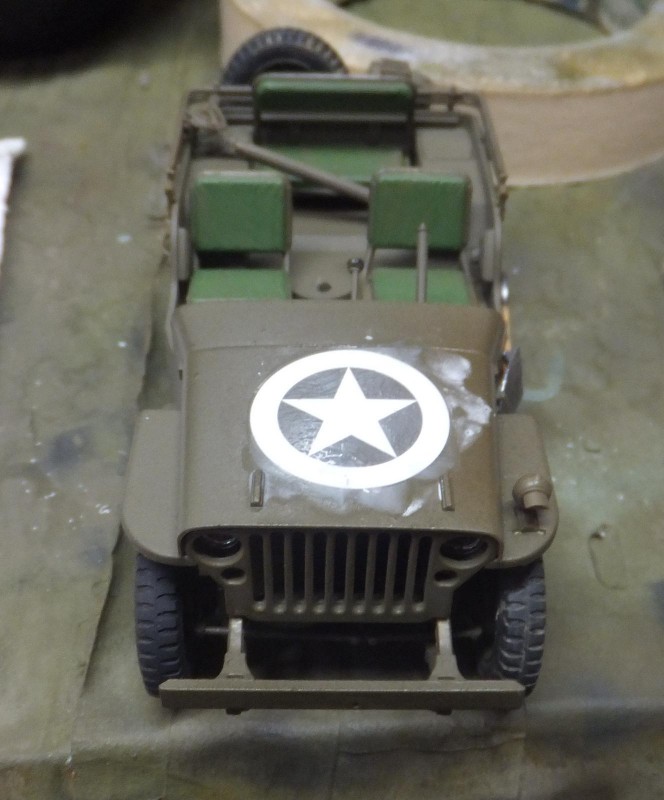
    At first this was normal at times I have had this happen before. Then when the solution dries it clears up. Not this time.
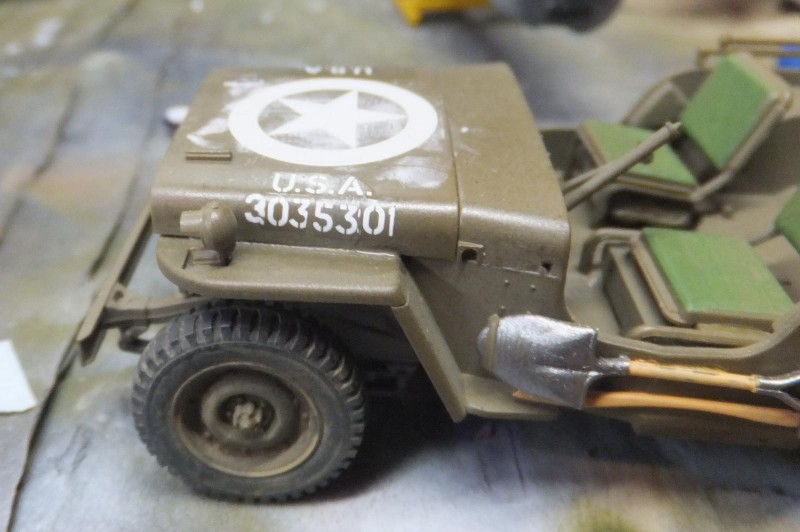
    I switched brushes and the rest of the decals went down ok, no issues. Again cobbling the numbers to match the serials used in the movie.
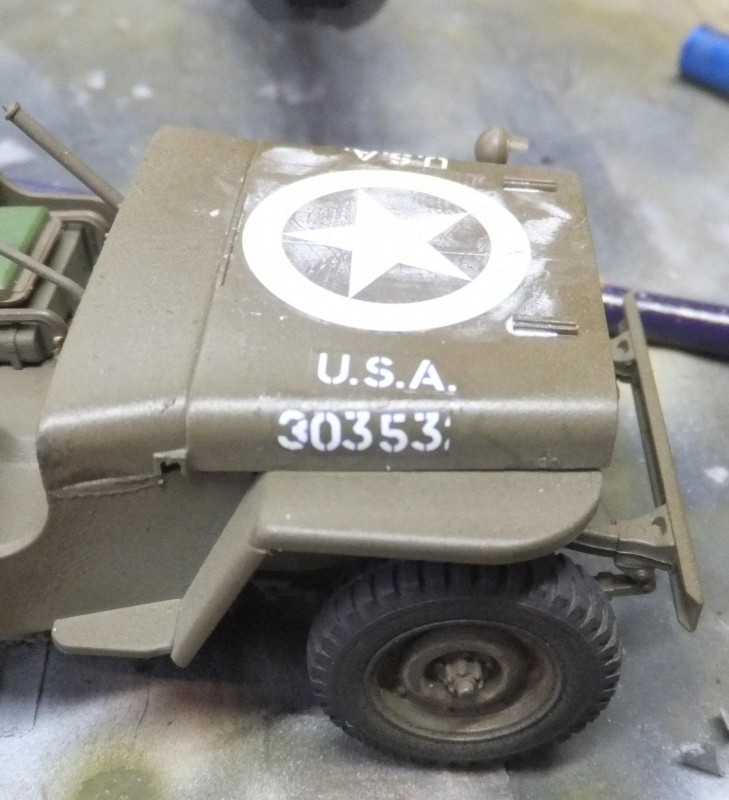
    Lifecolor Flat clear used. To seal the decals. The windshield frame assembly is attached.
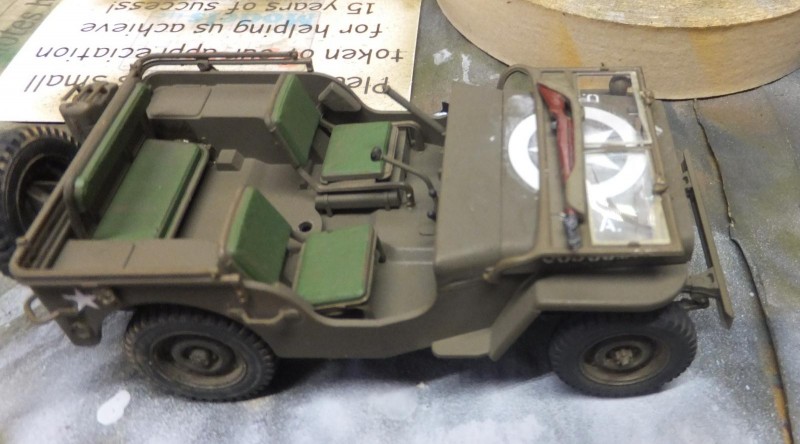
    Testors clear cement is placed into each headlamp. Great stuff to use for headlamp lenses.

    The steering wheel is cleaned up and attached to the column.

    Next the nicely detailed .30 cal and mount. You ever get fumble fingers when trying to be careful when assembling certain parts. I did with the gun mount.

    Next the rearview mirror. Chrome pen used for the background, Testors clear for the glass.

    The fender mounted lamp and guard is attached to the L/fender.

    The ammo box is assembled and attached to the .30 machine gun.

    Finale details, the machine is mounted up in place between just aft of the front seats.

    The rear view mirror is installed. Taillight lenses are painted clear red and the data plate decals are applied over the glove box door.

    The Jeep is basically done, now to add some cargo, detail and wear the seat cushions.  More to follow.
  • Profile Photo
    Chuck A. Villanueva said 4 years, 2 months ago:

    With the Jeep and Sherman basically finished, still have a bit more to do on the T19. More work on the suspension and put on the tracks.

    First up front with the support radius arms attached from the frame to the front differential.

    Then to prepare to install the tracks, I paint the rear drive sprockets wheels.

    One that has built a few tanks over the years using the provided vinyl band type tracks, solid plastic type track are a first for me, So a bit of planning and a quick video in how other assembled this kit helped. The method I chose was still a bit difficult.

    What I have noticed through out the kit, is how well defined the nuts and bolts are on the frame, suspension components and road wheels. The lug bolts are hexed as they should be. Really nice attention to details. Just slipped the front and drive wheels over the hub and drum just to check fitment.

    The idea is too first install the inner half of the track. Painted Vallejo Gun Metal.

    You first have the drive wheels off, work the track past the bogies and then attach each drive wheel in place. So far nothing broke off.

    Then carefully as the inner track is harder to install. The outer track assembly just slips over the wheels with a bit of pressure and snaps into place and then apply cement for a permanent set. whew! It all lined up.

    Repeat the process for the RH side.

    I love how things come together so far. The frame work on this is quite tedious but fulfilling once you get it all together.

    This is my 2nd halftrack ever built, the first was the Monogram kit way back in the 70's. Now reading on the Tamiya kit which has been the standard long before this series of Dragon kits, the weak point is the rear suspension and track system. Which some have mentioned is a task getting that together with the vinyl band style of track. My view is that despite the Dragon approach, the rear suspension has been together for almost 3 weeks before getting to install the tracks. So all the components have been set for awhile and the point of attachments are solid.

    Next up is to install the front road wheels and complete the frame work.

    more to follow

  • Profile Photo
    James B Robinson said 4 years, 2 months ago:

    Wow Chuck @uscusn, that Dragon kit looks pretty impressive as the rest of the kits do too. Looking forward to the rest of the build.

  • Profile Photo
    Chuck A. Villanueva said 4 years, 2 months ago:

    Thanks James, it is quite an impressive kit with a huge number of parts, that really enhance the kit. What is nice, that the fit of the parts to this point is good, just need to be careful as the instruction sheet is weak at times in location and where to attach some of the tiny parts and position. Just knowing vehicles in general helps a bit in this aspect.

  • Profile Photo
    Erik Gjørup said 4 years, 2 months ago:

    positive vibes man. . . - keep them comin'

  • Profile Photo
    Chuck A. Villanueva said 4 years, 2 months ago:

    Thanks Eric, love the positive waves.
    This session will have me weather and install the wheels. The main stuff I will use is this bottle of Acrylic Polly Scale Mud.


    I will start with the set of dual rear wheels.

    21 additional images. Click to enlarge.