Heinkel HE219 A-7
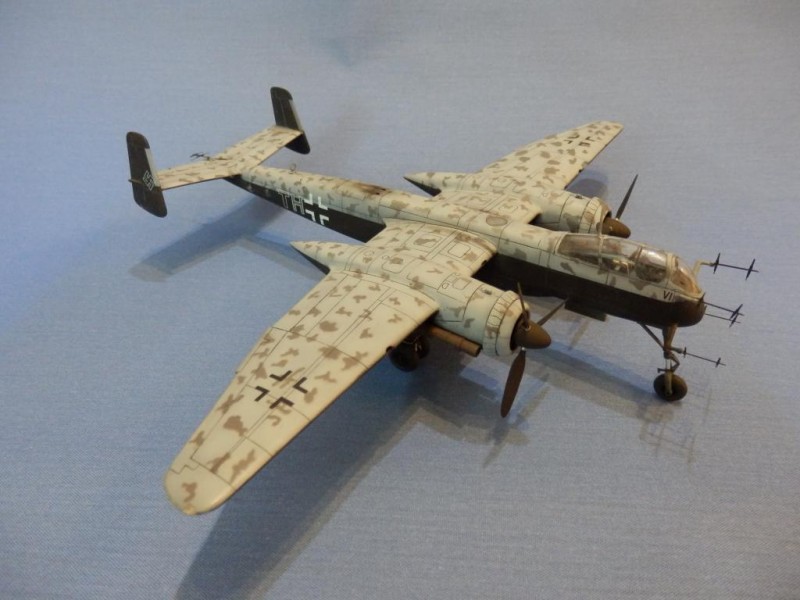
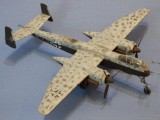
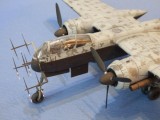
Hi All, This is the Dragon HE219 A-7
basically a Great Model, I only had one or two fit issues but i think they were of my own doing.
The one thing that wasn't great that was out of my control was that the panel lines on the the top of the fuselage didn't line up in fact they were quite far out enough for me to fill and try to re-scribe them and one of the jobs i try to avoid is re-scribbing i dont mind doing the odd panel line lost in sanding or clean up once i got over this part all went well so everything was prepped ready for paint it was at this point.
I noticed a wide scratch in the canopy luckily it wasn't to deep so i managed to polish out nearly all of the scratch but the clear area around the scratch wasn't great i polished again but it still didn't look that good, it didn't matter how many times i polished it i couldn't get it as clear as it was before i removed the scratch that would have to do
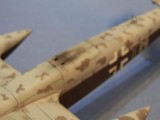
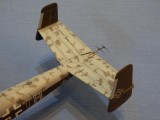
I masked the canopy stuck it on and painted over all RLM76 then i painted the black underside which is really a very very dark grey mix including Black, Mid Brown,Red and the smallest drop of white, the mottles were RLM75 i think and done with a home mad mask held slightly off the surface so there would be the smallest amount of overspray so the mottles didn't appear hard edged. To make the mask i used a pyro-graph with a modified tip, i copied the painting plan blowing it up to approximately 1/72 then with the red hot tip of the pyro-graph burnt out the shapes of the mottling. After some practice i got to be quite accurate at copying the correct shapes so if any of you guys out there have got this kit you can check the mottle pattern and you will see its pretty much an exact copy of the painting instructions especially on the wings - the fuselage not so.
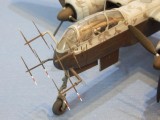
The last task after all the weathering was to stick on the antennas these come on Etch Frets in the kit and they do look the part but bloody fiddly to fit. As you can probably see from the photos these are not as straight as once they were after a season carting the model to show after show. A few antennas got knocked off here and there and to my shame i didn't always re-glue them on as straight as i could have there strikes my impatience again because when you are doing your best to reapply the things and all they want to do is stick to every thing else or drop of when you get them on and when they do finally go on and stay on the last thing you want to do is just nudge it slightly to straighten up, if its something like ok that will do!
Hope you like it
Mark


Awesome looking, Mark. Beautiful !
Thanks Joe,
great looking model mark...i never had much luck with the flory wash...seems like it all ways came back out...maybe i was just too ham-handed...yours look really great
Thank you Bob, jees iv just had a look at the photo's i wish i would have dusted it down a bit before i took the photo's !
Yes Bob the Wash can be a bit hit and miss the best base coat i find is one thats not to glossy something like Citadel's Purity Seal its a satin finish so not to matt and not to glossy just about right for the wash to stay put in the panel lines yet still able to remove with a damp cloth, your not on your own Bob i know a few guys who tried and didn't get on with it.
Thanks for kind Comments Bob
Mark
Nice one Mark, at first I thought it was the Tamiya kit. I've had the same problem trying to polish out clear parts, can't quite get that slight haze to buff out. A dip in Future floor wax usually cures that.
Cheers Rick, i will give it a go next time i polish a canopy.
Good looking build. Good color combination. You certainly have your trials and tribulations when you build.
your not wrong there AL i think a lot of my problems are of my own making, and lots of School Boy Errors i do worry myself because i tend to make the same mistakes over again.
Thanks for the kind comments
Absolutely gorgeous! The Germans didn't build too many planes I'd consider "beautiful". The 219 is one of the exceptions! Thanks for explaining your mottling technique!
Thanks Josh,
Nice one Mark, I agree with Josh most of the German stuff wasn't easy on the eye but these look great.
N.
Hi Neil, Thanks Mate,
you started that Horsa yet ?
Great looking Owl!
Thank you Gregor,
You can save a canopy in that condition by dipping it in Future, which will restore overall clarity.
Nice model otherwise.
thanks Tom, i will try it next time i have to repair a clear part.
Actually, the "cloudy" RLM75/76 camouflage was created by the Germans by applying RLM75 overall to the upper surfaces, then "scribbling" with 76. A guy on old Rec Models Scale figured it out in 1999. I don't know why more modelers don't use it (it's supposed to be messy, which makes it easy), but when I did it the result was exactly like photos. Just passing on a good technique for anyone considering doing an He-219.
Nice 219 Mark, like the piece about how you did the camo.
Well done Mark
Cheers Simon,
Mark
Another interesting build from you, Mark, and you managed to produce yet another very good looking model. It's more than likely that the prototype's antennae weren't always quite straight either!
Thanks George,
Mark,
Great build. I like it. As for the panel line not matching, this sees to be an overall problem with DML/Dragon kits. They combined a number of years ago and of course DML interprets to "Don't Match Lines". I found it true on every one of their kits so just sand it down, re scribe them, and move along. Your models look good. Don't point out the mistakes to us. We wouldn't see them or pay attention to them if you said nothing. Join my club.
Hi Frank, thanks for the kind comments,
Its a short fall of mine pointing out my little booboo's
i like you A20 Havoc what colours did you use on the top surfaces
im doing the 1/72 MPM kit for the D Day group build i hope, it looks a million times better than there earlier offerings but they were not hard to beat
Cheers
Mark
Mark,
I used Model Master enamels and spray painted the colors. I started with Green Drab all over the top portion, I then sprayed Olive drab over that leaving the Green Drab showing where the sun would not fade it. I then tinted the Olive Drab and sprayed it mostly over the the wings and spine. Then after I took the tape off the stripes I quickly and lightly sprayed a light tan over the top in a front to rear direction. It should be done with an airbrush unless you are very good at dry-brushing. Keep up the good work, your models look great.