Mach II 1/72 Convair 440 Metropolitan – Continental Airlines Delivery scheme
Following quite a bit of interest in natural metal finishes on the other Convair (Hustler) I thought I'd give the Mach II 1/72 Convair 440 a go with a similar finish, at least on the lower half and wings. I'm still not sure what scheme it will end up with. I normally opt for US Navy and that was the plan from the start but now I'm thinking of Swissair, Sabena or maybe Continental delivery scheme. The simple reason being that the kit istelf is pretty basic and the clear plastic parts a challenge (that's putting it mildly). I do airliners as well as military stuff and I know there are a number of aftermarket arliner decal suppliers that do sheets with windows & windshields with the airline decals. Why make life hard? F-Dcal.fr & Vintage Flyer Decals both do a nice selection of CV-440 sheets in 1/72 for the Welsh Models and Mach II kits. I did consider the Welsh kit but picked up the Mach II kit at Telford for £30 so thought I'd give it a go.
It's not your usual injection molded kit. The plastic is a bit different/softer and has the look of something made in your garage. I never complain about these things and take it for what it is. Like other airliner display models I have I decided to put this one on a stand so it's gear up. Again, the gear on this kit is far from hi-tech so that stays in the box. The intention is to make a nicely finished display model of the CV-440 and play around with some NMF's.
I've never recorded any of my past NMF efforts so here goes.
The kit is assembled and filled with a variety of fillers, mostly Milliput Fine. There's a fair bit of filling to do on this kit. Before putting the two halves together I've glued a strip of plasticard alonmg the inside of the window line to help with filling from the outside. I've also put a piece of broom handle inside the fuselage to help with having something to support the stand arrangement. I've also used some two part epoxy putty to hold the broom handle in place and stop it moving inside. I also used some silicone bathroom sealant in there as well. I just thought with such a soft plastic it could also do with some strengthening. Similarly, the wings are a bit floppy. I've done what I would do with some resin wings and reinforced with wooden coffee strirrers, the type you get at Costa/Starbucks etc, laying them flat along the inside like laminated floor, then space permitting, lay another at 45degrees, all held together Cyano. Once wing halves are together it is rigid enough to hold the model by the wing without any bending.
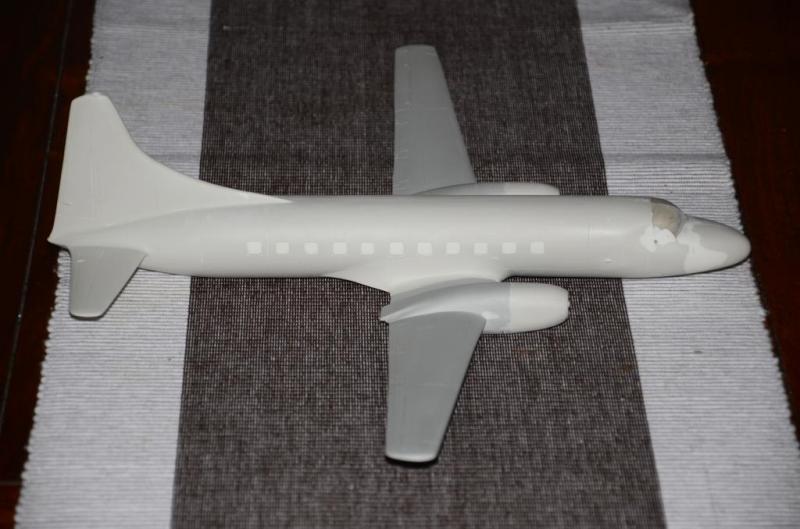
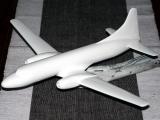
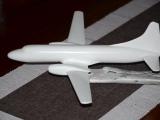
I'm not to bothered about panel lines on this model, not that there are many to start with. After I've finished sanding down to about 800 grit I've sprayed a coat of automotive white primer from a rattle can. I use Simonize. Again another rubdown to smooth down any lumps and sort out any voids that have shown up after primer, sand off with 800 - 1200 grit ready for top coat. Before any top coat I use a tack cloth to pick up any bits of dust.
Top coat in this case is an over all automotive white paint to get a refrigerator smooth finish. You will have a some imperfections and not a glass like finish. Not to worry, all this will get sorted out with micromesh and polish down to 12,000 grit where it will be super smooth high gloss.
This is as far as I've got to at the moment. I need to get the decals first before I can mark out the area to be painted in a metal finish.
More will follow when I get the decal sheet. Because I'm going for a durable high sheen lacquered finish I can't use the normal modelling paints other than Alclad, and even Alclad doesn't sit well with automotive lacquer on top, but there is a solution. There is a fine balance to be had between base coats, decals and lacquers without things melting in to a 'Salvador Dali' type paint scheme. Trust me it's not pretty.
A shiny smooth base coat finish is certainly the starting point for a highly polished NMF.
More to follow.
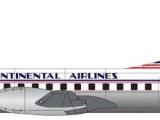
Slight update (2nd Jan 15) - Decals have been ordered. It will be Continental Airlines from Vintage Flyer Decals (see pic). Should be with me in a couple of weeks.
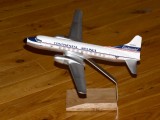
Update (22nd Jan 15) - Decals received from Vintage Flyer and applied. I must say the decals are fantastic and a dream to apply. Perfect fit on the Mach II kit and despite what some folks say about Mach II, I think it makes a good looking model of the CV-440 so long as you do 'gear up'. Just props and clear cote to apply and we're done.


Can t wait to see yours finished here, Alastair
Don't see many of these...I'm betting yours will be outstanding upon seeing that Hustler.
Looking good Alistair. I'll be following this with much interest.
Would you happen to know if anyone does or has a conversion set for the CV-580 (which was the 340/440 with Allison 501 turboprop engines)? I crewed those for a while, but have never been able to find a model of one.
Thanks Jaime
Try http://www.welshmodels.co.uk/proteus.html
It's mixed media kit; vac fuselage, resin wings, metal gear. Not built one yet but might give it a go soon.
I flew on one of these from Phoenix to Dallas in 63. I was just a tyke and all I remember is getting off. How was this kit for assembly?
Paul, let's say 'okay' but not your usual injection molded kit. A bit rough in places but fits together so long as you're not expecting super detail.
Lovely prep work Alistair. Looking forward to seeing which livery you pick
Photo uploaded of almost complete model in Continental Airlines. Just props and clear cote to do.
Cheers
Can't wait to see the finished project.
"A bit rough in places"? Man, that's the nicest comment I have ever heard about a Mach 2 kit! That you have it together and looking as good as it does is a testament to Major Modeling Skills.
I have that Welsh kit, haven't built it but have Western Airlines decals for it. Saw one restored out at Chino in those markings a few years ago and it looked great.
Hi Tom,
Yes, that's me understating the reality, but I cut Mach 2 some slack. It's a short run production, probably knocked up in a garage. It's certainly a challenge to make a good model with gear and windows, which is why I opted to try make a better looking finish without clear plastic and dangly bits. I'm still stuck with the problem of the props though. Not sure what I'll do about that. I've been looking for metal replacements.
This model is still without decals as I'm waiting for some to be printed. The kit decals are pretty pointless.
I do fancy now trying a Welsh CV440 but I'll finish this one first.