Review: 1/48 scale ICM #48244, Dornier Do-17Z-2 kit review… we have another winner!
A little while ago I posted an article on the new 1/48 scale ICM He-111. In that article I mentioned doing another review on the Do-17.
This will give me an opportunity to try out the new format that Martin and his staff have been working so diligently on. I can say this about the new Imodeler website: It is much easier to upload your pictures. I was able to take all of my photos and upload them at one time using my cell phone. This is a remarkable improvement that I like a whole lot! Thanks guys for the hard work you do.
So with this introduction, lets get to it.
The ICM Dornier Do-17Z was released a year or so ago. Up until then, the only other choices we had in 1/48 scale was the Classic Airframes kit, which is getting harder to find at decent prices, and the much older Hobbycraft kit, which many have shown to have a banana shaped fuselage and lacking a lot of details in the cockpit. Since I have several of the older Hobbycraft kits in the stash, it is a welcome addition to see that ICM has taken the time to give us a new modern release.
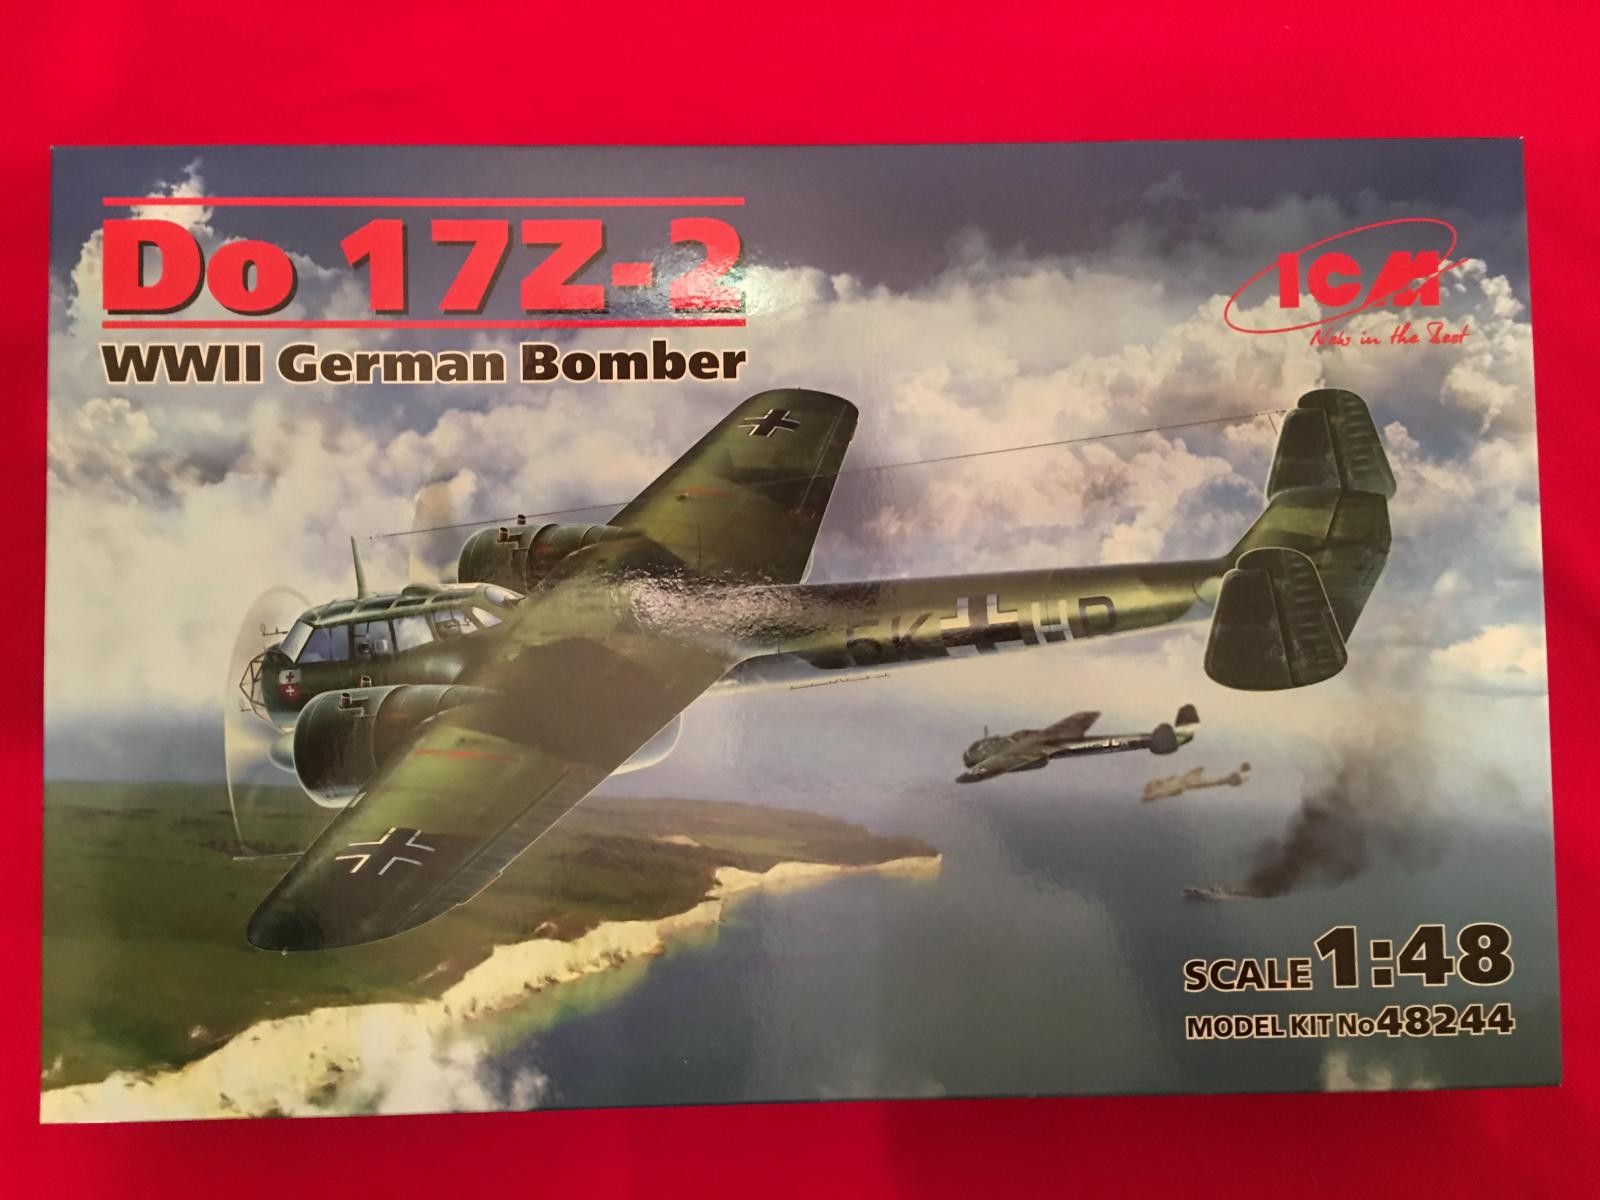
In typical newer releases, ICM has packaged the new Dornier kit with a nice and sturdy inner cardboard box that has a folding lid. I wish that more kit manufacturers would provide a sturdy box like this one - I have too many kit boxes in the stash that have partially collapsed due to having other kits stacked on top of them. I don't think this would be a problem with the way this kit is packaged.
The box cover fits very snug on top of the inner white cardboard box. Care must be taken to remove the outer lid, (that has the art depicted on it), or you can tear the corners of the outer box.
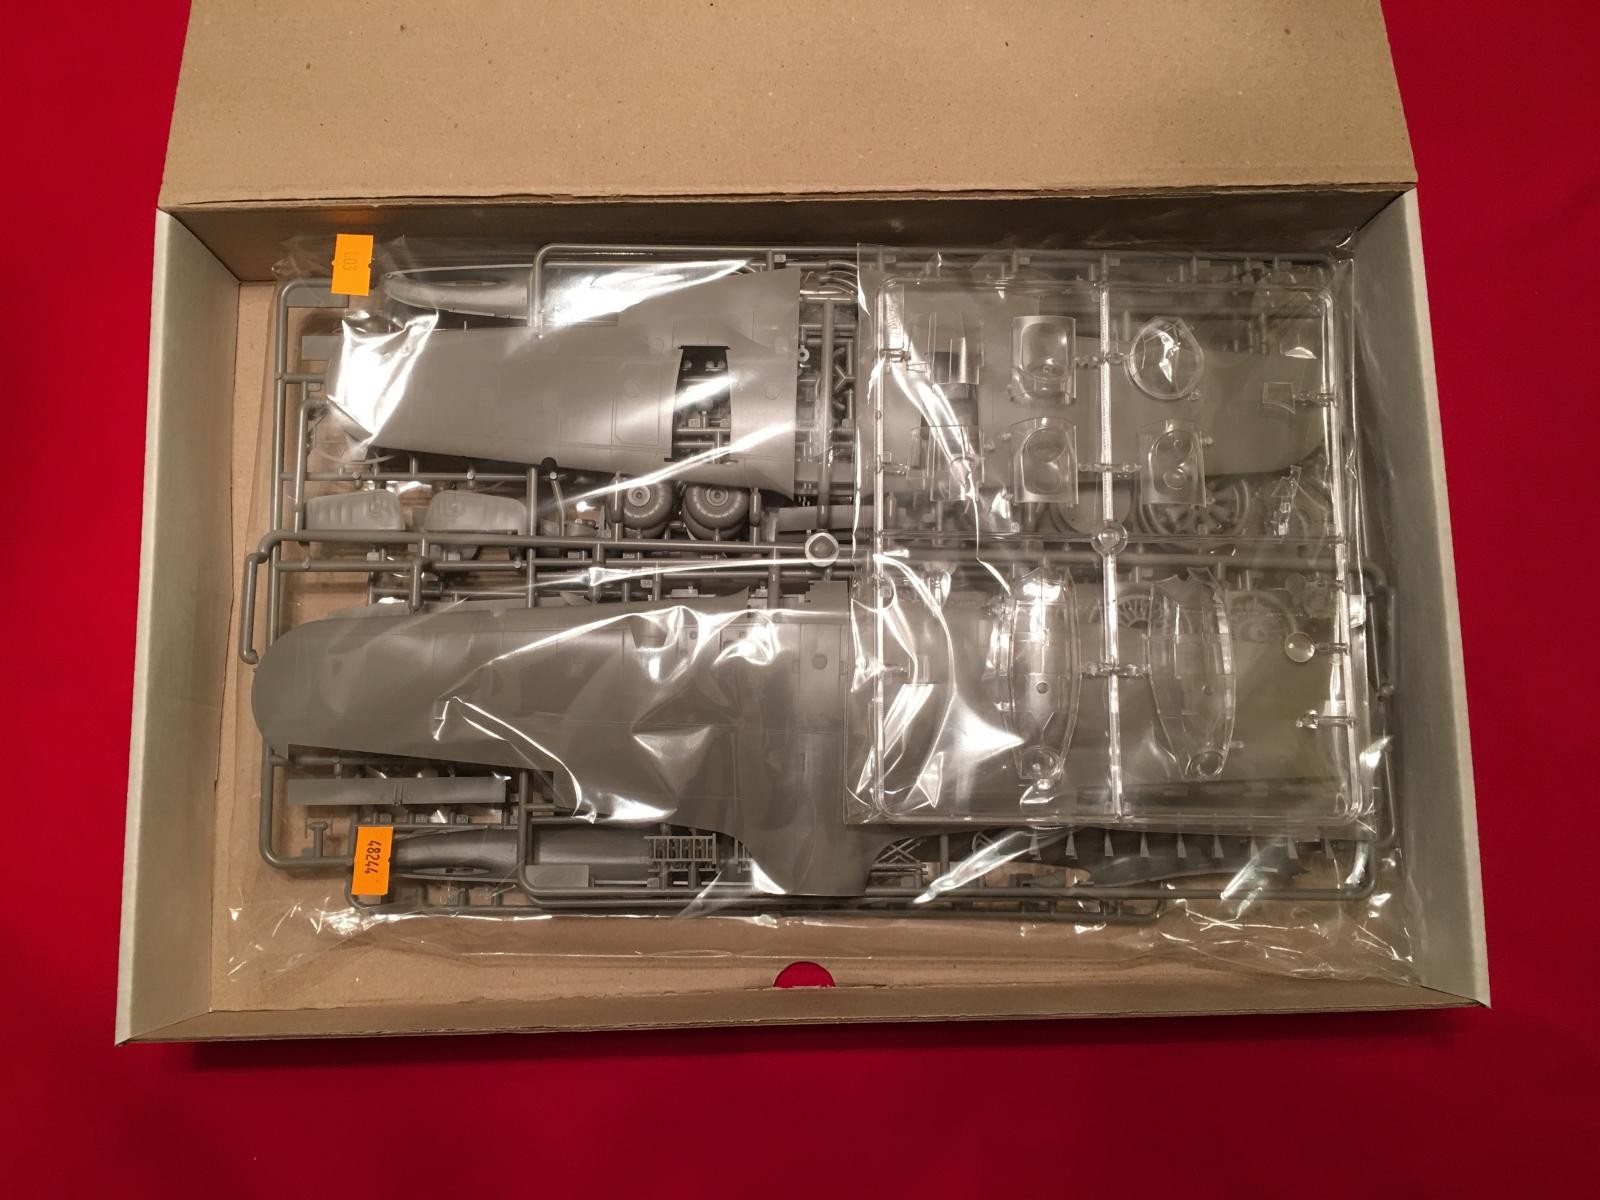
Once you remove the outer cover and open the folding lid, this is what you will find inside: The light gray parts are all packaged together in a single re-sealable plastic bag. I did find that two small parts were affected by this method (more on this later in the review).
Thankfully no parts were scratched. They are packaged rather well overall.
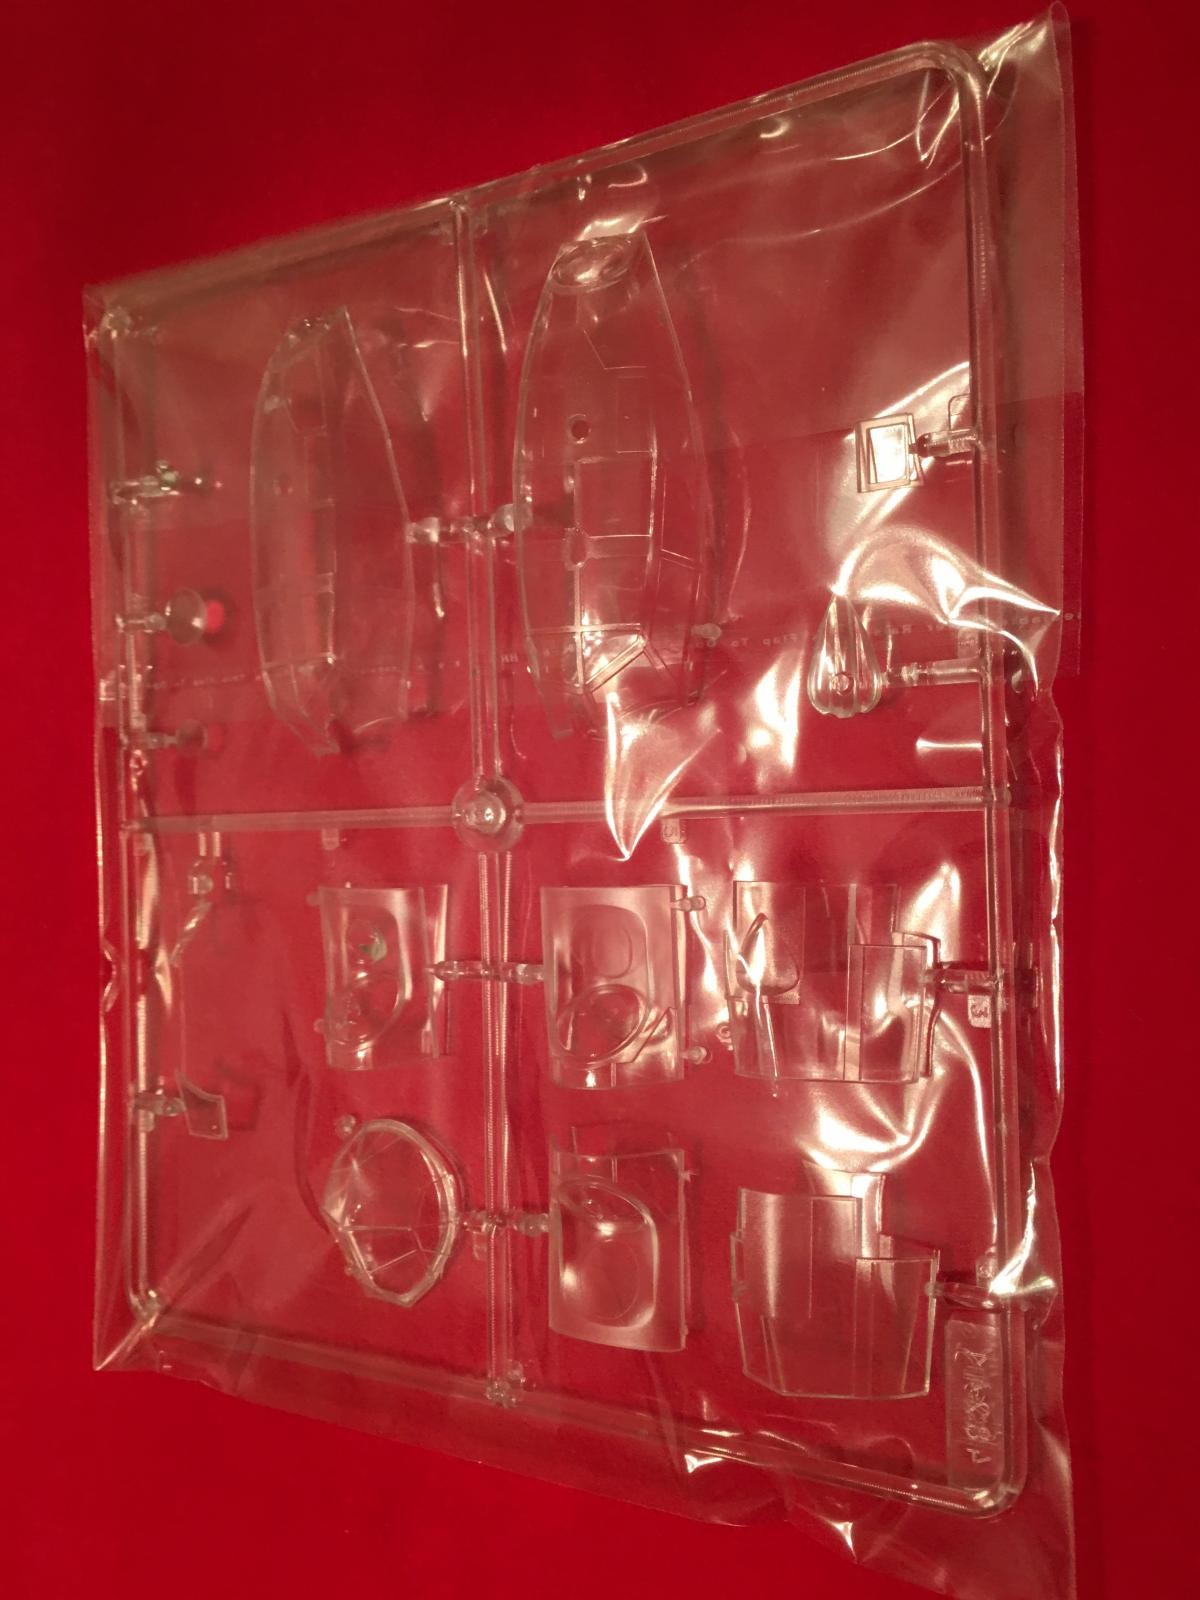
My sample had the clear parts packaged separately in their own re sealable clear plastic bag. This is a nice touch.
The remaining model parts were very well molded using a light gray colored plastic. No flash was present anywhere throughout the kit. There shouldn't be any flash considering this is a brand new mold.
There are six light gray plastic trees. They are lettered starting with "A", and go to "E". There are two "D" trees provided since these contain common parts for the engines and bomb load.
The instructions are very nicely printed, using a combination of glossy paper and color ink to guide you through the 20 pages of instructions, that cover 84 assembly steps.
The way the instructions are written remind me of the style that Airfix has adopted with their new releases.
Here's the first page of the instructions. A short history of the plane, and specifications are included on the front page.

The instructions are written in Cyrillic (Russian) and English.
There is a Model Master paint reference chart for the colors used at the bottom of the first page.
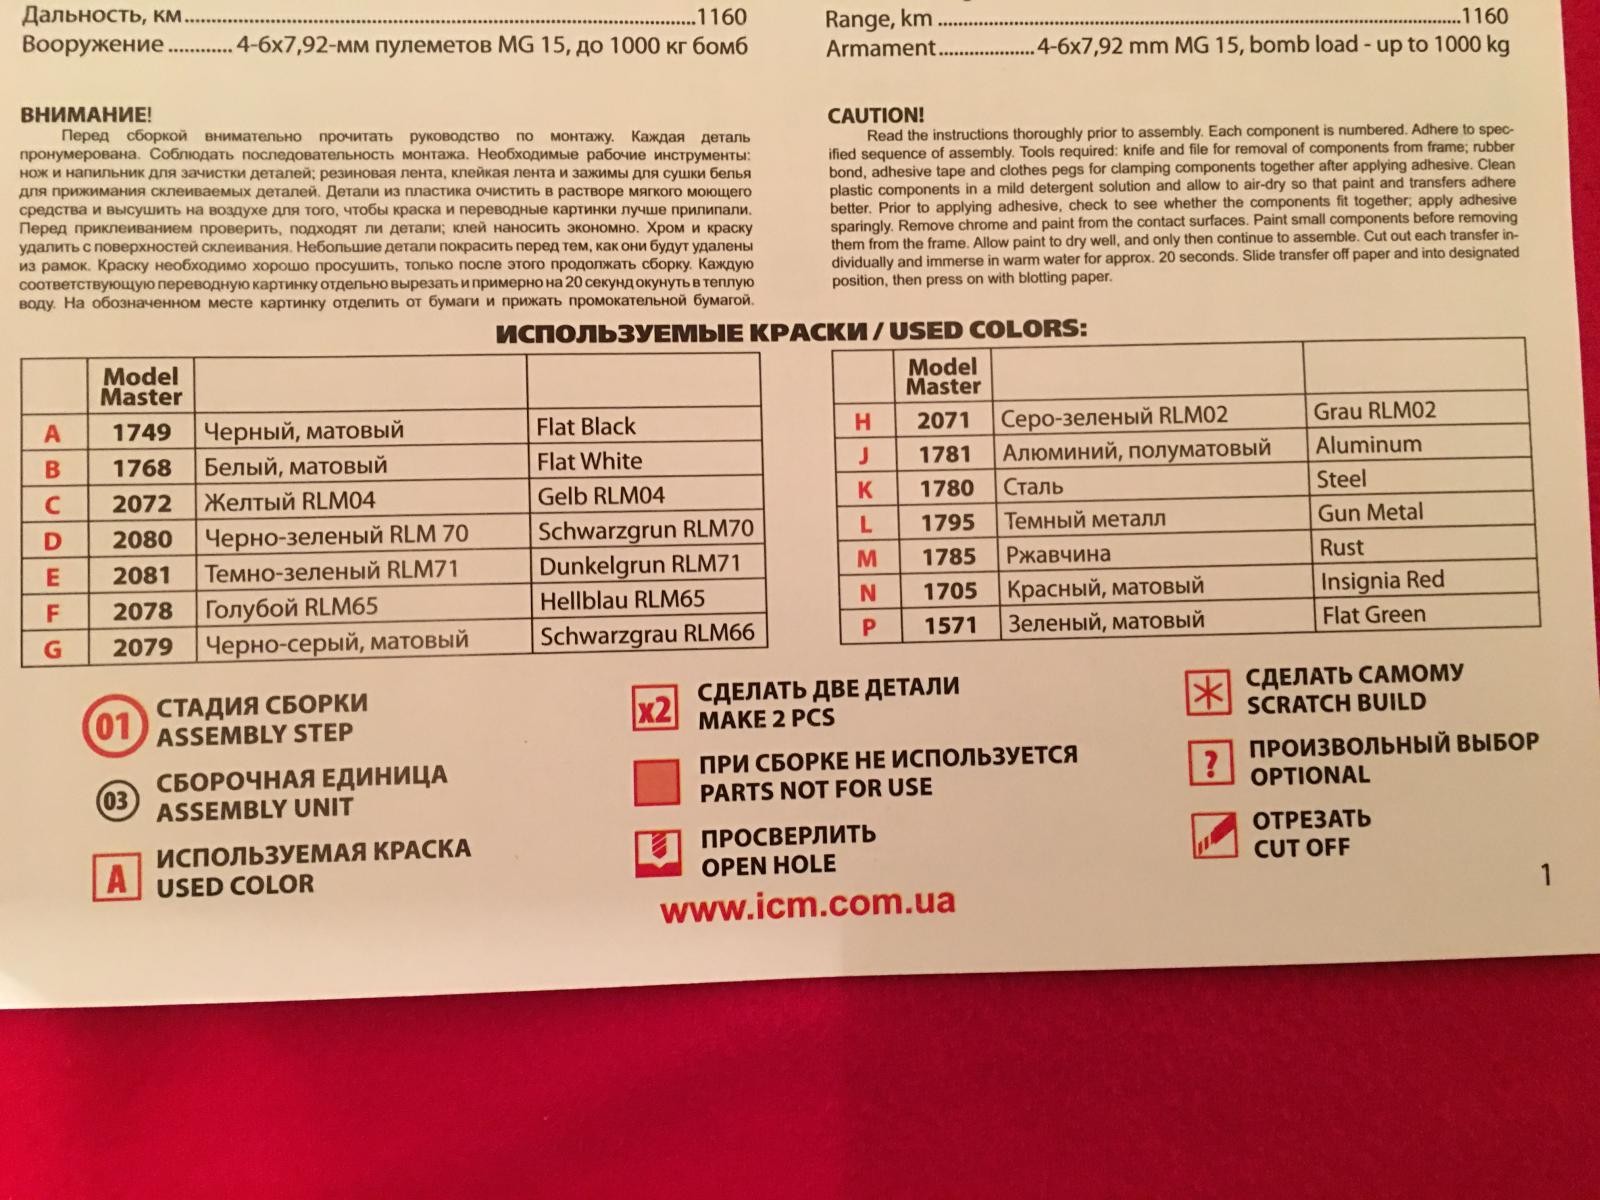
The typical Luftwaffe colors of RLM 02, 65, 70 and 71 are the primary colors used throughout the build.
There are also a set of "Universal" symbols listed at the bottom of the first page, to designate things like "Optional" or "Assembly Step".
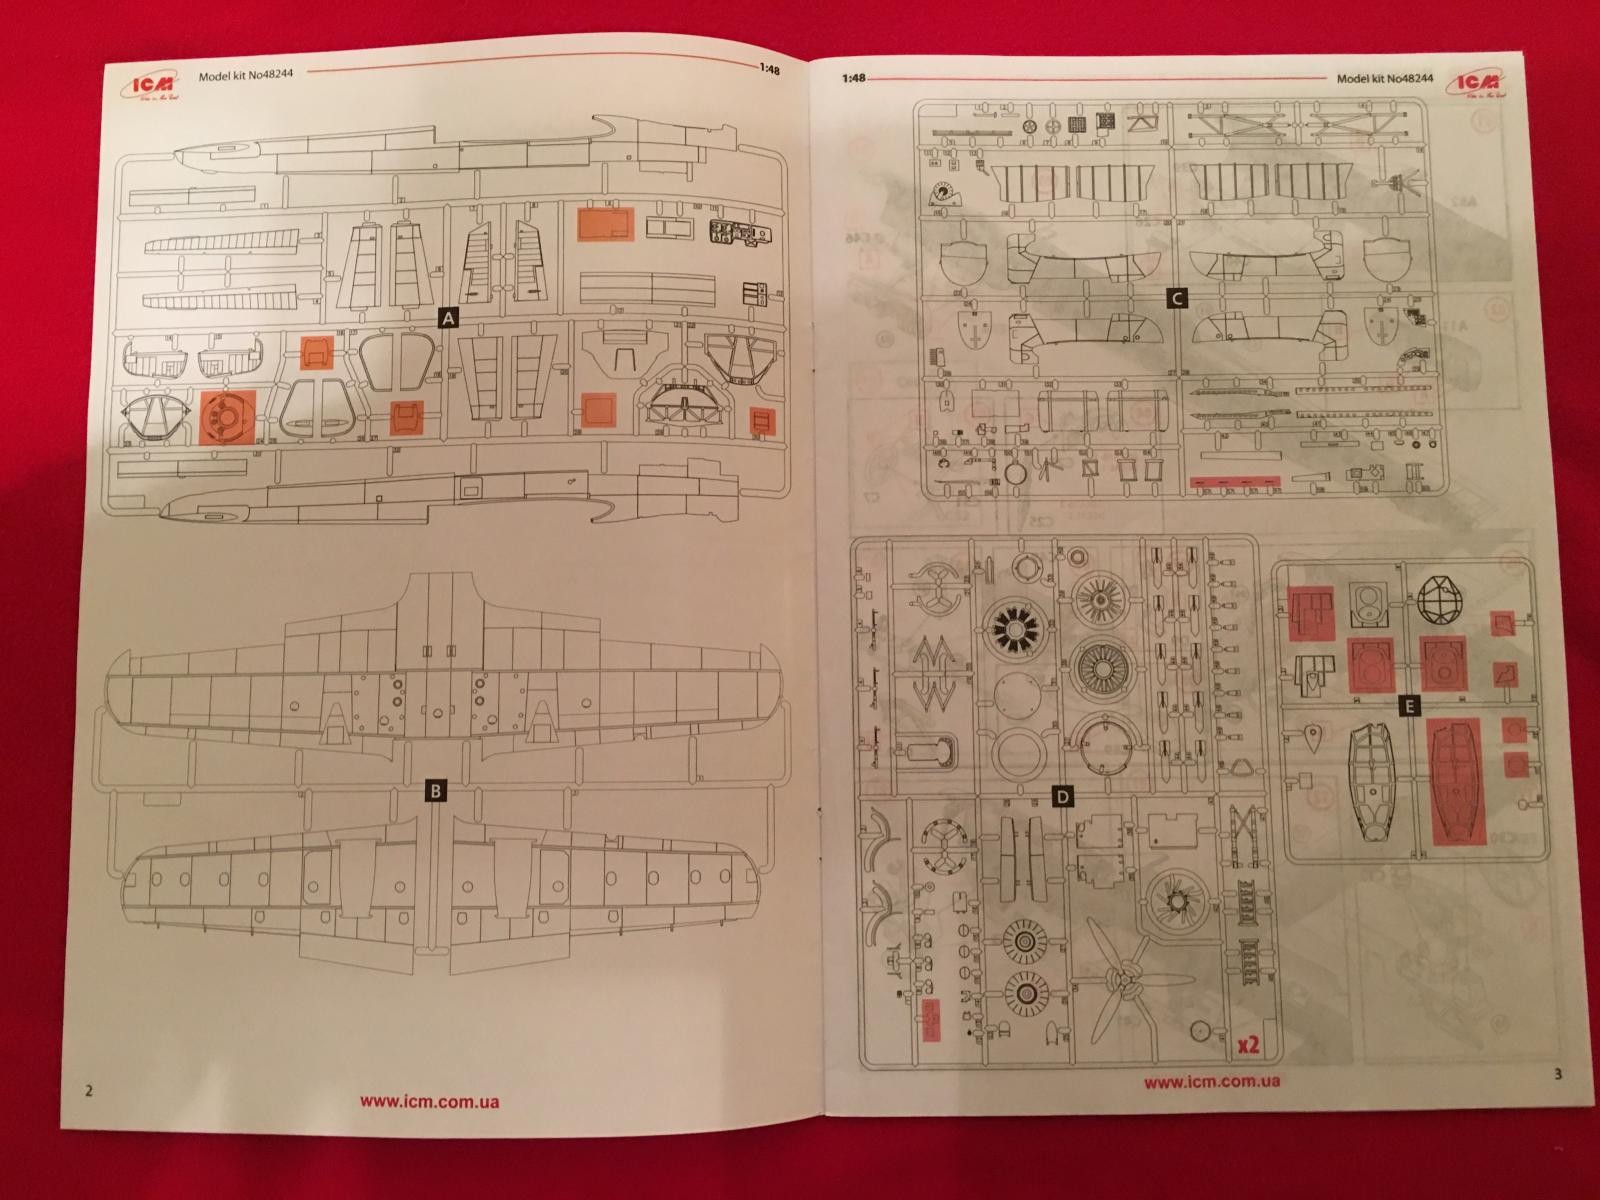
The next two pages show you how the parts are laid out on the plastic trees, but do not include part numbers. The illustrations are well done, so you shouldn't have too much trouble figuring out which part is shown.
Parts not for use are highlighted with a pinkish colored outline, that can be seen in this photo below.
The assembly sequence appears to be very well laid out, (but I have yet to build this one, so I can't really comment as to how it will go together).
In typical fashion, the assembly begins with - yep you guessed it. The cockpit.
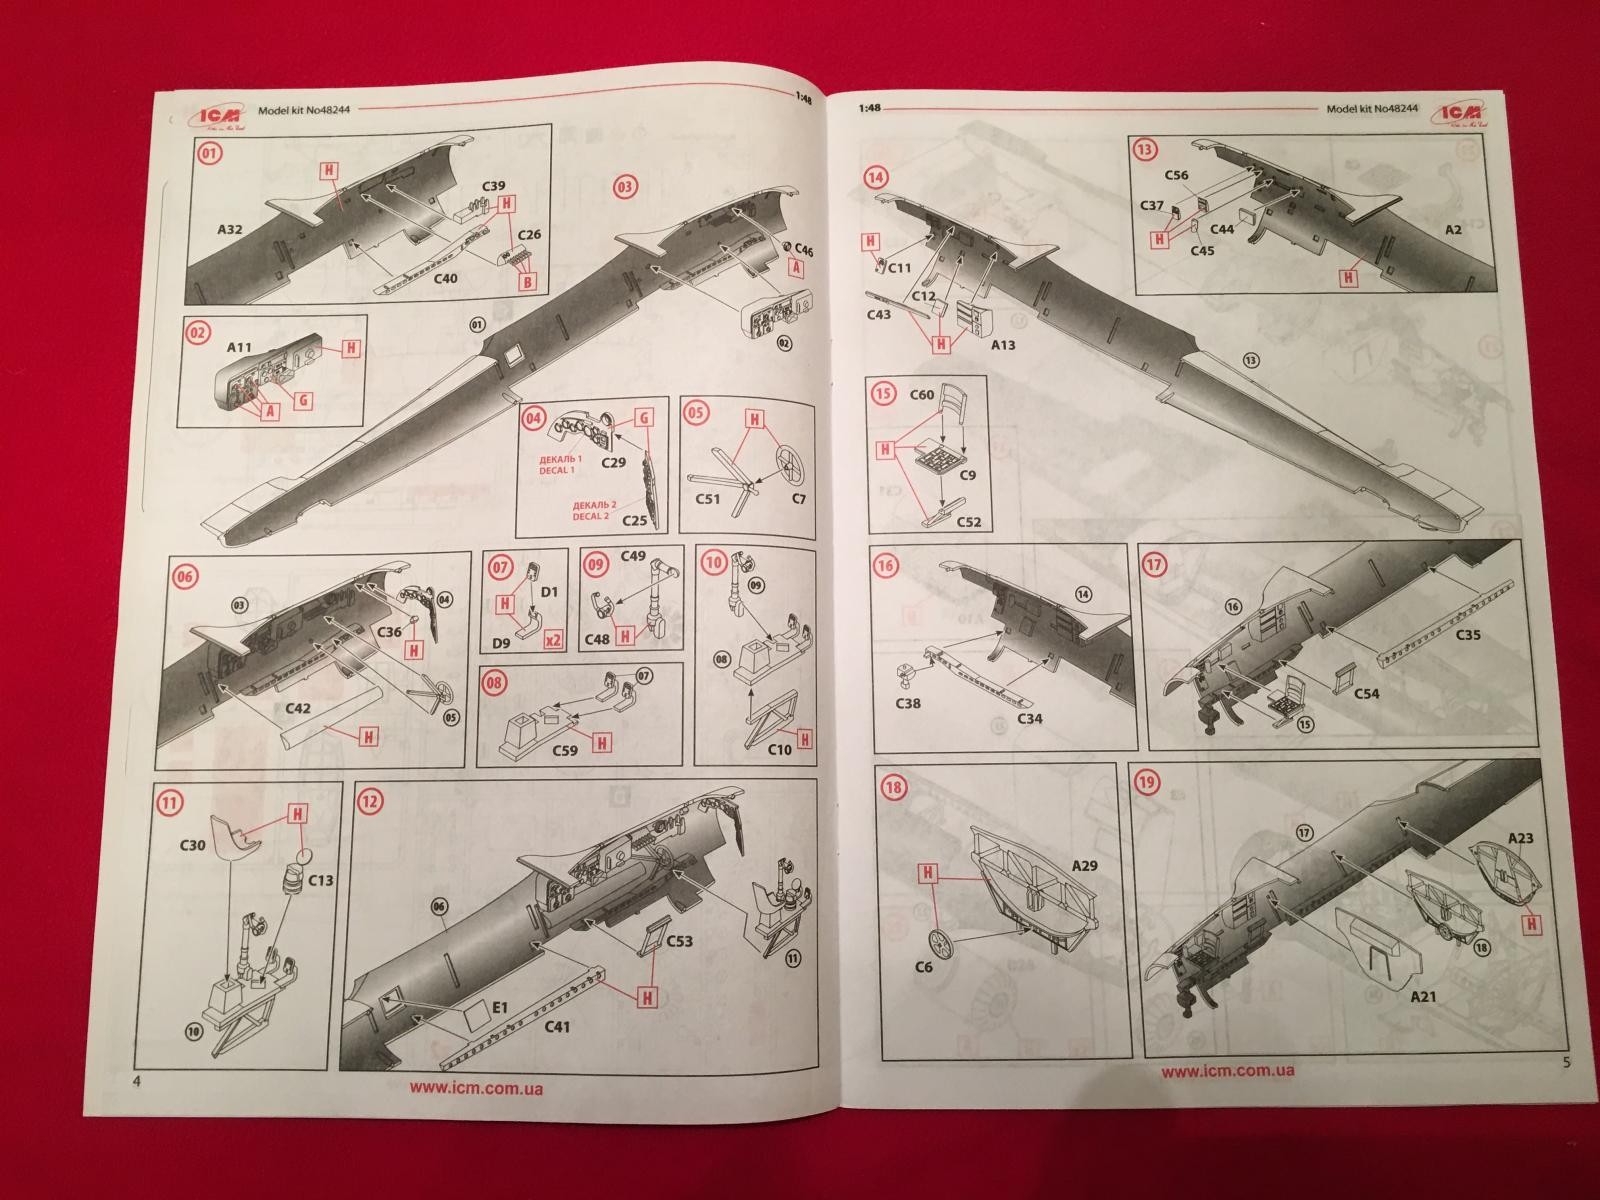
The bomb bay is the next step.
The option is provided to install a long range fuel tank in the front bomb bay if you so desire.
The bomb bay doors can also be assembled in the closed position if you want to go that route.
A full bomb load is provided. I'll be building one of mine with the bay doors open and a full bomb load carried. I may install the long range fuel tank in the second one just to be a little different.
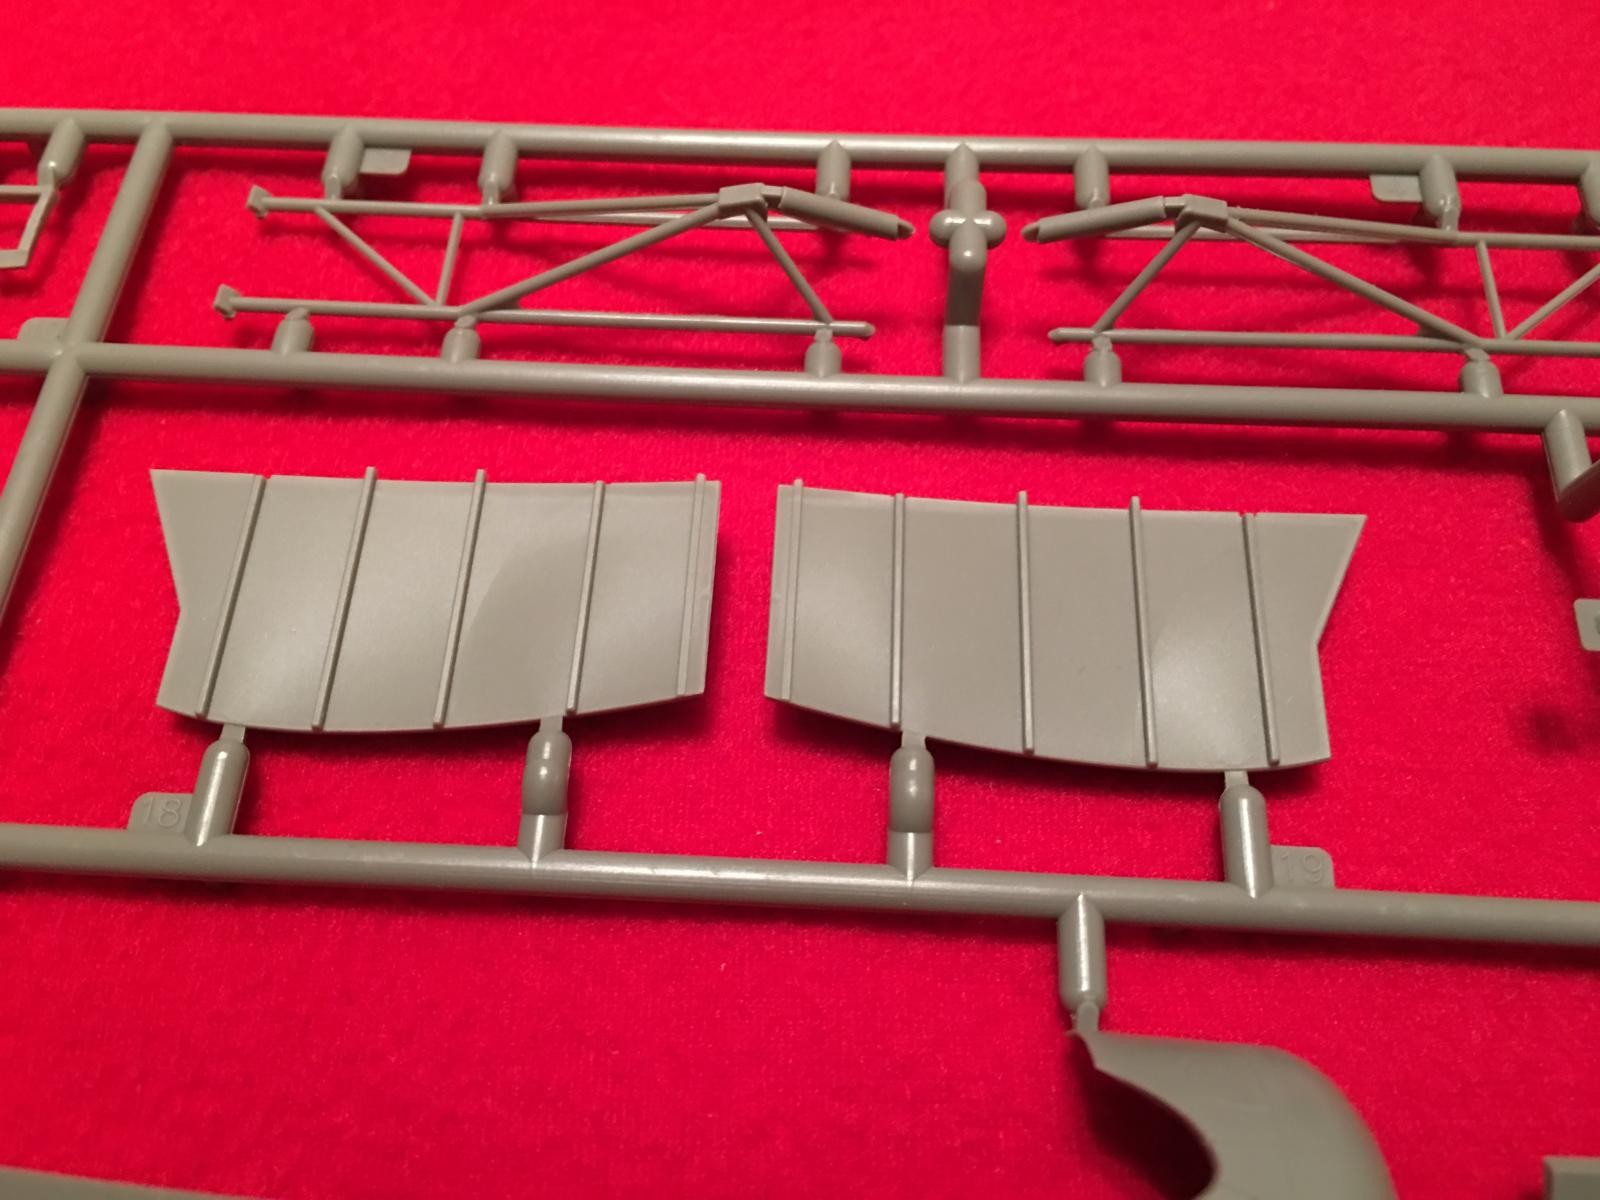
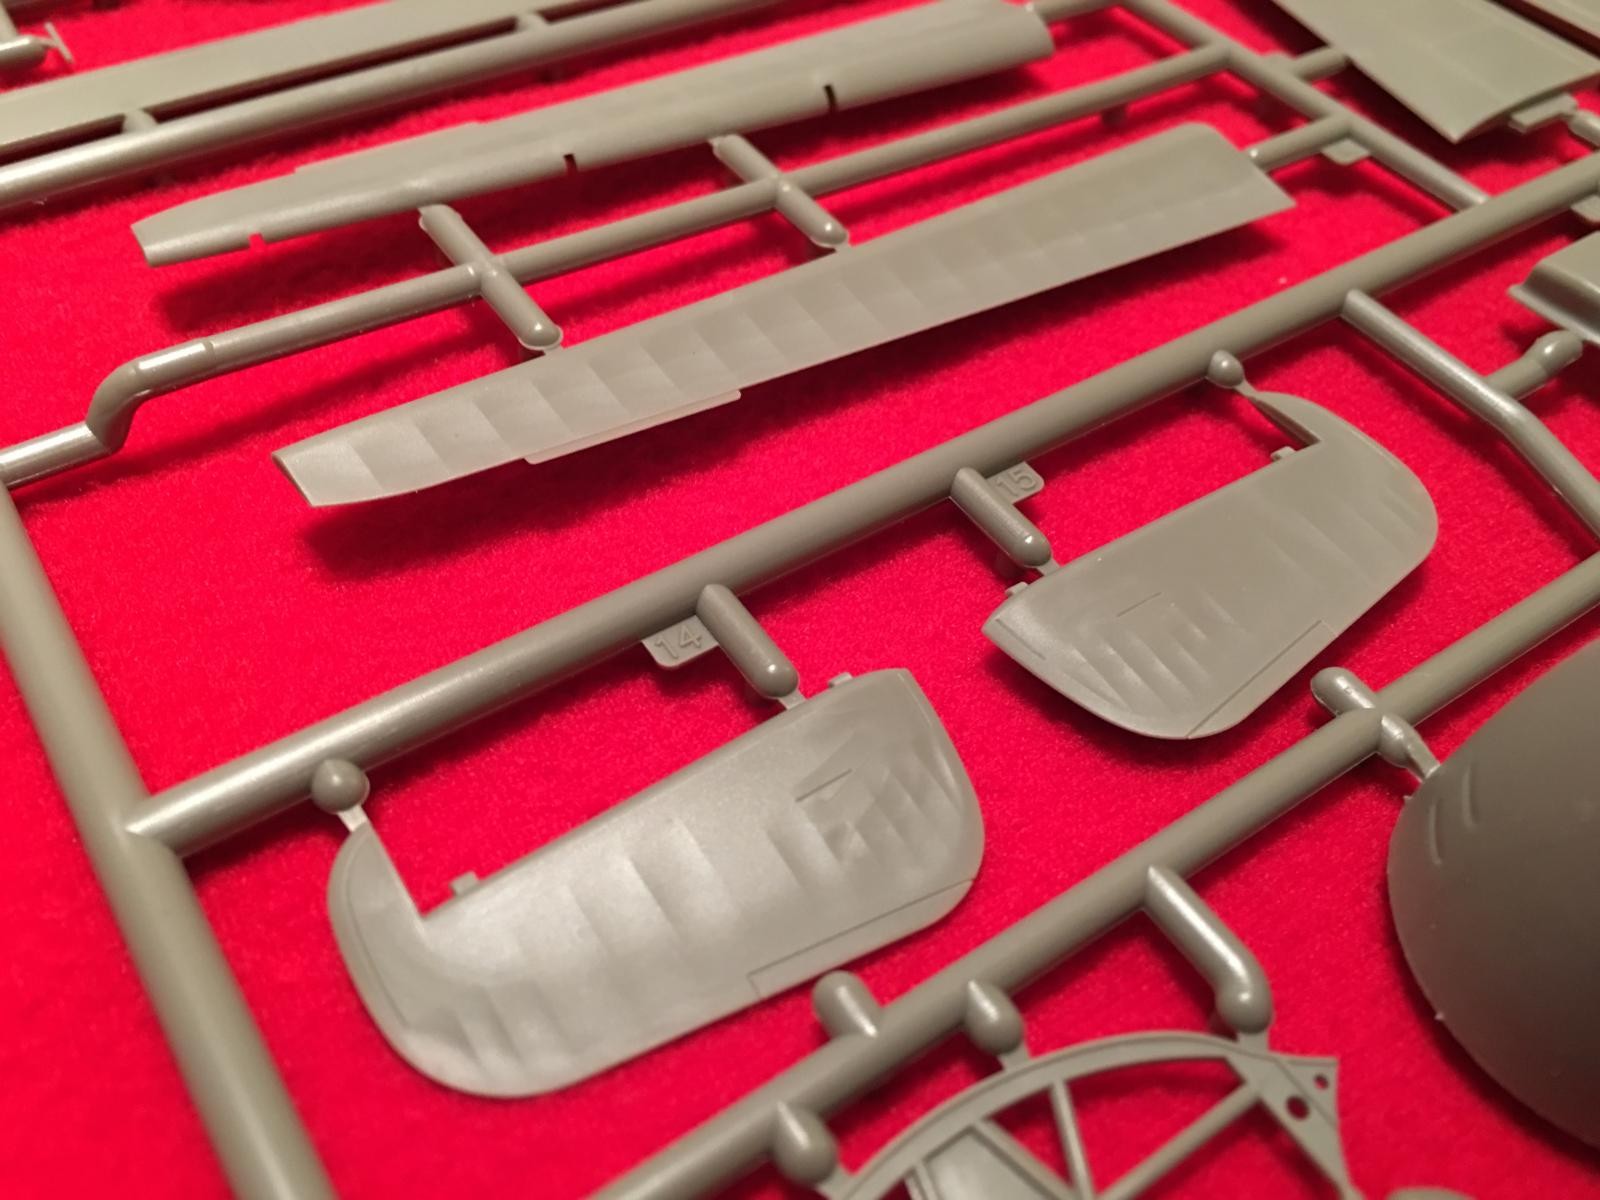
The control surfaces are molded separately, so they can be posed. However the flaps are molded closed. Some work will be required should you decide to drop the flaps. No inner details are molded into the upper and lower wing halves to depict the inner surfaces off the flaps. So if you want to drop the flaps, some scratch building work will be needed to add these missing details.

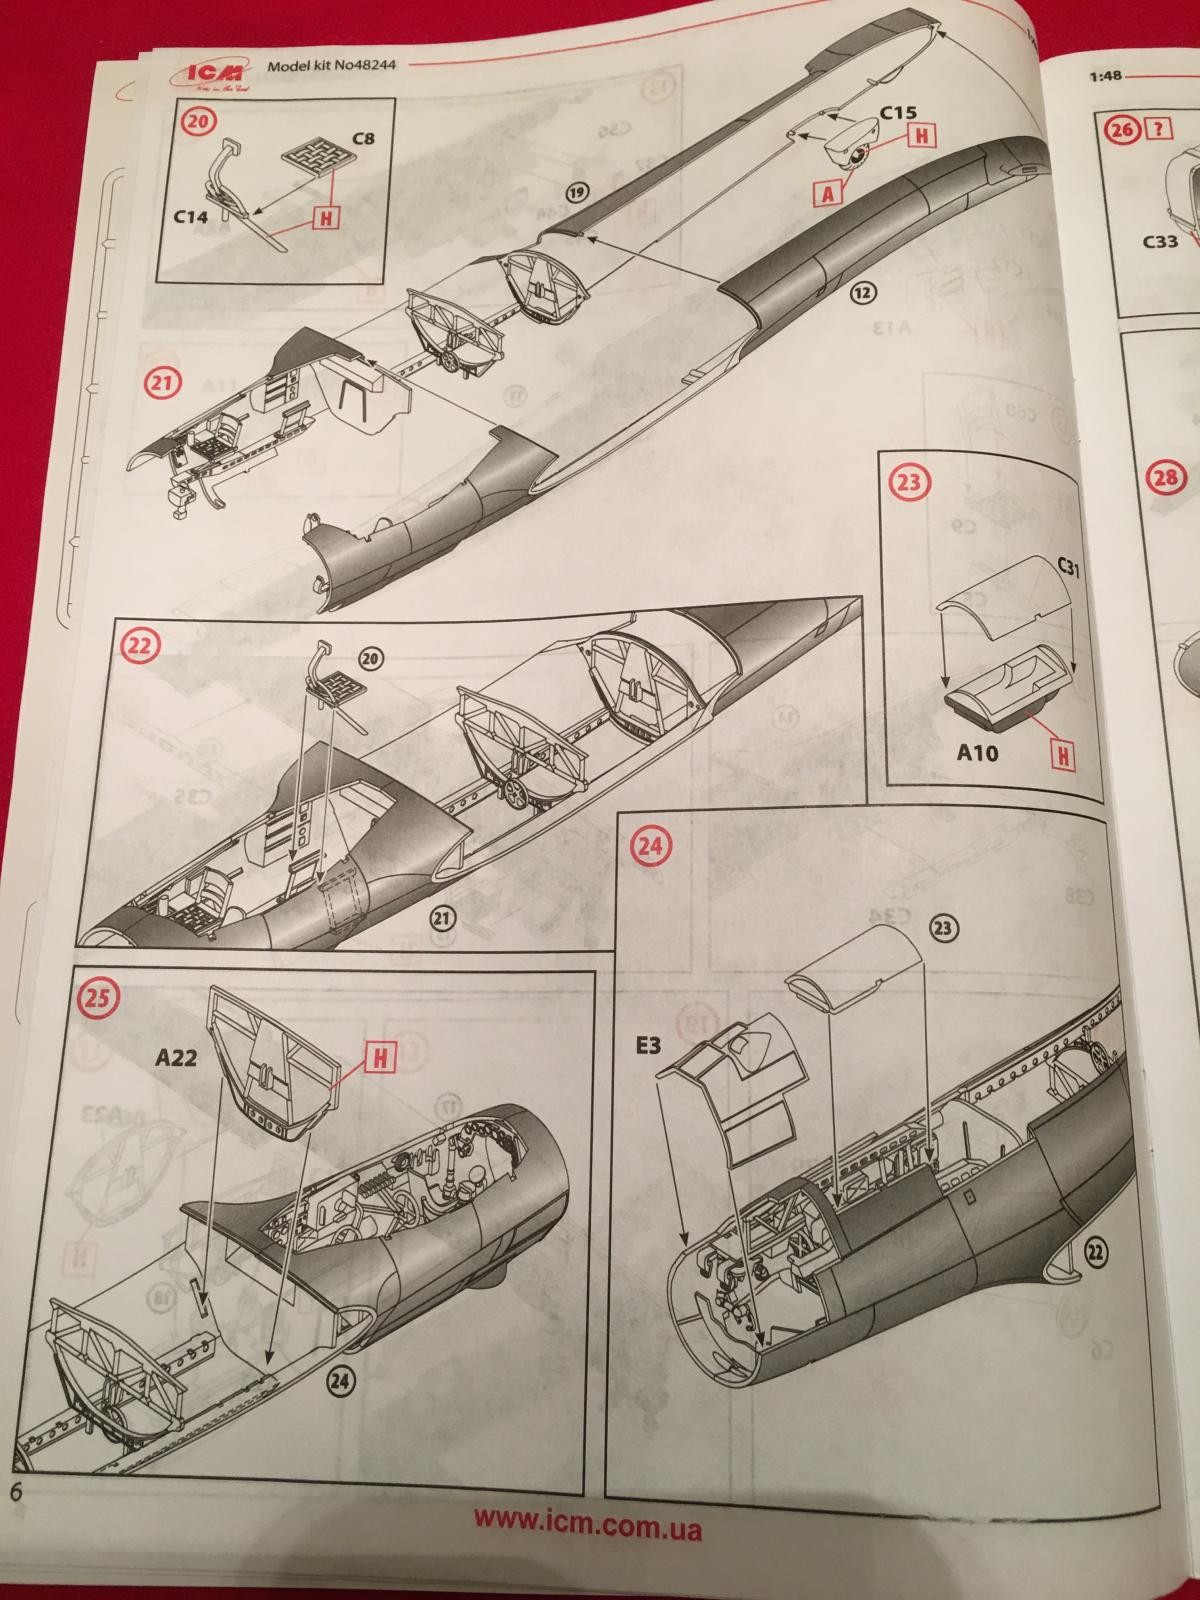
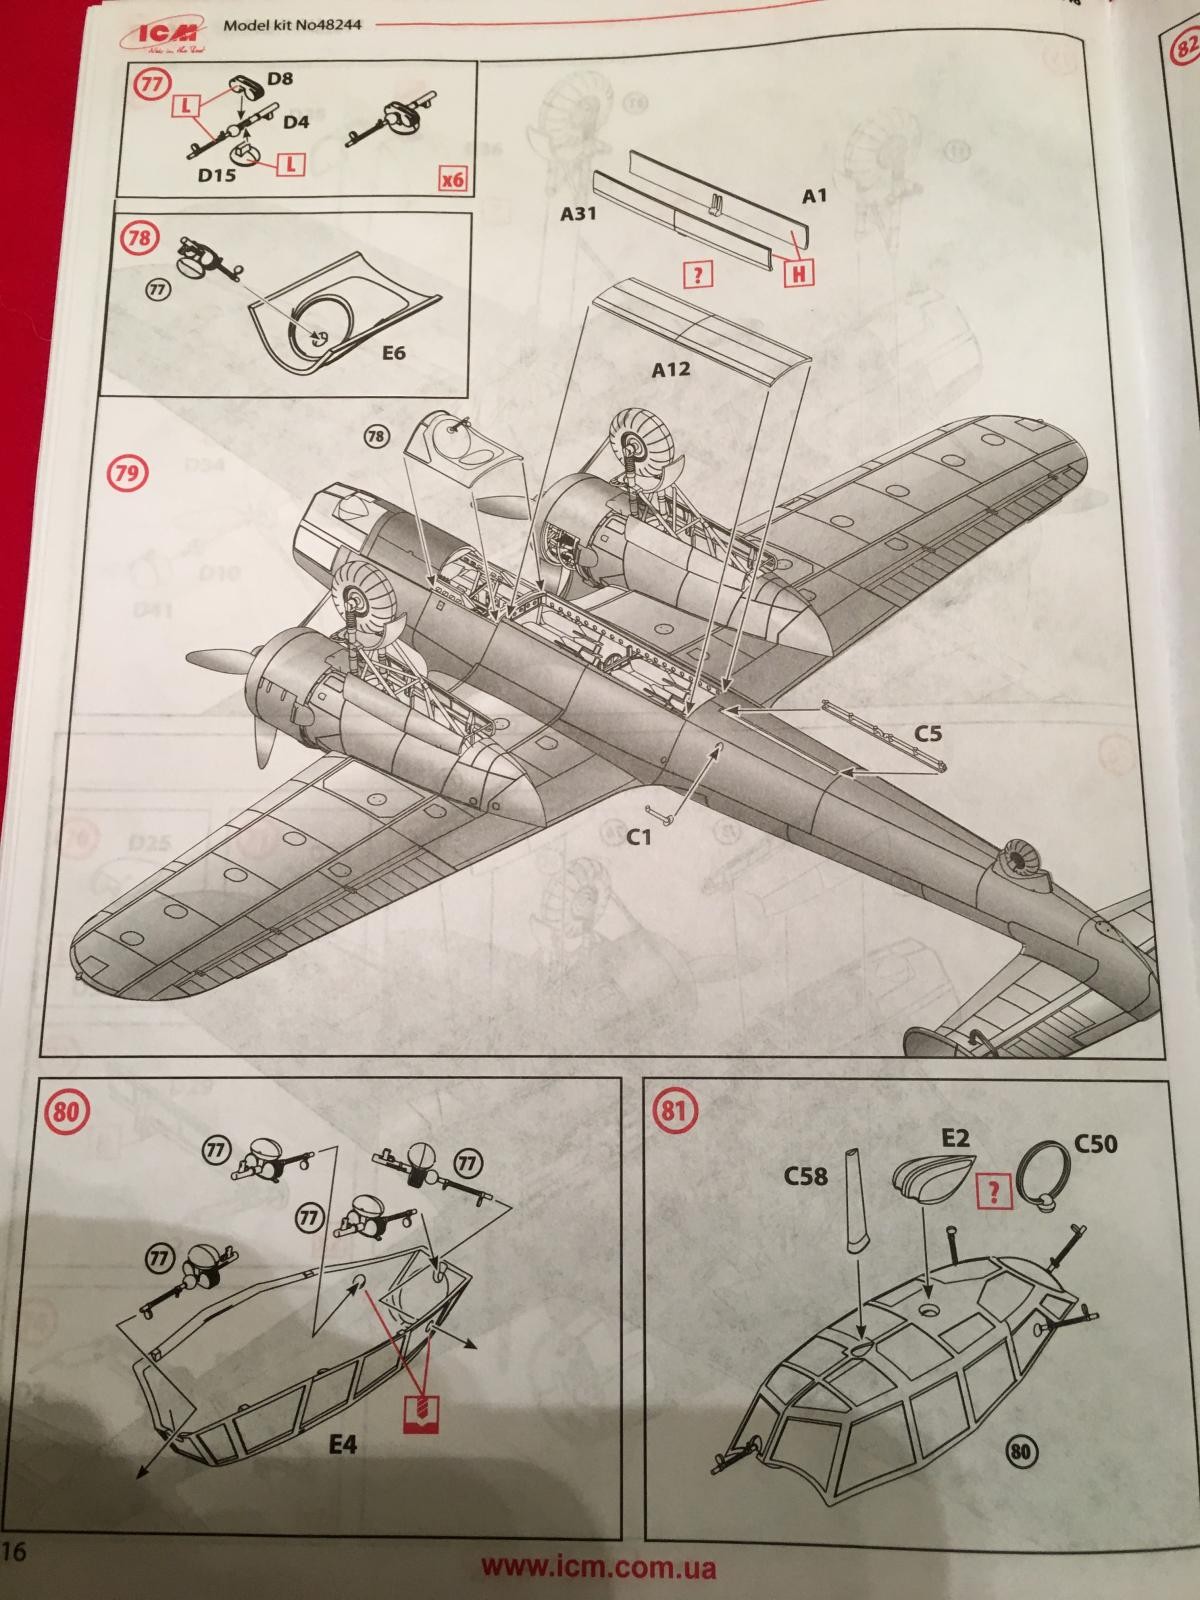
Since we are talking about the wings, the upper wing is molded as one piece. The lower halves glue in place and the completed wing is installed as a unit as shown in this instruction assembly photo below.

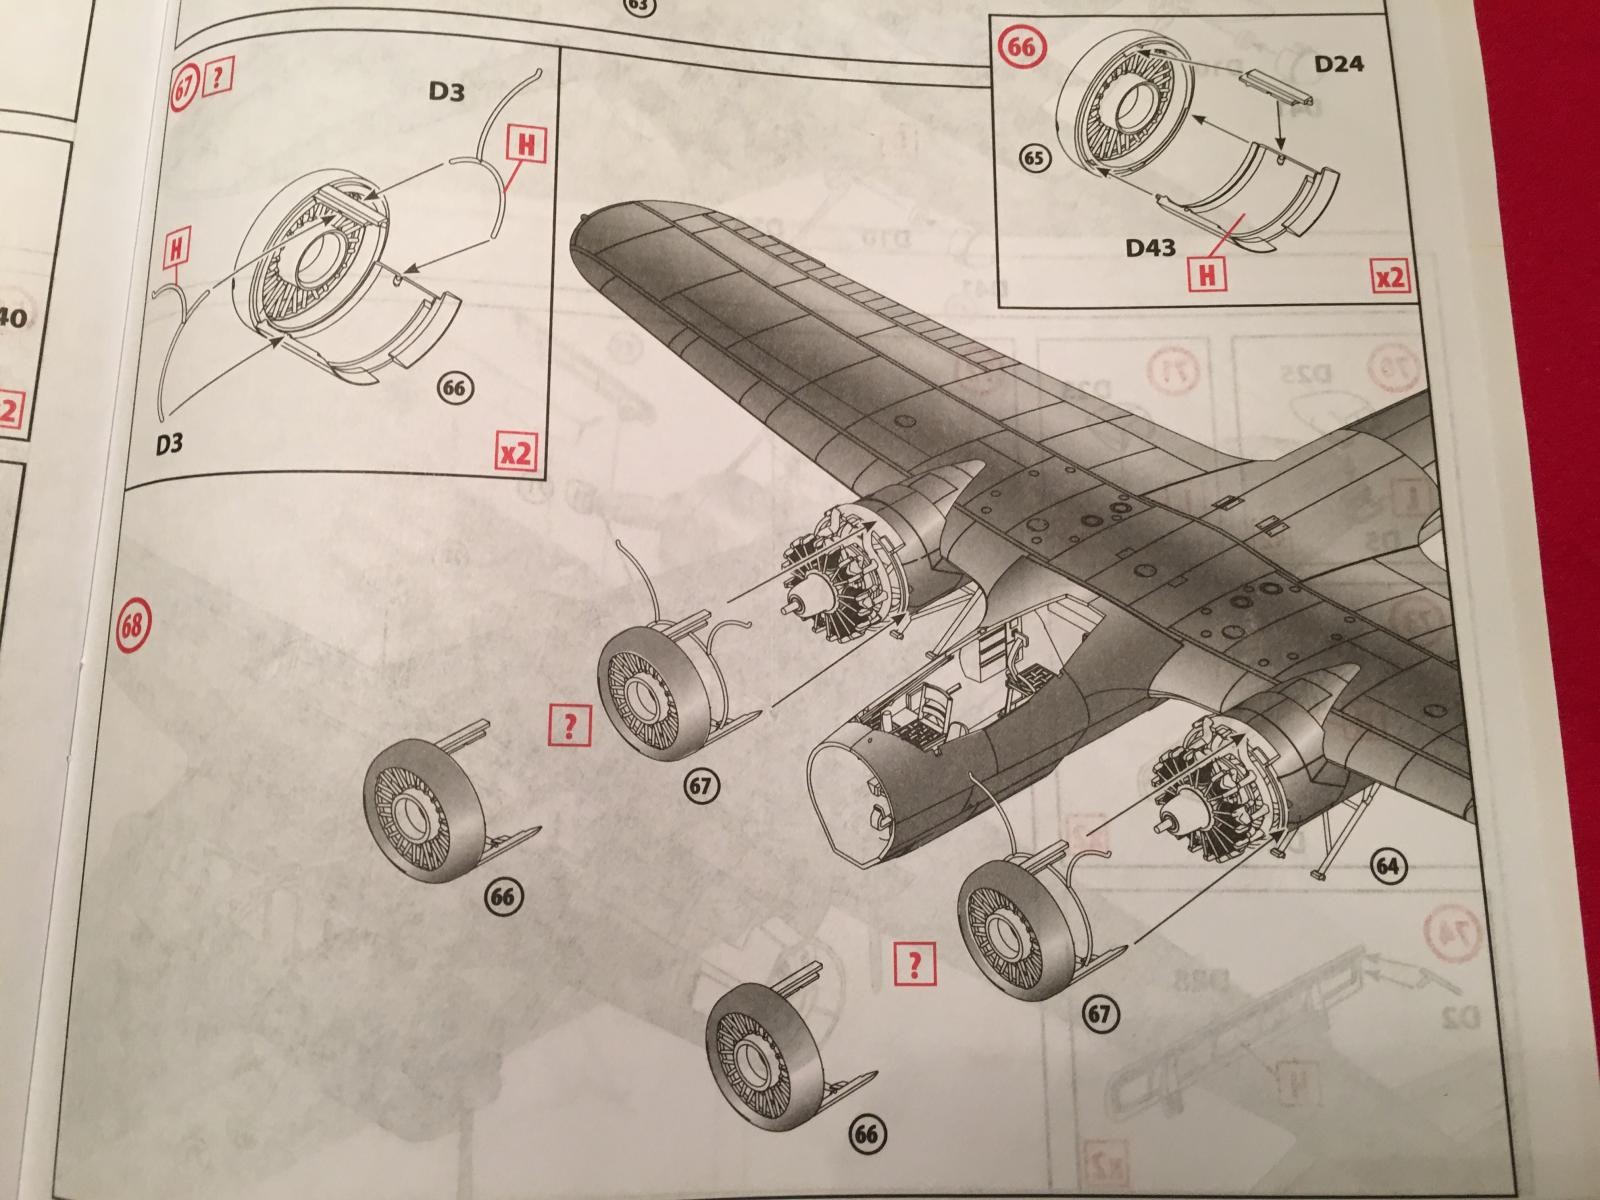
The engines and exhausts are little models in themselves. Two different style of exhaust pipes are included, so you will have to check your references to see which style of exhaust was used on your particular build. One style has individual exhaust stacks, while the other has two collectors that exit separately.

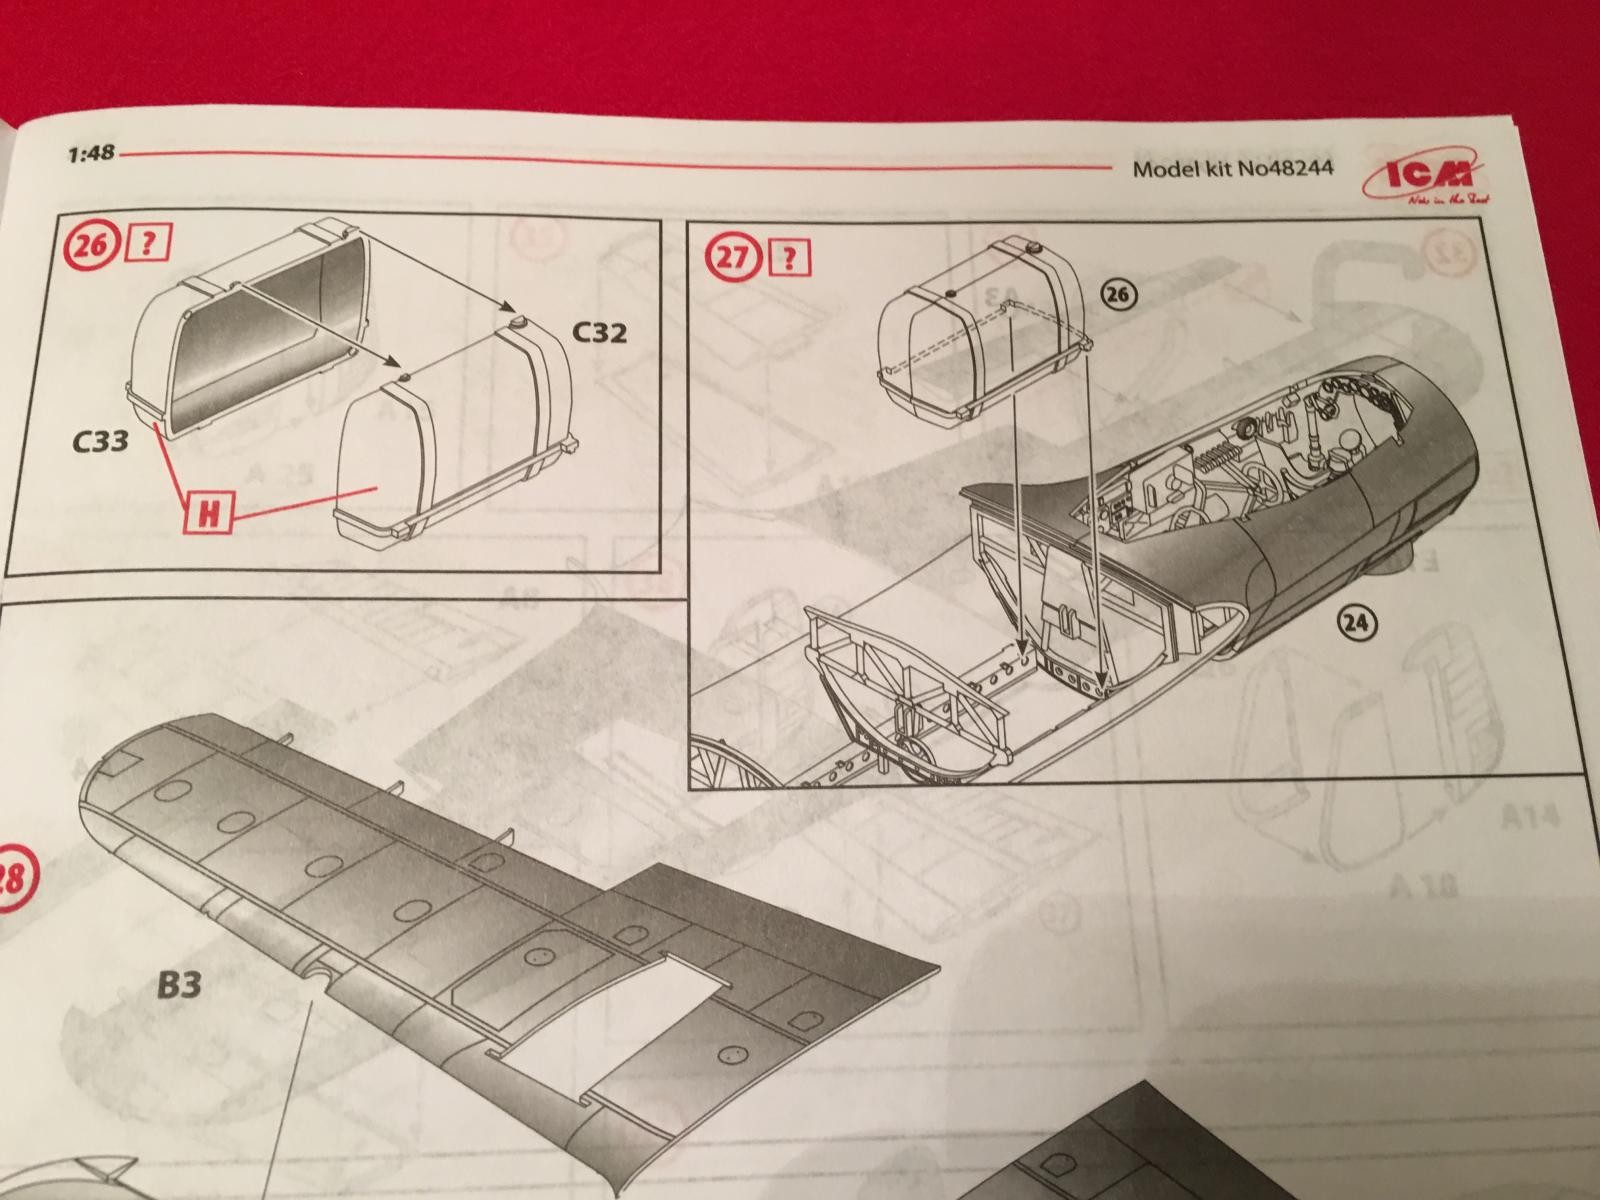
You will have the option of building this plane with the cowlings opened or closed. Here's another illustration from the kit instructions.
Four different planes can be built using the kit supplied decals.
Here you can see two of them.
The top plane is in RLM 70 and 71 over 65. It is coded as "U5 + BH" It is from 1 / KG 2 operated in Greece, during May 1941.
The second plane has a winter white wash applied over the upper surfaces, and has a RLM 65 lower. This plane is from 15 (Kroat) / KG 53, flown in Russia during the winter of 1941-42.
It is coded as "A1 + TZ"

The third plane is shown in the top of this next photo. Again we have RLM 70 and 71 over RLM 65. This particular plane was flown by 7 / KG 3 and participated in the "Blitz" from France in August 1940. This one has the fuselage codes of "5K + HR", and is illustrated on the box art.
The last plane also operated from France. It was with 3 / KG 76 and also operated during August 1940. This one too is in RLM 70 and 71 uppers over RLM 65. It is coded as "F1 + BL"

Since we are talking about the kit decals, here's a photo showing how they look. Mine appear to be well printed and in register. The carrier film also looks to be thin.
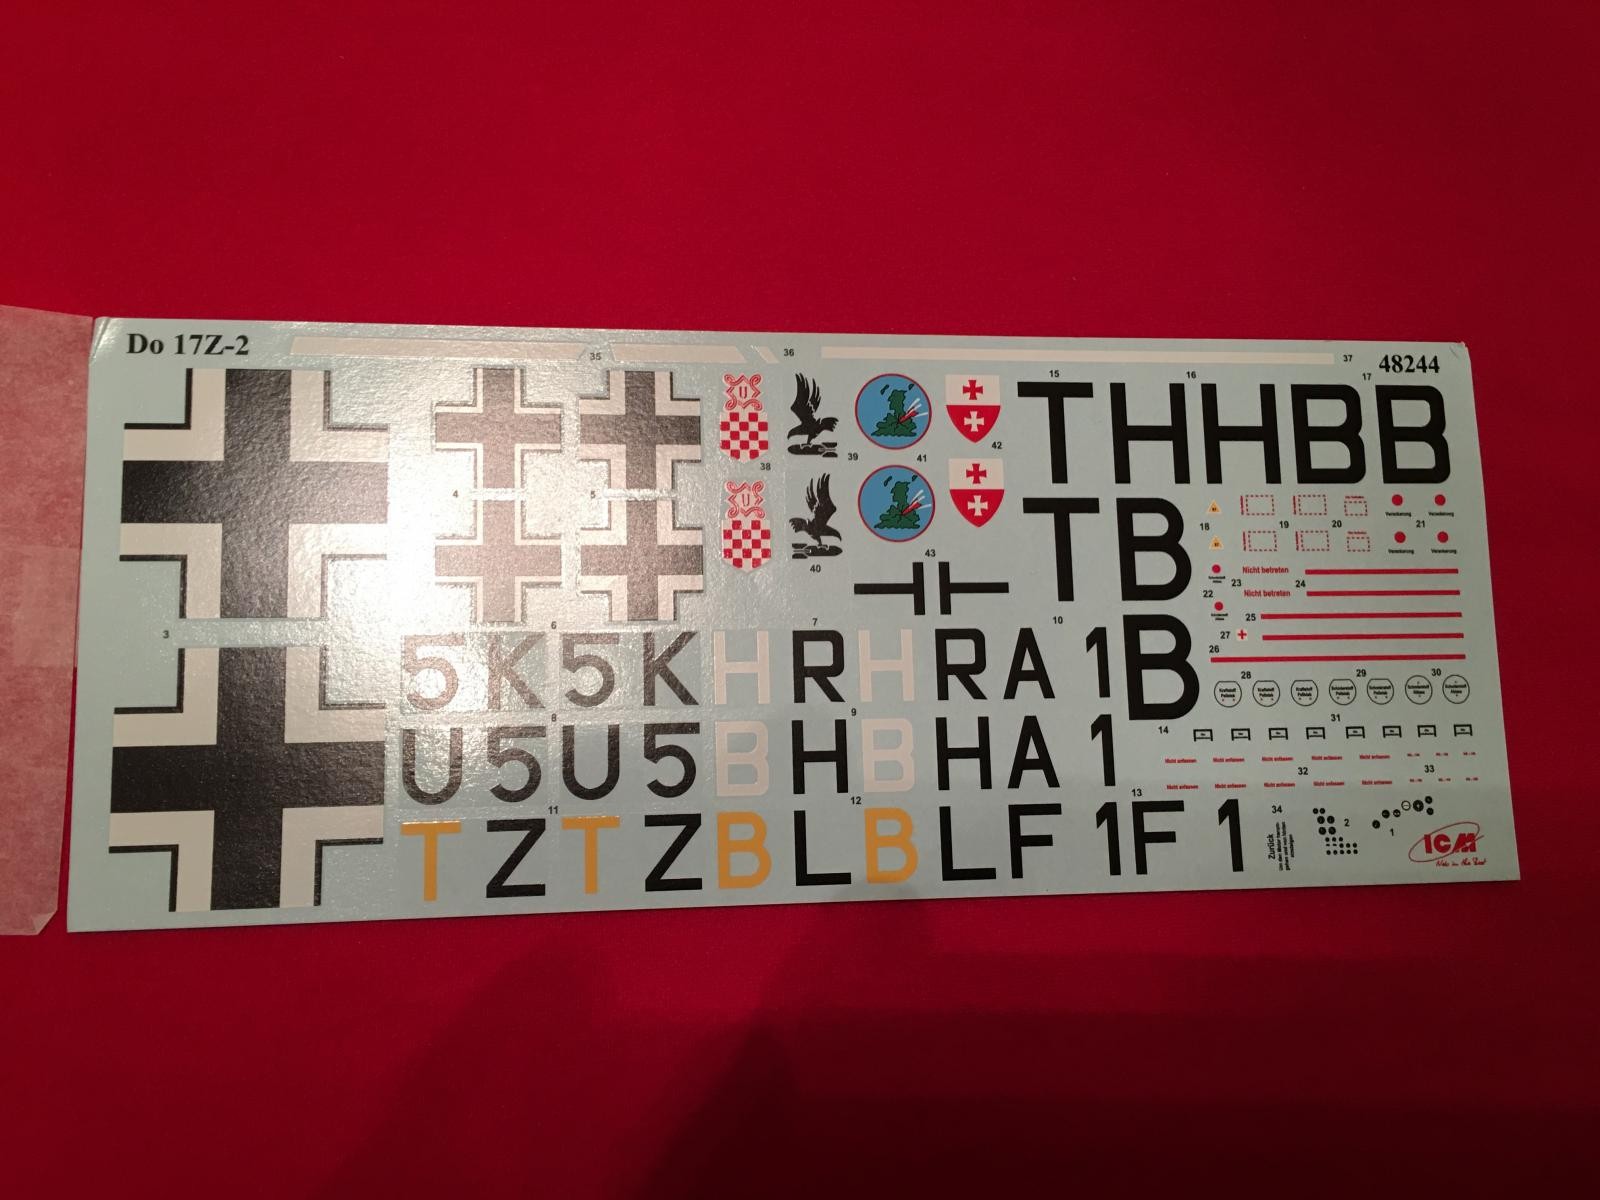
I have never used a set of decals from ICM, so I really can't comment on how they will work. There are a complete set of stencils provided. It looks like enough to do one aircraft. Here's a close up of the stencils, and the Unit insignias.
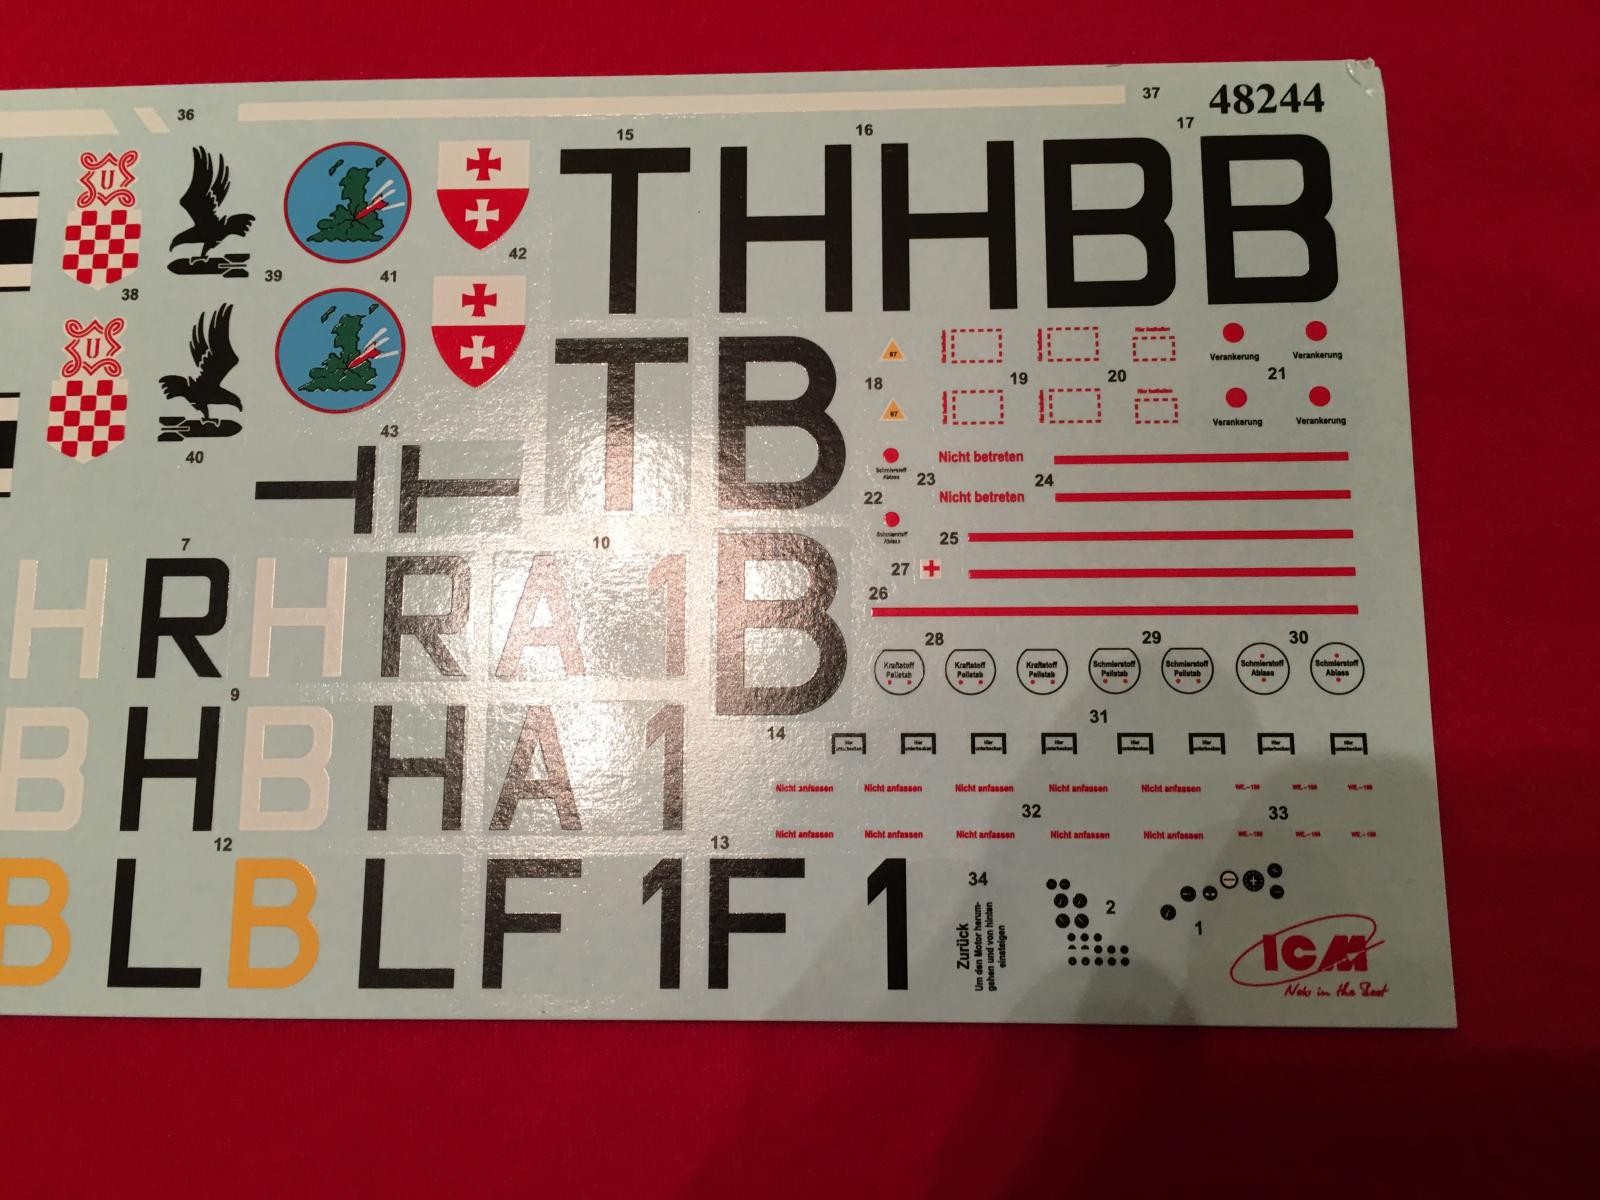
The instructions also provide an upper and lower view to assist with the location of these stencils. The Luftwaffe "splinter" pattern for the camouflage is also shown here, but it looks very dark and is hard to distinguish the lines in between the upper colors of RLM 70 and 71.

The clear parts are very well molded and are nice and thin.
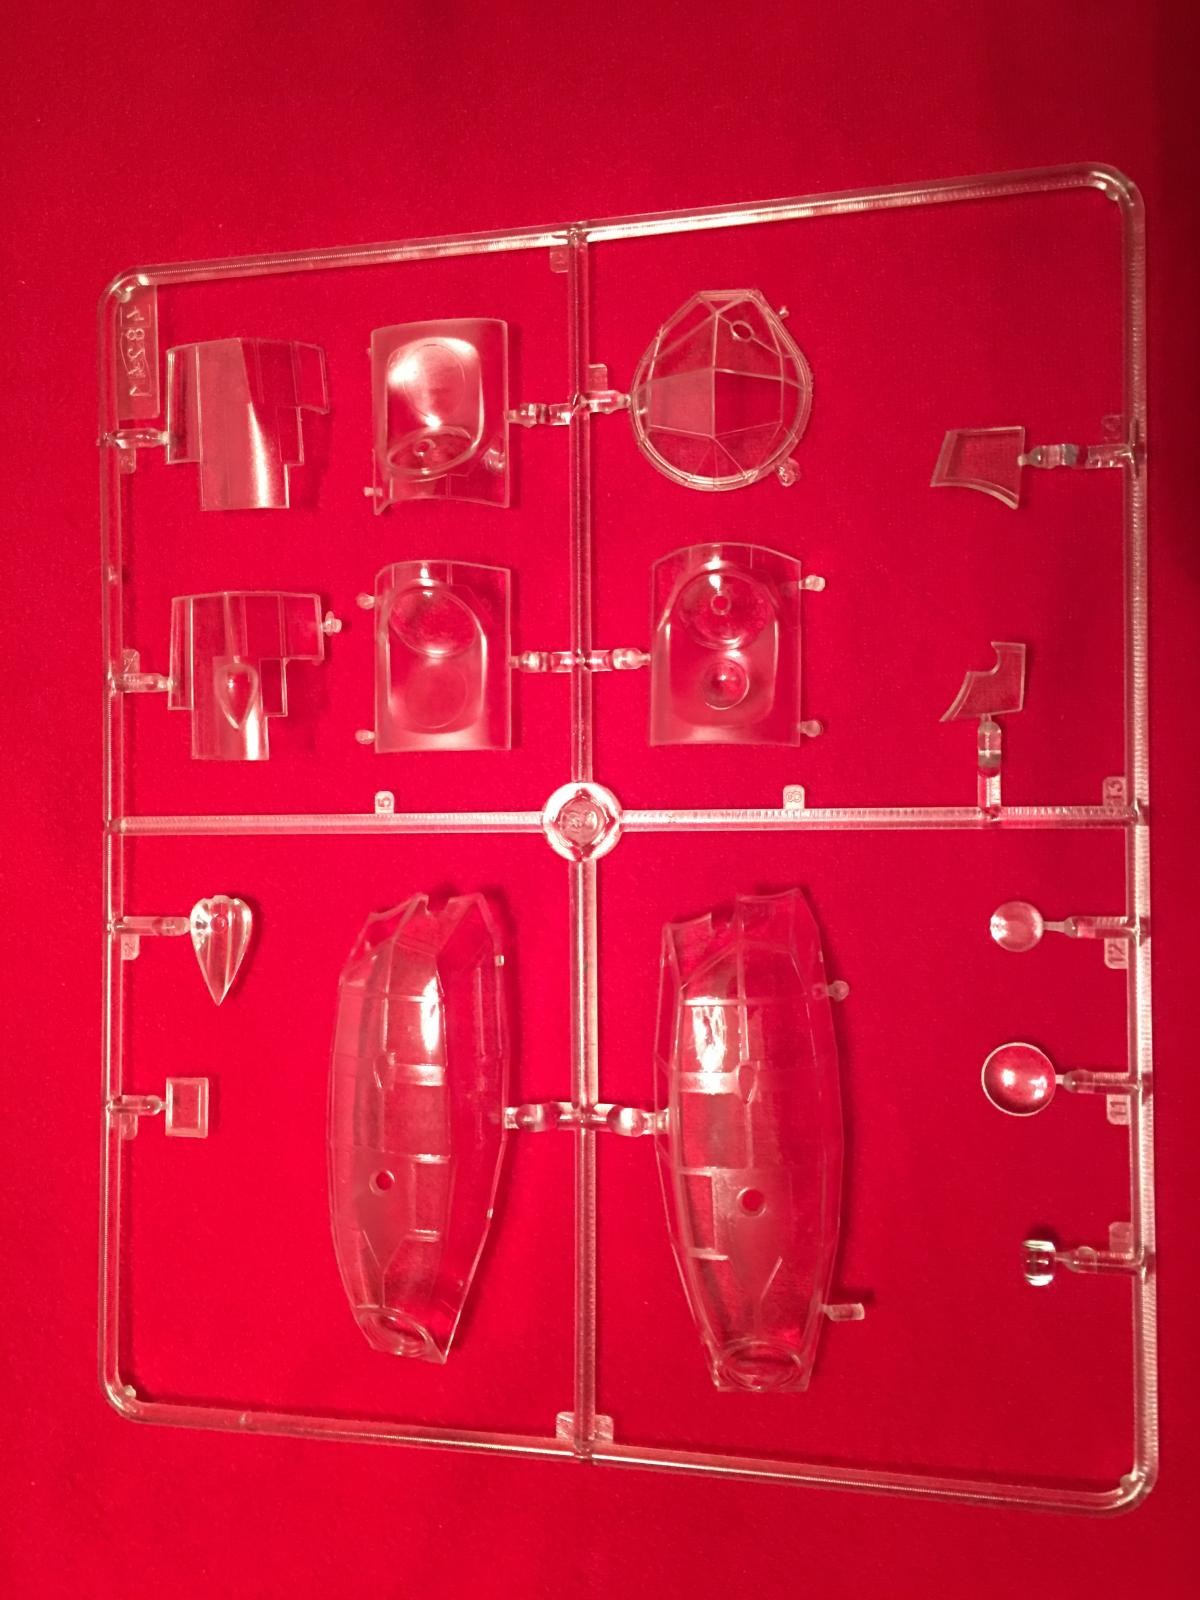
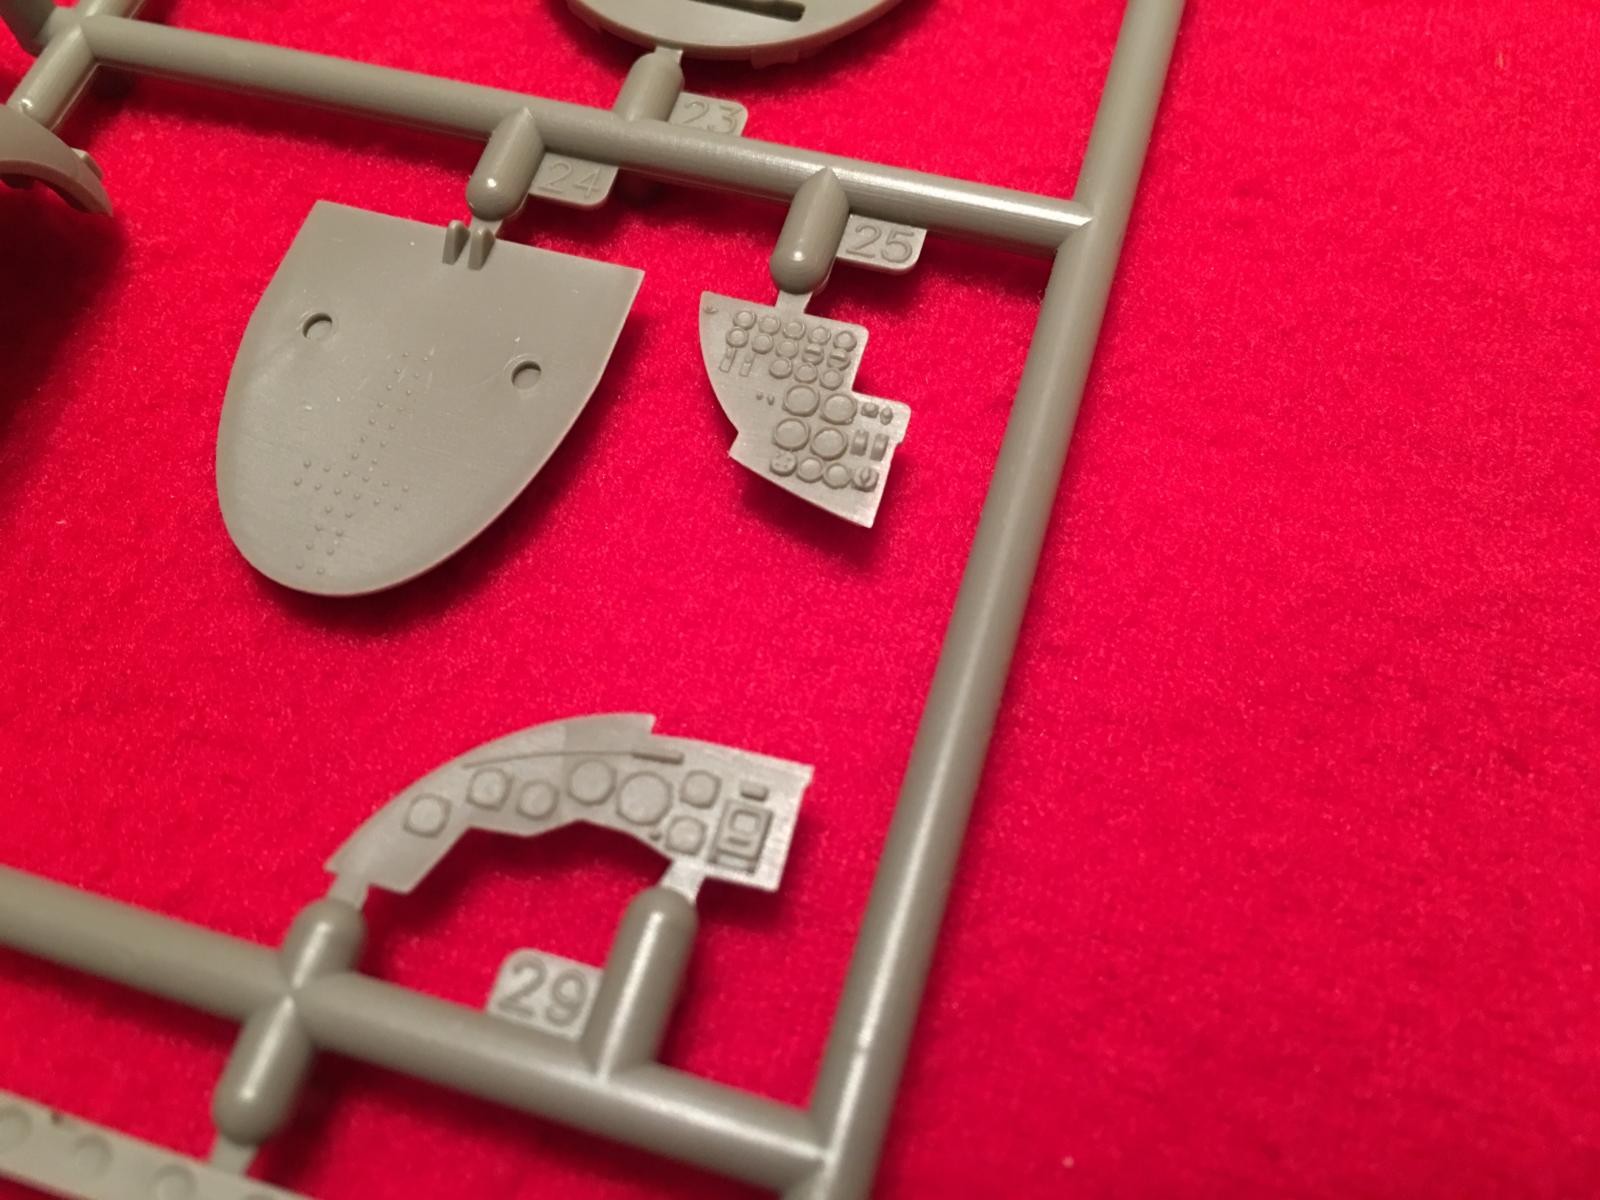
Two different style of canopies are included. One is marked "Not for Use" and has a provision for a MG that was mounted on the opposite side of the windscreen. If you look close, you will see where they have frosted the areas that need painting. This may help when time comes to mask off these window panels.
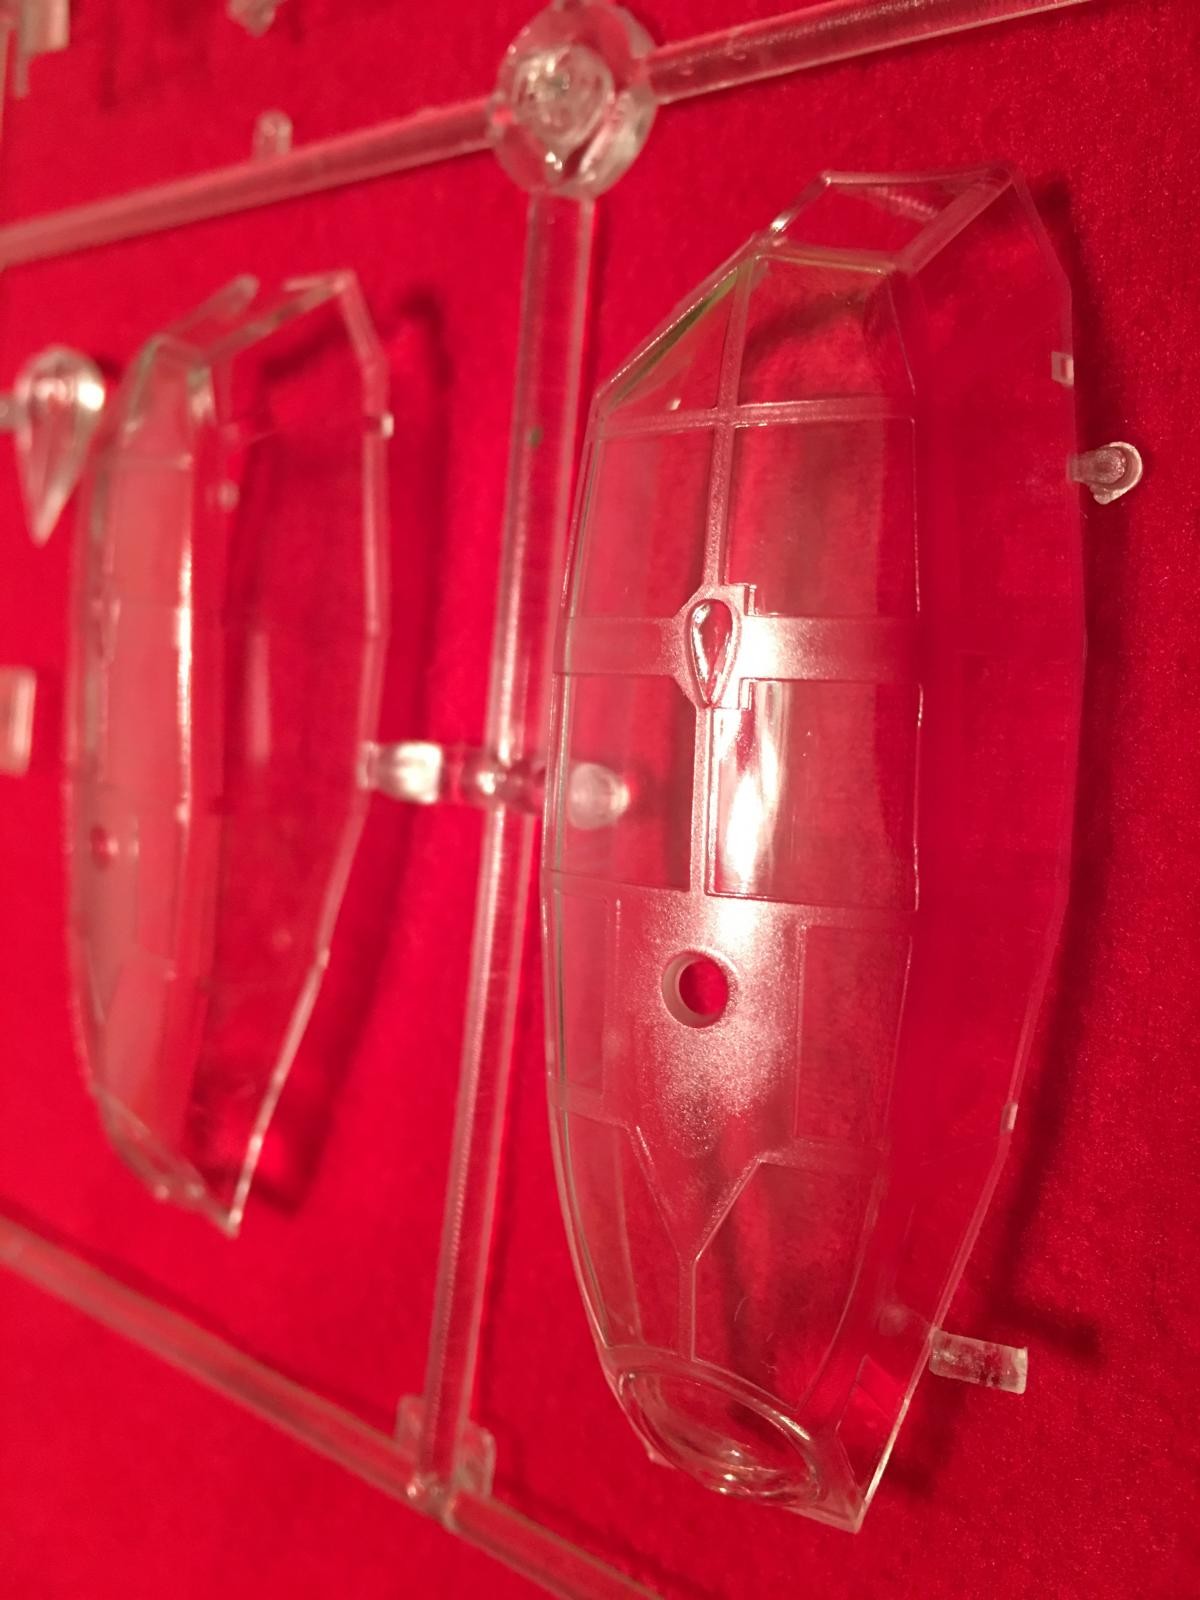
The forward nose glass is very nice too...

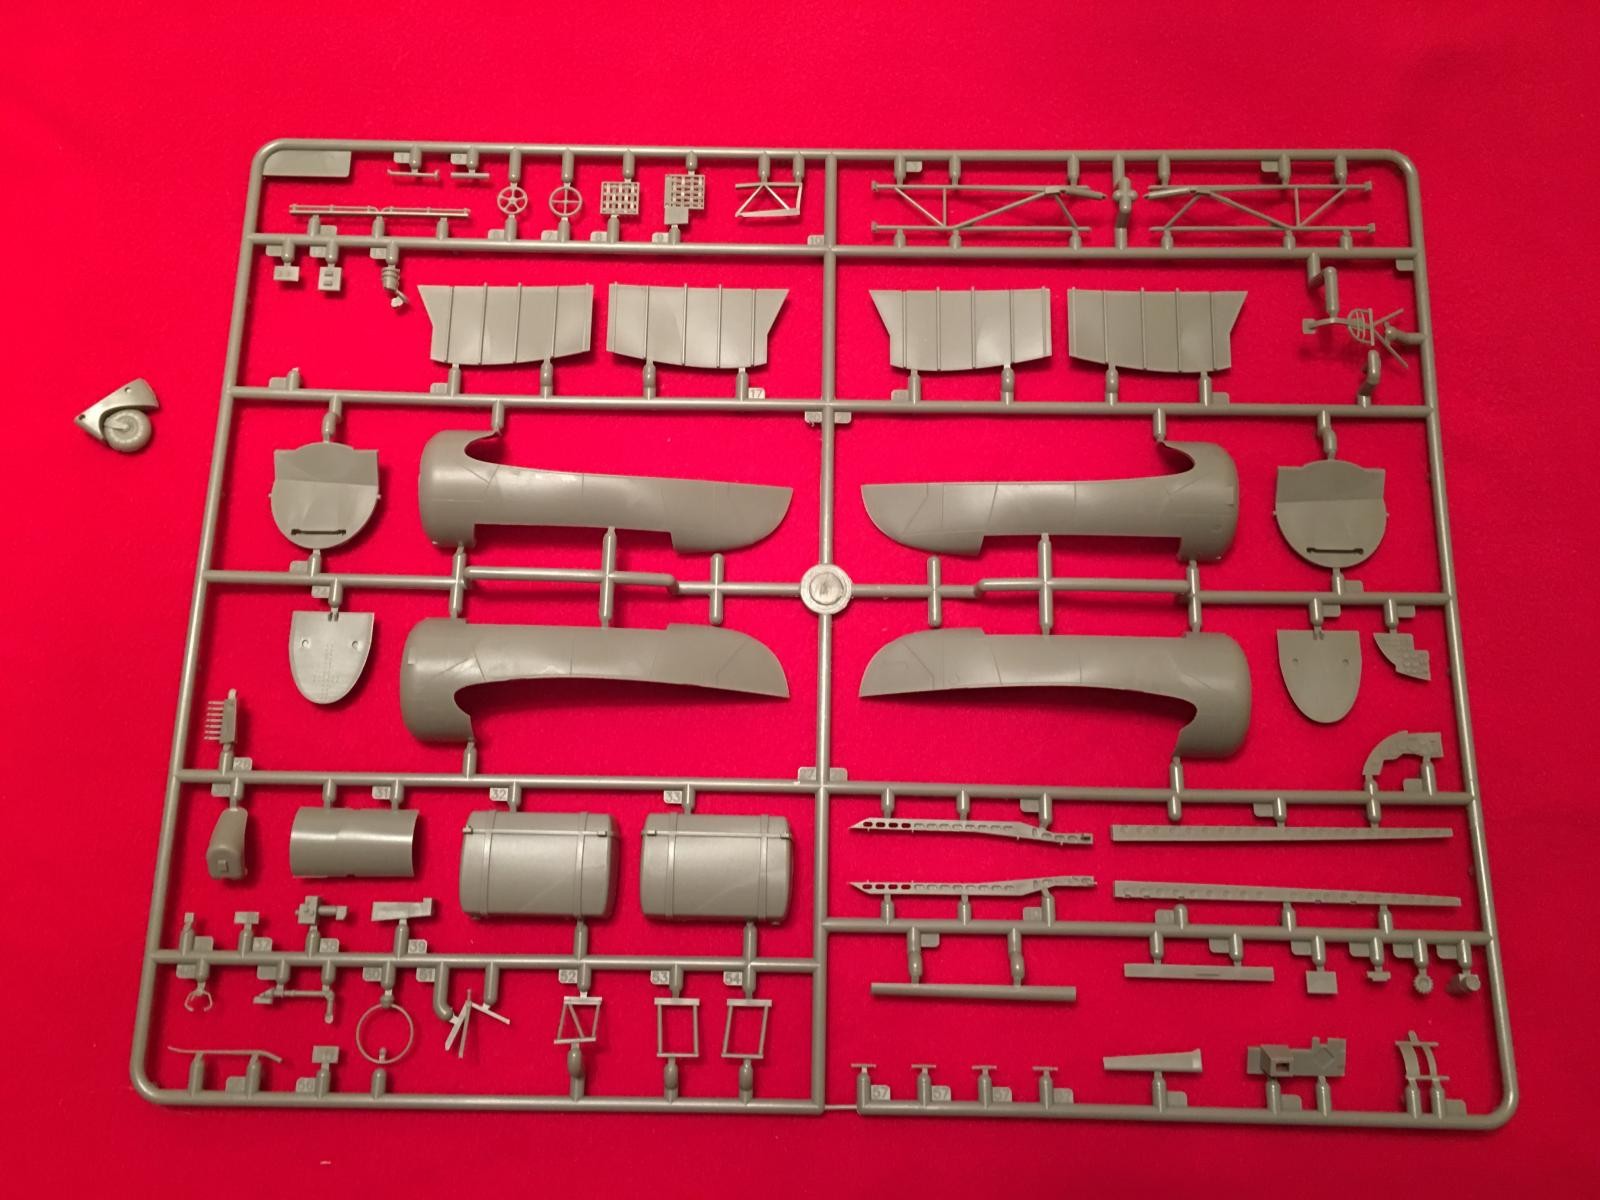
I took pictures showing the fuselage plastic "A" tree with a ruler placed along the side to show a size comparison. This will build into a decent sized plane.

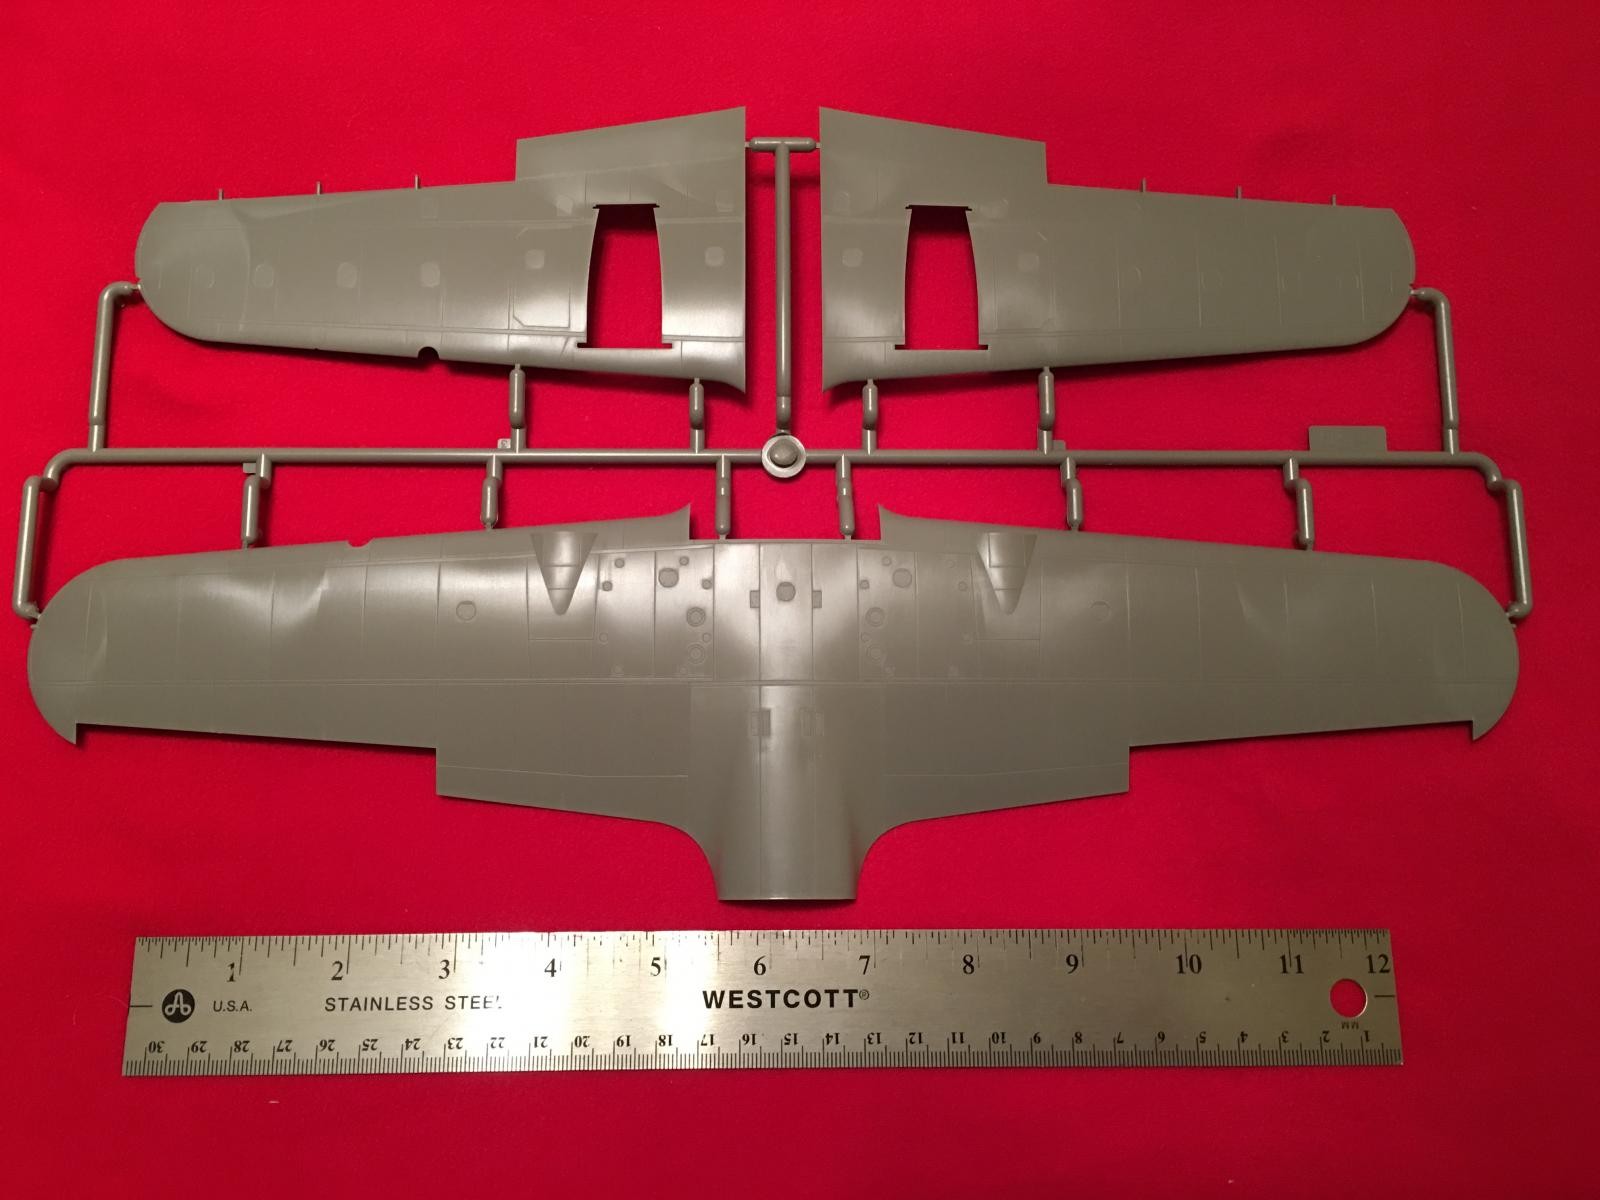
Here's the wing panel "B" tree. Notice the ruler for size comparison.
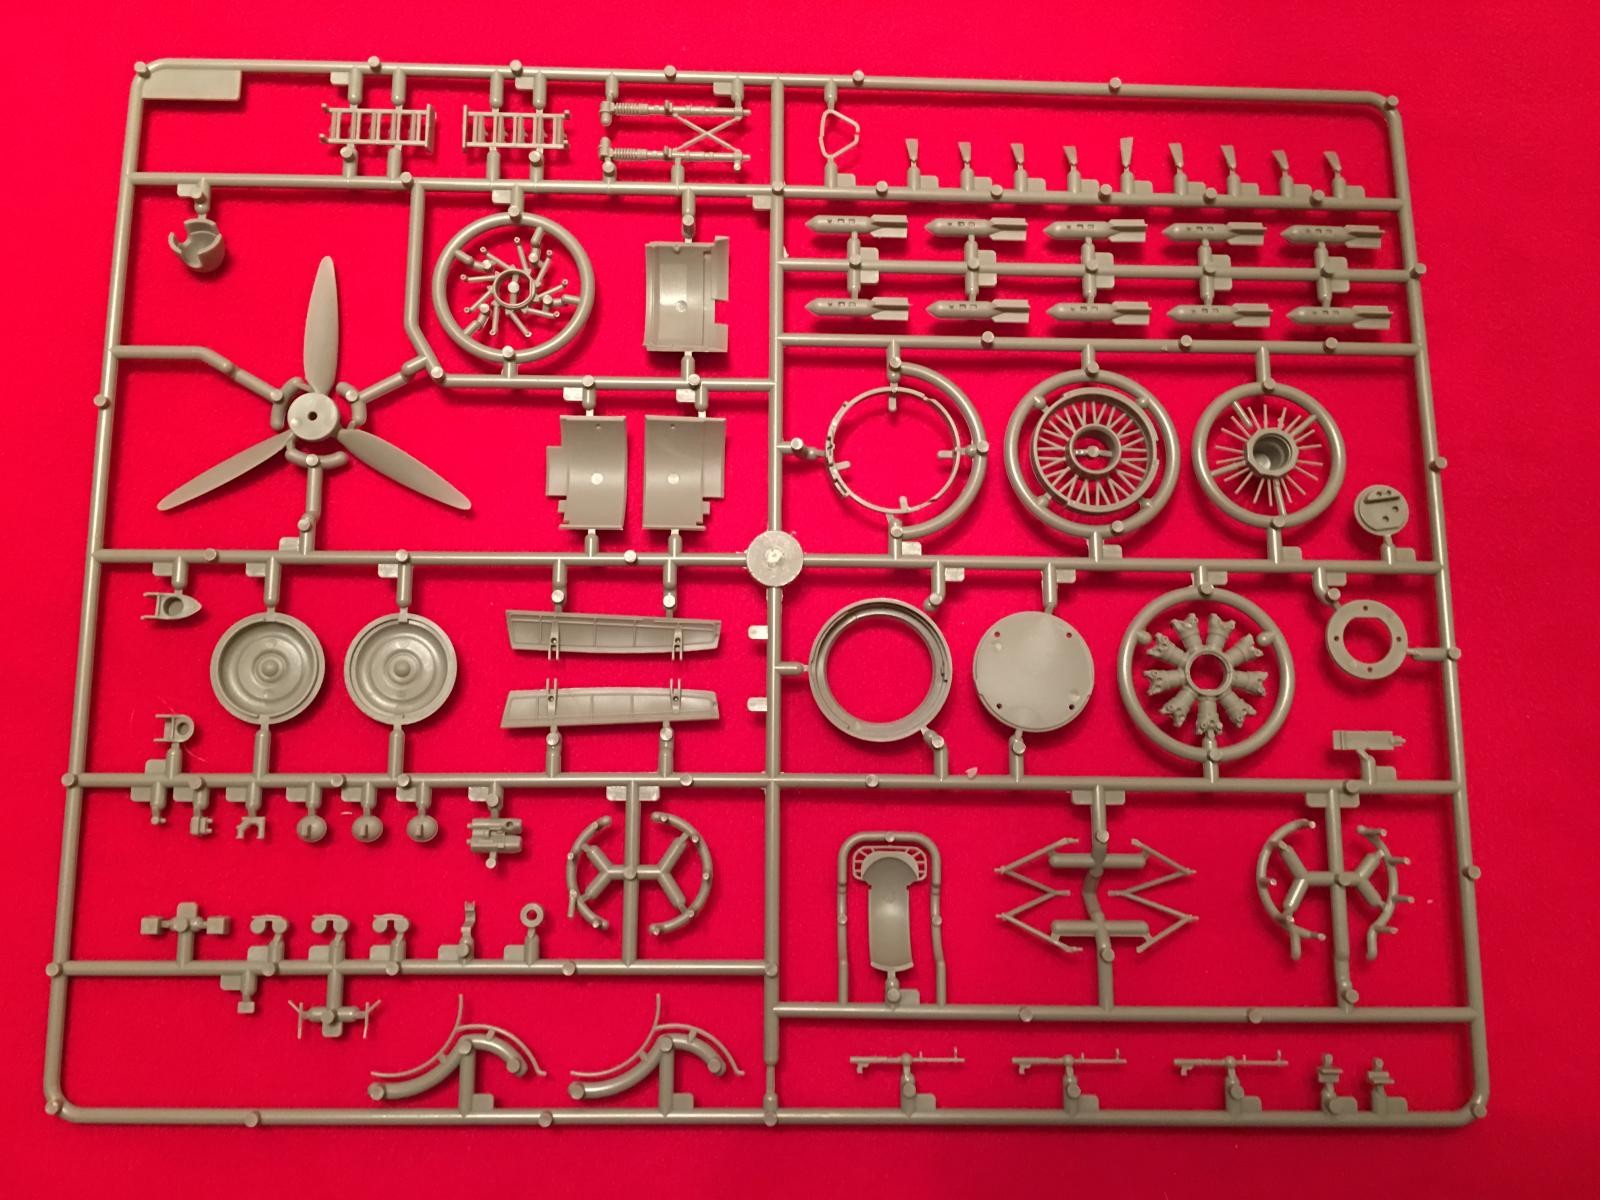
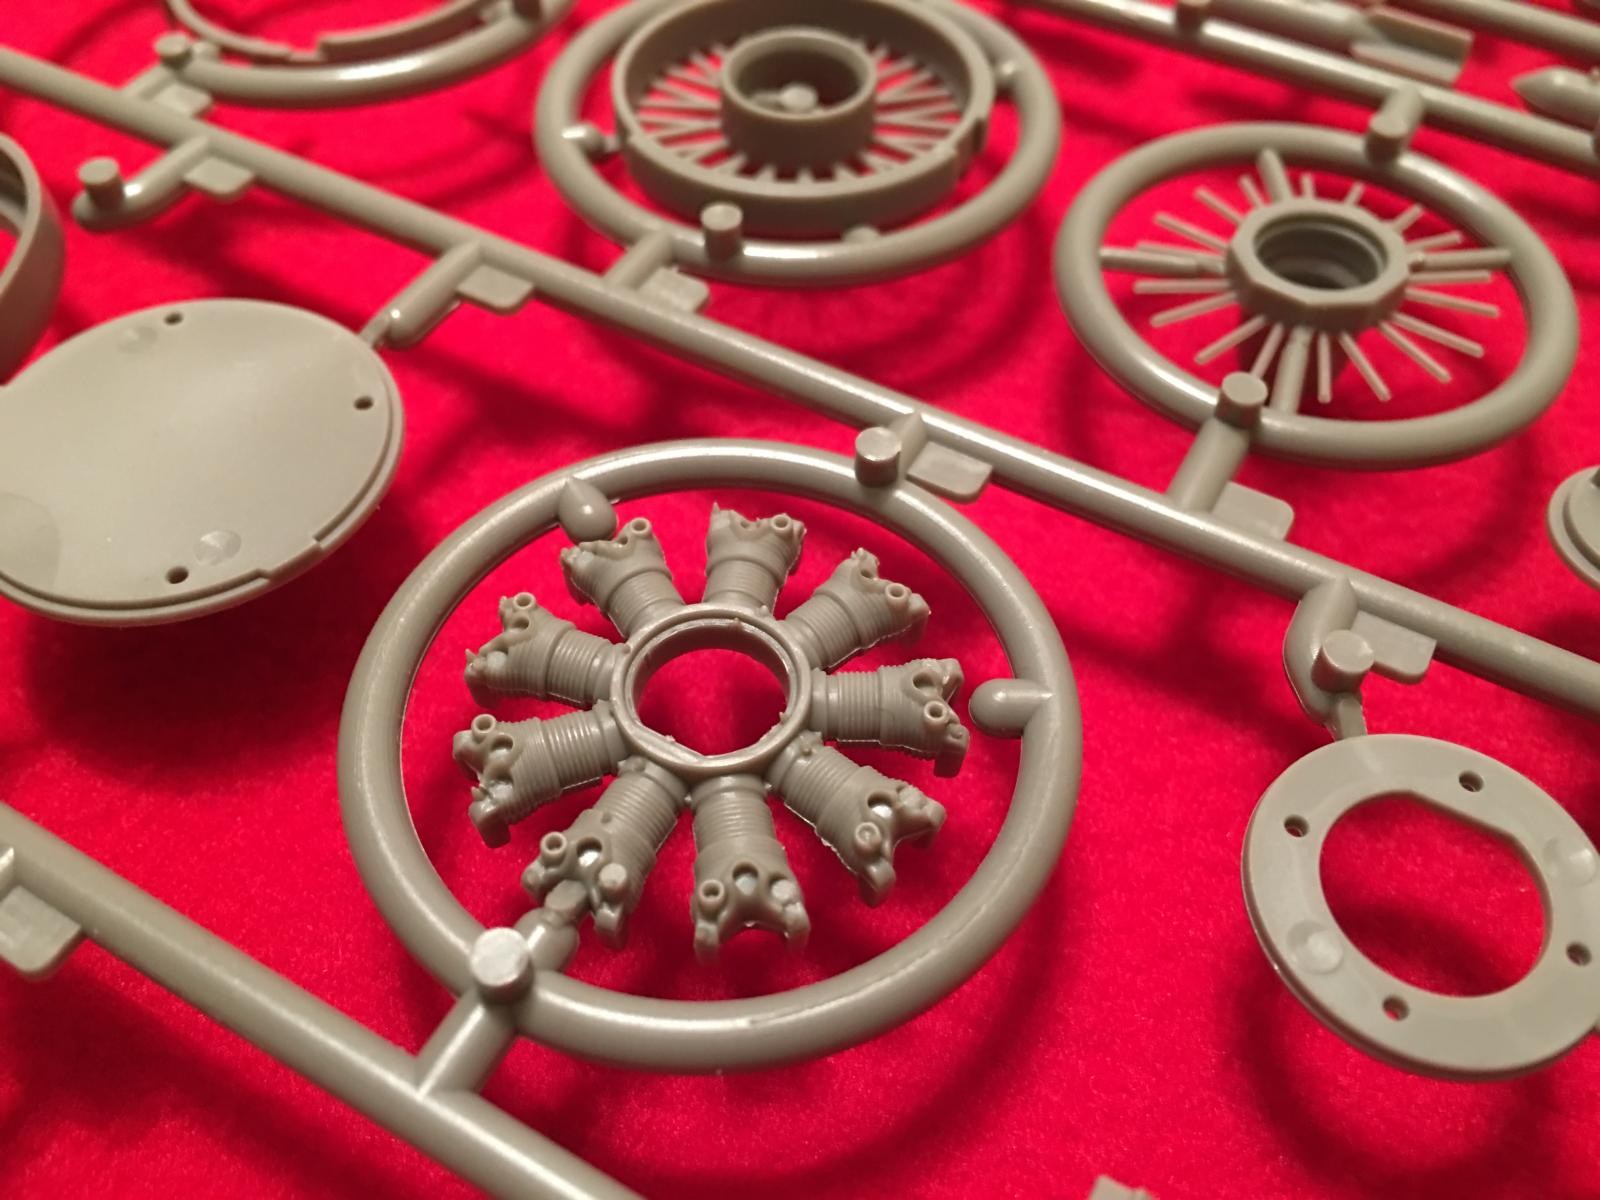
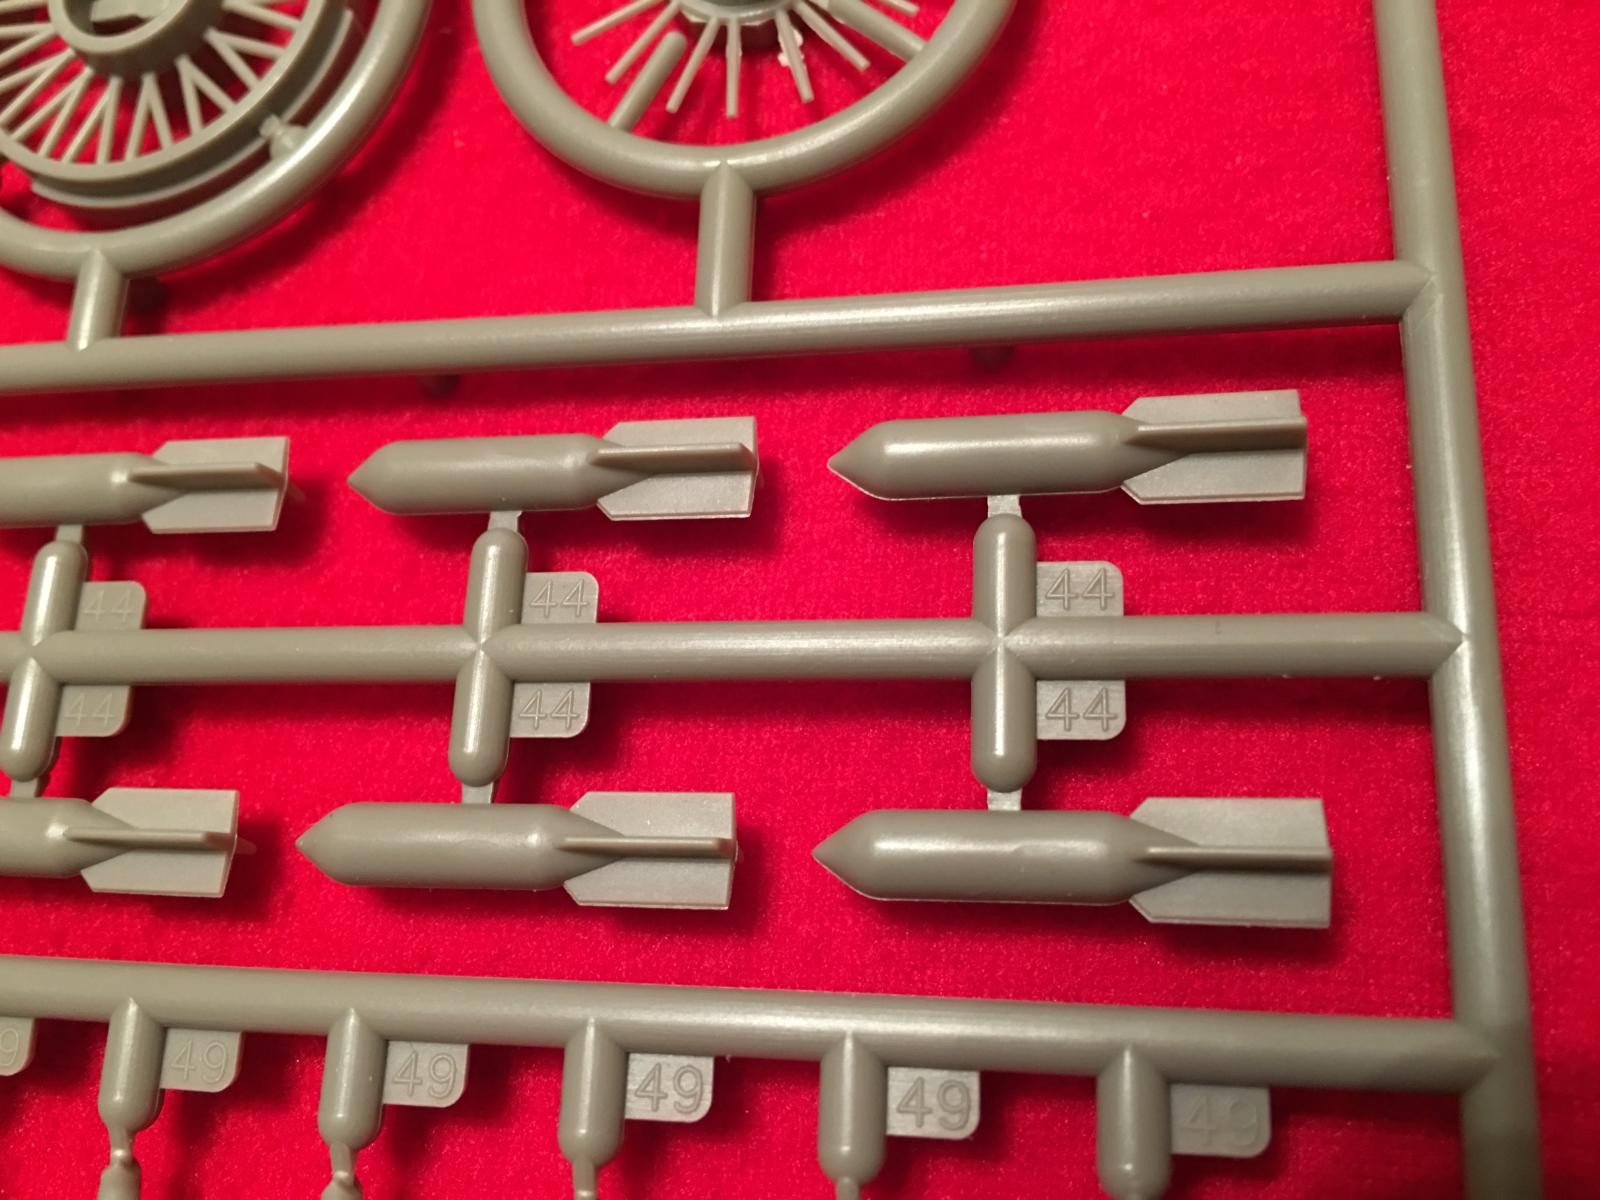
As mentioned above, there are two "D" trees. These contain the engine, exhaust, propellers and bomb loads.
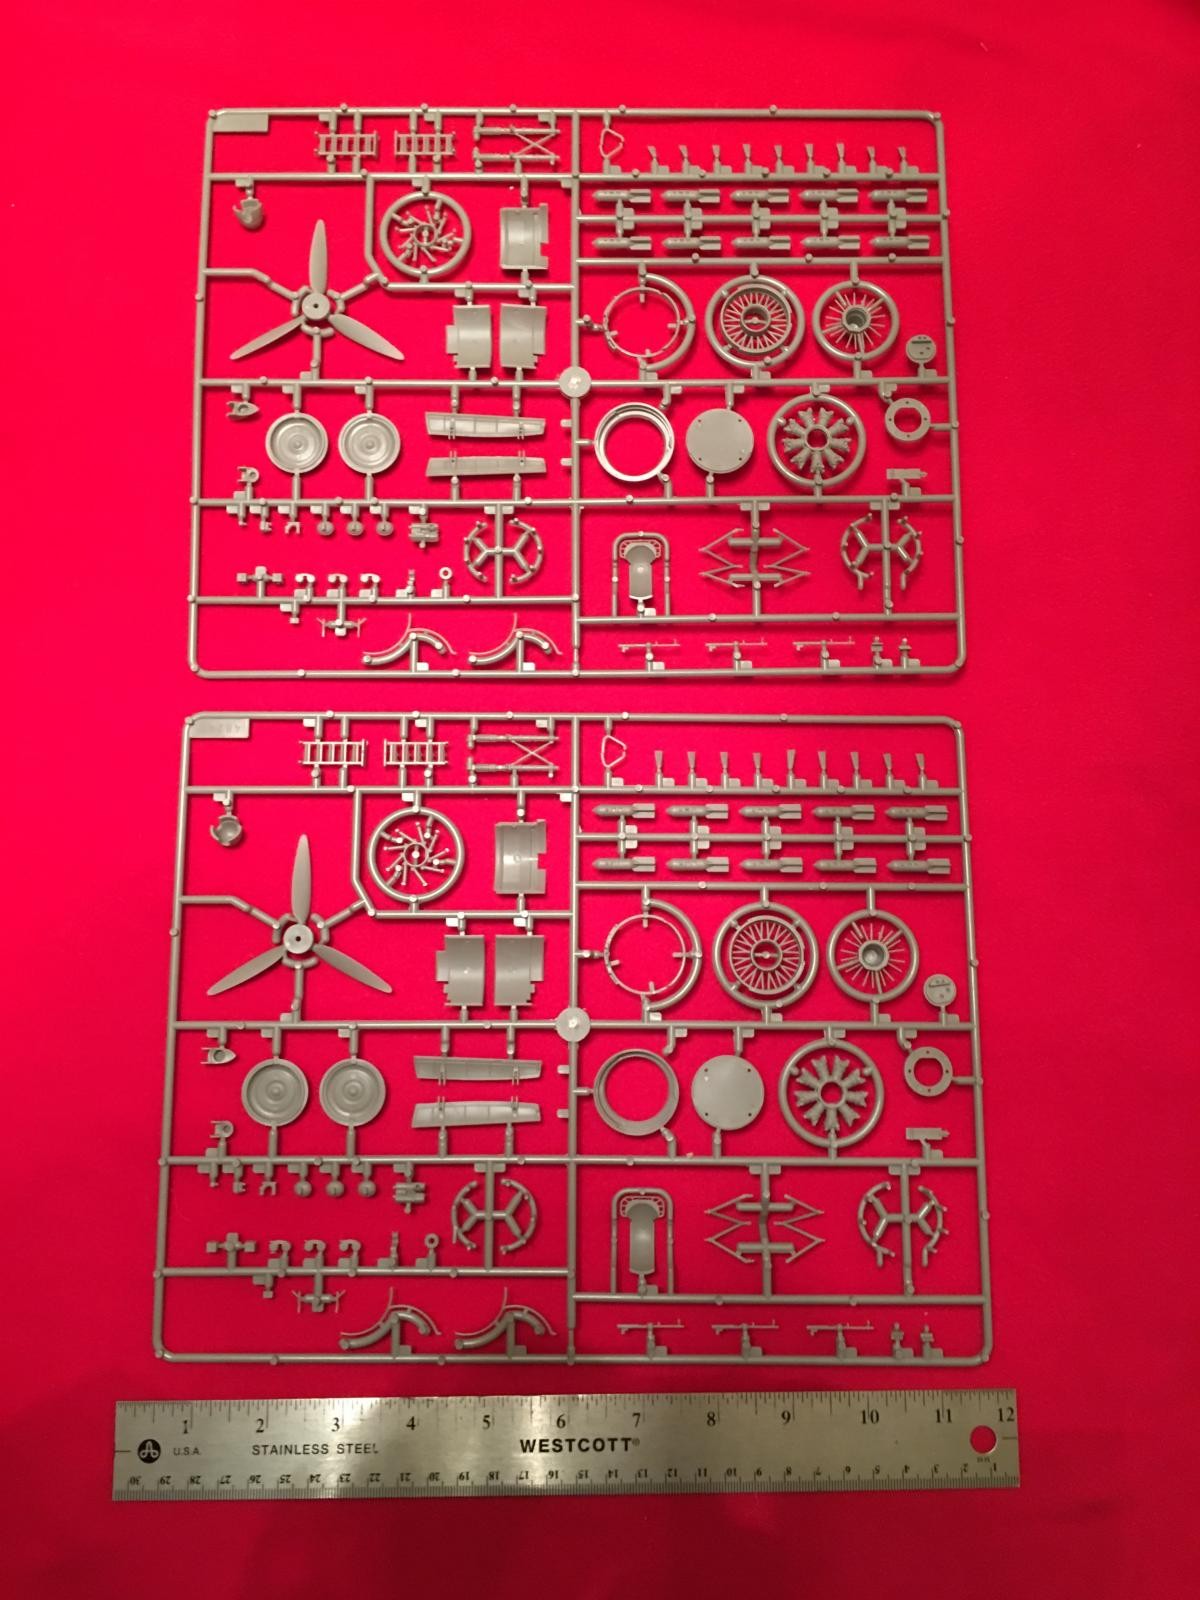
This is a close up of the "D" tree.
Followed by the "C" tree that contains the engine nacelles, various cockpit parts and landing gear wells. In the lower left of this picture you can see the extended range fuel tank that can be installed if you desire in the front bomb bay opening.
My kit had one part that was broken off the plastic tree when I opened the box. It was the tail wheel. Luckily nothing was damaged when the part was snapped off. Here I'm pointing at where the tail wheel should be located. It's part number #15.

I noticed that one set of exhaust pipes also had some minor damage on my sample. But it's nothing that is going to be a hard fix. All I need to do is glue the pipe back in position as shown in this photo below.
Speaking of exhausts, here is the other style ICM included. This one has the collector dumping into two separate exits near the top of the cowling.
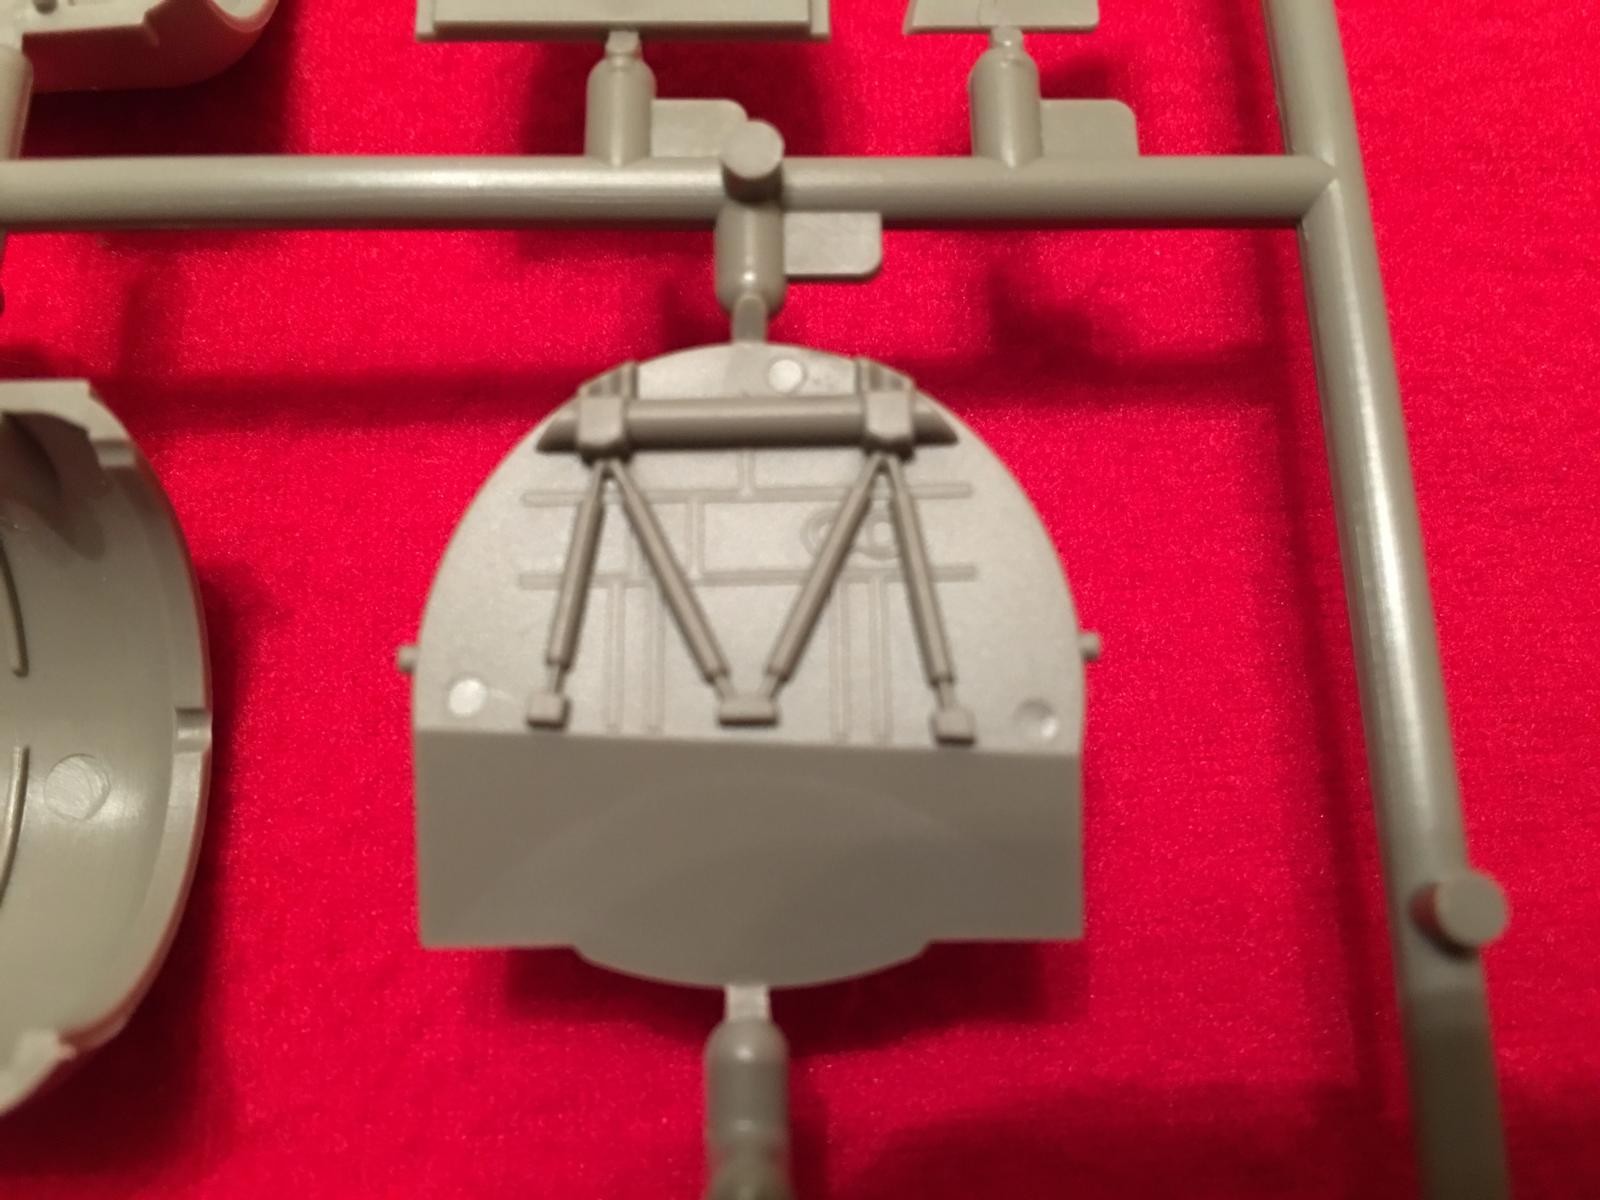
In this next photo you can see the other style of exhaust. This type has individual stacks. In this photo you can also see the cowling braces that allow you to pose the cowl with the panels open to expose the engines if you desire.

The engines are nicely molded too. They look like they will be very detailed once built and installed.
Here are a few close up photos showing the details on some cockpit parts.
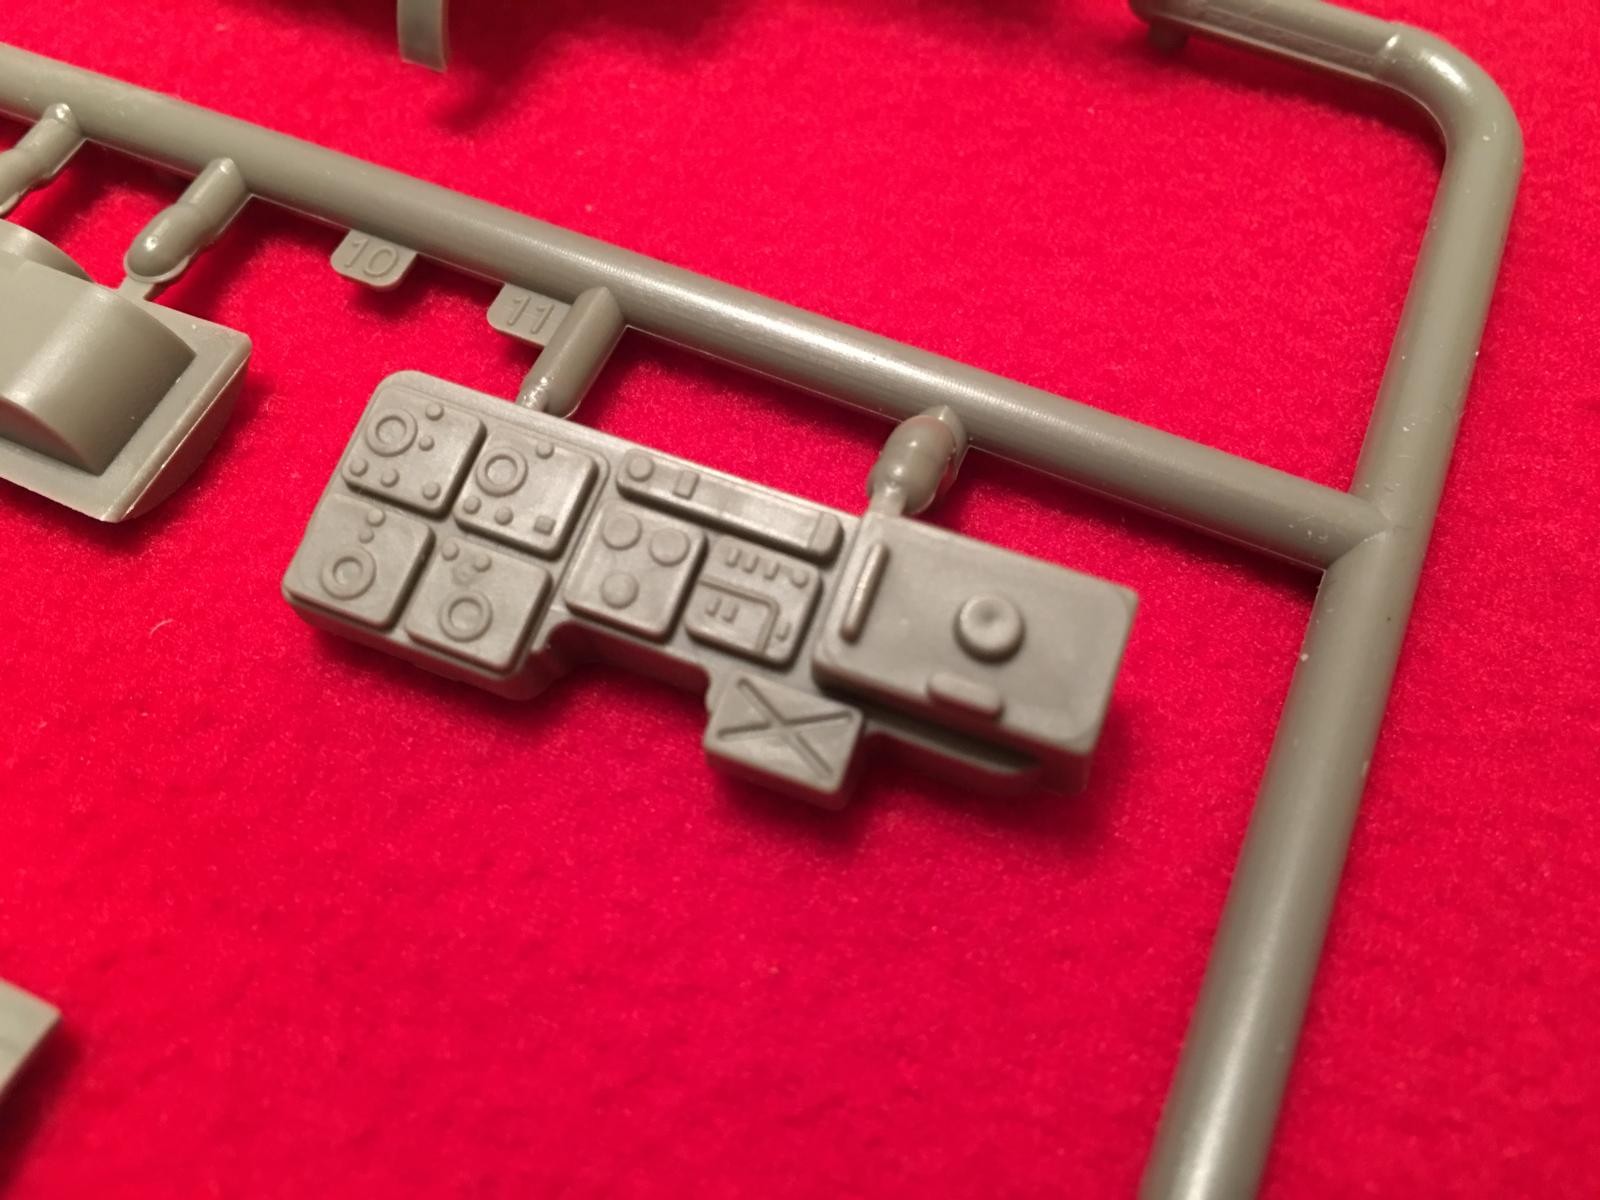
The instrument panel:
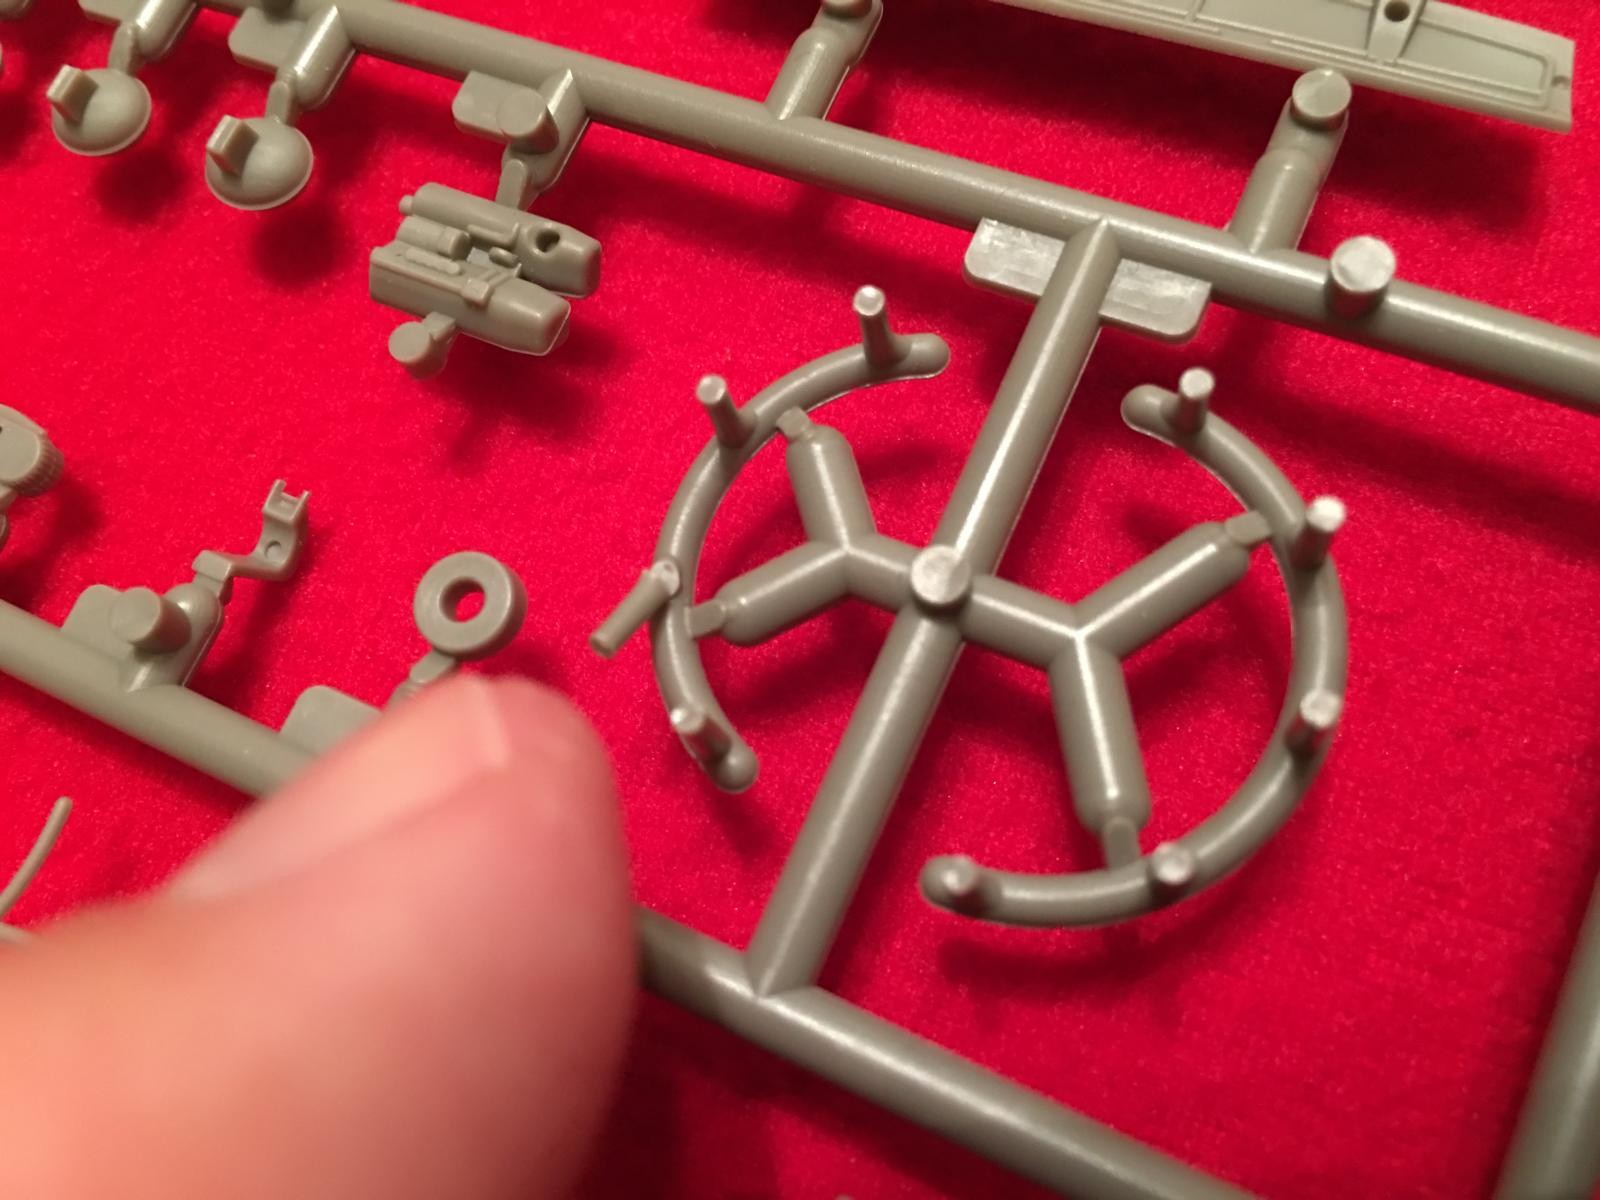
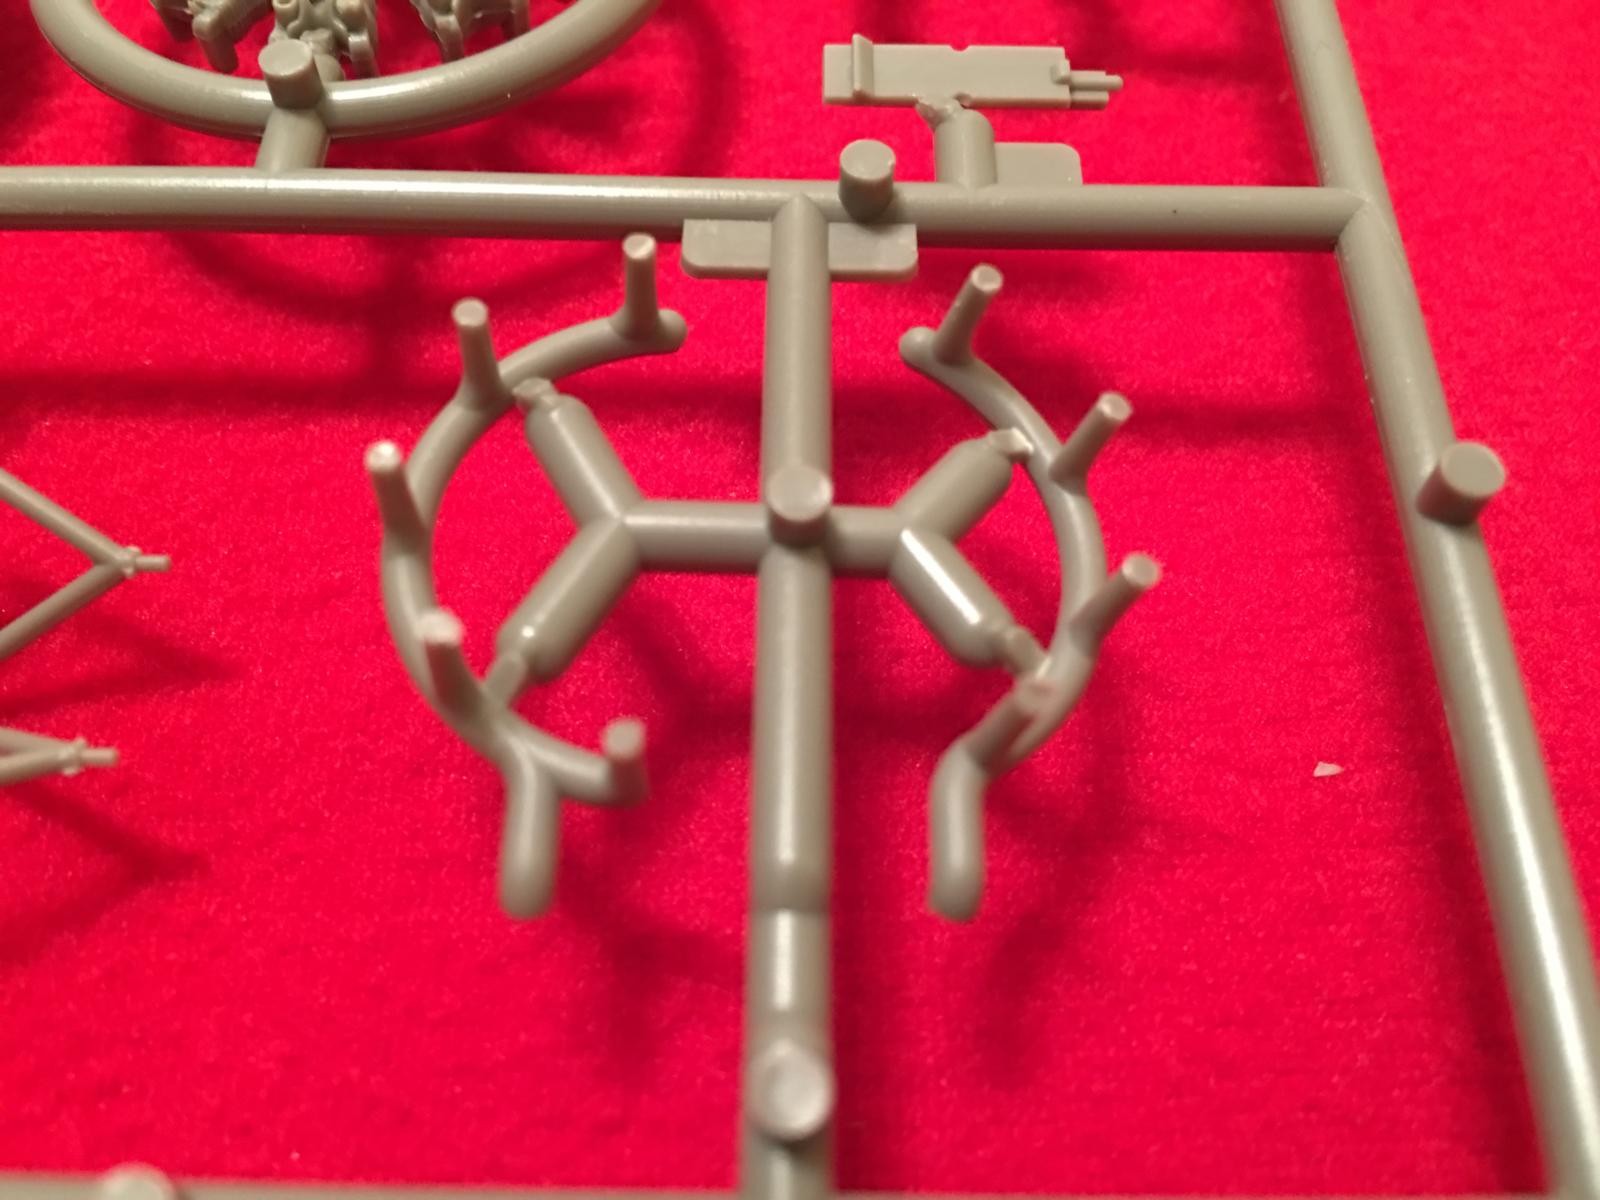
Gunner seats and control wheels from the center bomb bay.

Radio set:
The landing gear parts appear to be delicate, so care should be taken to remove these parts from the trees.
The main wheels have nice details too...

...as do the inner gear wells.
The other side wall parts shown in the picture above, glue to the inside of the nacelles.
These details are molded into the lower side of the upper wing half. This will represent the upper portion of the main landing gear wells.

The only ejector pin mold I noticed is located on the under side of the main gear mud guard. This will probably be covered by the main wheel once it is installed, and will probably not be a problem.
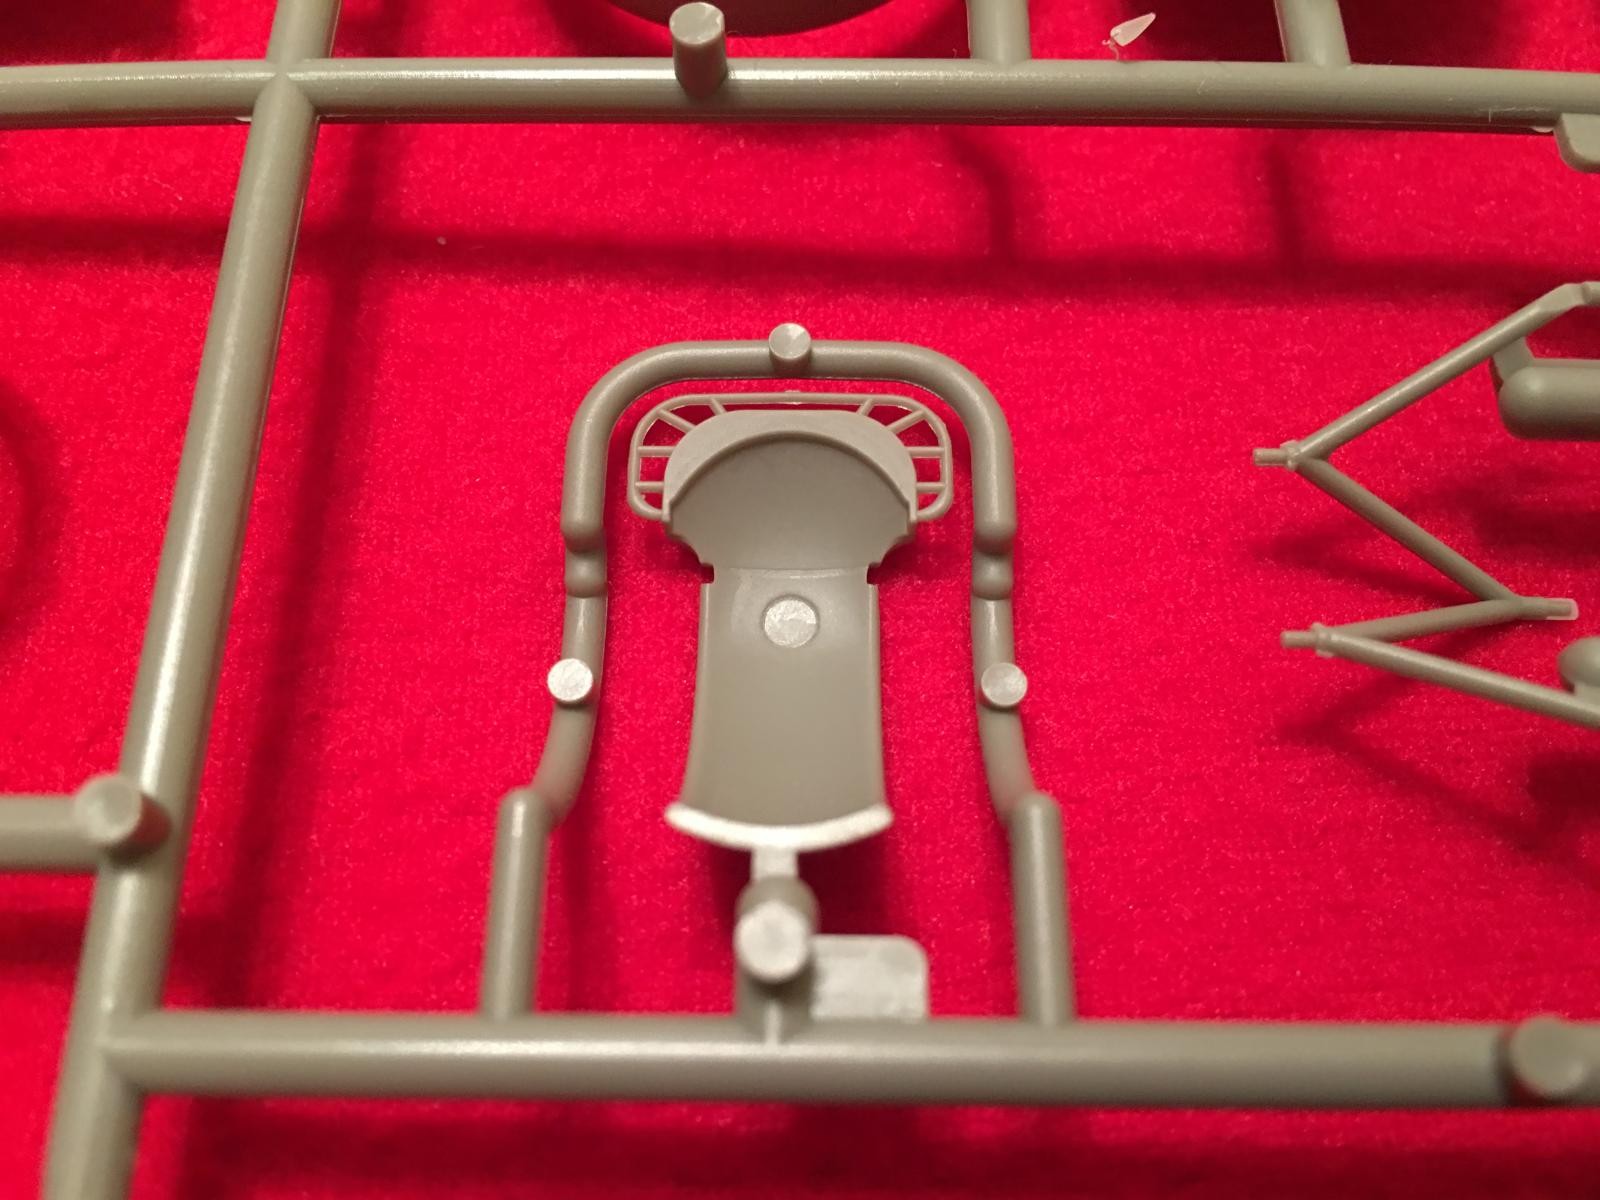
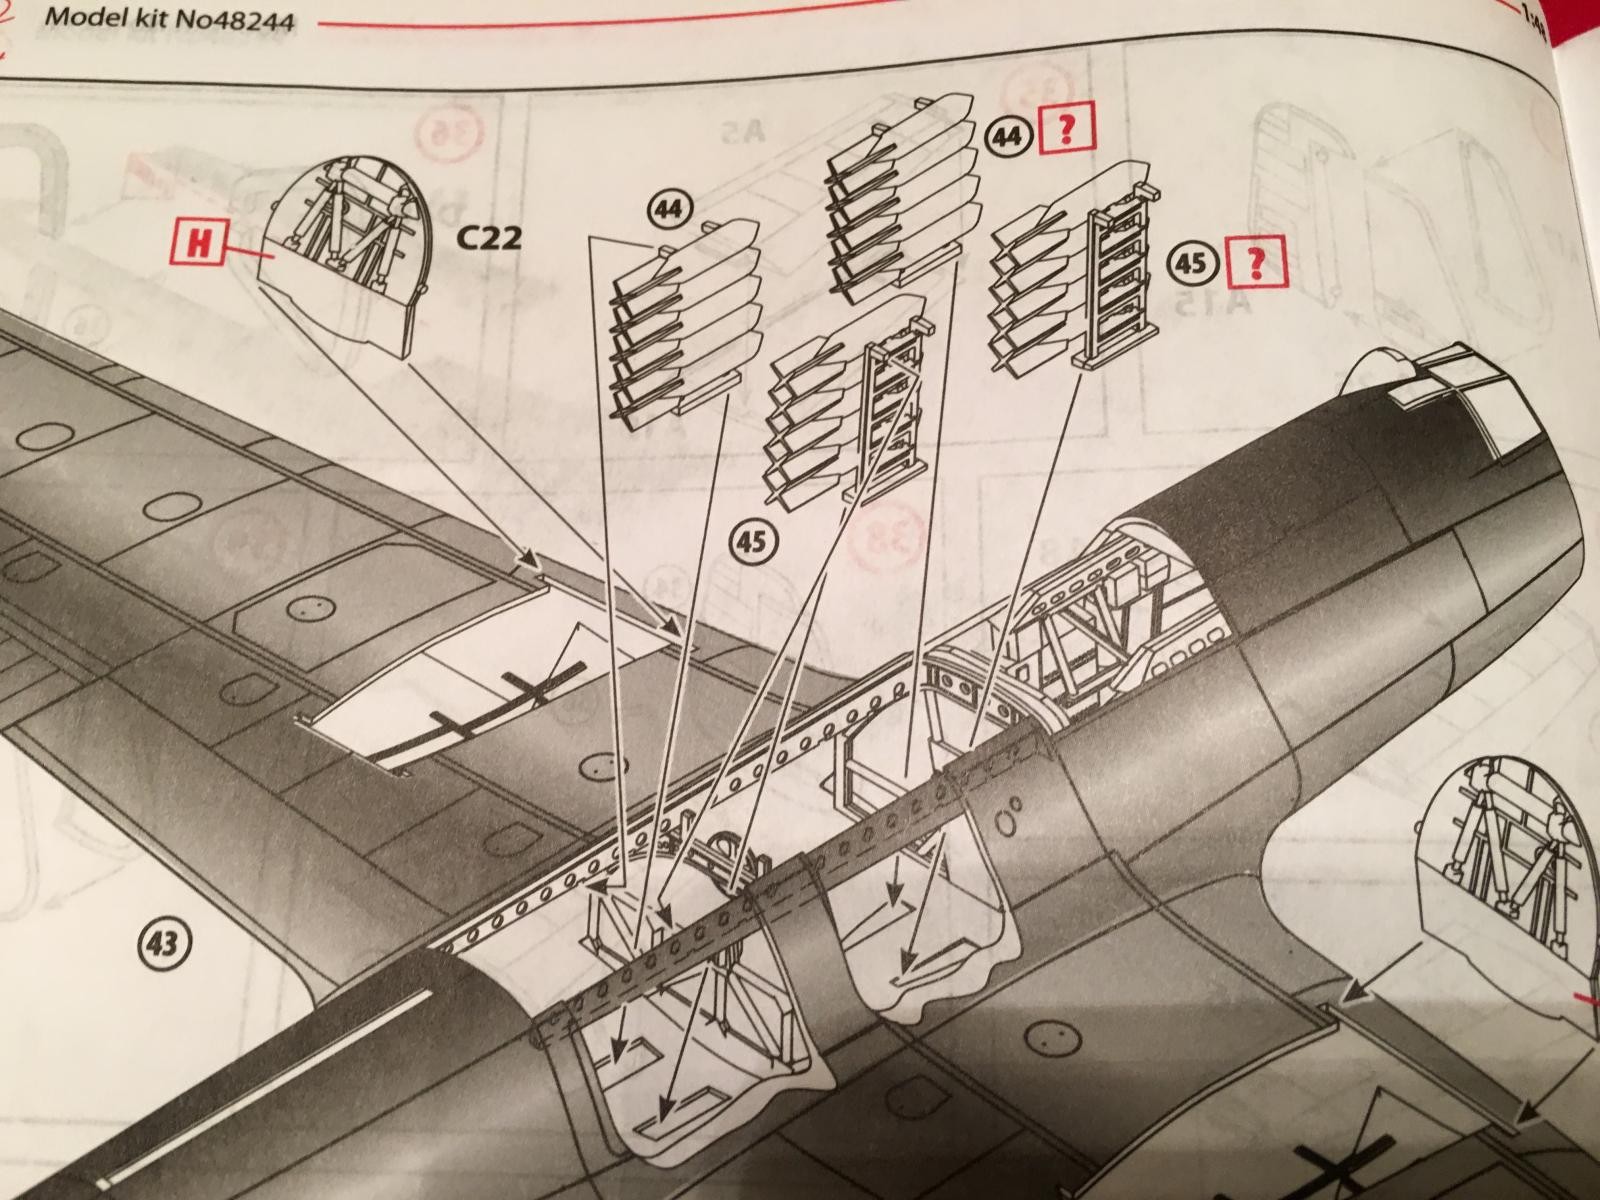
The crew served weapons are nicely molded too. The MG's look the part to me. They can be seen towards the bottom of this photo shown below.
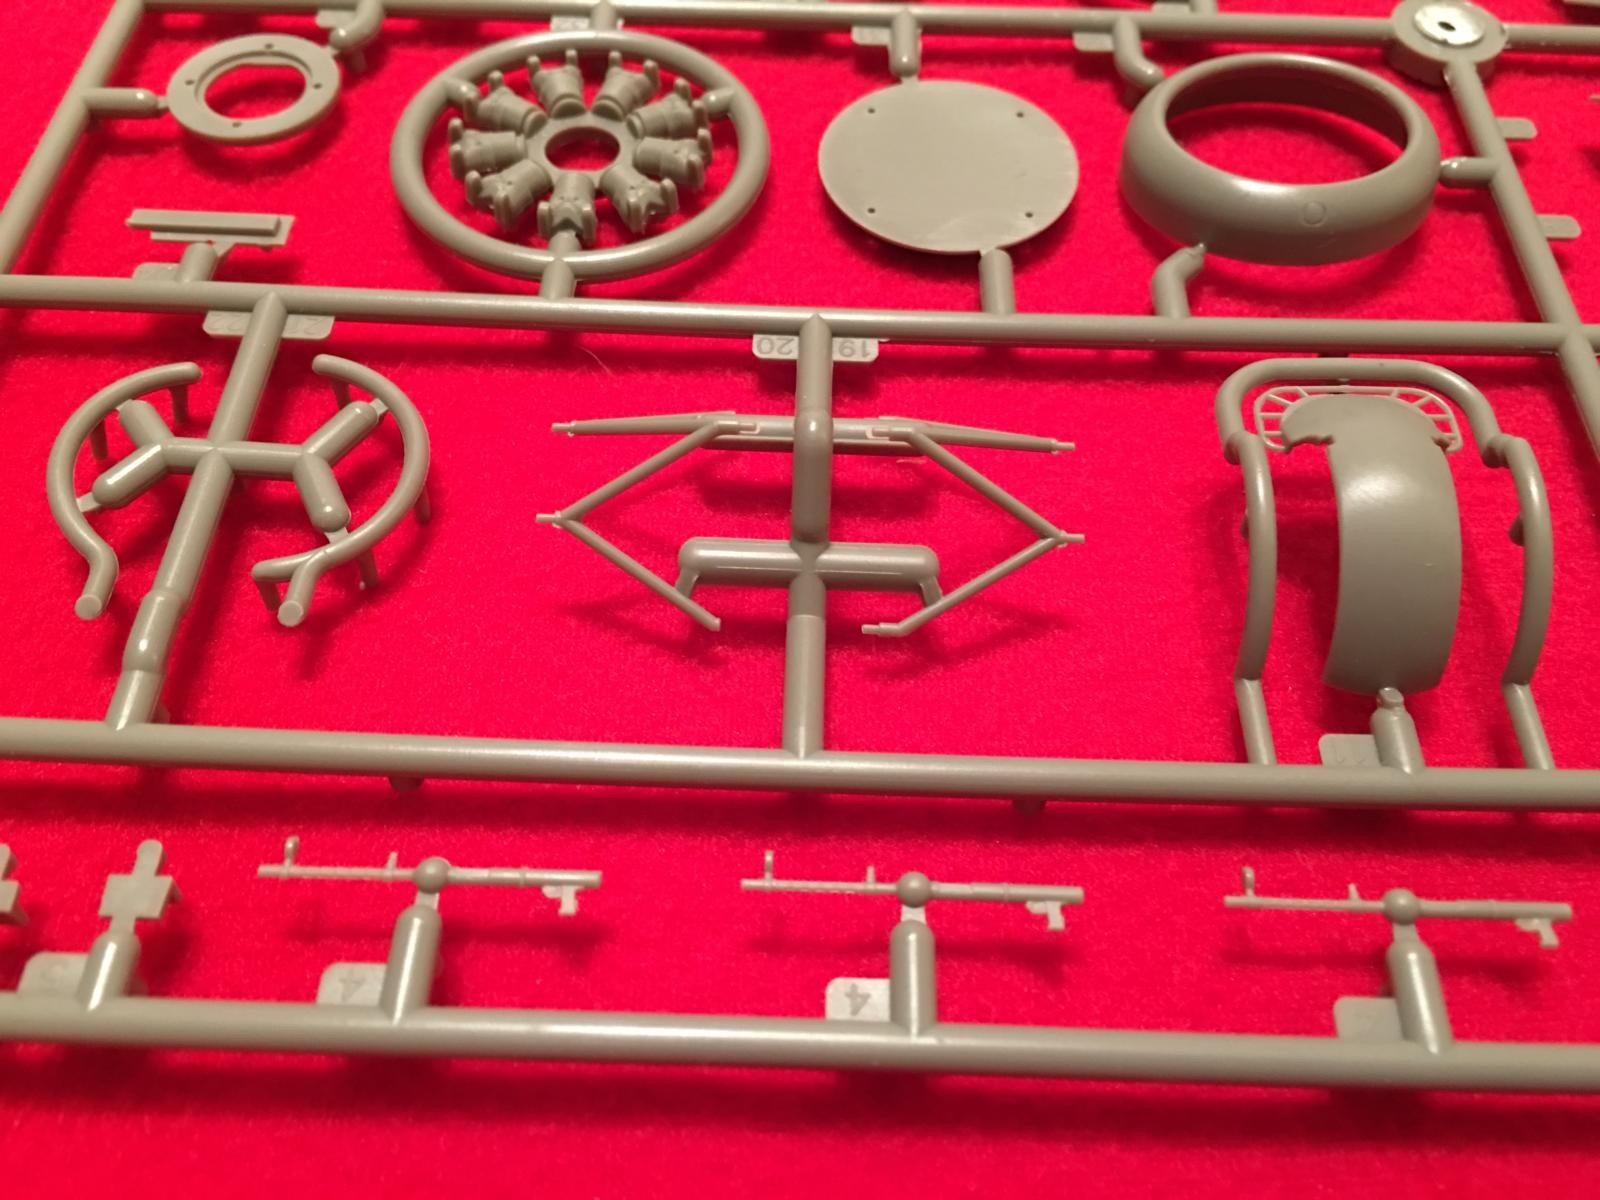
Several "snail drum" ammunition magazines for the MG's are also provided. They are located towards the center of this picture. The spend ammunition casing and link bags are also provided as a separate part. They can be seen towards the top of the photo.

The bomb load is nicely done. One size of bomb is provided, and there are enough to fill both bomb bays.
The propellers also look very good. They are molded as one piece.

Panel lines are nicely done too. They don't appear to be very deep or too shallow. I think "Goldie Locks" called when she said it's "just right". The panel lines look like this on top of the wings. The fuselage looks just as nice.

The control surfaces are individual parts and can be posed separately from the flying surfaces. The fabric looks convincing to me. Here's a few close ups, so you can judge for yourselves.
Elevators: I know that there has been a "Corrected" resin part made to be used as a replacement for the kit supplied elevator / stabilizer set. I don't know if the kit parts are "exact" or not. But they look "good enough" for me.

Rudders and Ailerons
There were several parts listed as "Not for Use" which caught my attention that another possible version may be coming out. It's possible these parts were used on the other Do-17 kit that was released a little while ago.
Here they are.
This looks like an under fuselage gun pod that was typically used on Night Fighters.

and this is a "four gun" nose, also possibly used by a Night Fighter variant.

Well there you have it. They say that if something looks like a duck, walks like a duck, and quacks like a duck, then chances are it's a duck. This sure looks like a Dornier 17 Z to me, but I'm not an expert on the type. I didn't measure anything or compare it to scale drawings. Personally I'm just happy to have a modern version of an important early war Luftwaffe twin engine bomber available for us to enjoy.
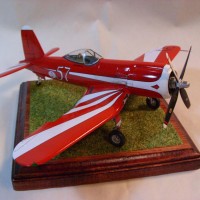
I can tell you this: It won't stay in the "To Build" pile too long, as I have already made plans to start a build journal here on Imodeler as part of the new "Nose Art" Group Build. I'm building it as the plane with the red Devil, "depositing" his bomb while holding a pistol in one hand, and gesturing with the other. I believe that Alan Price has built a Dornier using the same markings, and posted it here as part of his Battle of Britain postings.
This one was provided by me, courtesy of my wife's credit card. I can highly recommend this one to you. But please take a good look at the pictures I provided and make a choice on your own accord.
Now I have two cool looking ICM 1/48 kits that I have posted reviews for. Both kits are just begging to be built. This one and the Heinkel 111. I liked this new mold Dornier model so much, I had to purchase another one:-) If I didn't have so many He 111 Monogram kits already in the stash, I would have purchased a few more of them too.
Thanks for reading this lengthy review, and as always, comments are encouraged.
Take care. Now go build something:-)


A most comprehensive review, Louis...thanks for sharing all the info. 🙂
Thanks buddy ! I have a little more to go with a better description of the plastic parts, and I'll have it done. Take care my friend...
Bring out the Ju-88!
Will do... I will try to get it posted in a few days. Please stay tuned !
Agreed, Ju-88 please! And I'm looking forward to a build log, since I also have this kit!
Will do Robert... Also, I started a build log for this one in the "Nose Art" GB.
Please stay tuned for the Ju-88 kit review. I will try to get it posted in a few days...
Great review... Note that this kit shares a number of Sprue trees in common with their Dornier Do 215 kits (The Daimler-Benz engined "export" variant that ended up mostly impressed into Luftwaffe service, usually as a recconnaisance/bomber machine & Some were also nightfighters.)
According to ICM, they will be releasing a Dornier Do 217 J Nightfighter later this year.
Thanks Brett !
Aha... Do you think the Night Fighter parts I found in this kit will be part of the Do-217 J ?
These extra bits do look a lot like they may also be parts "possibly" used in the ICM Dornier Do-215 B-5 "Night Fighter" kit. I don't have that one on hand to use as a comparison. The nose on the 215 looks to be the same as what is provided in this one as an extra "Not for Use" part in the Do-17Z kit.
I will be looking forward to the next new ICM releases for sure.
Thanks for the review! What do You think about the plastic? I hated to work earlier ICMs because of their very soft plastic.
You're welcome ! I don't know how the plastic is, but I will be finding out very shortly. It didn't have the same feel to it as the earlier ICM kits. Once I find out by starting the build, I will let you know.
Fantastic review Louis, thanks for sharing this. I think they do some great kits at ICM, and I had a very nice talk with them in Nuremberg about their new releases for this year. My wishlist grew a bit longer I must say.
Thanks my friend ! I agree, they have really improved over the last few years.
I noticed the built up ICM 1/48 Heinkel you posted in one of your photos covering the show. It looks really good completed ! I don't know how much longer I can wait before starting it too ... I am waiting for the new Do-217J to come out. It will probably end up in the "to build" pile too...
Louis,
A comprehensive presentation that follows what the average modeler does when opening the box. Its a great nuts and bolts approach. In this case it looks as if ICM is doing a full court press and preying on people with loose credit card habits.
In the box looks good.
Two thumbs up.
Thanks Stephen ! They persuaded me to purchase several of their new kits. Two of these Do-17Z's, a Heinkel He-111H-3, and the Junkers Ju-88 A-5.
Thankfully we paid off the credit card balance at the end of the month... Otherwise, one could get into serious financial trouble by temptation. 🙂
I agree in the box it looks great. I just started a build log in the "Nose Art" Group Build for this one. We will soon see just how nice it builds up... Lets keep our fingers crossed.
If it builds as nice as it looks, I will be VERY pleased...
Take care my friend.
PS: I will be doing another kit review (like this one), on the newer ICM 1/48 scale Ju-88 A5 in a few days. Please stay tuned.
It looks quite nice, thanks for the review. Unfortunately, they seem to have copied 2 of the glaring errors of the previous release. The variable incidence horizontal stabilized is poorly represented or missing, with the "whale tail" between the elevators being too wide (the Vector resin tail can correct this) , and the engine cowl front with a forest of supposed "cowl supports" that seem base on misinterpreting blurry photos of pushrods as supports, this will require a little surgery, but shouldn't be to hard to correct.
You are welcome Colin.
I was not aware of the problems with the adjustable incidence tail feature, or the cowling support structure. Thanks for bringing these to my attention.
The photos you provided will be a great help when I build my kit. I can use them as a great reference source. I may pick up the new / improved Vector resin corrected tail you mentioned. I'll try my best to scratch build the cowl support rods.
Thanks !
Hi
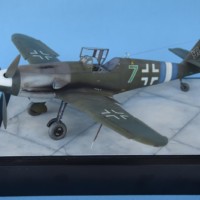
If it's of any help, here are a series of pictures of the cowl support rods and horizontal stabilizer mods that I did on the Classic Airframes kit (they also missed the boat on these areas) ...
Hope they help,
Colin
Colin,
These additional pictures you posted are a fantastic addition to this kit review. I know that I will be using them as a reference when I build mine. Now we all can make a more informed choice, and will know what to do, should our fellow members decide to make the corrections.
Until you posted what you knew about this kit, I was clueless. I didn't know about these errors. However, they don't look to be too bad, and will not be a deal breaker for me. I will be definitely using your photos as a source to correct my planes. Thank you !
By the way, your Dornier build looks amazing. I really like how you modelled the adjustable trim tabs on the elevators...and represented the cowling braces.
I do want our readers to be correctly advised on any reviews that I write. I want to remain fair and present the facts as they are. This way the readers can make their own informed decisions.
I am still very anxious to start my Do-17Z build, and now that I have these extra photos I can make it even better.
Thanks again for all of the help. If you don't mind, I may ask you for a few pointers along the way when I start construction on mine.
Take care.
Great review. ICM has really improved over their earlier efforts. So has their quality control. This and their HE-111 are really impressive. Be nice to see their JU-88, as compared to the DML multikits.Nice engine photos, Colin.
Thanks Bernard. I agree that ICM has really "upped" their game recently. I was very impressed with their new tool 1/48 scale He-111 kit that I posted a review on a few days ago.
The 1/48 scale ICM Ju-88 A5 "new tool" kit still has the shrink wrap on it, (but not for long though). I will post a comprehensive and fair review on it in a few days, similar in style to the reviews on the He-111 and the Do-17Z.
Please stay tuned my friend.
I may soon be posting a few other future reviews that I have in store as well.
Coming down the pipeline is the all new tool Revell of Germany P-51D Mustang in 1/32 scale, along with a good look at the new 1/32 scale Heinkel He-219 A-0 / A-2 "Owl" Night Fighter, ending with the all new Revell of Germany 1/32 Me-262 B-1 / U-1 twin seat Night Fighter... These new 1/32 scale Revell kits look pretty good too !
Thanks for this, Louis! Wow, it looks like an amazing kit! I can't wait to see you build it!
Thanks David ! It's great to see you back posting again my friend.
Yes this kit looks to be very nice. My photos really don't do the kit any justice. It actually looks even better in person.
You won't have to wait long my friend... I started a build log on the Dornier in the new "Nose Art" GB section. As soon as I clear a few other projects off the work bench, I will get started on it. I'm really excited to start on the He-111 too...
Take care buddy...
It looks very nice! ICM has some very good new models, both airplanes and vehicles. I like Dornier airplanes very much, especially their design. When my country was Kingdom of Yugoslavia we had very good airforce and among orhers we had Do 17 and Do Y ?
Thank you Alexander. I agree this new tool kit looks very nice indeed...
I really like the Dornier's too !
It looks very nice! ICM has some very good new models, both airplanes and vehicles. I like Dornier airplanes very much, especially their design. When my country was Kingdom of Yugoslavia we had very good airforce and among others we had Do 17 K and Do Y ?
Great review Louis, light years ahead of the Hobbycraft Do-17Z I built over 20 years ago and still have sitting among it's Luftwaffe brethren. When I built it, at the time there was no comparison and very little in reviews for this kit. And any aftermarket items other than True Detail resin wheels and decals from I believe 3rd Group. Despite the slight banana shape of the fuselage from stem to stern it was a simple build and for me fun as well. Who cares if it's off a bit. This Dornier is quite tempting. ICM has stepped up, like Airfix they are putting out some nice kits. And you know I do not have any ICM kits in the stash or had the privilege to build one. Thanks for sharing.
You're welcome Chuck.
I have been looking at your Dornier build and it looks really nice. Imagine having another one parked next to it...
This new tool ICM kit is light years ahead of the HC version. (I really like the new tool 1/48 He-111 that ICM came out with too). In a few days I'll do a kit review on the new tool 1/48 scale Ju-88 A5 they released a little over two years ago.
Just like Airfix has done, ICM has stepped up to the plate. I have been very impressed with their latest releases.
I also like the new tool Revell of Germany 1/32 scale kits. I'll be doing a few kit reviews on some of them too.
Please stay tuned my friend. Good to hear from you.
Very much like ICM also in armor. Dimensionally they are accurate and the mold/price ration can hardly be beaten. Thanks for this review Louis!
You are very welcome Michel ! I have never built any ICM Armor kits. But that may change... I agree that you get a lot for your money with one of their new tool kits.
Fortunately I have the D-Mold resin correction for the tail. Vector is the one currently available and is very useful. SBS Decals also does a nice sheet for this model as a Finnish AF plane. I need to get around to building mine, it's been here since they were first released two years ago. (bad Tom, bad! bad!)
The Ju-88 is a very nice kit, other than a modification to the flooring inside, which isn't accurate (though once built it's hard to notice unless you're "anal").
That is great news Tom. I will try to get a Vector replacement for mine. If I can't, I'll try to scratch build it up like Colin did on his Classic Airframes kit.
I have several spare decal sheets to depict various Luftwaffe Dornier's. (I believe they are from Super Scale). The kit decals look pretty nice, but I have never used any by ICM. But this too will soon change.
I have the 1/48 scale ICM JU-88 A-5 you mentioned, and have been looking at getting the "sister" to it, the A-14 version in desert finish as well. From what I have seen at a quick glance, just like you said, the Ju-88 looks like a nice kit too. ICM has really come a long way and they new tool kits are very impressive.
I plan on doing a kit review here on Imodeler on the new ICM Ju-88 A-5 in a few days.
It will be written in the same format as this one and the He-111 are. I have to ask, what modifications were needed for the floor of the A5 ?
I have heard the exhaust from the A5 are wrong, as the supplied kit parts are actually for an A-4. I'll try to confirm that before I post my review though. There have been some online grumblings about the radiator faces too. I'll try my best to find out exactly what the deal is before I do my article.
But man oh man, the new tool 1/48 scale ICM He-111 is the bees knees ! It's absolutely gorgeous ! I don't know how long I can resist starting on that one...
I'm not sure what I like best, the new ICM kits or your enthusiasm, Louis, these reviews have been very enjoyable, I'm looking forward to hearing what you say about the JU 88.
Ha ha, good stuff George !
I do get excited over these new kits. I could be compared to a little kid in a candy store... But on the other hand, these new releases are pretty nice too.
I'll post up a new kit review on the 88 in a few days.
Take care my friend.
Isn't that what its all about...the enthusiasm of being the adult kid,having fun and learning a little history and sharing. Your not working on commission Louis ;). Spreading the good word that is...
Hello Stephen !
Yes having fun is what the hobby is supposed to be about. There have been a few times however when something isn't going right during a build and it tries your patience. That is when I normally just walk away and think about what is going wrong. Eventually things have a way of working themselves out.
As far a getting a commission, No not me. I post an honest review showing the facts, that's all. I post pictures and let the reader decide for themselves.
On occasion I learn something new about the kit, which is what happened here with the engine mounted supports for the cowling, and the variable incidence tail.
The correct information was provided by a fellow member and that was outstanding. I learned something from the pictures and descriptions, plus this helps everyone else to make a more informed decision.
That is exactly what I wanted. As a group our postings have made this kit review even better.
But then like you said, having fun is what it's all about. If you don't then it's no longer considered a hobby. Then it becomes a four letter word... Like "work" ...
Thanks again for the comments ! I hope that you have enjoyed this review.
Please stay tuned for more of them.
As soon as I get the instructions sorted out on the new tool ICM 1/48 scale Ju-88 A-5, I'll be posting a kit review on it too.
Then I'll be switching gears and going into the 1/32 scale kits and plan on posting kit reviews for several of the new tool Revell of Germany releases.
These will include the Heinkel He-219 A-0 / A-2 Uhu, the Me-262 two seat night fighter and the brand new P-51D.
From what I have seen by looking inside these boxes, they're all pretty sweet.
Stay tuned for these kit reviews and possibly some more later down the road.
Dear Louis,
Thank you for this comprehensive review. It was very useful and the way it is presented is pleasant and practical in particular regarding the instructions. It helped me make my mind and I have just ordered the kit in a « new moules » series. I will see what it means.
Thank you again.
Olivier