Making Realistic Lights on Models
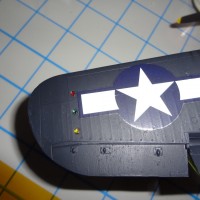
Many World War II U.S. Aircraft had three colored lights on the underside of the aircraft. The location of these was typically on the bottom center line of the fuselage or near the edge of the starboard wing tip. The purpose of these lights was a visual “Identification Friend or Foe” (IFF) system. At night you could not tell if an aircraft is friendly or the enemy. The U.S. came up with these downward looking lights to keep from being shot down by friendly fire. The colored lights are red, green, and amber.
Aircraft models today tend to mark these lights. Some kits provide clear lens for them but many do not. Typically the instructions have you paint the red, green and amber lights with gloss paint. This tutorial will allow you to replicate them on models that just have them marked and add a depth of realism.
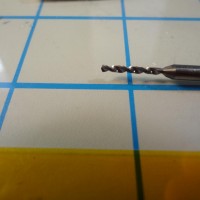
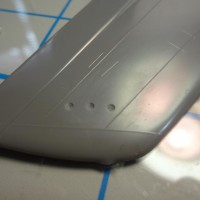
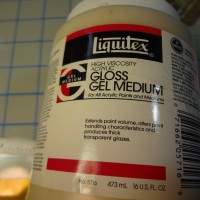
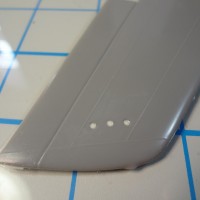
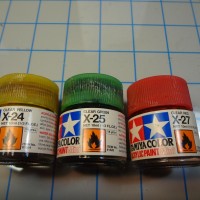
The tools required are a drill, a jar of acrylic gel, toothpick and paints in the following colors: Chrome Silver, Clear Red, Clear Green, and Clear Yellow. Start by drilling into the plastic with a bit the same diameter as marked on the model to create a concave divot about half way down the thickened of the plastic.
Paint the inside of the divot with chrome silver paint to simulate the mirror reflector of the lamp. This is what will give the lamp depth after painting.
After the paint has dried, fill the divots with the acrylic gel using a toothpick. The gel is a milky white and dries clear after about 10 minutes.
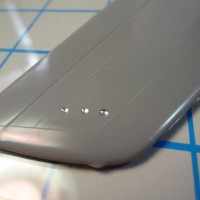
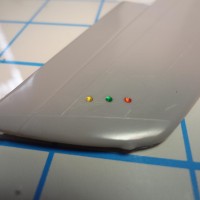
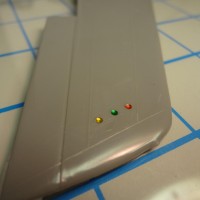
Once the acrylic gel has cured and clear. Paint the lights with red clear on the first light towards the front of the aircraft. Clear green on the middle light and clear yellow on the last light.
The recognition lamps will have a look of depth and reflect light to highlight their color. This adds a level of realism to the lamps and accents the area very well.
This also works for formation lights and wing tip lights! Check out some of my other tips and trick athttps://davidsscalemodels.com/tips-and-tricks/

Thanks for the advice, David. I used to simulate them by just putting a drop of each color onto the painted surface, the results being dull...
This trick with the chrome silver and the "lens" will do the job.
All the best!
A great tip, thanks for sharing.
Actually, they are formation lights for night flying, not IFF lights. If the wingman can see the red, he's too close; the green, he's in position; the yellow, he's lagging and needs to close up.
Your way of making these is very good.
Tom,
They are recognition lights. The pilot controlled all 3 lights including steady or flashing as well as which lights could be on or off. It was used to as a signal method to ground or other aircraft. I have added the actual ARMY Air Corp drawings. Formation lights are typically dimmer blue lights that can be seen when the aircraft are close to each other during low light or night flying. (modern jets use light green EL panels) They were dim so they could not be seen from a long way away but seen easily by the other aircraft in formation. For more info see https://ww2aircraft.net/forum/threads/recognitiion-lights.11908/
3 attached images. Click to enlarge.
Hello David.
Yes you are absolutely correct on what the lights were used for. So please don’t take what Mr. “I think I know it all, just ask me” had to say.
As part of the pre mission briefing the pilots were given the “code of the day” and advised what colors or what sequence of colors were to be used if the mission was going to carry on into darkness. This information was also regularly passed on the the anti aircraft gun crews and other friendly aircrews for obvious reasons.
The control panel gave the pilot control over the lights so that they could be manually flashed by the pilot in a manner similar to Morse Code. Each light had its own switch and they could be operated independently or as one depending on what position the switches were placed in.
Thanks for sharing your methods of scratch building them. It’s a definite improvement over simply painting the lights on.
In the past I have used bare metal foil or a Molotow Liquid Chrome pen as a background and it looks really good once you paint some clear red, yellow and blue (or green) on it.
I finished my Monogram B-25J “Stuff” a few months ago and I had the opportunity to take some pictures of the real thing. Here’s my model
And the underside of the wing on “Tondelayo”
Thanks again for taking the time to post this article. I’m looking forward to seeing your next installment.