Seeking advice for an old model kit.
I am posting this seeking advice from people with more experience than myself.
I have posted before, I am getting back into the hobby after MANY years away from it. I am nearing completion of several models, including this one.
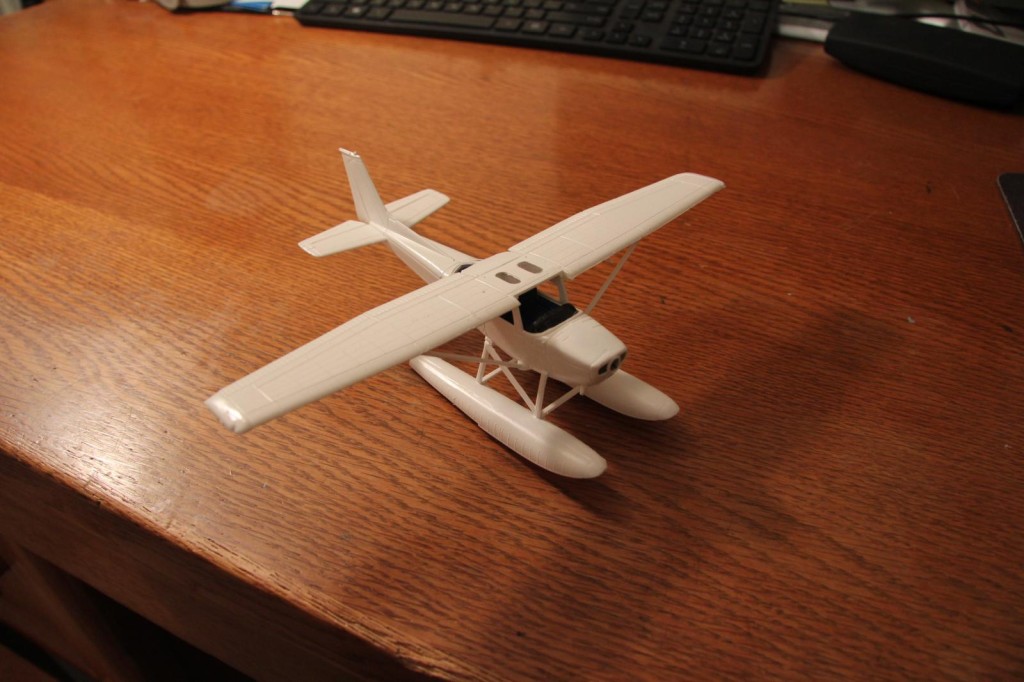
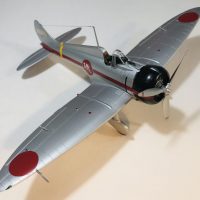
I have run into a new snag with this model. As you can see, it is a very old kit. I painted it white, then put a clear coat on (Revell gloss, spray can). I put a large decal on, a blue stripe down the side. As it dried it fell off! It had lost all the adhesion chemical. I even used micro set before putting the decal on and micro sol after putting it on. I suppose I could mask and paint a blue stripe down the side. Here are my questions:
-
I have other old kits. Any advice on using old decals would be appreciated. I have heard about taking a picture of them, then printing on decal paper. I do not have a color laser printer.
-
Could it have something to do with my clear coat? I have used the floor polish before, it worked well (with new decals). Cant tell what the culprit is because more than one variable changed (age of decals and clear coating).
-
Does anyone make new decals for old kits? That is a long shot, but had to ask.
Thank you.

Old decals are a hit and miss propostion I've had them work or not. Usually they come apart on the paper when I soak them but I suppose they could lose adhesive properties as well.
For replacements you could try Sprue Brothers, ScaleHobbyist, and Carcal which are the three places I know of and have done business with. Do a Google search I'm sure there are others.
I am not sure you'll find anything for Civillian aircraft tho, most of the stuff I've seen is military
Hi, Jim...
An interesting issue to try and help you with, this one... :-).
First up, I can't comment on the use of old decals, but if you want to make your own, you don't need a laser colour printer... a standard home-use colour inkjet printer will suffice, and I can vouch for this, having done it myself. What you will need is either the special white-coated decal sheets, or uncoated decals sheets, depending whether or not white is a colour you need on your preferred marking because inkjet printers don't produce white. Also, some colours like strong yellows or reds sometimes look better when they have a white background but please note, that if the colour of your model is dark, then unless you're very careful at cutting the decal from the white-coated sheets, you will most likely have a very thin white outline to it where you probably don't want it... just bear that in mind. There are, of course, ways to get round that... paint out the excess portion of the decal, or apply the decal to the model, varnish it in - I use Future floor polish - to seal it before painting the external surfaces, and when you come to the colour scheme a day or so later, mask the decal before finishing the colour scheme. There is always the chance it may still tear when you remove the cover, so please try first on an old model. I use Maskol as a cover material and you just apply it with a small brush. You can miss out the excess white edge to the transfer and your colour scheme paints will blank that portion out; Maskol dries to a rubbery coat so just peels off when you're ready for the big reveal.
So, once you've identified your preferred marking, it can be manipulated to the required size on Photoshop or some other similar programme on your PC. Once you've done that and scaled it to the size you need, that's you ready to print it onto the decal sheet. Adjust your printer to accept the decal sheet under the 'Paper Quality' tab, under something like 'other glossy papers' in that section, so the printer can produce the best results on your decal paper. It can be hit and miss to start with, but keep with it and of course, differing programmes will have different tab names so you will need ot familiarise the ones pertinent to your Photoshop/other programme type and printer.
A good tip - print a few examples so you have extras to hand if things go wrong, and remember to save the marking(s) to your PC for future use. Select your marking from your PC and print it onto the decal sheet. If/when you're happy with the outcome, you then coat the marking to seal it in. I used to use enamel gloss varnish, but when the decals came into contact with the water to separate the backing paper, it bled out completely. This is because inkjet inks are water-based themselves. I saw on YouTube, a guy using clear laquer from a spray can... the type of lacquer you'd use to seal in repaired paint work on your car. That's the secret... using that lacquer somehow seals the marking properly and prevents it bleeding out when in contact with water. Three light coats, about 45 minutes apart, the first from about 16 inches/45 cms, the next at 12 inches/30 cms and a third coat from about 7 inches/17.5 cms. Let them dry thoroughly before using them and of course, open the windows to ventilate or do outside, and use a mask. When you come to using your homemade decals, try to be patient and let them separate themselves from the backing paper but if all else fails, you may need to apply a little, careful pressure with your fingers.
At the link below, you'll see other guys' methods to do this process, and probably better explanations!
https://www.youtube.com/results?search_query=how+to+make+waterslide+decals+for+model+kits
And lastly, some images below of decals I've made, so far mostly in 1/72 scale although they show bigger here. The left-side marking was straightforward, although I had to add the tip of the devil's tongue separately outside the circle as it sat on the coloured section of the model. The right-side marking was more challenging as I had to modify an unrelated marking with the shield by removing its content, saving the 'empty' shield, then adding into it the content on the middle and right-side shields you see here, then add each to the other in sequence and postioning them at angles. I now really enjoy making my own markings and they have opened up a whole load of other colour schemes for me to consider for my kits. If you're doing cheat lines/stripes on the side of a kit, as the one you have above, your decal may be quite long, so once printed, perhaps best to cut into smaller sizes when applying to the kit, to make it easier for you. I use Microsol and Microset and they seem to work well with homemade markings.
Hope your efforts turn out well... :-).
2 attached images. Click to enlarge.
Hi Jim!
When decals seem to lose their adhesion chemical, I apply some Future on the surface and apply the decal: the Future becomes the adhesion chemical. The decal has to be positioned and the excess liquid removed, as usual, but, once Future sets after some minutes, the decal cannot be repositioned. So, you only have one chance!
Colin-
I tried your trick with Pledge Floor Gloss, it appears it worked! I will give a closer inspection in the morning.
Luckily, till now I didn't have decals that did not cooperate, Jim@jmorgan
So unfortunately I have no experience on how to handle this issue.
I do however have a very old kit which is on the way to the workbench and the decalsheet doesn't looks that promising so I will be following this discussion with interest.
As long as the decals don't break into pieces, the solution of Spiros @fiveten sounds promising.
Colin-
I tried the "Future" trick, it looks like it worked. Actually it is now Pledge Floor Gloss.
I am going to let it sit overnight and inspect tomorrow.
All very interesting Jim and Suggestions to an age old problem ! I’m trying to do the same. In Reading about the same issue I saw that some People use dry transfers for lettering and Make stencils for some of the other. Printing for now is in the future for me as the old kits with failing decals have added up I will need to get to that some day !( not good with Computers either ) With that I use them as experiments before embarking on the more valuable to me interesting kits Where decal failure would be sad.
Welcome back to this great hobby !
Old decals can be a problem, but there are solutions.
I always clear coat first with Future, to give a glossy finish under the decal. If the decal is thin and fragile (I'll try an unwanted marking to see if the are bad) I will coat the with Microscale's 'Liquid decal film' and allow it to dry completely before I use the decal (it reinforces or replaces the decal 'skin' and can save very old decals). If I there is an adhesion problem, instead of decal set, I will paint a thin puddle of Future on the surface, and install the decal in that. When it dries, it will suck the decal down as tight as any decal set. Finally. I will give another spray of future over top, to seal the decals and give a consistent shine to the finish, prior to any flat coats.
I have used this method with 54 year old Monogram decals (from 1967) which were among the worst I have ever seen, and it works. No silvering, no breaking or lifting, and a painted on look.
Try it, you'll be impressed.
Colin
1 attached image. Click to enlarge.
Colin-
Thank you for your input. I have read that the "Future" floor polish is not avilable any more. I heard Pledge Revive It Floor Gloss is the equivalent. I put that on, then the decal, seems to have worked, so far.
Pledge is Future, for some reason they keep changing the name, but as far as I can tell, not the formula!
I would strongly recommend using Microscale's 'Liquid decal film' if you have any doubts about the decal, and definitely a second coat of Future/Pledge to seal the decal.
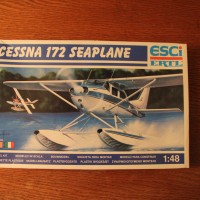
I have the old 'Esci" C-172 floatplane kit, also. I hope you post some photos when you are done!
Merry Christmas!
Colin
Colin-
It appears to have worked.
I will get some of the Microscale Liquid Decal Film. Is that similar to Micro Set and Micro Sol ?
I now need to find another one of these kits so I can put on the second blue stripe. I will build the second kit and use the red decals.
I'll post pictures when completed.
The liquid decal film is in a similar bottle, but functions completely differently. You paint it on the old decal sheet before using the decal and let it dry. It dries very smoothly, and forms a new decal carrier film that can keep an old decal from fracturing, and can be used in conjunction with MicroSol, MicroSet, and Future/Pledge.
http://www.microscale.com/Merchant2/merchant.mvc?Screen=PROD&Product_Code=MI-12&Category_Code=FINPROD&Product_Count=6
Colin
Some good info here. If you are going to print your own decals, get a photo editor that uses Vector graphics and not raster. Here's the reason