Airfix 1/72 Spitfire Mk 22/24!

Started by Magnus Fridsell · 47 · 1 year ago · 1/72, Airfix, Mk 22, Mk 24, Spitfire, Spitfire Mk 22, Spitfire Mk 24
  • Profile Photo
    Magnus Fridsell said 12 years, 2 months ago:

    At the same time as I bought the Mustang I also picked up another one of Airfixยดs latest offerings, the Spitfire 22. And since I am a Spitfire fan I of course also happened to have the Xtrakit kit in the stash so off we go for a double build!


    Airfix box-art...


    ...and the box contents. Very much like the Mustang!


    Xtrakit box-art...


    ...and the box contents. Looks quite different, lots of small parts!


    A clever trick from Airfix! By using angled ejectors in the moulds they have managed to make very nice Griffon-bulges that would otherwise have been impossible to mould integrally with the fuselage halves! Nice touch, the engineer in me approves ๐Ÿ™‚ !

    Finally, I have gotten myself an Xtradecal sheet with a myriad of marking options. I will go for a high speed silver Mk 22 from Turnhouse and a camouflaged Mk 24 from Kai Tak (old time favourite from the Matchbox 1/32 kit!).

    Regards

    Magnus

  • Profile Photo
    Magnus Fridsell said 12 years, 2 months ago:


    Obviously not the same DNA here...


    ...it will be interesting to see how much they differ when finished! Main thing seems to be a difference in rear fuselage lengths...


    Parts-on-sticks! Interior parts with a bit of additions in the form of a resin dashboard and a home-made compass...

    Regards

    Magnus

  • Profile Photo
    Magnus Fridsell said 12 years, 2 months ago:

    And a bit of interior painting...

    Seat belts are masking tape.

    Regards

    Magnus

  • Profile Photo
    Magnus Fridsell said 12 years, 2 months ago:

    I've been busy assembling the airframes lately. I didn't manage to get them as right as I had hoped for, especially the Xtrakit Spit needed more putty than ideal around the wing roots.

    Soon primer-time. And the traditional parts-on-sticks-photo of course ๐Ÿ™‚ !

    Regards

    Magnus

  • Profile Photo
    Magnus Fridsell said 12 years, 2 months ago:

    Preparing for primer...

    And, as promised, parts on sticks! (FYI, not edible...)

    I've actually primed them already even if I haven't taken a photo of them. It doesn't really add to the interest anyway ๐Ÿ™‚ !

    Regards

    Magnus

  • Profile Photo
    Geoffrey Abreu said 12 years, 1 month ago:

    I am going to start the Airfix kit as well soon Magnus. I have resin exhaust and guns. What color do you think the cockpit black or green?

  • Profile Photo
    Magnus Fridsell said 12 years, 1 month ago:

    Hi Geoffrey!

    I checked against what photos I could find of 22/24-cockpits from the net and they seem all to be green so I went for that!

    Regards

    Magnus

  • Profile Photo
    Magnus Fridsell said 9 years, 11 months ago:

    @caabreu Did you ever get around to start your's?

    We can't sit idle, can we? Those got stuck when other stuff jumped the queue but now I've found some time for a restart.


    A white background doesn't really add to the attraction in this case... There were a few blemishes in the finish to attend to, I've added wingtip lights from clear sprue and drilled out the canons on the Xtrakit Spit. On the Airfix one I will probably cut them off and substitute thin tubing.

    I've also rethought my paint scheme strategy: I'll go for two camouflaged planes (one 22 and one 24).

    Regards

    Magnus

  • Profile Photo
    Gregor d said 9 years, 11 months ago:

    Cool. I built the Airfix kit a while ago and it was a nice build right out the box. Yours is progressing very nicely Magnus. Nice work as always.

  • Profile Photo
    Magnus Fridsell said 9 years, 11 months ago:

    Gregor! It's a really nice kit!

    Some time since last update but I haven't been idle. I've done some camouflage experiments on my old Matchbox Spit IX paint test object and some detail work on the actual kits as well!


    As usual I am very generous when it comes to equipment: my pilots always gets Quickboost sights without even having to ask for it!


    The Mark II Gyro Sight was licensed to the US where it was called the K-14 Acemaker sight so Quickboost 72 066 "K-14 U.S Gunsights" will do fine for your late-mark Spit as well as for a D-Mustang!


    They obviously can't both be accurate, Airfix to the left and Xtrakit to the right... Airfix part fits fine inside Xtrakit part!

    The more I stare at the Xtrakit Spit, the stranger I think it looks. I look forward to seeing them both finished for comparison!

    Regards

    Magnus

  • Profile Photo
    Gregor d said 9 years, 11 months ago:

    Good progress Marcus. The xtrakit's fuselage around the cockpit area looks considerably wider than the Airfix kit. I'm not sure which is more accurate but they both look great in their own right.

  • Profile Photo
    Magnus Fridsell said 9 years, 11 months ago:

    Gregor! Both can't be correct but I'll wait with my judgement until both are finished ๐Ÿ™‚

    I have a quite substantial stash of Falcon's Clear-Vax sets, you never now when you need something from them... I pinched the last two Spit bubbles for this project.


    The Falcon canopy is quite literally the "in-between-solution" in this case and I think it will even up the score quite nicely when both kits get one.


    I would risk a guess now that the Airfix canopy is on the small side while the Xtrakit obviously is on the fat side ๐Ÿ™‚ ! It also looks rather "squashed" which is even worse than the size problem.

    Regards

    Magnus

  • Profile Photo
    Magnus Fridsell said 9 years, 11 months ago:

    I thought I would be far into the paintjob by now but I wasn't as careful as I should have been when I started the kits so there have been quite a lot of small fixing to do. But now I think I'm quite close to where the fun starts really!


    I've added a fuel filler tube and cap behind the cockpit and also the rather prominent oil filler hole in front of the windscreen...


    ...canopies have been masked and faired in as well!

    Regards

    Magnus

  • Profile Photo
    Gregor d said 9 years, 11 months ago:

    More sterling work Magnus, I admire your attention to detail. These are starting to look very nice now. Keep up the great work.

  • Profile Photo
    Magnus Fridsell said 9 years, 11 months ago:

    Greg! Paint is on, I hope I don't disappoint you!

    Finally I've arrived at the painting stage, a rather lengthy post this will be!

    To start with, I find RAF colours troublesome, there is nothing that I really like the look of "out of the bottle" (sounds a bit elitist but it is true, I'm sorry...). I did a fair bit of testing on the Matchbox Mk IX paint victim (it has been painted and sanded smooth so many times that it nowadays mostly looks like a recognition model: there are no features left at all except where the Matchbox Trench Digger worked overtime one late Tuesday evening around the engine covers ๐Ÿ™‚ )

    The greatest disappointment were the "new" Tamiya colours that I have been intending to try for several years now, XF-81, 82 and 83. They MIGHT look good on the 32-scale Spit they were released for but in 1/72 there was something that bothered me: too dark, too blue, too green and really not to my liking. Bleaching them with white didn't do much good either.

    So, back to basics (Google and Gunze paint - two things that always can be trusted!) I found a bunch of different recipes people are using for Dark Green, Ocean Grey and Medium Sea Grey. After some experimenting and leaving it overnight for a renewed look in the morning I finally was quite content with the following mixes using Gunze paints:

    DG: 25xH73 10xH303
    OG: 10xH335 2xH93 1xH11
    MSG: H325

    The numbers aren't percentages, they are "parts" - mix 25 drops of H73 and 10 drops of H303 (or multiply both numbers with the same factor if you need more paint (you'll get 50 and 20; 75 and 30; 100 and 40 and so on until you have a whole bucket-full of it ๐Ÿ™‚ )).

    Finally, mostly for fun, I did a digital experiment as well. Using colorserver.net I generated paint samples for the nearest FS equivalents stated in this one:
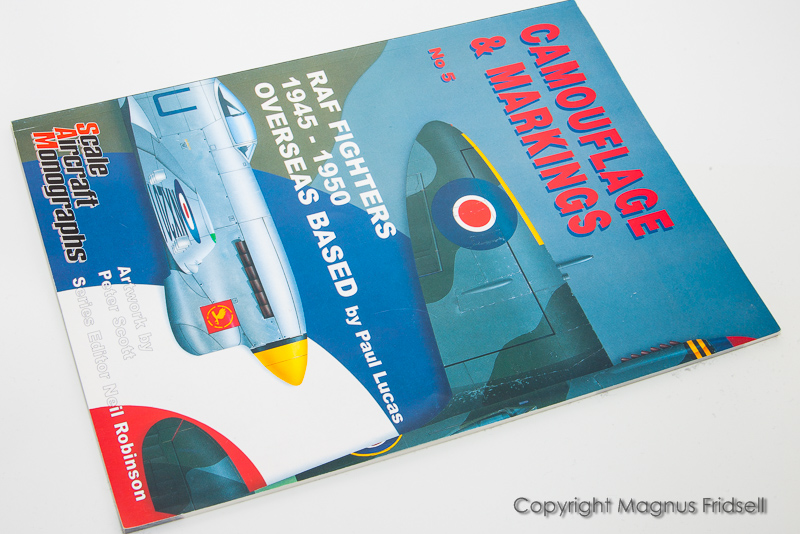
    ...and ended up with this:
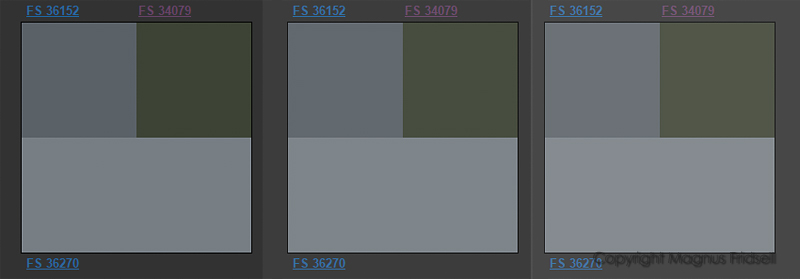
    The one to the left is the FS matches "out of the box" while the other two are "digitally bleached" by putting a layer of white over them with transparency set to 10% and 20%.

    So much for this, now on to the Spitfires!
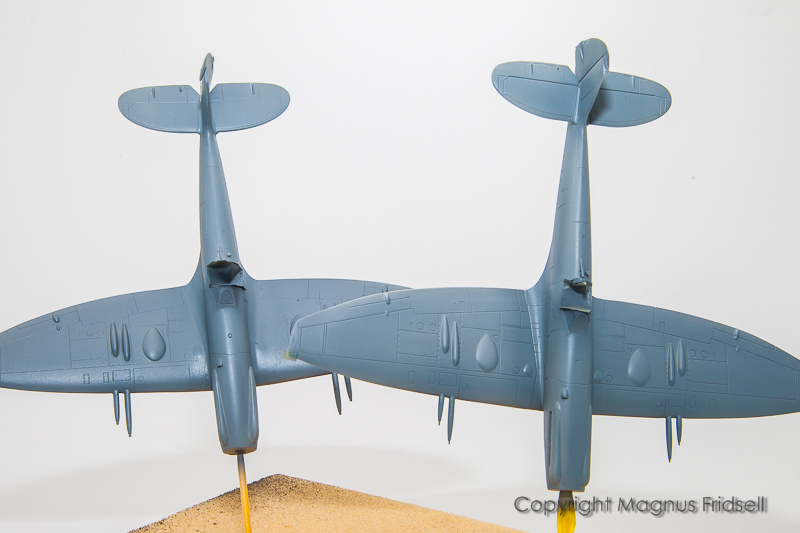

    Spits on sticks. In Ocean Grey (or at least my idea about Ocean grey!).
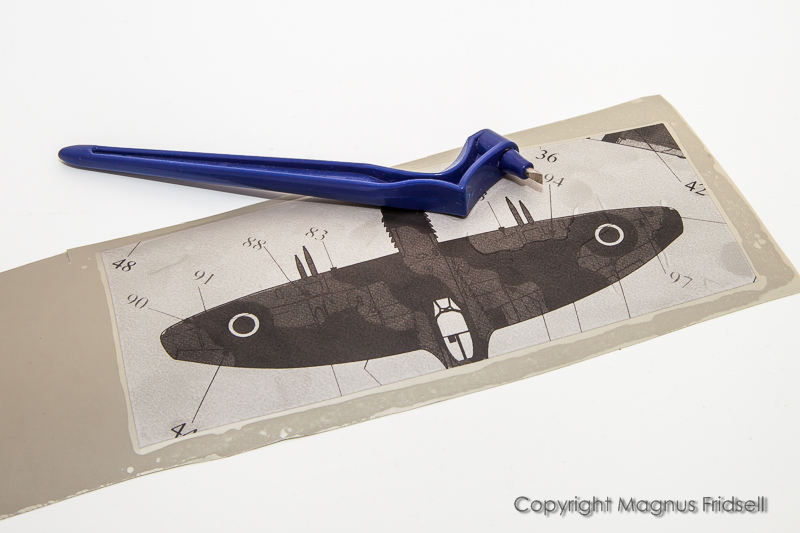

    And now for something further that is new to me. I usually like freehanding camouflage, if for nothing else it is great fun! It lends itself best to rather free-flowing lines, I find RAF camo to be a lot "tighter" and more "squiggly" so I decided to go for masks this time. At Telford Mal told me about this masking film that I was able to get from a supplier here in Sweden. Their minimum order was 3 meters on the roll and it is about the width of a bed sheet, sticking to 1/72 I have masking film to outlast my stash and probably this millennium as well ๐Ÿ™‚ ! It wasn't expensive though (about the price of five rolls of Tamiya tape!) so it's more a question of logistics and storage than money...

    I resized and copied the top view from Xtradecal's instruction sheet and slipped it between the adhesive film and the backing and then I took out another thing I brought home from Telford: this absolutely magnificent swivelling craft knife! Cutting the masks was an absolute breeze!
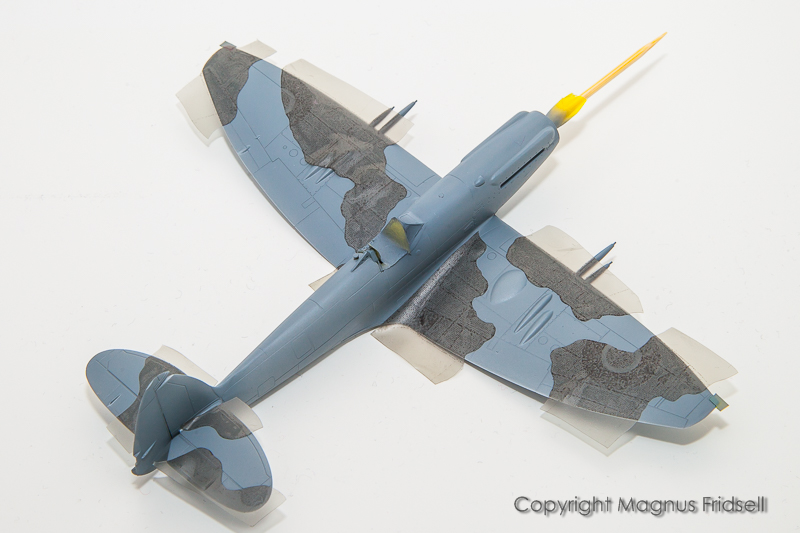

    First set of masks in place! They bring with them some of the ink from my printer, that's the reason for the ghost roundel and the panel lines. A stroke of luck really, it makes it even easier to place them!
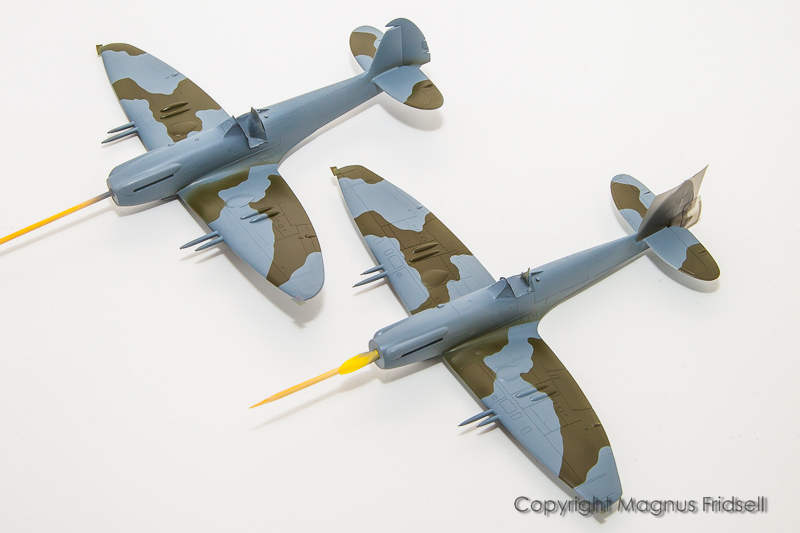

    Horizontal surfaces finished and I've masked the fin for more painting. Originally I thought I should do the flat and easy surfaces of the wings and stabilisers and then try freehanding the curved surfaces but I ended up doing it all with masks.
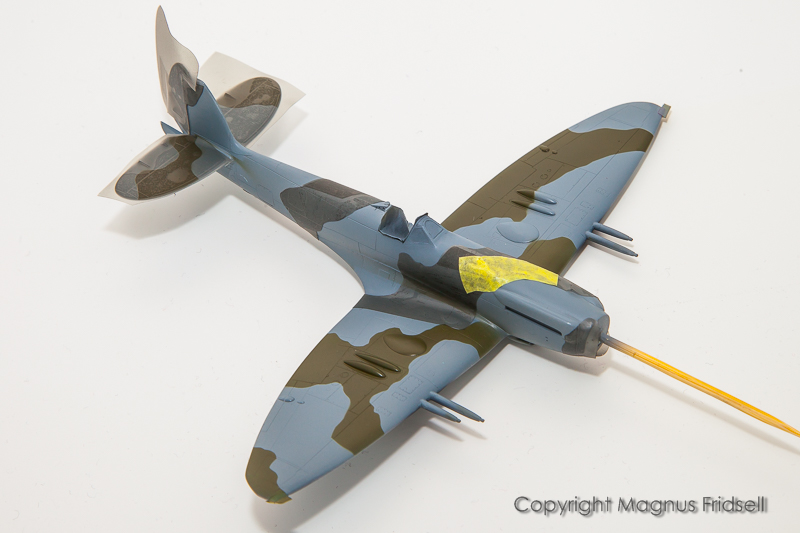

    Fuselage done up for painting. I had to use a tiny bit of tape over the nose. The masking film is less sticky than the tape (tape over large areas is VERY sticky so I like this a lot) but also stiffer so it can't be "bent" the way tape can, it has to be cut to shape. Also, I wouldn't recommend doing any cutting while it is on the model, it is rather thick and the risk to ruin the paint below is very real!
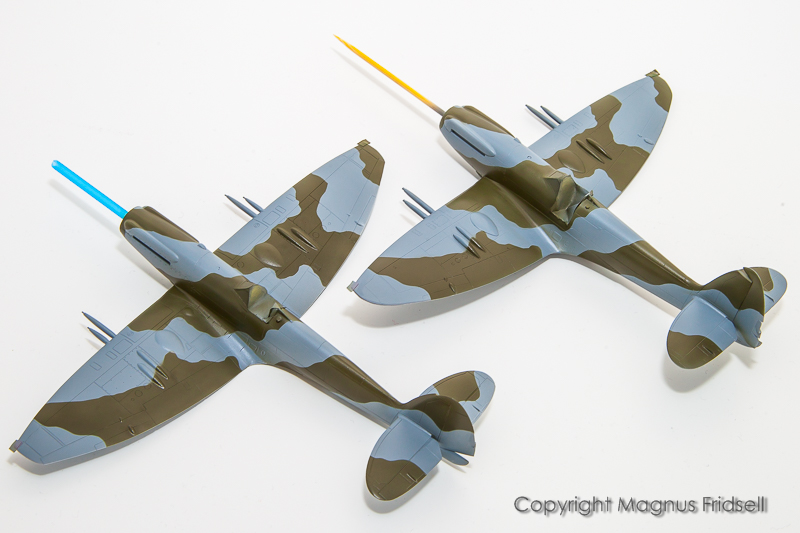

    So, the result of last evenings handiwork: two very identical Spitfires. I trust that the markings and weathering will break up the "identical twin" look enough for it not to be too disturbing. And I don't have to put them on the same base plate either ๐Ÿ™‚ !

    Sorry for the novel!

    Regards

    Magnus

  • Profile Photo
    Gregor d said 9 years, 11 months ago:

    Magnus - never dissapointed watching your builds, I admire the amount of thought and effort that you put in to it. This work really pays off in the long run. Being colourblind I am totally reliant on the paint coming out of the bottle so i'm happy to go with your judgement on shading etc. It all looks good to me! Will be watching out for your next informative update. Great work mate.

  • Profile Photo
    Bernard E. Hackett, Jr. said 9 years, 11 months ago:

    Magnus:
    It was easier when we were younger, and didn't have all this information. You could just paint it with whatever you had on hand (Testors little square bottles, usually), or mix something up that "looked about right". All gloss, of course.
    Good results on your Spitfire pair.
    How does the Airfix compare with its mate?

  • Profile Photo
    Gregg McKim Shaw said 9 years, 11 months ago:

    Magnus
    I've got both kits to build as well, so find your build description very helpful.
    Thankyou for that, like anything that makes builds easier.
    Looking forward to your next update.
    What is the name of that masking film and where did you get it.

  • Profile Photo
    Magnus Fridsell said 9 years, 10 months ago:

    Gregor! I have found that colour perception gets better with practice but I realise that you can't get around colour blindness with that ๐Ÿ™ ... In the age of the Internet, there is always the possibility to google up all kinds of recipes if you loose faith in the bottles ๐Ÿ™‚ !

    Bernard! I've still quite a few models from my childhood that were all painted using Humbrol enamels and many of them still look quite OK colour-wise even if the general result often leaves something to be desired... Airfix vs Xtrakit: I am not sure... They might be both wrong in the cockpit area but I think the Xtrakit is affected the worst, it is also rather plump in general. I'll finish them and let you know what I think then!

    Gregg! Thanks for following and I hope I am of both help and inspiration! Masking film is called "Oramask 810" and I think it can be found just about everywhere. I got to know about it from a friend in the UK who makes masks professionally and it was just a google away here in Sweden. I got quite a lot of it but it isn't expensive!


    The masking film doesn't solve ALL masking issues, I still have to use the sticky yellow stuff now and then, in this case for painting the MSG lower surfaces...


    Most major painting done, I even managed to shoot a thin layer of clear to prepare for decalling!

    I've turned down some of the knobs in Lightroom by the way, I realise that the colours looked a bit wild in some of my earlier posts! This is quite close to the actual looks, at least with my eye- and screen settings

    Regards

    Magnus

  • Profile Photo
    Gregor d said 9 years, 10 months ago:

    Getting there Magnus, I am looking forward to the next progress update already! ๐Ÿ™‚