This is the second part of my entry to David’s “Kasserine” Group Build. I intend to model the a Tiger I initial in Tunisian setting into a diorama. This part describes the progress on the Tiger I initial, for the Opel Blitz fuel and ammo transporter, see my article:
Italeri Kfz. 305 Opel Blitz in 1:35 (#216) Afrika Korps
Some history:
The tiger I is probably the most epic tank of WWII. Its design was a response to the KV series tanks the Germans met in Russia, in the early stages of operation Barbarossa. The designer, Dr. Edwin Alders was Chief Development at the Henschel Werke in Kassel, Germany. The first vehicles became available in late 1942 and some of them found their way to Tunisia in the late stages of the North African campaign. Some were in action at Kasserine, hence my choice for a GB entry.
The Tiger I opened a new doctrine of "armored pincers" to breach enemy lines of defense. Armored effectively 110 mm in front and 80 mm on the sides, this 57t beast could take most of what the Russians and Allies could throw at it. Furthermore, its Kwk 36 - 88mm - L56 gun, a direct derivative of the infamous AA gun Flak 36, had formidable armor piercing potential and flat trajectory. A single Tiger could knock out enemy armor at ranges of 2000m, many times more than the effective range of its adversaries. However few Tigers there were, for some time during the war, the Tiger had the monopoly on tank warfare and its very appearance on the battlefield already made most adversaries become quite nervous to say the least...
The kit:
This kit was released by Dragon in 2015 and is of the accustomed level of detail for this manufacturer. The gun is plastic but molded in one piece, there is photo-etch and a box full of plastic. The track is DS, so no individual track links (I prefer the latter but it's ok for once). Nevertheless, the build involves more than 450 parts at high level of engineering detail. A true challenge this Tiger most certainly compared with its Opel Blitz brother in arms for this build... The build of this vehicle will largely be out of the box (OOB).
The build:
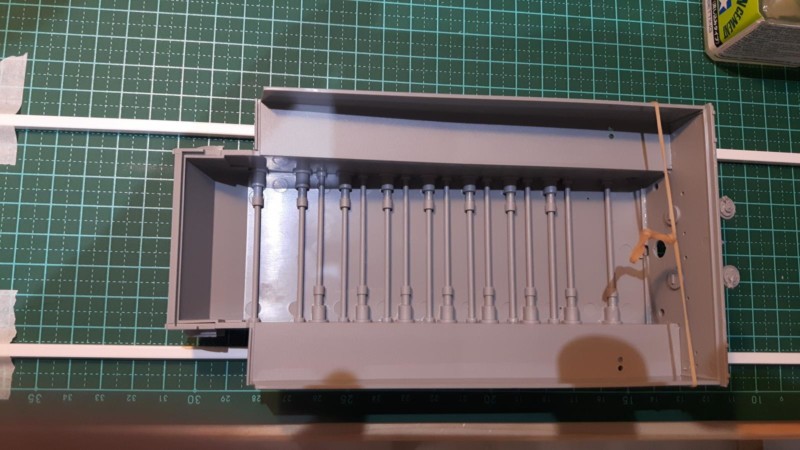
I started with the lower part and suspension. The torsion bars are featured with the kit and since I intend to leave at least some of the hatches open, I decided to install them although they are not workable (sigh...). These and the suspension arms require quite some cleanup, but there are no ejection marks to fill, so that's a start.
-

I assembled the suspension and am now aligning the arms flat as you can see below. I used two styrene bars equally spaced and fixed to the workbench to "carry" the underside of the tank so that the arms can evenly set overnight.
As a last, I could not resist placing the Tiger's older brother next to it. Gives you an idea how big this thing was, even without figures...
More later, stay tuned!
Happy modeling!
Michel.