The interior is starting to come together. I ended up scratchbuilding a lot of the interior parts. Desks and additional equipment were added to the radio compartment. The nose compartment was still pretty bare, even after adding the additional resin, so I added some detail to the back and side walls. I am currently working on the flight deck. In photos, this is a really busy place, so I am trying to make some additional detail to "busy-up" the pilot's compartment. In all of the photos I have examined, the two things you see in every compartment are yellow oxygen bottles and red fire extinguishers. There are two or three different styles of oxygen bottles visible in photographs. There are large oxygen bottles that appear to be attached to the walls behind the pilots that are system oxygen for the aircraft. The other two types are "walk-around" bottles that the crew would use when moving from one area of the plane to another.
I hand-painted the floor, walls, and black boxes in the compartments. I had planned to spray them, but a lot of creative masking would have been required. I used Vallejo and AK 3rd Generation acrylics to do the painting. I added a drop or two of water into the paint to make it smoother to paint. The interior green in the photos is much lighter and brighter than it is in reality. I guess the camera in my iPhone couldn't accurately translate the paint color in the photograph.
That's about it for now. I have spent a lot of time looking at reference photos so that I can piece together an interior that looks suitably busy. Trying to replicate everything in the plane, especially in 1/72, would be foolish considering not much will actually be visible. It is weird that once you start adding details it is tough to stop. I really want to close everything and get to the exterior. Anyway, hopefully more tomorrow.
5 attached images. Click to enlarge.
-
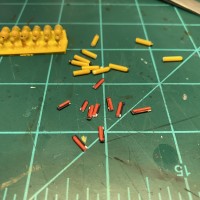
1. Hoards of scratchbuilt oxygen bottles and fire extinguishers.
2. I found the large aircraft oxygen bottles I needed in my resin stash. Who knew?
-
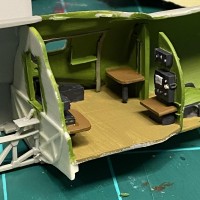
1. Radio/Ferret Compartment: Everything hand-painted, about half of what you see is scratchbuilt. A lot of the ferret equipment is yet to be added.
-
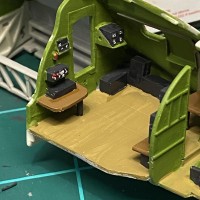
1. Faces still need to be added to the scratch-built black-boxes. There is only one seat included with the resin set, so I will need to build some more.
-
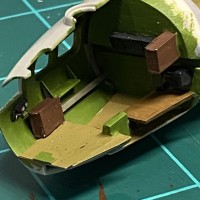
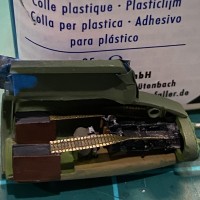
1. The resin set included only the floor, two small black boxes, and the two large brown boxes (which are actually boxes for the nose machine gun bullets). Everything else was added, with more to come.
-
1. Tail gun position is basically done. I painted the walls using a darker green.