Hobbycraft 1/48 DHC U-1A, 18th Aviation Company, Vung Tau, Vietnam, July 1963

Started by Spiros Pendedekas · 94 · 2 years ago · 1/48, de Havilland Aircraft Company 100 years, de Havilland Canada, DHC-3, Otter, U-1A, Vietnam
  • Profile Photo
    Allan J Withers said 3 years, 4 months ago:

    Coming along nicely Spiros.

  • Profile Photo
    Spiros Pendedekas said 3 years, 4 months ago:

    Thanks Allan @kalamazoo!

  • Profile Photo
    Spiros Pendedekas said 3 years, 4 months ago:

    Fuselage closed


    Fit was so so, due to (I believe) slight warpage of the halves.
    Since the rigidity of the top part above the passengers deck was questionable, I added styrene blocks underneath the roof before closing them. Upon attaching a gap appeared there, filled with liquefied styrene.
    This is not a small plane...

  • Profile Photo
    Pedro L. Rocha said 3 years, 4 months ago:

    Spiros @fiveten, I just found this new WIP of yours now, and I have to give you a high five for getting such unusual kit made. I have not seen neither the box nor any Kit made from it until now. Keep up the good work! I’ll definitely follow along

  • Profile Photo
    Eric Berg said 3 years, 4 months ago:

    Looking good Spiros! Liquified styrene to the rescue again! Just how large is that fuselage going to be from nose to tail?

    Did you ever busy up the interior? Can you even see in there?

  • Profile Photo
    Spiros Pendedekas said 3 years, 4 months ago:

    Thanks my friends!

    Pedro @holzhamer, the big box and unusual subject drew my attention and bought this kit many years ago. Having thought of it as not really inspiring, I have to say that the more I build it, the more inspiration builds up!

    Eric @eb801, yep, liquefied styrene to fill but also strengthen the weak joint. I believe it is longer than the P-47.

    I just busied up the cockpit, where something can be seen (I will take pics during later stages of construction). I left the passenger/cargo cabin empty, just painted it. Nothing can be seen anyway in there.

  • Profile Photo
    Erik Gjørup said 3 years, 4 months ago:

    Unmistakably Otter - looking good my friend @fiveten!

    I have to hunt down one of these kits if they are anywhere to be found at a reasonable price - the few on auction sites are through the roof!

  • Profile Photo
    Spiros Pendedekas said 3 years, 4 months ago:

    Thanks for positive support, my friend @airbum!

    I found that kit at about 2002, forgotten at a very small toy shop in Salonika (Thessaloniki), together with a 1/48 Avro Arrow and two 1/48 Canucks! For less than 20 Euros each! I grabbed the three of them, leaving only the second Canuck (I regretted that I left it soon afterwards...).

    Despite some or more setbacks, there is something tempting in Hobbycraft kits, something magic, I would say. OK, I am carried away now, Mr Admin...I stop!

    Onto the build:

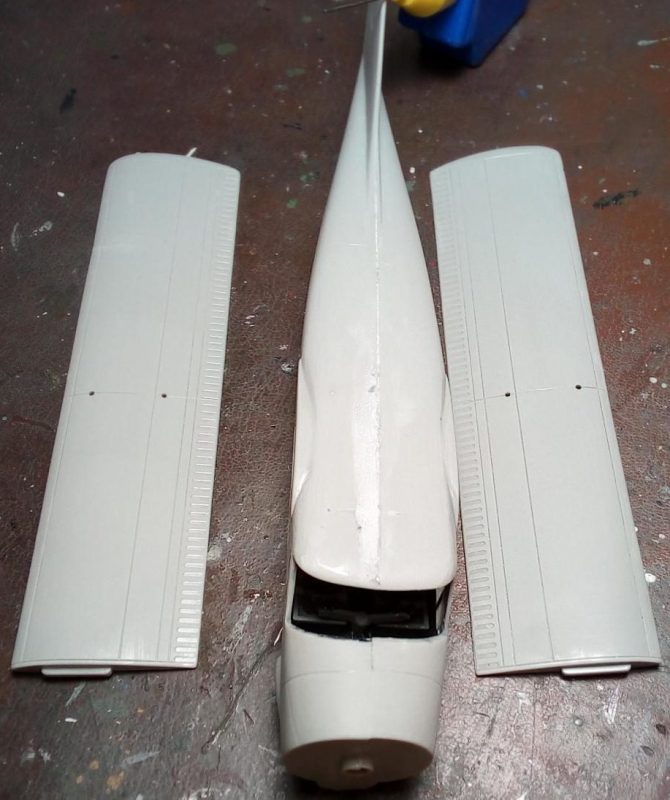
    Initial coarse sanding!

    To my joy, the reinforcements and liquefied styrene held on very well, so I could perform the absolutely necessary initial coarse sanding. The fuselage looks homogenous now, so I can proceed to the wings attachment.

    As you can see in the next pic, liquefied styrene did its magic. Few fillers could have achieved this:
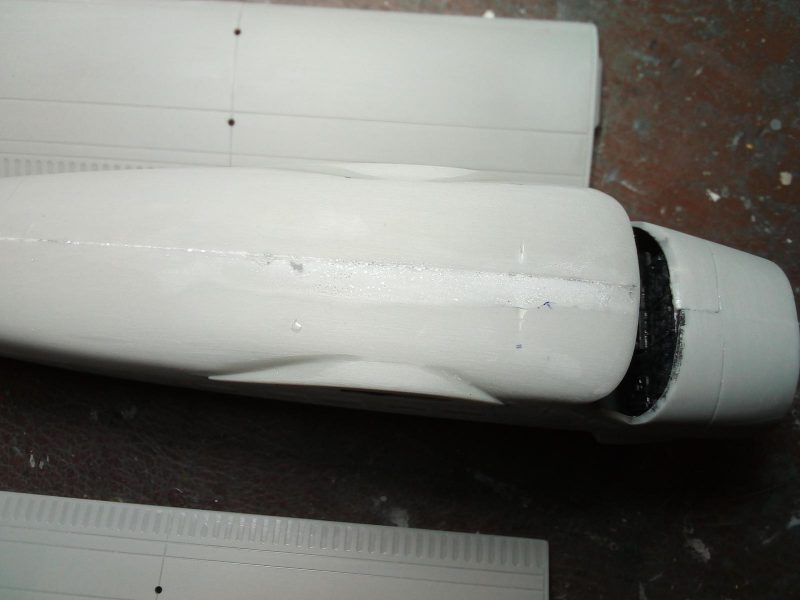
  • Profile Photo
    Jordyn Collier said 3 years, 4 months ago:

    Such a cool subject, Spiros, And fairly large to boot.

  • Profile Photo
    Spiros Pendedekas said 3 years, 4 months ago:

    Thanks Jordyn @1corsair64!
    The more I build it the more hooked I get!

  • Profile Photo
    Spiros Pendedekas said 3 years, 4 months ago:

    The Hobbycraft provided supporting strut at the lower engine air intake (where I guess is the oil cooler's housing), is crude and toyish:


    It is quite visible, so I decided to make the area more real looking.
    This is how it looks in reality:

    I cut it and replaced it with a piece of stretched sprue.This is how it looks now:

    Cheers!

  • Profile Photo
    Spiros Pendedekas said 3 years, 4 months ago:

    Fuselage puttied, engine in painting process, inner cowlihg painted green zinc:


    I decided to putty and sand the fuselage, before attaching the wings (with their supporting struts) and the fixed landing gear (with its struts construction), as it would make the process much more difficult

  • Profile Photo
    Erik Gjørup said 3 years, 4 months ago:

    As usual the scratchbuilding monster peeks out! Nice small changes Spiros.

  • Profile Photo
    Spiros Pendedekas said 3 years, 4 months ago:

    Thanks, my friend @airbum!

  • Profile Photo
    Eric Berg said 3 years, 4 months ago:

    Spiros: redoing that air intake was a good move. It now looks so much more realistic.