Car Door Incident - Hasegawa 1/48 Hawker Typhoon

Started by Editor · 52 · 7 months ago
  • Profile Photo
    Editor said 1 year, 1 month ago:

    @gblair: Thank you very much for the encouragement. Yes I'd like to find work-life balance that would allow for some continuity in my modeling. Maybe this time...

    @fiveten: Thank you my friend. To me, part of a fun in a modeling project is the amount of learning about the subject, can't help it - it's fun!

  • Profile Photo
    Editor said 1 year ago:

    Some progress today.


    Fuselage halves joined without issues.


    I have learned over time that I tend to handle my models fairly heavily during painting & finishing (remember? slow builder), so I've taken the precaution to reinforce the joints from within, just in case.


    Here's the fit of the fuselage inserts, sanded and re-scribed. By carefully considering where to put spacers, I was able to avoid any excessive puttying.


    The unwanted joints were filled with superglue and sanded smooth.


    I was a bit concerned whether the canopy would fit the fuselage after the latter's adjustment, but this is looking promising indeed!.

    Next step: chin air intake.

  • Profile Photo
    John vd Biggelaar said 1 year ago:

    Great progress, Martin @editor
    What a good idea using that whiteboard marker, very helpful.
    The canopy does indeed fit nicely, very promising.

  • Profile Photo
    Pedro L. Rocha said 1 year ago:

    Yep, looks like that complex arrangements of parts Hasegawa usually has was perfectly tamed by your skill and patience Martin. Looking forward to see how the rest goes

  • Profile Photo
    Spiros Pendedekas said 1 year ago:

    Coming together nicely, my friend @editor! You have tackled the kits issues excellently so far!

  • Profile Photo
    Editor said 1 year ago:

    Slow progress on this project just got a bit slower because of one frustrating moment...

    Radiator duct

    After assembling the fuselage, I went about improving the air intake area, which is such a defining feature of the Typhoon.


    The first step was both easy and satisfying. I improved the kit's radiator grille by adding the four spacers supporting the inner and outer circular openings, plus added the two vertical bars to the main radiator. Looking nice and clean.


    Problem: theses two pics show the fit of the inner surfaces in the air duct. Hmm. One could either ignore the seams, or do something to smooth them out. The latter operation seemed a bit tricky with the radiator in place, but after some deliberation I decided to take the radiator out again and go about smoothing out the duct.
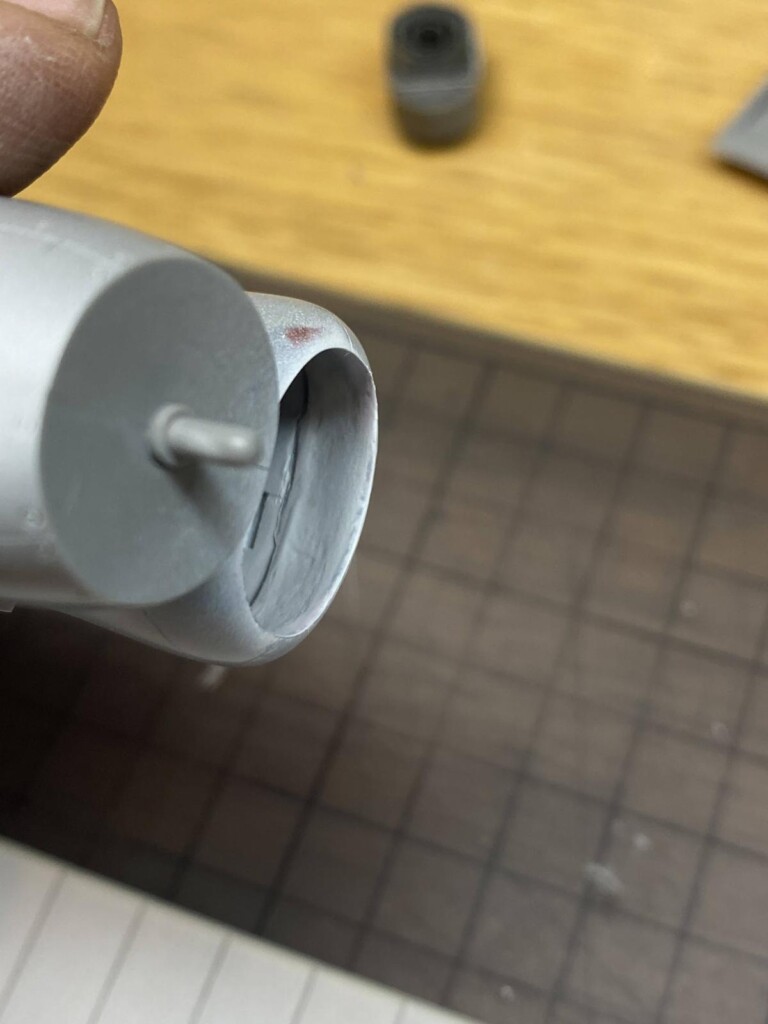

    The first attempt was to take out the radiator, and then use Tamiya putty to fill in the inner surfaces of the duct, and then try to smooth the surface out using soft brush dipped with thinner. The result was so-so. Sanding would be necessary. BTW, I'm not very fond of using solvent-based putties for surface filling, so here I am way out of my comfort zone!


    Sanding was really tedious because the area is so small and short. Care must be taken to preserve v-shaped profile of the upper lip of the duct, and you don't want to apply much sanding pressure to the lip of the intake so that its contour is preserved. I decided to progress really slowly, first cutting down a soft sanding stick into narrow strips, and then using the tip of each strip to gently reach into the area and do some sanding. Sanding, spraying with white Mr Surfacer, and re-sanding turned out to be a very boring task that took many short sessions to complete.


    Dry-fitting the radiator. Getting there... I'll paint the inside of the duct dark green before attaching it. Then on to the wing...

    If anyone has a better suggestion for how to fill & sand the inside of an air duct, please share!

  • Profile Photo
    John vd Biggelaar said 1 year ago:

    You decided to take on a real challenge, Martin @editor
    Absolutely not an easy task to smoothen all this inside a circular object.
    To be honost, I have no other suggestion on how to approach this more easily, I think the way you tackled this is very good. Maybe a paintfiller might be helpful for the last bits.

  • Profile Photo
    Spiros Pendedekas said 1 year ago:

    Great so far, my friend @editor!
    Filling and sanding air duct innards is typically a time consuming, boring thing, the result is really paying off though, as is the case here.
    Looking forward to your progress!

  • Profile Photo
    Erik Gjørup said 1 year ago:

    Long sanding-sessions are not my best way of spending time either. But it is all worth it in the end, and all those details with filler and shims just makes the finished model a lot more enjoyable to study.

  • Profile Photo
    Editor said 8 months, 1 week ago:

    Wow, it's been a long time since my last update.

    After sanding the fuselage halves, I have primed it with white Mr Surfacer and are now in the process of riveting.
    Actually, the white background makes the riveting job easier because the results can be seen so clearly.

  • Profile Photo
    Erik Gjørup said 8 months, 1 week ago:

    Lookin' good indeed. That is an awful lot of rivets!

  • Profile Photo
    George R Blair Jr said 8 months, 1 week ago:

    Great work, Martin (@editor). I thought you said you were a slow builder. You really got a lot done. Interior looks great. Nice technique to use a whiteboard marker.

  • Profile Photo
    Spiros Pendedekas said 8 months, 1 week ago:

    Excellent so far, my friend @editor!

  • Profile Photo
    John vd Biggelaar said 8 months, 1 week ago:

    Great work on the riveting, Martin @editor

  • Profile Photo
    Editor said 8 months ago:

    @gblair Yes and additionally, I find this phase of the build a bit tedious. Despite all the work so far, the model is pretty much still only the fuselage. I haven’t gotten to the wings yet.