Blohm und Voss Bv 141B

Started by Michael Turner · 33 · 1 week ago · 1/48, Blohm und Voss, Bv 141B
  • Profile Photo
    Michael Turner said 4 months, 3 weeks ago:

    I bought this from a fellow member of my modelling club and started it at our Build Camp in October.

    I thought that it would be a quick build, but, as is often the case, after a bit of research I decided there were a few mods and additions that I wanted to make.

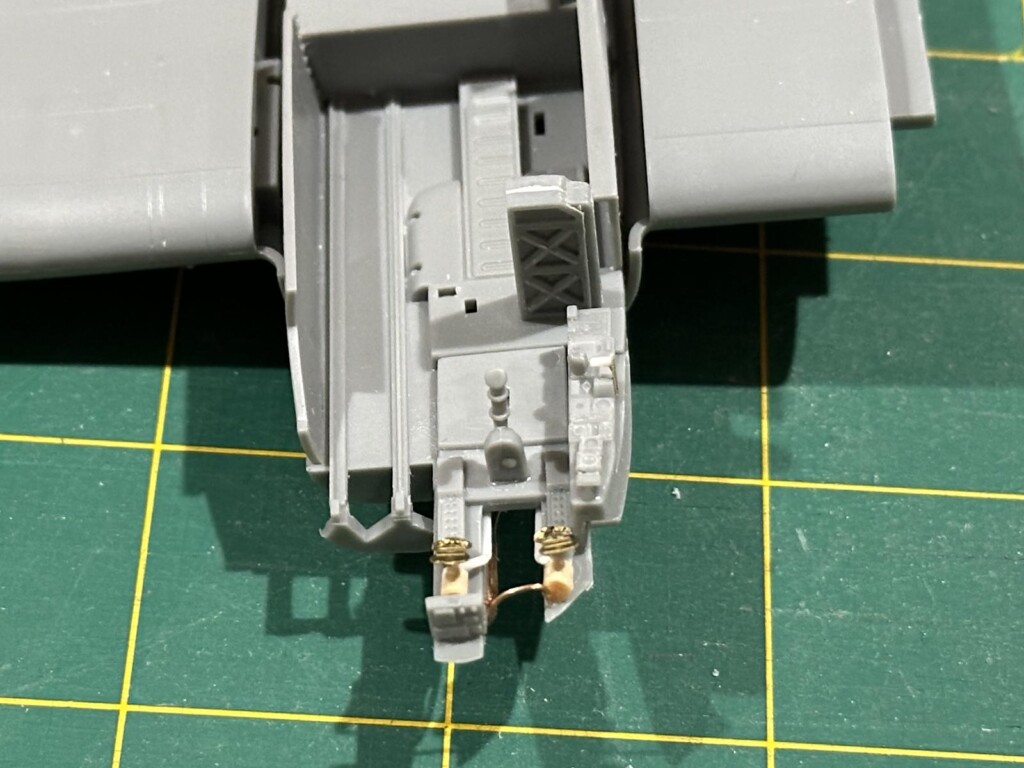
    The first thing was to add seatbelts. I had a set of German bomber etched belts in the stash, so used them.

    I also added some rudder pedals from another set and brake lines from copper wire. I added rudder control rods using thin, round styrene.

    I also added electrical cables for the small panel ahead of the right rudder pedal.

    The kit provides decals for the various control panels and equipment, but these are single decals where the parts are 3D, so I cut out individual dials and attached them to the corresponding parts.

    All of this will be visible through the extensively glazed cockpit.

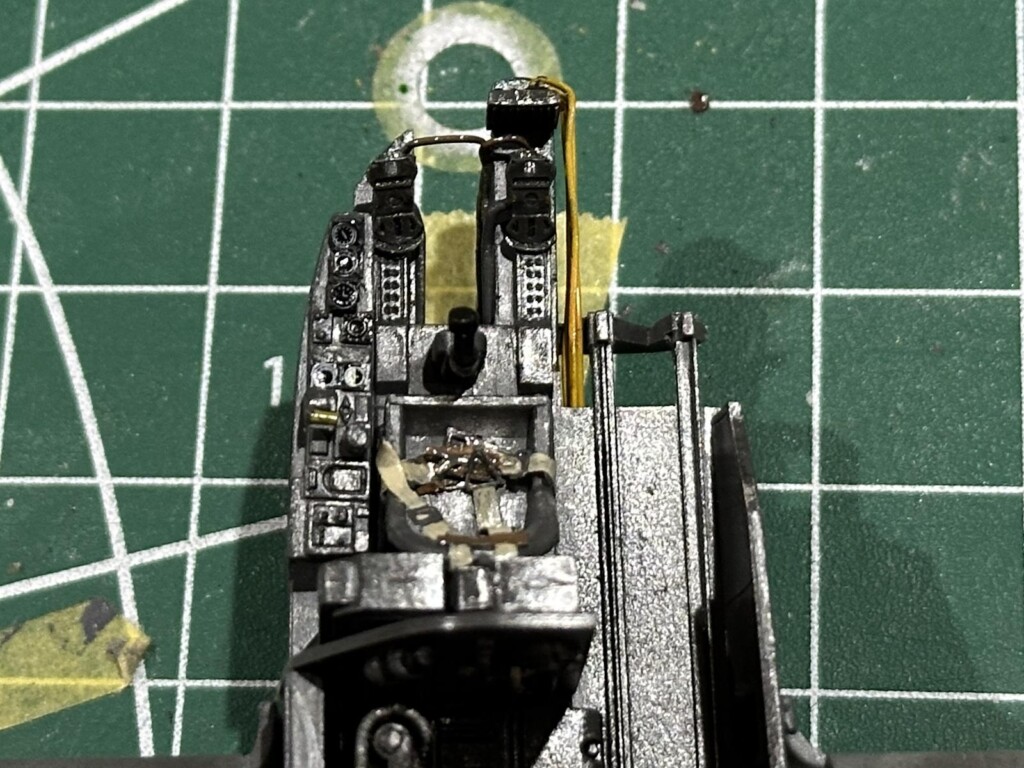
    The aircraft has a crew of three but only two seats. I found this picture from a German aircraft manual on the internet (translated using Google Translate).

    As can be seen, the third crewmember had a seat for take-off, landing and normal flight.

    I scratch built a seat using copper wire and a bit of flat styrene and added a lap belt.

    You can see it in position here:

    The finished cockpit:

    The kit has a strange oval shaped landing light but a picture of the V10 (Bv 141B-02) I have in a book shows it to be round. As it happens, the diameter of the sprue runners is the same as the wing leading edge, so I cut out the oval landing light, glued a half section of sprue and sanded it all smooth.

    Next I drilled a 3 mm hole in the leading edge, which matched the diameter of the clear sprue runners. Then I cut a section of clear sprue, and rounded one end by placing it in a electric drill and shaped it while spinning using a file.

    I drilled a hole in the end to represent a globe ang painted it silver. This end I glued into the hole and, when dry, cut and sanded it smooth to create a new light.

    Another photo showed that there is a superfluous control rod mid way up the vertical tail, which would, incidentally, obstruct the elevator. So, I removed this and sanded it flat.

    The same photo shows that the odd rectangular piece on above the rudder trim tab should be a small rounded navigation light, so I reshaped that, too.
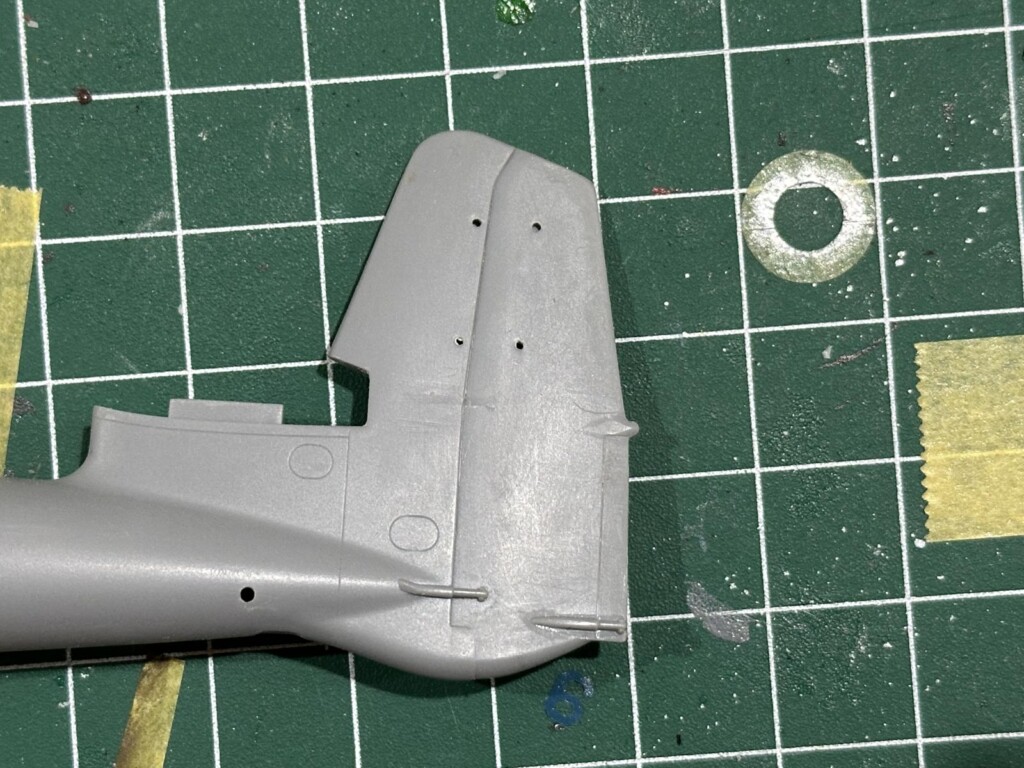
    The elevator and ailerons have excessive corrugated surfaces, so I scraped and sanded these flat.
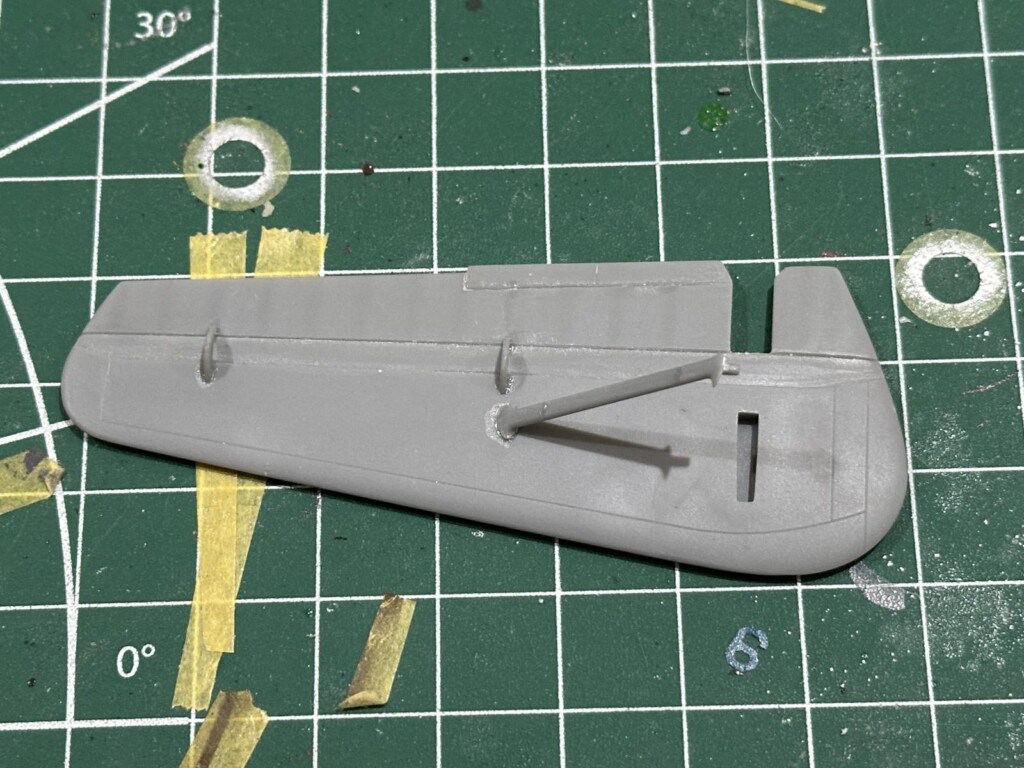
    Finally (for now) early releases of this kit, and this is one such, had a propellor that rotated in the wrong direction. So, I grabbed a spare from and Eduard Fw 190A kit.
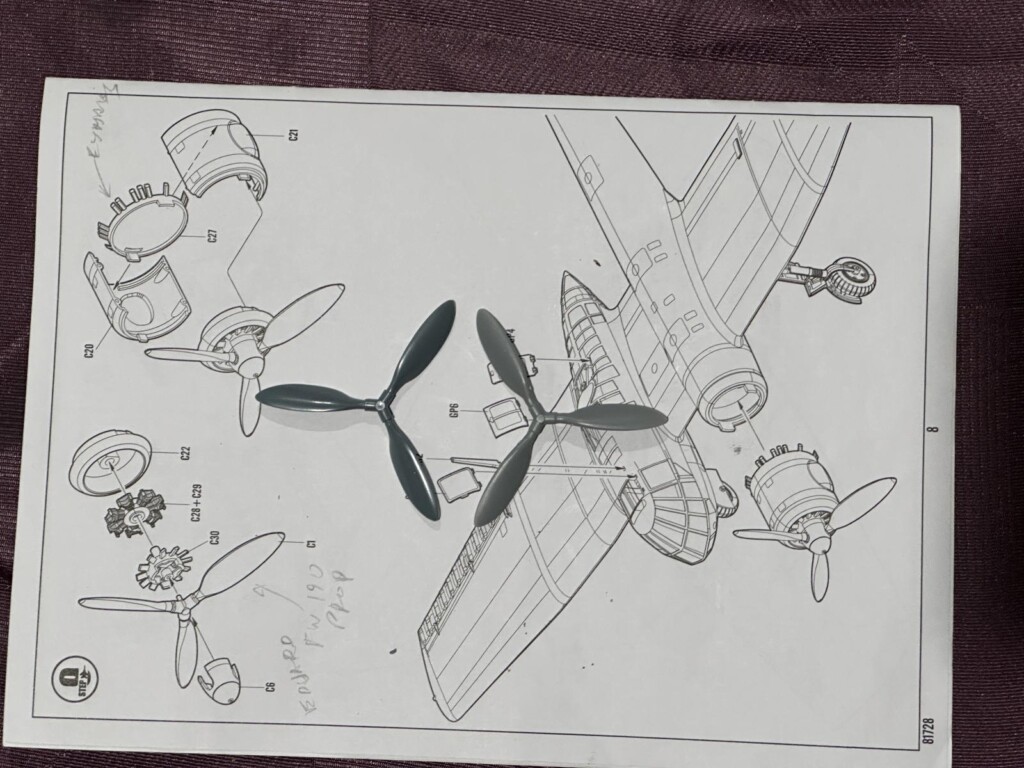
  • Profile Photo
    Spiros Pendedekas said 4 months, 3 weeks ago:

    Another superb entry, my friend @michaelt! Excellent progress and awesome modifications/improvements! Looking forward to it!

  • Profile Photo
    John vd Biggelaar said 4 months, 3 weeks ago:

    Very nice entry, Michael @michaelt
    Great progress and some excellent addition and modifications, clearly not a quick build anymore.
    This aircraft is still on my wishlist so your thread might push it upwards on the todo list.

  • Profile Photo
    Louis Gardner said 4 months, 3 weeks ago:

    Michael Turner (@michaelt)
    This is an excellent start on a VERY neat looking plane. I especially like all of your research and scratch built detail items. Thank you for starting this build journal. I'll definitely be watching this one for updates.

  • Profile Photo
    Michael Turner said 4 months, 3 weeks ago:

    Thanks for following, Spiros (@fiveten), John (@johnb) and Louis (@lgardner).
    My goal is to get it done by the end of the year, January tops.

  • Profile Photo
    Michael Turner said 4 months, 1 week ago:

    A bit of black primer has shown how poorly I have sanded the control surfaces and the small gaps down the fuselage join.
    I’m happy with the wing joins, though.


    The tailplane, engine cowling and clear parts are not yet glued in place, but this shot shows that they all fit nicely.

    This was a rather large aircraft for a single engine, as you can see when compared to a P-40.
    I’m packing this up for now to make way for Christmas…

  • Profile Photo
    Spiros Pendedekas said 4 months, 1 week ago:

    Solid progress, my friend @michaelt!
    A big aircraft indeed!

  • Profile Photo
    John vd Biggelaar said 4 months, 1 week ago:

    Great progress, Michael @michaelt
    Merry Christmas

  • Profile Photo
    Michael Turner said 4 months, 1 week ago:

    Thanks Spiros (@fiveten) and John (@johnb).
    Wishing a happy, safe and relaxing Christmas to you and yours.

  • Profile Photo
    Spiros Pendedekas said 4 months, 1 week ago:

    Thanks my friend @michaelt! Also wishing you and yours Merry Christmas!

  • Profile Photo
    Louis Gardner said 4 months, 1 week ago:

    Michael Turner (@michaelt)
    What an excellent update. The added details you have incorporated look magnificent.

    I never realized just how big this plane was, but it becomes readily apparent with the P-40 parked next to it.

    One time several years ago, I saw a decent sized RC flying scale model of this BV-141. It looks rather odd in flight, but it's surprisingly a good flying aircraft (at least in model form). I'm guessing it had a wingspan of roughly 80 inches.

  • Profile Photo
    Michael Turner said 3 months ago:

    I added some backs to the dials on the instrument cluster that attaches to the upper canopy.


    Next I drilled holes and added wires to the back of the cluster and the same for a single instrument that attaches to the left side of the canopy.

  • Profile Photo
    Erik Gjørup said 3 months ago:

    Some very visible scratch built additions. I suppose these will be a very nice addition to the interior with all that glass.

  • Profile Photo
    Spiros Pendedekas said 3 months ago:

    Superb add-ons, my friend @michaelt!

  • Profile Photo
    Michael Turner said 3 months ago:

    The instrument decals are very good except the surrounds are an unusually light grey.


    Back of the cluster.

    Single instrument in place.