Messerschmitt Bf-109G-6 1/32 – two versions

Started by Colin Gomez · 56 · 2 years ago
  • Profile Photo
    Colin Gomez said 2 years, 9 months ago:

    Thanks, Michael. Sorry to take so long in replying. I have been juggling projects with emphasis on the He. 111 and Stuka. I am glad the details look right on the Bf-109s. I feel I am mostly doing corrective stuff, but I am proceeding carefully so the overall finish will look right on both models.

    Thanks, Erik. I appreciate the insight on the canopy hinge. I came to the same conclusion looking at the pic in my Squadron Walkaround book but it only shows the inside view of the hinge. As seen below, I had to do some more surgery on the Revell kit to get the area under the Erla canopy to look right. It's finally done and painted and a great relief. Revell sure got that part messed up.

    Thanks, Spiros. It's surprisingly fun working with the resin. I have worked out good methods to eliminate resin sanding dust and gluing issues and am getting comfortable with this material, amongst other detailing.

    Here is my latest work on the 109s. I did some further mods on the decking under the Erla canopy for the Revell kit. I had to pry off the rear plate and remount it so that the plate was flat and smooth. This meant carving away a lot of the stuff Revell molds in to mount it otherwise.

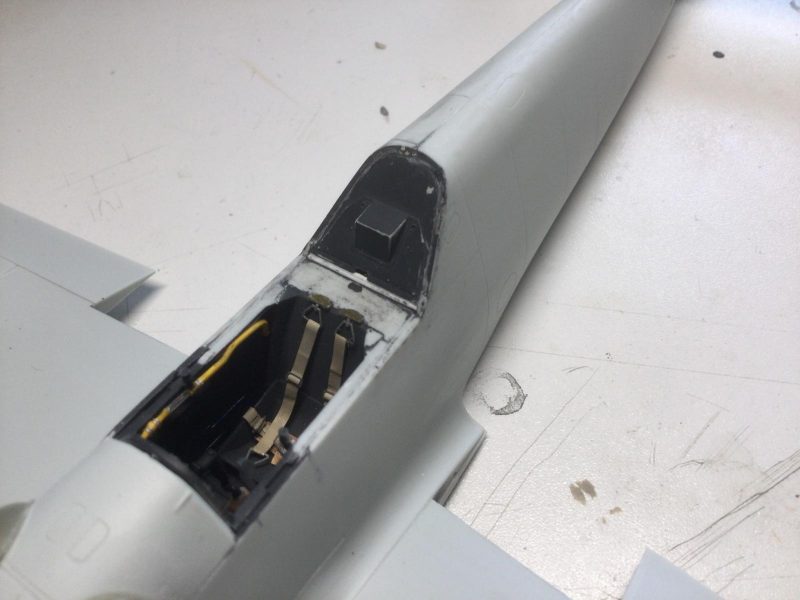
    Filling and sanding were followed by brush painting carefully around the installed harness details. I thought this looked rough, so I decided to mask and airbrush this, which finally looked good. On the Revell kit, I also sanded the spinner smooth and eliminated the pesky seam.
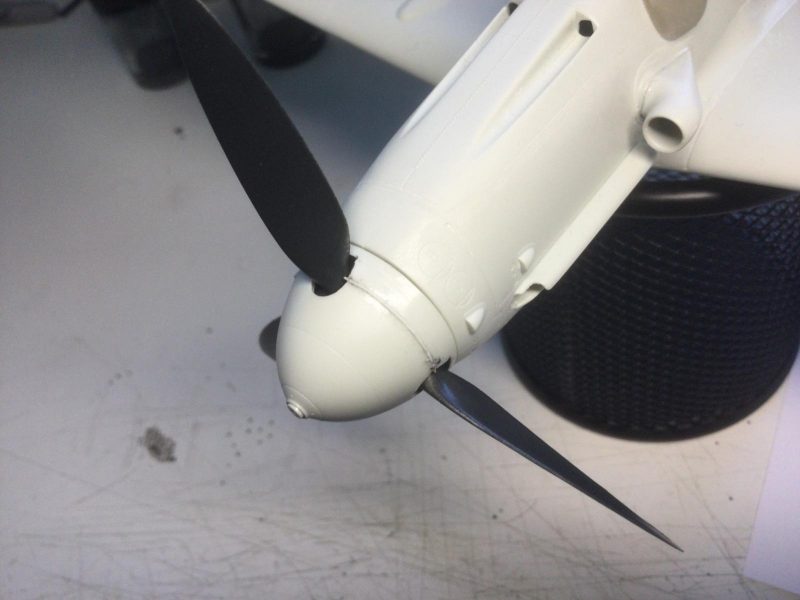
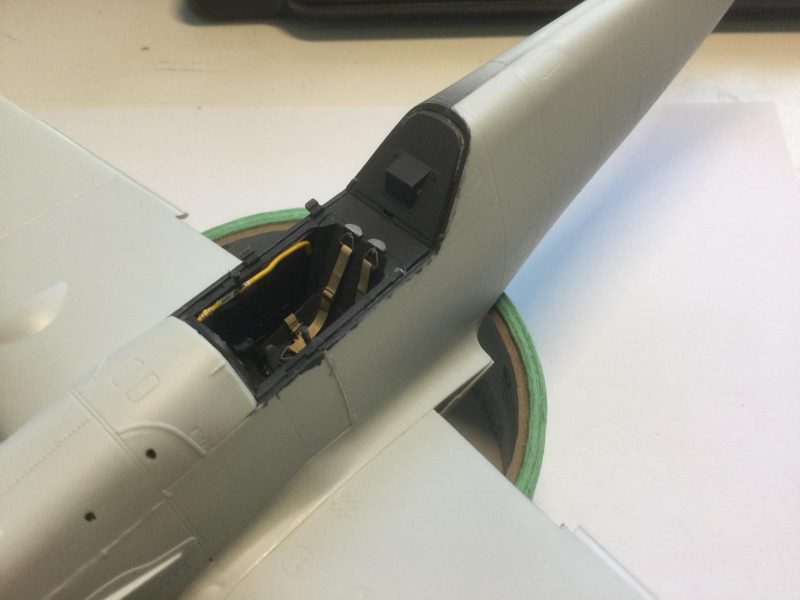
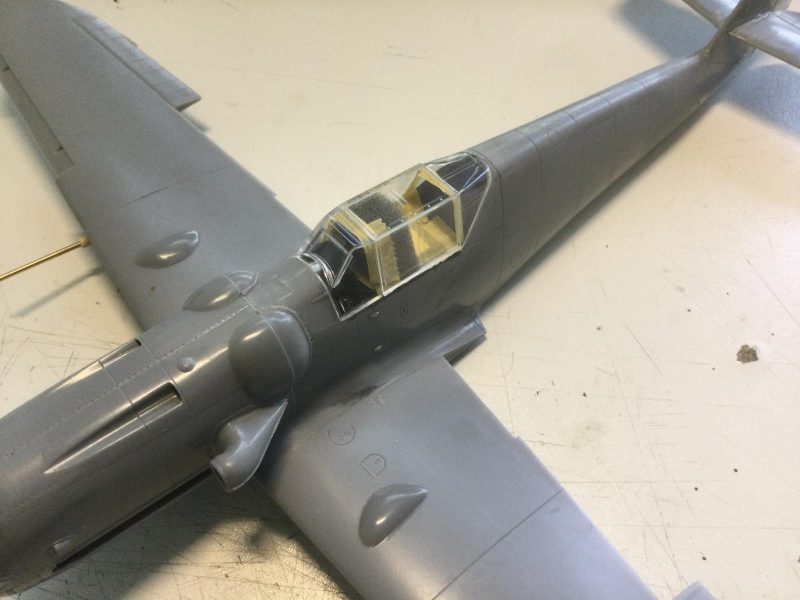
    Since that work, I have concentrated on the Hasegawa build. First of all, I finally did the harness belts, using paper and the metal buckles from the old Eduard set.

    I added two more buckles for spares to better match the look of the real thing. I had to trim the canopy components carefully by sanding to get them to fit (very tightly).
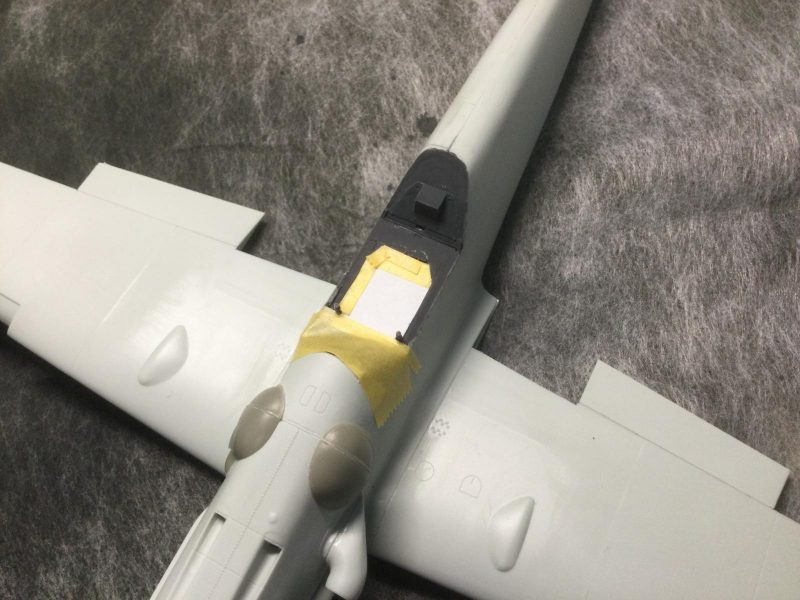
 
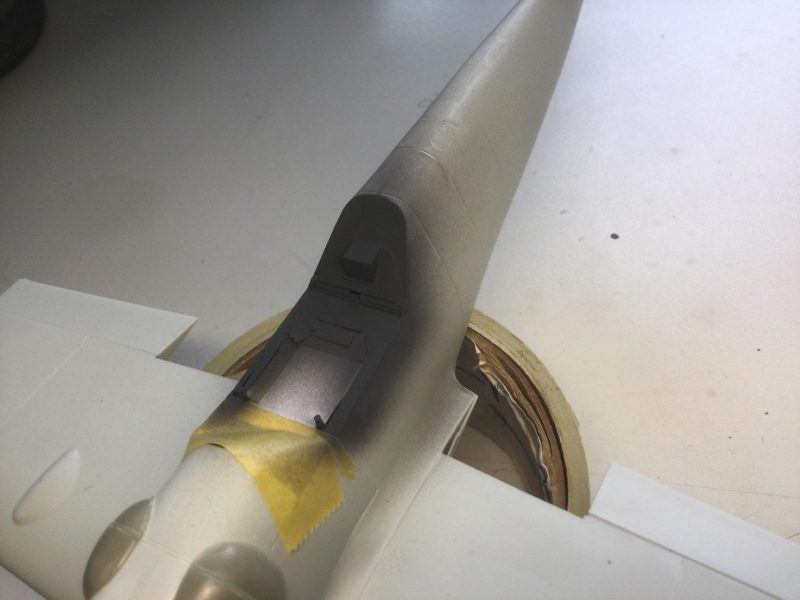
I elected to use the whole canopy to mask the interior and so proceeded accordingly. With no Eduard mask set, I cut all the mask pieces by hand, using the methods I employed for my Buffalo build. I started painting today with the RLM 66 canopy framing undercoat. I also did the first coat of Flat White for the rudder and as an undercoat for the RLM 23 fuselage ID band (I like to do a white undercoat under red to brighten it up). I always do white coats in two sessions because they need to cure each time for good density (acrylics being so thin). It's nice to get painting. The hinged portion of the canopy lifted a bit while painting but it is masked internally so no underspray danger there. Nonetheless, I will probably remount it after the paint dries so that it fits more tightly. Next up will be the RLM yellow ID panel under the engine as well a s the red and white bits mentioned. All this will be masked before main camo goes on.

    It's slow going but worth the extra time to get right. Thanks for looking.

  • Profile Photo
    Pedro L. Rocha said 2 years, 9 months ago:

    You are doing some fantastic work around those 109s Colin. I never dwelled in 1/32 since I took the hobby more seriously as an adult, but those seem like good canvas for any type of 109 project.
    A special mention for the fabulous seat straps you made. Much better than some AM stuff I’ve seen!

  • Profile Photo
    Louis Gardner said 2 years, 9 months ago:

    Colin, @coling
    I agree wholeheartedly with Pedro, and basically say the same thing about the quality of your work on these two kits. I am particularly impressed with your scratch built seat harnesses.

    Incredible !

  • Profile Photo
    Spiros Pendedekas said 2 years, 9 months ago:

    Count me also in for regarding your job excellent, my friend @coling.
    Looking forward to those builds!

  • Profile Photo
    John vd Biggelaar said 2 years, 9 months ago:

    Outstanding progress, Colin @coling
    You did perfectly on the spinner of the Erla with the stretched sprue.

  • Profile Photo
    Colin Gomez said 2 years, 9 months ago:

    Thanks, Pedro. My favorite scale remains 1/32, as I find it is exactly the right size canvas to have a relaxing build, even when doing super detailing and scratch building.

    Thanks, Louis, Glad you like the builds. I will be concentrating on the Hasegawa kit now to get painting done quickly.

    Thanks, Spiros.

    Thanks, John. I am quite pleased with the spinner. I actually dreaded doing it for a while for fear of irreversibly distorting the shape, but it came out fine with the right contour intact. Revell got the shape much better then Hasegawa, they just messed up the engineering.

  • Profile Photo
    Colin Gomez said 2 years, 9 months ago:

    Here is a brief update on painting progress. I redid the Flat White on the rudder and masked it. I then proceeded with the yellow ID panel under the cowling.

    It is interesting that the most commonly built version of the JG-53 bf-109G-6 - Yellow 6 of the Eagle Cal sheet - is often portrayed by modelers without the yellow underside cowling and radiator. Some versions of the Eagle productions decal sheet profile show the yellow cowling and others don't - I guess there is some doubt about its accuracy. Hammer's aircraft has this feature, in most extant builds and profiles. Aesthetically, I like the way the primary nature of the yellow intensifies the red of the fuselage band so it's my choice in this case. Speaking of the fuselage band, this was a bit of a challenge for me. After masking the yellow and white components, I attempted to do the band in Gunze RLM 23. This turned out to be too washed out looking - kind of orangey-pink and lacking in density. I ended up stripping it off and restarting with Tamiya Flat Red. The Tamiya XF-7 Flat Red had enough of the slightly orange tones of RLM 23 while being richer and redder than Gunze's version. There is lots of discussion of the most appropriate RLM 23 on-line but many go with Tamiya and I can see why. The pics, taken with intensified artificial light don't show the difference too much but it is quite evident to the unaided eye in natural light. Anyway I am happy with the result. One of the reasons I chose the JG-53 a/c was because of the red tail band and its overall look against the camo, hence my perfectionism about the color. Tomorrow I will mask the red and begin laying on the RLM 76 over pre-shading. I have a nice MM Acryl version of the 76 for this and excellent Gunze paints for the 74 and 75, all of which I have used before with good success. I hope the painting progress is worth following for now.

  • Profile Photo
    John vd Biggelaar said 2 years, 9 months ago:

    Great paintwork, Colin @coling
    The reddish marking band looks perfect to me.

  • Profile Photo
    Spiros Pendedekas said 2 years, 9 months ago:

    Nice progress, my friend @coling.
    I too like more the Tamiya red.

  • Profile Photo
    Colin Gomez said 2 years, 9 months ago:

    Thanks, John. I fussed a bit with the color but I am happy with it now.

    Thanks, Spiros. Glad you concur about the color. The red will look deeper after a clear coat in the weathering process but I am sure it will turn out to be the right shade.

  • Profile Photo
    Pedro L. Rocha said 2 years, 9 months ago:

    One thing that brings the 23 red from Gunze more to life is a who te basecoat, something i always do. Don’t know which red maker is the most “accurate” but the one you chose, Tamyia, looks the part Colin

  • Profile Photo
    Colin Gomez said 2 years, 9 months ago:

    Here is a small update on the painting process. I took some time and care to mask the red Reich's Defence band and then set to work on the bays for the wing slats, done in RLM 02. I also decided to do the inside of the split flaps but found these had annoying mold release marks that needed filling and sanding first. This slowed me down somewhat. All done now and masked.

    I took a three stage approach to the RLM 76 fuselage sides and undersides. Since I was using the somewhat fragile MM Acryl version of 76, I decided to do a light primer coat of Tamiya white as well as preshading with a dirty black mix of Tamiya Flat Black, German Grey and NATO Brown.

    The Tamiya base coat gives the MM Acryl something to stick to so it will be less likely to chip or wear off. I managed to keep a fairly dark pre-shading look to the RLM 76 at the end of the first painting session today. I will let this cure overnight and then do a final spray while touching up bare areas (like one side of the the port cannon pod) and also do the drop tank and flap undersides. I will also be inspecting the finish for stray lint and polish this out, if possible. I am pretty happy with my approach to keeping cat hair and dust down while painting. I always clean up my office, vacuum and dust everywhere first then run an electric hepa air cleaner for an hour or so before I start work in the spray booth. I have had far fewer headaches with lint contamination these days and get bonus marks from my family for cleaning up (ha ha).

    I hope this looks good to you. Still a work in progress but I am pleased to be painting now.

  • Profile Photo
    Spiros Pendedekas said 2 years, 9 months ago:

    Painting looks great so far, my friend @coling!
    I too miss spots, almost constantly. The closer the color is to the styrene color, the more spots I miss!

  • Profile Photo
    John vd Biggelaar said 2 years, 9 months ago:

    The painting does indeed look good, Colin @coling
    Fully recognized as well, the closer the color is compared to the plastic, the more easy it is to miss some spots.
    I always try to focus on the shininess during spraying if I have covered all regions.

  • Profile Photo
    Colin Gomez said 2 years, 9 months ago:

    Thanks, Spiros. The missed spots on the cannon pods were partly left until later intentionally. There are limits to how I can hold a model while painting in a single session. I always try to avoid spraying at weird angles as it can build up in the wrong places. Of course I do also just miss things in the shadows as well, especially in the limited light of the spray booth.

    Thanks, John. Looking for shinier areas is a good strategy to avoid gaps in painting. I get used to doing two coats on different days when using acrylics. I inspect the model between coats and make notes about where to fill things in.

    Here are the first stages of the mottling process. It is denser than I want so I will do some counter spraying with RLM 76 tomorrow to lighten things up. I went denser to deal with the over-sharp demarcation line I had previously defined with SiIlly Putty masking. All in all, I am pretty happy with the look of the mottle so far. It is only the second time I have done this German-style camo in my modeling work. I got some practice with my Iwata Custom Micron. My first mottling job was my FW-190A-6 in 1/32, posted a while back. JG 53 aircraft clearly had pretty dense and dark mottling, going by photos. I have three pics of Hammer's 109 but they are pretty dark and not so much help on the pattern. As you can see, I prefer to do the fuselage mottle first and then make this before doing the 74/75 splinter pattern on the wings and tail. I started by masking the main demarcation line as accurately as possible.

    Then, I applied the 74/75 on the upper fuselage. Mottling followed. I hope this looks OK so far. Still quite a bit of work to do. I am just happy to have avoided splatters and stray specks of paint so far. My Iwata Custom Micron is the only airbrush I trust for painting like this. I will mask the whole fuselage after the mottling is done in order to do the wing and tail splinter later. Comments welcome.