Italeri Macchi Mc. 200 Saetta 1/48

Started by Chuck A. Villanueva · 55 · 5 months ago
  • Profile Photo
    Chuck A. Villanueva said 9 months ago:

    Thanks Erik, a process I have used since my teens. As skills improved and my ability to detail paint in my younger years made pre painting as part of my method. I did not invent, just seeing other modelers using this technique and their results made sense to me.
    Thanks John and Spiros. Lets get started.

  • Profile Photo
    Chuck A. Villanueva said 9 months ago:

    Step 1, we start in the cockpit, first removing the floor and start attaching parts.


    I used a Pale Interior Green, a Polly Scale, Acrylic with a couple of drops of Interior Green.
    The seat is aluminum and the side seat braces are PG.

    I found it was easier to attach the braces to the floor and then the seat to the support braces.
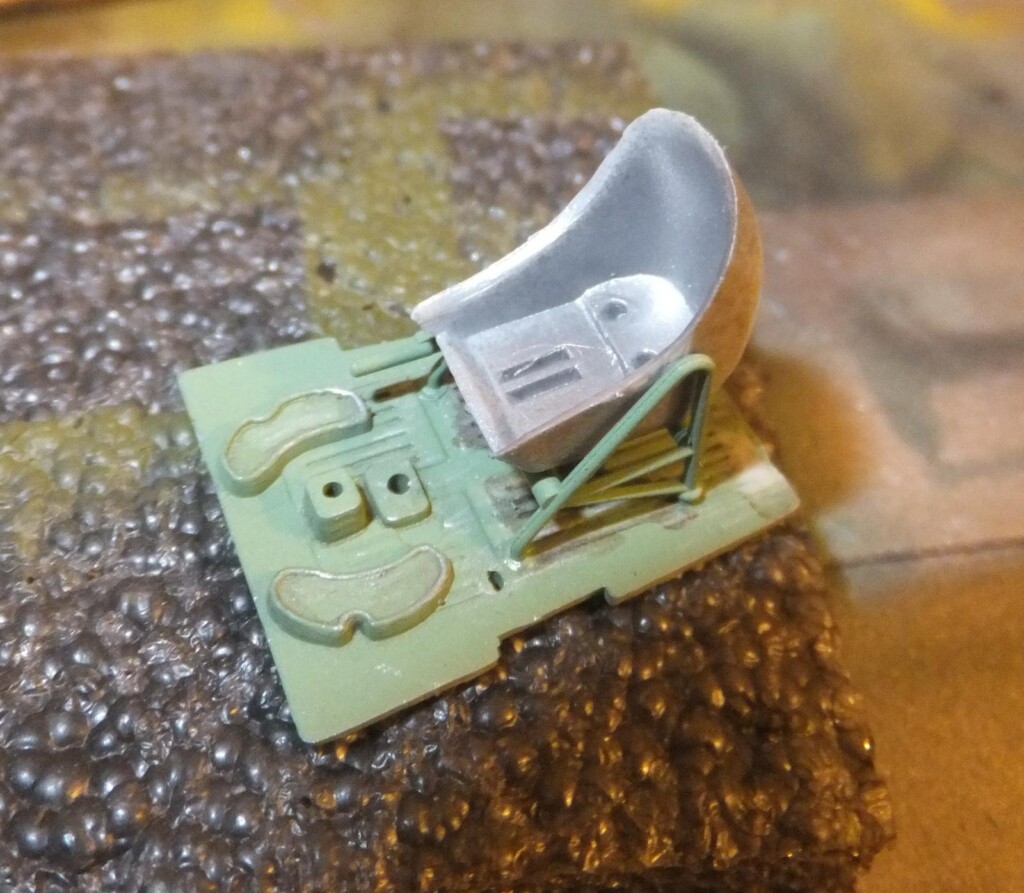
    The PE leather seat belt back/cushion is painted Red/Brown with steel chain style lap belts.

    While waiting for the paint to dry on the PE fret. I attach the lever on the LH side of the seat.

    The center lap chain belt is attached on the front edge of the seat. And carefully laid over towards the seat back.
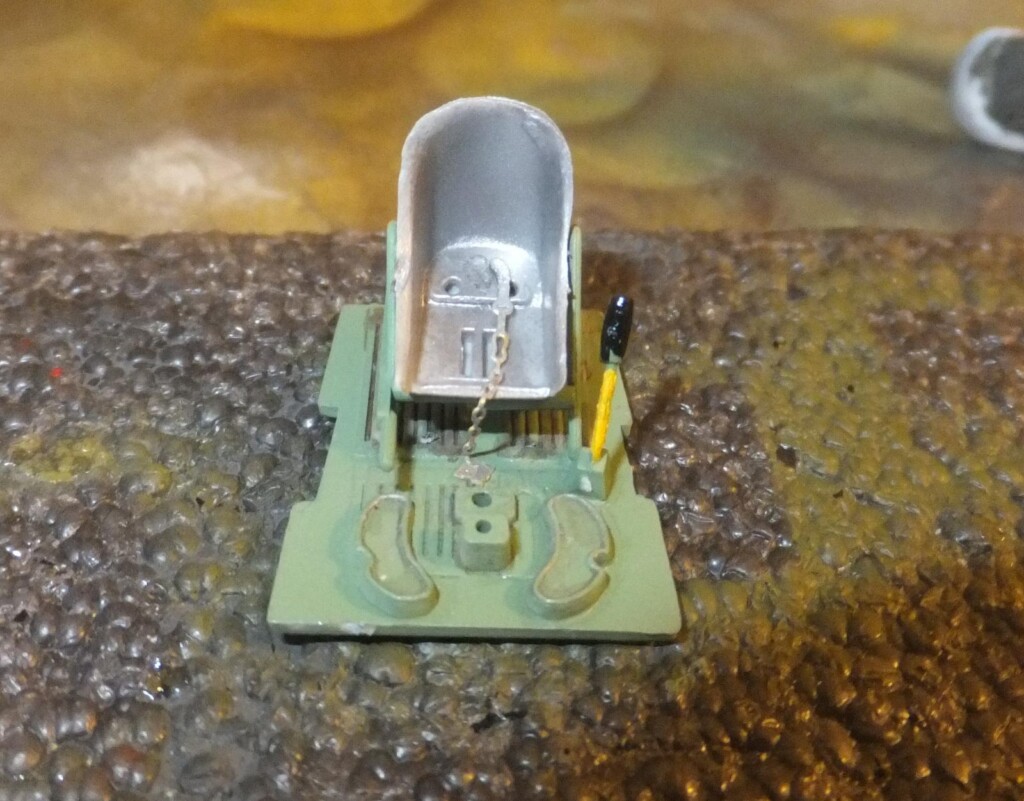
    Rudder pedals and control stick are attached.

    Finally the rear seat back and leather shoulder harness, which also has the chain syle lap belts attached is carefully installed with the unique way the leather shoulder harnesses hang. Stiff leather. This kit has some character.
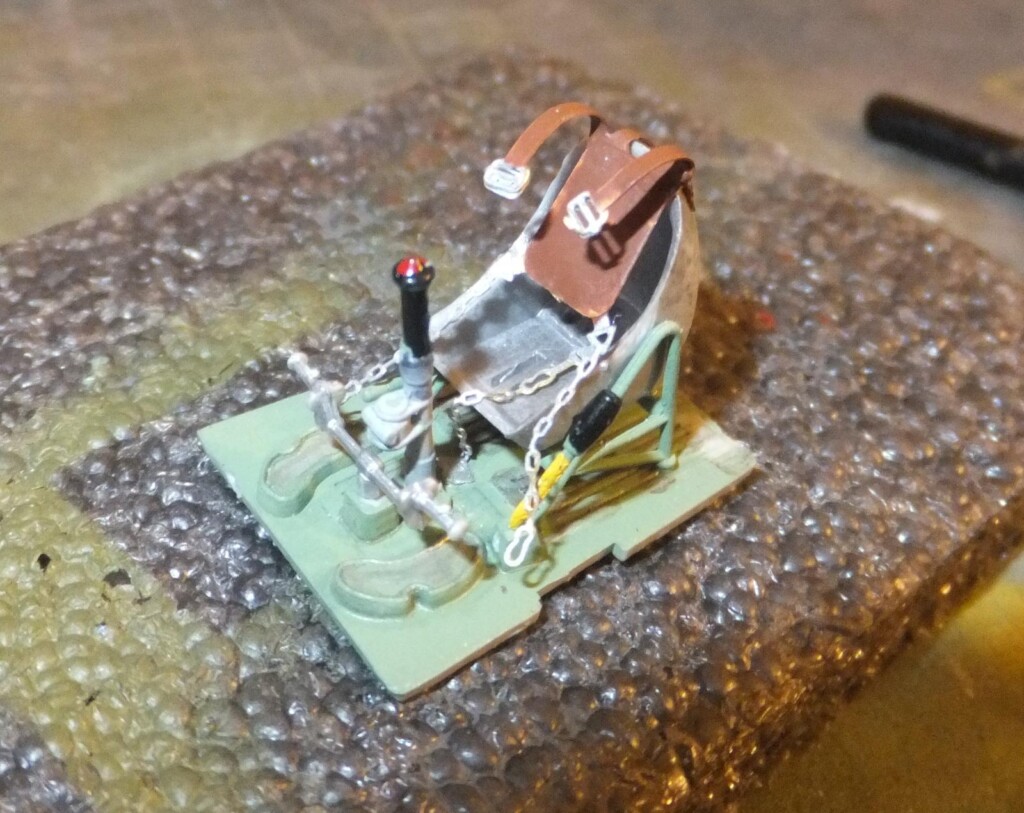
    Now step 2, Instrument panel, side interior consoles. and details.

    The side walls are detailed with black boxes, conduits highlighted with silver pencil. A but of wash applied. Incredible how they look ok when I painted the black boxes. And how awful picked up by the macro image from the camera.

    I attach the RH side wall to the fuselage.

    Normally I do not like using decals for the IP in this scale, but these looked really good, kudos to Italeri, so I used them.

    The fuselage halves are well detailed with engraved panel lines.

    The interior trim wheel is painted and attached to the LH side interior wall panel.

    The tail wheel strut is ready to install as we inch closer to mating the fuselage halves.

    The IP and interior is attached to the RH side fuselage.
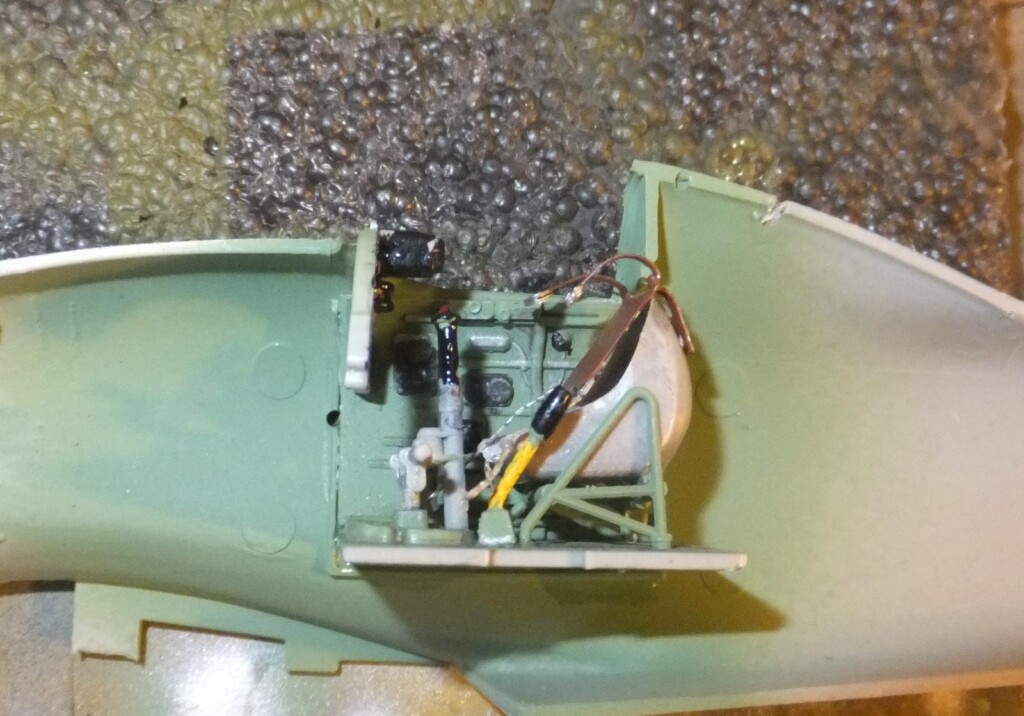
    The tail wheel strut is installed and the halves are glued with Tamiya quick drying cement.
    The fit is a bit tight but not where a seam may part over time. The seams will be easy to clean.

    Next up the wings and tail.

    more to follow.

  • Profile Photo
    John vd Biggelaar said 9 months ago:

    Excellent work on the interior, Chuck @uscusn

  • Profile Photo
    Spiros Pendedekas said 9 months ago:

    Fantastic entry and ditto progress, my friend @uscusn!

  • Profile Photo
    Anthony Ricco said 9 months ago:

    A beautiful plane thats looking really great so far, the interior is awesome - Nice work Chuck @uscusn, now I want to get one - But I already have a Saetta.

  • Profile Photo
    Chuck A. Villanueva said 8 months, 1 week ago:

    Thanks John, a nice change from the norm, the Saetta so far is a nice kit to build.
    Spiros, Italeri has nice gem of a kit, not a lot of pieces but Tamiya like in simple and yet enough details to build a nice little Saetta.
    Yes Anthony it is like a little sports car, as it is quite a small air frame. Especially next to a Hellcat it is currently sharing the work bench.

  • Profile Photo
    Chuck A. Villanueva said 8 months, 1 week ago:

    Time to get back into the Saetta, assembling and installing the wings. Really like the instruction sheet on this kit.


    The rear wheel bay wall also serves as the wing spar. The roof panel and firewall. All painted in Interior Pale Green. with yellow, black and silver details. Also givien a wash to brong our the details.

    Nice that Italeri pretty much have enough details to highlight with detail painting and washes. Attaching the forward wall and braces.

    The one piece lower wing, Careful to trim the back edge. of the wing.

    The wheel well bay is then attached to the lower wing, good fit here. So far the kit is going together wll, Parts fit, no worry about alignment, so far.

    Next the fit of the wing to fuselage is ok, just a bit of a gap at the wing to fuselage join on the RH side contact point. The lower rear trailing edge to fuselage is good and will need a bit of filler seal the seam.

    The horizontal stabs have separate elevators, Nice touch and will display them drooped to add character.

    Next up to assemble the engine.
    More to follow

  • Profile Photo
    Spiros Pendedekas said 8 months, 1 week ago:

    Great progress, my friend @uscusn!

  • Profile Photo
    John vd Biggelaar said 8 months, 1 week ago:

    Superb progress, Chuck @uscusn
    The details are really nice on this kit and you are definitely making good use of it.

  • Profile Photo
    Jakub Vilingr said 8 months, 1 week ago:

    Italeri made horrible kit 🙁 It was necessary reworked all panel lines, engine cover (from Special Hobby kit), fuselage, wheel wells or cockpit 🙁 Here are few photos from my build... I am curious about your work 😉

    11 attached images. Click to enlarge.

  • Profile Photo
    Chuck A. Villanueva said 7 months, 4 weeks ago:

    Thanks as always Spiros.
    Hi John, I thought so too, but apparently someone doesn't think so. I will try to get an explanation as to why from the dissenting member.

  • Profile Photo
    Chuck A. Villanueva said 7 months, 4 weeks ago:

    Hi Jakub, 1st your models are excellent, the Eduard's A6m3 and the Saetta. I have not read anyone mention any inaccuracies on the Eduards's kit what is wrong with it? Next you mention the Italeri kit is horrible, define horriible and what is wrong with the panel lines. Why did you use the Special Hobby engine cowl instead of Italeri's parts. Normally when critizing a kit you need at least explain why. A horrible kit for an example is the Modelcraft F-82 all of them. Now one can say the Modelsvit kit is too as it is not an easy build but much more tolerable. One can say all of Monograms kits are hoirrible as they can be challenging but build to excellent kits as they are fun to build. Being on this a number of years I will point out from time to time any inaccuracies with images of the actual aircraft or a particular detail showing evidence why a detail may be wrong. But I will never bag a kit just point our facts and what too look for. Now I am not an expert on Italian WWII era fighters, expecially the Saetta, but I am a bit knowledgable on the Folgore and the Veltro. more well known Italian fighters. Then looking at some reviews on line, and no I did not looked at them all just a couple and not one of the builders mentioned any issues other than a typical Italeri fitness just as we both encountered at the wing root contact point to the fuselage. Bit of filler needed there. As for me I build for fun, my passion it US Naval Aviation, being air crew on helicopters while serving in the Navy was inspiration that carries over to model building. I do not limit myself to Naval or Marine Air, but all eras from WWII and beyond. I don't build for shows I build to enjoy the hobby. Some builds I will go all out for accuracy, with resin updates, detail sets, etc. Otherwise I will just build what is given such as the Saetta, why because I would love a companion for my Veltro on the shelf. It is a neat little sports car just like say an Alfa Spyder. And a neat little subject to build that is all. Now if you can provide me with some facts in what is wrong with the Saetta out of the box I would like to know. Pics of the actual aircraft so you can point out the inaccuracies. Otherwise you work is excellent. I see that you enjoy the hobby as I do. Thanks and God Bless, Fly Navy

  • Profile Photo
    Chuck A. Villanueva said 7 months, 4 weeks ago:

    Now enough of that and back to the Saetta: This session is to build the engine.

    Simple sharp details on the small radial engine, well defined cooling fins on the cylinder heads i will enhance with a wash later in the build.

    Next to carefully remove the pushrod from the sprue. I cut the section that are holding the parts off the main sprue, then trim more of the sprue off a portion of the pushrods. Then carefully remove the parts of the tree. Very fragile but cutting away sections of the sprue gets them off safely.

    Next was to attach both front and rear set of pushrod tubes and crank case cover.

    The exhaust collector ring is next and installed at the rear of the engine.

    Next up is to build the engine cowling,

    more to follow.

  • Profile Photo
    Pedro L. Rocha said 7 months, 4 weeks ago:

    @uscusn

    Hey Chuck! Only today did I spot your Saetta WIP going about. This one and the Macchi 202 are undoubtedly the essentials for any modeller who wishes to build the most proeminente fighters of the RA of WW2.

    I too have veered away from this kit due to a lot of criticism in model forums, I remember focusing the engine and the spinal piece.

    However your model does look like a 200 from here 😉 looking forward to see the final form assembled and the paintwork

  • Profile Photo
    Spiros Pendedekas said 7 months, 4 weeks ago:

    Excellent progress, my friend @uscusn!