You are visiting iModeler as a Guest. Let's hope this is only a beginning.
Join iModeler today.
Work on the interior accomplished. Sorry for the bad pics.
Trying to replicate the seat shown in the 1:1 pic I modified the seat by adding sheet and rod stryene seat base/frame. Seat and back were covered with tissue with an application of diluted white glue. Painted up and kit PE belts added.
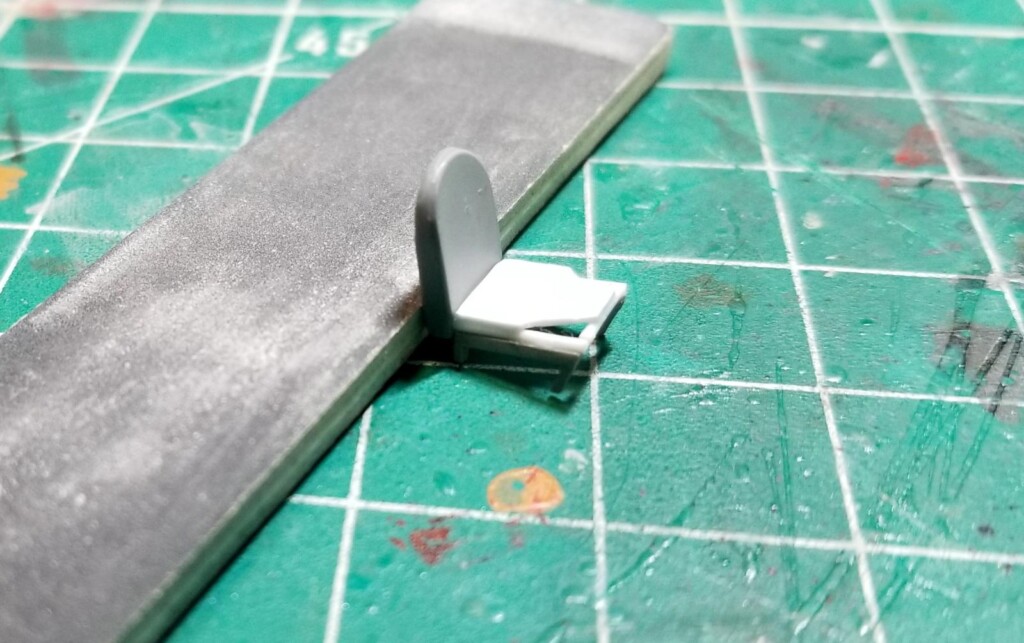
The floor with details and seat completed.
Primed the interior with Mr. Color 329 Yellow FS13538.
Wonderful job, my friend @gwskat!
Nice result from using the tissue, Gary @gwskat
Moving forward: Added the floor assembly to the fuselage and added rudder cables with EZ Line Fine. Completed the instrument panel with instrument decals and clear UV epoxy lenses. Installed the engine, assembled the fuselage halves, added the under the instrument panel fuel tank and rear seat.
Nice work on creating the rudder cables, Gary @gwskat Other results equally great.
Wow. You went all the way and installed rudder cables! Nice attention to detail, Gary @gwskat. Your cockpit interior looks just like the photo including that uncomfortable looking canvas seat right where one’s rear would sit. Impressive work here.
Wow! Great so far, my friend @gwskat! Rudder cables! Awesome!
I really like all of the WW2 observation planes, gary (@gwskat), but I can't imagine sitting in that seat for a long time. Interior looks great.
Thanks All. George, I'll bet that seat makes you forget all about your headache from a long night at the O'club...LOL
gary sausmikat (@gwskat) This is an excellent start and the extra details you added to the office look spectacular. These are an all time classic. I have plans to draw up a set of scale plans for one of these, a Taylorcraft, and eventually a "Gull Wing" Stinson SR as electric powered flying RC planes. Chances are they will be in 1/6 scale which is a lot easier to detail.
Man this is looking good... keep it going buddy !
Thanks, Louis! Good luck with those builds.
Removed the inner cockpit masks. The sub assembly approach paid off by making the removal of the masks easier. Added the instrument panel. It will need some paint touch up. Glued the cockpit top in place. Next up...remove seams.
Very good result with this practical approach, Gary @gwskat
Looks really nice, my friend @gwskat!
gary sausmikat (@gwskat) What a big difference with the fuselage halves closed up and glued together. It's really starting to look like a Piper now... and a very nice one at that !