1/35th Dragon M-46 Patton Tank USMC

Started by Chuck A. Villanueva · 76 · 10 months ago
  • Profile Photo
    Louis Gardner said 2 years, 2 months ago:

    Chuck, @uscusn
    I have built one of these Dragon M-26 kits in the past. Dragon seems to make a very detailed kit, and all of the minor differences between the different versions are very well captured with the way they have detailed all of these little parts.

    The final drives, sprockets and even the road wheels that they used in these M-46's (and the Pershing's too) look to be identical to the ones that we used in the M-60. During our "Q Serve" we had to take oil samples from the final drives and hand them over to our Motor Sergeant. He would send the oil samples out for analysis to see if anything "bad" was going on inside the gear box with bearing failure and so on. I have had to change several of these final drives and this is not something you want to do on a daily basis. We had to remove the power pack, just so we could get to the bolts that held the drive in place on the hull. These bolts were very big and they took a high torque value when tightened. I'm going from memory here, but I think the bolts were torqued down to 600 Pound Feet on each bolt.

    The track had to be 'broken" and removed from the sprockets. We also had a special "sling" that we bolted to the drive unit. This sling was hoisted up by the M-88 tank recovery crew. It was WAY too heavy for us to pick up. Sometimes we replaced the sprockets at this time. They had a wear gauge that was stamped into the teeth, so you could visually inspect the sprockets and see how much "meat" was left on the teeth.

    I like how you take the time to snap great pictures to go along with your very detailed build journals. Please keep it going my friend. Your work here looks very neat.

  • Profile Photo
    Chuck A. Villanueva said 2 years, 1 month ago:

    Thanks John, though a Dragon/DML kit from the early 2000's, good details abound and not labor intensive yet.

  • Profile Photo
    Chuck A. Villanueva said 2 years, 1 month ago:

    Thanks Spiros, good details are provided within the kit, so far all fits well and progress is steady/
    Thanks Gary, a nice change of pace from all the aircraft builds.

  • Profile Photo
    Chuck A. Villanueva said 2 years, 1 month ago:

    Louis I really enjoy the personal experiences you have had with your time working around these tanks. The Navy does have it's share of adventures. But not exclusively the Navy, your time in the Army has it's moments as well. Never a great deal of fun changing a flat tire on the road somewhere, much less servicing a road wheel on a tank the fails which is a crew endeavor and labor intensive. And dangerous if not careful. Even on an aircraft where things become routine while doing regular maintenance and get to casual about the task. Not paying attention, an oops and major problems all of a sudden start to happen when not paying attention to details. No shortcuts!

  • Profile Photo
    Chuck A. Villanueva said 2 years, 1 month ago:

    Getting back to the ground and the Patton, will work on the suspension and some lower hull details.

    Will start with the front torque arms.

    Now to attach the rear lower service plate which contains several service hatches.

    The suspension is not that complicated of a system but is quite detailed. With the torque arms that the road wheels ride on as well as the idlers.

    The forward arms along with the shocks give these tanks the ability to run in rough terrain off road.

    A pair of rear service hatches are attached to each side rear of the lower hull.

    Aft of the rear suspension torque arm attachment point.

    Dragon also provides the shocks for each suspension torque arm.

    Next to attach each suspension arm to each side of the hull. A little bit of play as you insert each arm into it's location point along the hull, so attaching each arm LH and RH side front to rear. I check for alignment so the tank will sit level to the deck, each arm touching evenly working my way back to the rear.

    Attaching the shocks on each assembly.

    The suspension stops, that prevents the arms from bottoming out against the hull.

    These are attached for each torque arm. Both sides of the hull.

    Finally all the arms, shocks and stoppers are attached.

    Next to build the road wheels and some pre painting.

    More to follow.

  • Profile Photo
    Spiros Pendedekas said 2 years, 1 month ago:

    Superb job so far, my friend @uscusn!

  • Profile Photo
    John vd Biggelaar said 2 years, 1 month ago:

    Nice progress, Chuck @uscusn

  • Profile Photo
    Chuck A. Villanueva said 2 years, 1 month ago:

    Thanks Spiros and John, it was about this time that DML/Dragon really put out some well detailed armored kits. A bit more bits and pieces as well as defined details. Just the suspension process shows a bit of this so far,.

  • Profile Photo
    Chuck A. Villanueva said 2 years ago:

    Time to finish up the lower hull on the M-46.

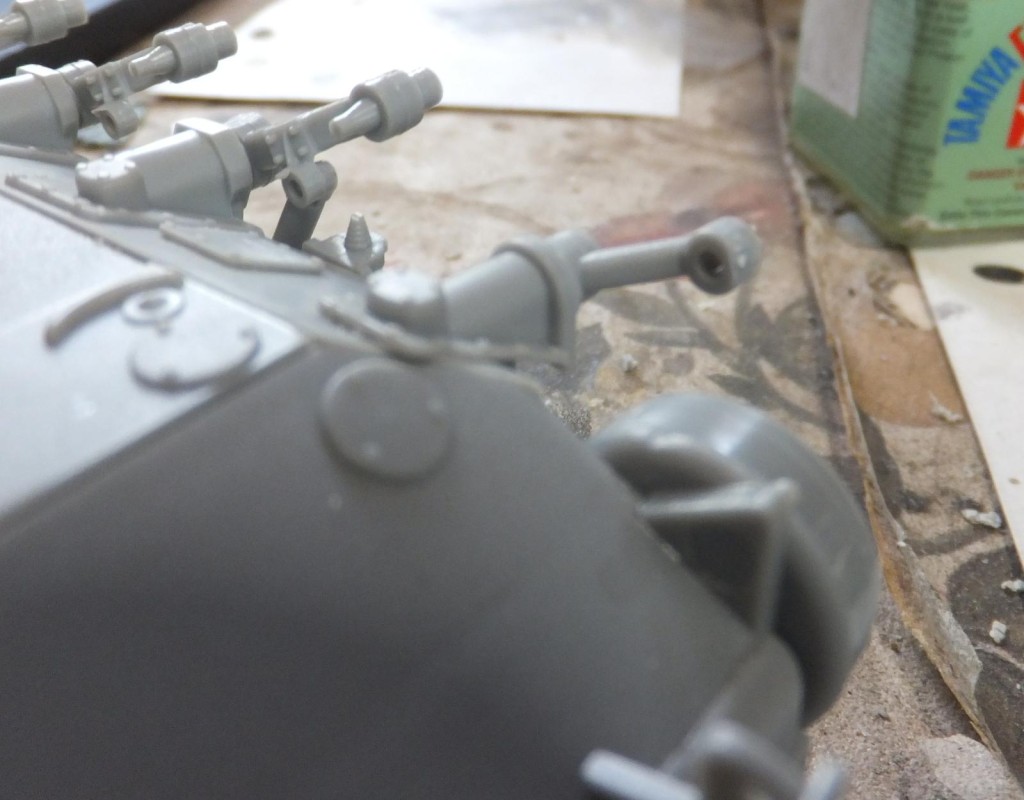
    The final detail is the flange and support housing for the track tensioning wheel. This attaches between the first set of road wheels and the drive sprocket. One on each side.

    Then the flange is attached to each housing.

    Next to attach the tensioning arm to the housing.

    The front suspension system looks very busy, as this part of the build is complete. Now to paint the road wheels.

    First using Nato black to paint the tires on the road wheels and idlers.
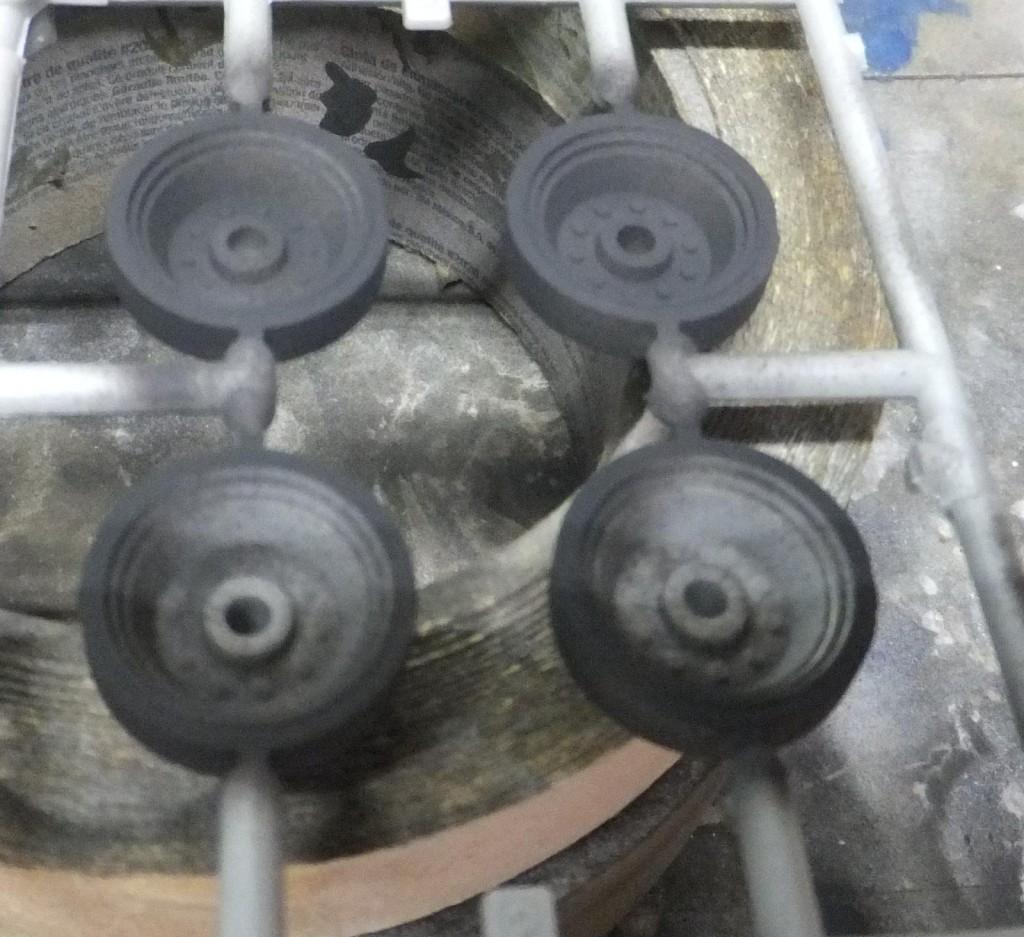
    Making sure to paint front and rear sides of the inner and front road wheels.

    With the Black leftover in the brush, next is to go over the lower hull and paint all the components that are attached as well.

    It will be easier at this stage to paint this section before attaching the road wheels and tracks. The black is a base for the next step in applying the Olive Drab.

    Not a total coverage as this is more of a base color before applying the first coat of Olive Drab. This serves as a base for the next series of OD's.

    Now looking at images, it seems to me that a darker shade of OD was used on the tanks used in Korea, comparing images from WWII, taking into account the heavy use, in Europe the fading and environment that may account for the lighter OD's on the US equipment in theatre, compared to stateside service. Regardless I will use Xtracolour US Marine Corp OD to start the base coat on the lower hull, wheels and suspension.

    It will dry to glossy finish when dry which is ok, as it will be lightened as we go along. First the USMC OD overall.

    It takes a while to dry, but it is quite glossy and dark. I also paint the road wheels, idlers and sprockets.

    No I did not mask off the tire section. Though some overspray, but this I can touch up with a brush, which is something you can do with armor. I tried the tedious process of masks, seems like they work well on aircraft wheels, a hassle with armor wheels. So I just paint the hubs then with washes and detail painting with a brush I get the desired result without the use of masking off the tires or wheels.

    With the first coat now set, ready to apply the lighter shade of OD over the dark OD/

    Mission Models Olive Drab is then lightly misted over the dark OD.

    You can see how the Darker shade under the lighter coat still enhances the details on the hull, bolts and rivets.

    The MM OD dries flat. So far the results look what I was after. Yet still maintaining that darker OD shade compared to a WWII US tank.

    Next up to install the road wheels.

    More to follow

  • Profile Photo
    John vd Biggelaar said 2 years ago:

    Very nice work on that complex suspension system, Chuck @uscusn
    Paintwork is looking good as well.

  • Profile Photo
    Chuck A. Villanueva said 1 year, 10 months ago:

    Hi John, thanks sorry for the long delay in responding. It has been a busy last 2 months (closer to 3) of moving, packing, unpacking and organizing. The last part takes a bit longer. But have the workbench 80% setup but still a work in progress. First repairing some of the models damaged during the move. But now lets get to getting the road wheels on the M-46. Starting with the return idlers.

    These are nicely detailed and are of 2 parts.

    The first roller is attached to the tensioning arm that is located between the drive wheel and road wheel.

    Next to proceed to install the rest of the return rollers.

    A total of 6 on each side.

    These will be static and will not rotate.

    The tires will be cleaned up once these wheels set. And remove remnants of the stubs.

    Now to start on the road wheels.

    12 sets of road wheels are assembled. 6 each side.

    Again these will not rotate and are attached and cemented onto the spindles.

    As each wheel are installed. The fit so far has been excellent.

    Nice that the fit is precise and all wheels are set in place and in alignment. None wobble or feel loose.

    Once the wheels are set, I will go over the tires and repaint the black and clean up any of the nub remnants when the wheels were removed from the sprue tree.

    The lower hull sits nice and level when placed on the deck.

    Will let this sit for a week and next to attach the track.

    More to follow.

  • Profile Photo
    Spiros Pendedekas said 1 year, 10 months ago:

    What a great update, my friend @uscusn!
    Color choice looks very "correct".
    Looking forward to it!

  • Profile Photo
    John vd Biggelaar said 1 year, 10 months ago:

    Excellent progress, Chuck @uscusn
    The wheels on looks perfect.

  • Profile Photo
    Erik Gjørup said 1 year, 10 months ago:

    Good to see you have the workbench back in working order @uscusn.

  • Profile Photo
    Chuck A. Villanueva said 1 year, 9 months ago:

    Thanks Spiros, finding that the OD looked a bit darker in shade in the Korean era and after into the 90's when camo became a standard scheme depending on environment. Desert, Euro, etc.

    Thanks John, doing wheels on a tank are much easier to me despite the number that are on a tank compared to aircraft no matter the type. I don't use masks, just careful airbrushing, first painting the tires either Rubber or Tire Black, depending which brand I'm using then the wheels in whatever color they will be. Without the tedious masking involved.

    Hi Erick, love the smell of styrene in the morning.

    With the lower hull pretty much finished, time to start work on the upper hull which is nicely detailed from Dragon.

    The upper has really well defined details overall, moulded into one large piece, Now to start adding some bits and pieces.

    1st with the ball gun mount that is on the front plate on the right side.

    Next a pair of crew hatches for the driver and gunner.

    A pair of disc covers are then installed.

    The travel barrel mount is then installed on the rear deck.

    A vent cover is then attached just aft of the turret opening.

    Now a set of shackles are attached on each side of the rear deck, bordering the edges, right above fenders.

    With the basic parts attached, the upper deck is then attached to the lower hull. The fit is excellent, and slowly beginning to look like a Patton.

    Particularly very good fit in the rear section. The details look great and more so when time to do some weathering.

    Next up, install the tracks. This will be fun and frustrating, hmmm

    More to follow

    1 additional image. Click to enlarge.