1/48 Tupelov Tu-2 "Bat" N. Korea

Started by Chuck A. Villanueva · 99 · 5 months ago
  • Profile Photo
    John vd Biggelaar said 10 months, 2 weeks ago:

    Very impressive interior, Chuck @uscusn

  • Profile Photo
    Chuck A. Villanueva said 10 months, 2 weeks ago:

    Thanks Spiros and John, at first it seemed sparse in detail. But as you start attaching pieces, it ends up quite a bit more than expected.

  • Profile Photo
    Chuck A. Villanueva said 10 months, 2 weeks ago:

    Now to work on the flight deck and navigators compartment;.

    The flight deck is part of the 2 forward compartments, cockpit and navigator.

    PE floor section is placed in where the seat will be located.

    The operators rear bulkhead is placed in position on the flight deck. Also another PE floor plate is placed here as well.

    Focusing under the floor with a pair of inserts to attach.

    The bomb bay forward wall sits at an angle under the floor. A test fit to set the angle

    The Pe floor plates are painted Lt Medium Grey.

    The bomb sight is installed in place.

    A unique pair of rudder pedals are next place in the front of the cockpit floor, they do sit kind of high.

    The pilots seat is a high back affair, with controls and circuit boxes mounted on the rear of the upper seat back. Even a little shelf.

    Next the PE belts are attached to the seat pan.

    The seat is then assembled.

    The control column and wheel is next to be attached to the flight deck. Then the wheel is attached to the column, painted semi gloss black.

    The rear upper trim panel is placed at the operators rear bulkhead.

    The shoulder harnesses are next to be attached to the upper seat back.

    Next the seat is then placed in a pair of locating slots on the deck.

    Finally a test fit into the LH side of the fuselage. Everything clears and aligns in the location point along the flight deck. Not shown is the PE lower dividing panel under the floor.

    Next up the rear compartment deck, seat and radios

    more to follow...

    1 additional image. Click to enlarge.

  • Profile Photo
    John vd Biggelaar said 10 months, 2 weeks ago:

    This is indeed getting nicely detailed, Chuck @uscusn
    Nice progress.

  • Profile Photo
    Spiros Pendedekas said 10 months, 1 week ago:

    Indeed, it looks really nice with great detail, my friend @uscusn!

  • Profile Photo
    Chuck A. Villanueva said 10 months, 1 week ago:

    Thanks John and Spiros, there is much more details in the kit than it appears at first glance. Then add the PE enhancement makes them pop a bit more.

  • Profile Photo
    Erik Gjørup said 10 months, 1 week ago:

    Great PE additions. As you say they make the details pop a bit more!

  • Profile Photo
    Chuck A. Villanueva said 10 months, 1 week ago:

    Need to step up the pace a bit. Next is to start work on the rear compartment, floor, and rear seat.

    Starting with the rear seat and seat belts.

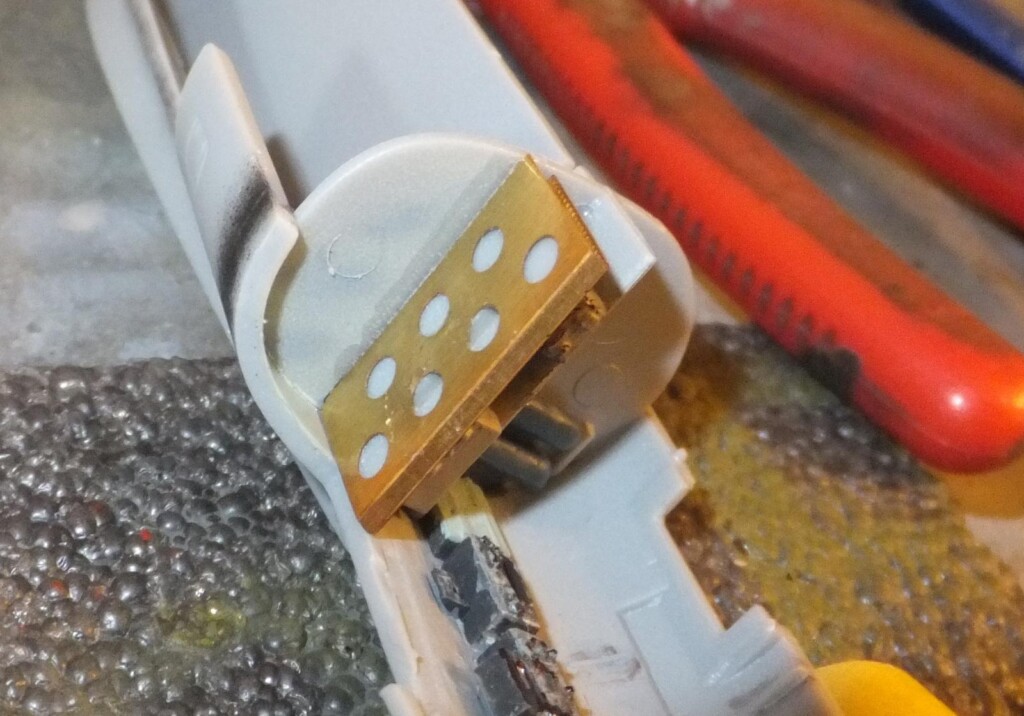
    Once the belts set, the pedestal post is attached. At first it looks like this will not hold up, but the unique step designin attaching it to the bottom of the seat feels pretty secure.

    A pedestal for the console is placed on the deck.

    The seat is then installed in place in the locating notch, Tamiya thin quick set cement is applied for a positive fit.

    Next is to add the details to the rear comportments forward bulkhead, which also serves as the rear wall of the bomb bay. Tanks are painted blue and attached to the bulkhead.

    The bulkhead is then cemented into place on the LH fuselage, while setting the RH fuselage is temporarily placed to the LH side to keep alignment and fit.

    A quick peek at the cockpit area seems to show that things seam fit well. Nothing is interfering with clearance on the interior parts as the halves are in place.

    As parts set, the bomb is painted Vallejo Dark Green, and set aside, as it will be installed later towards the end of the build.

    Next is to continue work on the rear compartment by folding up the PE to make the pedestal mounted control console.

    The electrical components are next to be attached to the rear lower shelf. The RH side fuselage has been removed to continue work on the interior.

    Next to prepare the upper shelf, with a detailed PE shelf sleeve that will slip over the plastic shelf, first details are removed to an even level surface to bend the panel over the plastic shelf.

    The PE shelf is then folded into shape and slide into place over the plastic shelf.

    Then the shelf is attached to the bulkhead sandwiching the previously installed components shelf.

    More avionics boxes are attached to the upper shelf

    Next the 3rd component is attached to the shelf.

    The 2 taller boxes are painted grey with white faces and black dials.The 3rd component is black.

    The rear reinforcement rail is has an added PE enhancement panel attached.

    The ammo drum is folded in shape and attached just above the rear port hole windows.

    Next up is to complete the interior and assemble the fuselage halves.

    More to follow...

  • Profile Photo
    Spiros Pendedekas said 10 months, 1 week ago:

    Wow! Super progress, my friend @uscusn! Looking forward to your next steps!

  • Profile Photo
    John vd Biggelaar said 10 months, 1 week ago:

    Great progress, Chuck @uscusn.
    All the extras and PE does make this cockpit look amazing.

  • Profile Photo
    Chuck A. Villanueva said 10 months ago:

    Thanks Spiros and John, keep the straps on and your hands on your lap, as we get this interior completed finally. A lot going on.

  • Profile Photo
    Chuck A. Villanueva said 10 months ago:

    Next is to assemble the twin tailed rudder and horizontal tail.

    The upper 1/2 of the horizontail tail is one piece with separate elevators.

    On both the upper lower stab halves I have to cut and sand of these quite large mold release subs. They only appear on these parts in the kit.

    Once getting these cleaned up, the horizontal tail parts fit properly.

    The vertical twin tails are one piece and a good tight fit into the locating slots.

    Putting the tail aside, back to buttoning up the fuselage. The ammo drum is painted black.

    Working front to back in sealing the top seam of the fuselage, the fit is a bit tight. The top seam will close with pressure and taping them as they set.

    Using Tamiya grey putty to fill and sand. It was a bit of work they are cleanin up quite well. Upper and lower seams.

    Like the hood of a car, the nose is the first thing most will see. So it was important to make sure this looks good when primed and ready for paint.

    Filler, sanding and smoothing out the upper and lower seams. Here the top and rearward center seams are sealed and rescribed.

    Next up is to install the upper insert panel and the canopy, yeah a bit early.

    more to follow

  • Profile Photo
    Spiros Pendedekas said 10 months ago:

    Great assembly job, my friend @uscusn!

  • Profile Photo
    John vd Biggelaar said 10 months ago:

    Looks like solid progress, Chuck @uscusn
    I defintely remain strapped for the next steps.

  • Profile Photo
    Chuck A. Villanueva said 9 months, 3 weeks ago:

    Thanks Spiros and John, slowly getting there,