Modelsvit F-82G Twin Mustang, 1/48

Started by Chuck A. Villanueva · 97 · 11 months ago
  • Profile Photo
    Chuck A. Villanueva said 2 years, 4 months ago:

    A Christmas blessing finally here and now to start on the F-82, more to follow.

    4 attached images. Click to enlarge.

  • Profile Photo
    Andrew H said 2 years, 4 months ago:

    Awesome, Chuck. Mine will be in before new year. Looking forward to your thorough build log.

    I wonder how far out that E/H release is...

  • Profile Photo
    Juan Benitez said 2 years, 4 months ago:

    Got mine last week, really looking forward to building it!

  • Profile Photo
    Chuck A. Villanueva said 2 years, 4 months ago:

    Thanks Andrew, you will not be disappointed. The plastic looks good so far.
    Hey Juan thanks for dropping by, this will be my first Modelsvit kit to build. Will soon get started on it.

  • Profile Photo
    Spiros Pendedekas said 2 years, 4 months ago:

    A fantastic entry, my friend @uscusn of what looks to be a super kit!

  • Profile Photo
    Chuck A. Villanueva said 2 years, 4 months ago:

    Thanks Spiros, so far was able to paint the interior components as my usual process before starting assembly.

  • Profile Photo
    John vd Biggelaar said 2 years, 4 months ago:

    What a fantastic Christmas present, Chuck @uscusn
    Looking forward to this great looking kit.

  • Profile Photo
    Chuck A. Villanueva said 2 years, 4 months ago:

    Thanks John, got it started already. At least step 1.

  • Profile Photo
    Louis Gardner said 2 years, 4 months ago:

    Chuck, @uscusn
    Thank you for starting another build for our Korean War group. I was hoping that someone would start one of these new tool Modelsvit kits and build it as part of our Korean War group. Judging from your very detailed kit review, this should be a very nice model, as it has a ton of details. It's definitely head and shoulders above the old Modelcraft F-82 (which I have one of in the stash).

    I'll watch and follow along as you build this beauty. Please be kind and post the good along with the bad, as many of us will be using this journal as a road map when we start ours.

    You couldn't have received a nicer Christmas gift. Excellent choice ! By the looks of things, Ruffio likes it too.

    I'm looking forward to your next posting.

  • Profile Photo
    Chuck A. Villanueva said 2 years, 4 months ago:

    Let's get started. As my usual way of doing things, I first pre-paint the basic interior colors while still on the sprues. Starting by using Mission Models (MM) Zinc Chromate Green in the cockpit interior.

    Don't forget the forward and rear bulkheads in the for the cockpits, these parts are on another sprue tree.

    Used a lot of MM Zinc Chromate Yellow on the rest of the interior components. Seems like most of the interior wells and service bays were this color. The intakes may be natural metal. So may change this later on as I get closer to that part of the build.
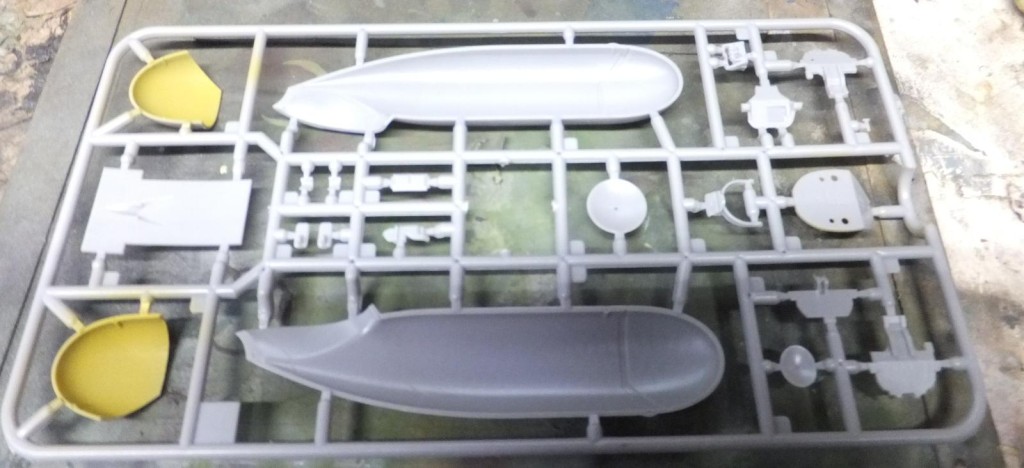
    Edged the main gear bay openings on the lower wing panel.

    Also painted the interior of the fuselage halves, ZCG in the cockpit area, ZCY in the service and tail wheel bays.

    The main gear bays, doors and roof areas are also painted ZCYellow.

    The wheel bay are well detailed and looks accurate. The roof area looks ok. The bulkheads and walls look busy and just right in what is within the wheel bay. Parts looks real good to this point. The details pop already without any wash applied as yet.

    The kit does feel more of a main street molding so far, sprue gates not oversized yet delicate, fine detailed parts will still need to be removed carefully.

    Step 1, build the seats.

    3 pieces make up both the pilots and WSO's seats.
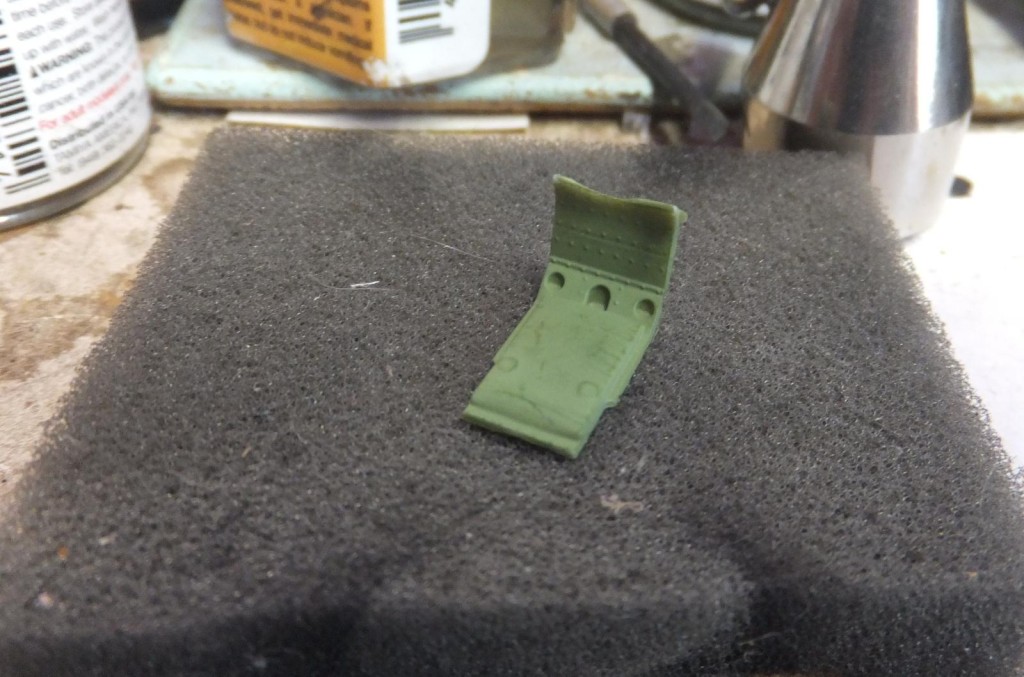
    And already a boo boo, not following my own advice in removing delicate parts. Already broke one of the legs on the seat frame. Easy fix and solution.
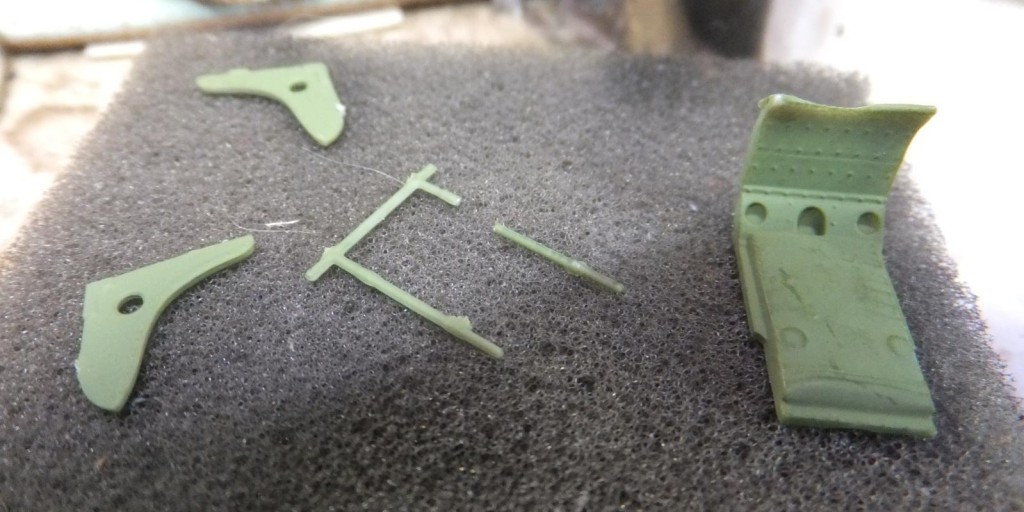
    Take your time, be patient, parts are delicate. The parts fit well on the seat. Just let them set before handling.

    Don't worry about the paint, touching up and some wash will take care of any discrepancies.

    The upper seat cushions call for Tan or I may use a Faded Olive Drab. Then some can be yellow. Will check references. Was able to remove the 2nd seat frame successfully without breaking it.
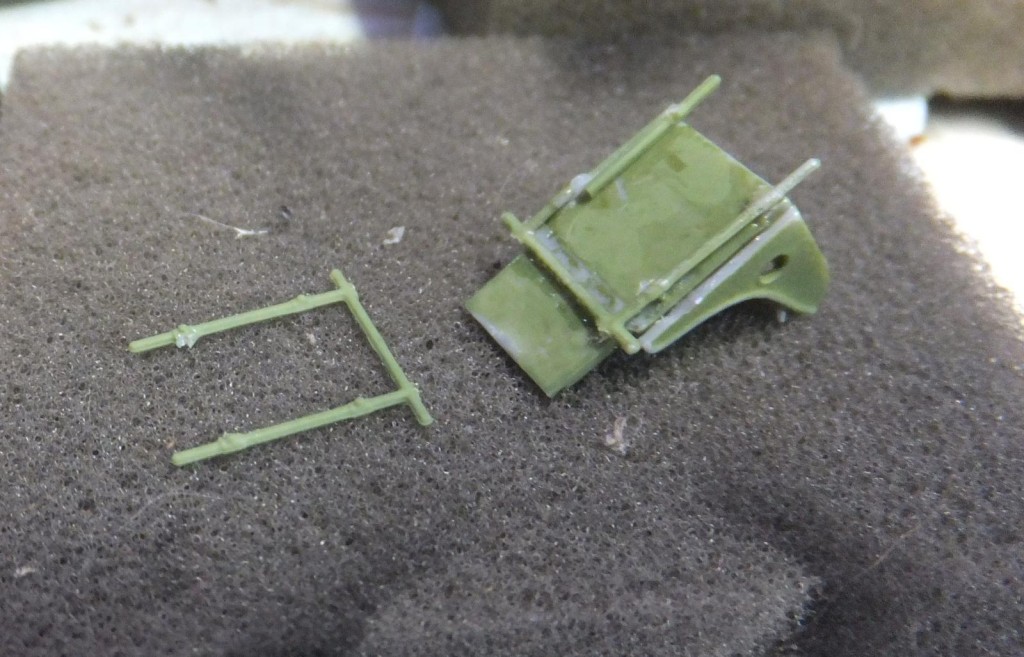
    I will use the supplied seat belts. The quality looks good, similar to an Eduard's fret. Painted the belts a Dirty White.

    Will attach these in the next step. Off to a slow start but so far as expected on a new kit.

    More to follow,,

  • Profile Photo
    John vd Biggelaar said 2 years, 4 months ago:

    That is a great start, Chuck @uscusn
    A pitty about the broke frame but that will be solved easily by you.

    Thanks John, already a "Doh" on my part. Just need to be careful.

  • Profile Photo
    Spiros Pendedekas said 2 years, 4 months ago:

    Off to a great start, my friend @uscusn!

    Thanks Spiros, will do an update this weekend.

  • Profile Photo
    Tom Cleaver said 2 years, 3 months ago:

    Chuck - From my experience there are two things to worry about in assembly:

    1. thin down the insert side of the dorsal tail fin, then when assembling, flood the area where that inserts to on the other side with glue, then push it hard together. You will lose the seam there, then when you rescribe, it will completely disappear.

    2. When attaching the three upper wing parts to the lower wing, make certain that the attachment of the outer wing part to the center wing part at the forward edge looks just like the other (molded) side to get fit. Use the already-assembled fuselages to check the fit while the glue is still setting. the closer you get that, the easier everything will align. - that is the one area that if not gotten right will throw off alignment of the whole model.

    Other than that, everything is easier than I expected when I started.

    Thanks for the heads up, will watch out for this when I get to this stage of the build.

  • Profile Photo
    Chuck A. Villanueva said 2 years, 3 months ago:

    More work on the cockpit. Attaching the seat belts to the seats. Step 2

    Loving the clear colorful directions so far. But this is not a quick build. First after painting the belts Dirty White with Aluminum buckles. I first attach the LH lapbelts to the side rails and set before bending them to shape.

    The PE is not as easy to work with like Eduards. But after some patience I start work on the first seat. The pilots and Rio's seat are identical.

    Before working on the shoulder harnesses. Was painting yellow on another project, while doing that, I took the opportunity to paint the yellow tips on the prop blades for the F-82.

    While still waiting for the lap belts to set, started step 3 to work on the RH side pilots panel.

    Though not much to it, still lots of patience in removing the delicate detail parts that attach to the side consoles, requires, decaling, PE detail pieces as well as the plastic parts. First was to gloss coat the side panels for the decal step. I did this the day before.

    Next was to remove a portion of the sprue that contains the hoses. This will be easier for me to remove them carefully without breaking them.

    First thing was to apply the decals on the side panel.

    Next was to attach the PE gauges and switch panel. Then carefully remove one of the hoses off the sprue which I was able to successfully, yippy! and the lever I guess that opens the canopy. The hose was painted Olive Drab, with a black regulator and aluminum fitting.

    Let the pieces set and then go over with the ZCG and a wash. This finishes one of the panels. 3 more to go. and still to attach the shoulders harnesses on the seats.

    Next up is to continue the work in the cockpit. More to follow.

  • Profile Photo
    Spiros Pendedekas said 2 years, 3 months ago:

    Great progress, my friend @uscusn!