So this will be the final build post for this model. It was a lot of fun trying all these new techniques and I learned a lot. Even better, I've given myself renewed confidence to expand on what I've learned here and to try more dioramas. My Constellation build will be a diorama and that is getting closer to the painting stage.
And I feel that I have come up with a satisfactory approach to simulating propellers in motion which has been a long term goal of mine. We'll see how that technique works with other spinner types, but it definitely works with this type of propeller hub.
I also learned that thicker acrylic for the cover looks fine. I had initially tried thinner acrylic when I was attempting to build version 1 of the cover and it never really was satisfactory. It did work out for the support piece, but if the model had been much heavier, it may not have worked.
Okay so enough of that. On with the post.
As I mentioned earlier, I wanted to add external bombs to the wings. These were installed at this point.
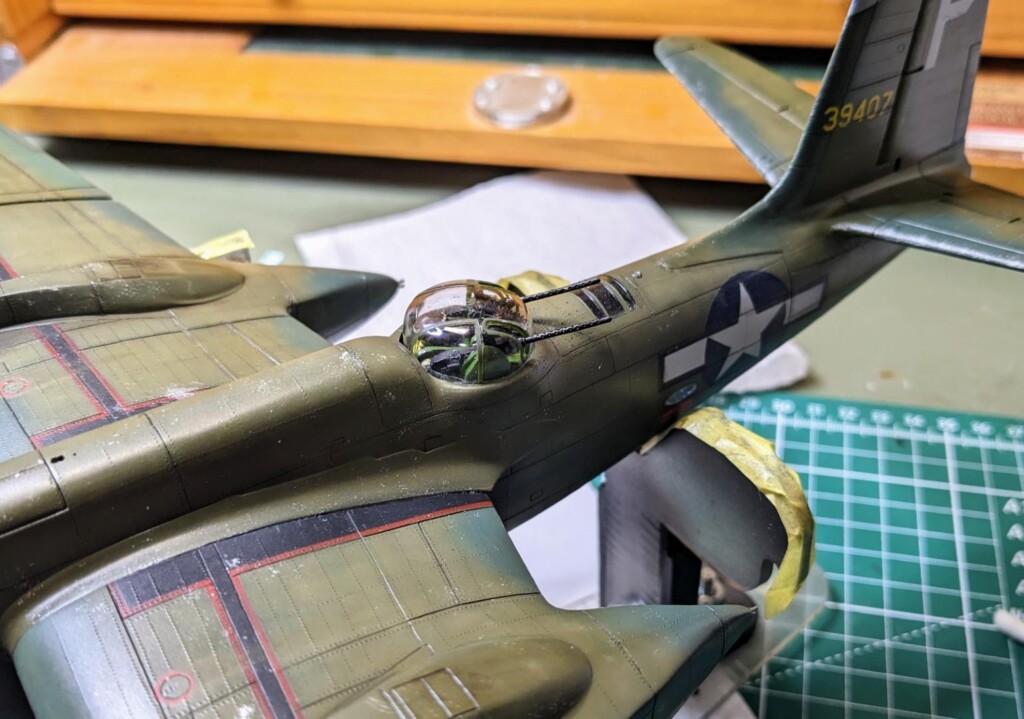
The gun turret, was going to have some additional detailing added including the upgraded barrels from Quickboost and some photo etch machine gun belts from Eduard. However getting all this into the turret was difficult and not entirely without problems which I could do nothing about. Specifically, I had trouble getting the belts laid into place and staying put long enough for the CA glue to hold. I eventually got them where I wanted. But when I put the clear dome on, the fit was tight, not so tight that I felt there was serious interference, but tight nonetheless. So I glued it down and immediately added tape over it to hold it in place. UNfortunately, one of the belts broke loose and I am unable to get in there to fix it.
-

The next step was to get the plane mounted to the acrylic support. I had already drilled the holes for the brass rods before installing the acrylic sheet to the base, so the position of the aircraft was already determined earlier. I had already determined that 5 minute epoxy was not going to work as it is too rubbery and not strong enough, so I had purchased 30 minute epoxy to use instead. This worked much better. Because the mounting point on this display was small, I wanted to give the epoxy plenty of time to cure and supported the model for 24 hours before moving on.
While that was curing, I started painting the propeller blade simulations. This was done using very thin black and yellow paints with very low pressure and lightly applied in numerous light coats. I had practiced this several times on other clear acrylic cut to prop shapes before doing it on these. THen these props were installed and the outer wing was added as well.
Next I added the machine gun barrels in the nose. These were quickboost barrels as well. I believe however, that I should have trimmed off more of the base of these as they stick out too far. But live and learned at this point. I used a technique I learned for making micro tubes by stretching plastic cotton bud applicators over heat. Then these were threaded over some Easy Line for the rigging. The entire thing (Easy Line and micro tubes) were super glued into place and the micro tubes painted to simulate insulators / shock absorbers.
I also made a new loop antenna from copper wire and attached it to a small Milliput putty base which was then added to the fuselage and painted. Finally, I made a small aiming piece for the nose and glued this into position on the nose. The model was complete.
So should I wait until next time to reveal the model. Ha Ha. No I won't do that. Here it is from a few different angles on my desk. I don't have a proper photographing setup yet.
And here is it displayed with my other models.
I've enjoyed sharing this build with you all and hopefully someone will be able to use some of these techniques or be inspired to try something similar.