A Little Fish, in a ”Small” Scale

Started by Andrew H · 6 · 3 years ago
  • Profile Photo
    Andrew H said 3 years, 11 months ago:

    When one thinks of 1/72 scale, be it for armor or aircraft, a diminutive form is usually brought to mind. Sometimes they are no less detailed then a larger scale, but often times are lauded for taking up less shelf space then their more expensive brethren. This is all true because 1/72 is usually on the smaller end of the scale for smaller subjects..

    However, for militray/naval vessels... they don't usually come in any "larger" scale than 1/72.. for a reason... Case and point, Revell's 1/72 U-boat/Submarine lines. Let's let the box do the talking:

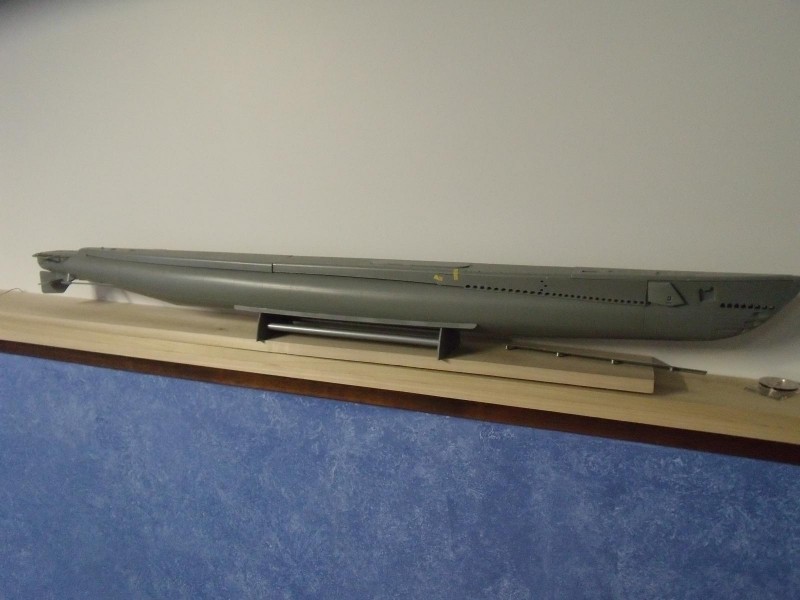
    This thing is massive. Though Gato-class subs were large "fleet" sub's when conceived, their size was hardly comparable to dated destroyers of that same period, and for obvious reasons, their tonnage was quite low. I'll spare the history lesson for now and get this build kicked off.

    This Revell kit has been around for about 14 years now, and its praises and woes have been well documented out on the inter-webz. I know ships/boats are less popular [around here], but I couldn't help but snapping and sharing a few pics as I tore into this kit today.

    The kit itself is well packaged, and for such a simple subject matter it offers a fairly large 273 part count. The main hull is split into two large pieces vertically. There is no pressure hull to build, which would needless over-complicate the kit with un-needed construction. Instead there are two support ribs. To locate the two halves, a number of small slip-fit pins are provided, which allowed for just enough slop to ensure that seems are aligned as the glue begins to set. The fit was not perfect, given that there was some bowing lengthwise, but with enough clamping, tape, quick-set cement, and time, all set up with no discernible issues.


    Once the pieces set, I then added the bilge keels, and found a place to temporarily shelve the assembly.

    Bow and stern are [like the hull] each split into two vertical pieces. The bow assembly has a small insert that fits between these halves to add some "interior" detail to the vents just aft of the breakwater. I painted this black prior to install, since it will be visible enough to see, but hard to paint later. After fitting these and letting set, the front diving planes were fit and assembled. Like the real thing, they extend and retract, as well as change dive angle.


    At the stern, there is an insert for the torpedo tube doors, which was painted black prior to install. Unlike the front dive planes, the kit has you assemble the rear planes and rudder in a fixed position. Fortunately, but plan or by luck, they made it enough enough to snip away some material, so that they can be articulated. If you choose to make this modification, just ensure that the fit of the plane's axle is not too loose, else it may flop around (axle is not center of mass).


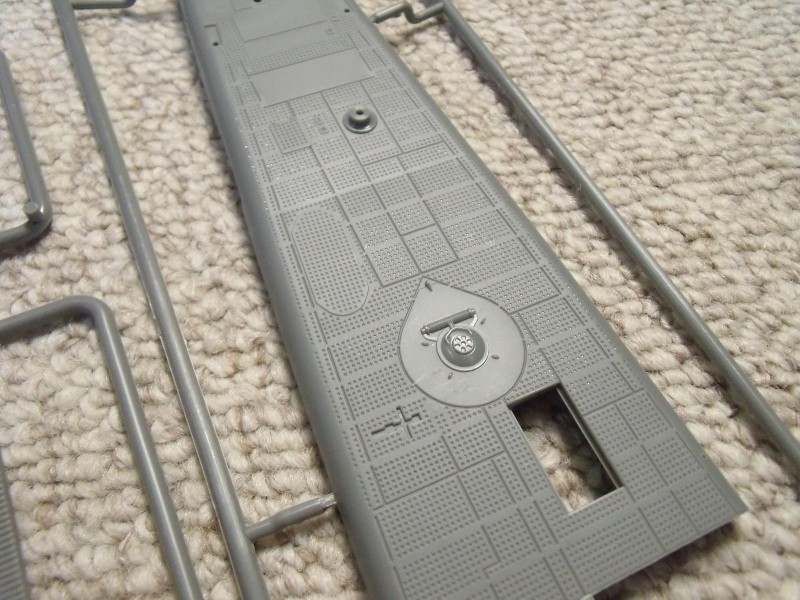
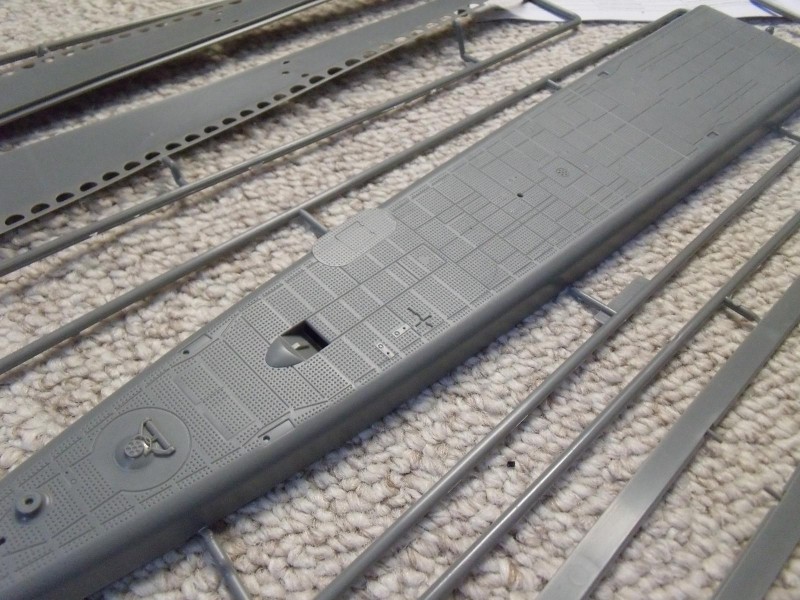
    The deck is made into three pieces, and detail is pretty good. My only complaint is that I wish they would have provided surface detail to the side portions, such as riveting or panel detail (like what Eduard's detail set has). I may yet add rivets, if I can find a good enough detail shot of the real deal by scouring Navsource.


    Speaking of scouring Navsource... My initial plan for this build was to build USS Wahoo. In taking to doing research, I was reminded by 2 facts... First, good reference photos of silent service boats are
    sparse. Second, no two boats were alike, it seems. With subsequent re-fits and modifications at various stages of the war, these boats rarely looked alike, if you start to scrutinize bridge structure, and gun placement, quantity, variety, etc.. The most unfortunate thing I found when research first on the Wahoo, was that Revell opted to use Electric Boat's limber vents, seen in the shot below. Perhaps this was because this pattern was the most sparse, or because this leaves the best canvas for cutting holes to what ever boat you want to do. Nautilus Models makes templates for cutting these, but I'm not sure I want to go down that road. Also, the kit doesn't provide the correct AA guns to do the Wahoo, the propeller guards aren't correct, and lastly the rear of the superstructure on the Wahoo was tapered-off, rather than rounded like the kit provides. All-in-all, the modification can be done, but i'm not ready to signup for that amount of work.


    With all the noted differences, I was left wondering, if I built the kit out-of-the-box, what could it represent? This is when I began thinking that Revell probably based their kit on a surviving Gato. Sure enough, 95% of the details on this kit match the USS Cobia in Wisconsin, as she sits today. Because patrol boats didn't carry their hull number, I will not have to truly decide, but instead, I'm just going to build. I will continue to research as I build, and build to suit when able, however, it is mainly superstructure detail and gun placement that will make all the difference.

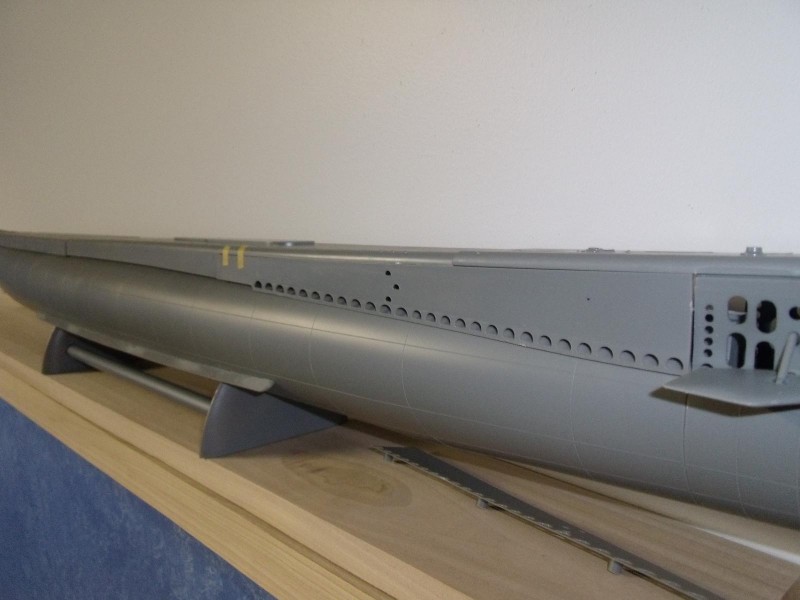
    Speaking of which, the superstructure is ready for "interior" paint, and coming together nicely. Pics for now... This build has progressed rather quickly thus far, hopefully I can keep pace in the days/weeks to come.


    Much cleaning/filing/filling/sanding to do yet, but as she sits... this kit is massive! Now that the massive parts are clipped and glued, I can stop using my carpet as a workbench! (...now what to do about a paint booth...)

    9 additional images. Click to enlarge.

  • Profile Photo
    Colin Gomez said 3 years, 10 months ago:

    Nice clean assembly work so far. It is a huge model and quite a beast to handle while building. I have the same kit at about the same stage. I am trying to fit the Eduard etch decking and interior fittings to the conning tower. I am beginning to regret it as it is hard to get the halves together without bending the etch. I am considering getting a custom built case for the model when done. It definitely won't fit in any of my cabinets.

  • Profile Photo
    Andrew H said 3 years, 10 months ago:

    Colin, thanks for the comment, just now seeing it.

    As it turns out, I did order Eduard's basic detail up last night, along with some 1:48 decals needed for other projects. To this point, I had paused assembly, realizing the PE decision was "now-or-never".

    Is it the PE on the back of the "covered wagon" frame that is giving issues?

    The Poplar board seen underneath the model will likely be made into a case, mounted to the wall with a glass front. Haven't formally decided yet, however.

  • Profile Photo
    Colin Gomez said 3 years, 10 months ago:

    Hi Andrew. Here are a few pics to illustrate. I have the small Eduard Fret to do mainly the conning tower details, including the flooring. The main challenges come from the fact that the flooring will be pinched inside of the assembled structure. I have glued one side of the covered wagon structure (as you aptly name it) to allow me to slip it in from the side before I glue the posts on that side down as well. The decking has gaps between the slats, so the plastic underneath should be black. However, I will need to remove paint to glue it down properly. I can airbrush any lost under-painting only in the areas that I can access after assembly, so there a limits were I can put glue. Anyway, I am just proceeding carefully so I don't bend or dent anything as this is al sandwiched together. Masking of the black photo-etch decking could be problematic later when I paint the outer structure gray. I wouldn't want to pull it up and bend it while removing tape. All of this make me ask myself why I sanded of the molded in decking to begin with. No turning back now, of course. It should all be fine, really. Just temporarily lost my modelling gumption.

    Another issue that arose for me was the join between the hull parts. There are raised panel lines as welds all along the lower hull. I am unsure if there is a weld where these parts join as well or whether it falls between welds. It is not clear in drawing and photos that I have. Did you sand it smooth or leave a raised line here for a weld?

    4 attached images. Click to enlarge.

  • Profile Photo
    Andrew H said 3 years, 10 months ago:

    Ok, I see. Thank you for sharing your experiences. Perhaps a thin layer of CA spread thin will be enough to keep the deck flat? The front of the bridge/fairwater should help the front stay down, if I'm imagining installation right.

    I will have to do some disassembly to get some of the fairwater PE parts on, but as much as applicable to a fresh build, I'll let you know how mine goes together, and what directions I take to rectify if needed.

    As for the the weld lines, they are (as is common) on the "over-scale" side of the scale spectrum. In reality most of them could be sanded smooth, and it would be more accurate. I'll dig up some pics in a minute.. The most accurate way to depict the plating and welds would be a mix of raised lines, and with paint and weather, imo. I will likely keep the lines that are there for my build. If you sanded smooth or glued on stretched sprue where the front and rear hull are glued, would make little difference, imo, unless you're striving for 100% absolute accuracy, in which case you would be redoing the welds, and a host of other things..

    All this is to the point that I stated in a post above.. I'm going to try not to let rivet counting ruin this one for me. That said, I may yet add more detail... who knows, I am very fickle with this hobby. 😉

  • Profile Photo
    Andrew H said 3 years, 10 months ago:

    Here are some high-res shots, first of some EB boats... note that there is no vertical weld line immediately aft of the dive plane, but rather just a short distance after the start of the limber hole plate. Also note that the kit's hull weld lines (laid out as a grid) is not correct, as the hull plates were laid out in staggered lengths, and even this likely changed from dock to dock, builder to builder.
    Corvina:
    http://navsource.org/archives/08/228/0822601.jpg

    Cobia (which again, appears to be the boat the kit is modeled after, following a life of use and modification anyhow):
    http://navsource.org/archives/08/242/0824522.jpg

    Cavalla:
    http://www.navsource.org/archives/08/0824409.jpg

    Here is the Drum, which was a Portsmouth boat. Notice the lack of apparent weld lines at the individual plates. This is not to say they weren't there, but smooth, like you'd expect of a sub.
    http://navsource.org/archives/08/228/0822810.jpg

    Blackfish, very high res:
    http://navsource.org/archives/08/206/0822102.jpg

    Various others:

    http://navsource.org/archives/08/233/0823212.jpg (Very good shot)

    http://navsource.org/archives/08/238/0823611.jpg

    http://navsource.org/archives/08/233/0823203.jpg

    http://www.navsource.org/archives/08/0822505.jpg

    http://www.navsource.org/archives/08/0822205.jpg

    Stern shots can also be found from the dockyard of many boats to give you the same idea.