Aichi E13A1b ”JAKE” (零式水上偵察機), Nichimo, 1/48

Started by Spiros Pendedekas · 191 · 4 years ago · 1/48, Aichi, E13A, Nichimo
  • Profile Photo
    Spiros Pendedekas said 4 years, 5 months ago:

    Thanks my friend @airbum!
    Maybe building a BMW 50's boxer engine?
    Need to modify the heads a lot.
    Oh, and have to scratchbuild the crankcase...

  • Profile Photo
    George Henderson said 4 years, 5 months ago:

    Great start, love the engine mods

  • Profile Photo
    Louis Gardner said 4 years, 5 months ago:

    It looks like your quality control team have given the green light and all systems are go. Nice work on everything ! I'll look at my kit to see how bad the sink marks are. Now you have me curious...

    Looking forward to your next installment. Great idea with the clay and lead weights.

  • Profile Photo
    Spiros Pendedekas said 4 years, 5 months ago:

    Thanks @blackadder57 and @lgardner!
    You are not even allowed to breathe without QC green light!
    My Nichimo copy even had rust remnants at spots (from the rusty molds)...
    Maybe it was a not so well taken care of copy.

  • Profile Photo
    Spiros Pendedekas said 4 years, 5 months ago:


    Initilal scraping and coarse sanding at main parts.
    In black circles you can see the sink marks I've noticed so far...
    Quite a bit of detail is already (and more will be) lost due the above discrepancies that have to be remedied, but I'm ok with it.

    I am a Kinsei! I am a Kinsei! (or at least I can pass for one from 3...ok 4 feet!).
    All the best!

  • Profile Photo
    Erik Gjørup said 4 years, 5 months ago:

    This build is just starting to sink in on me (sorry, could not resist). Your engine is lookin good, bet it is looking good up close too when it gets the @fiveten treatment with proper QC.

  • Profile Photo
    Spiros Pendedekas said 4 years, 5 months ago:

    Thanks @airbum!

  • Profile Photo
    Spiros Pendedekas said 4 years, 5 months ago:

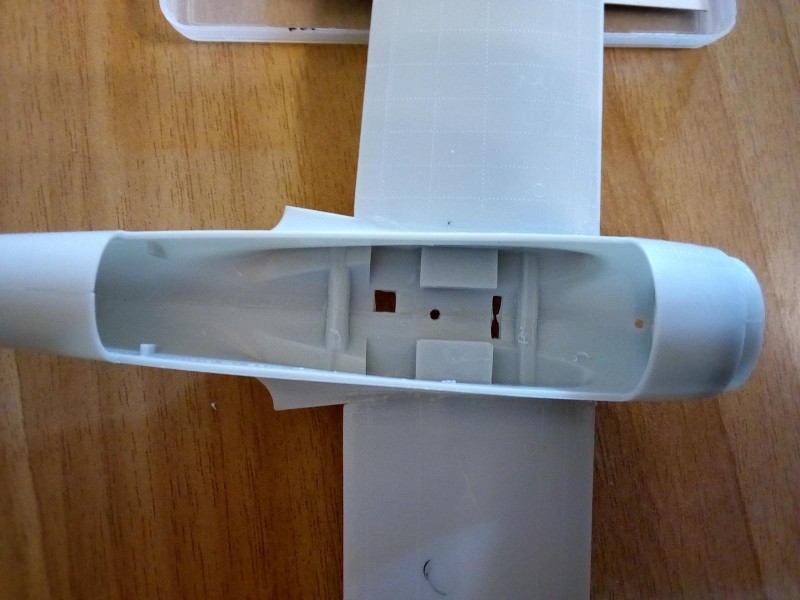
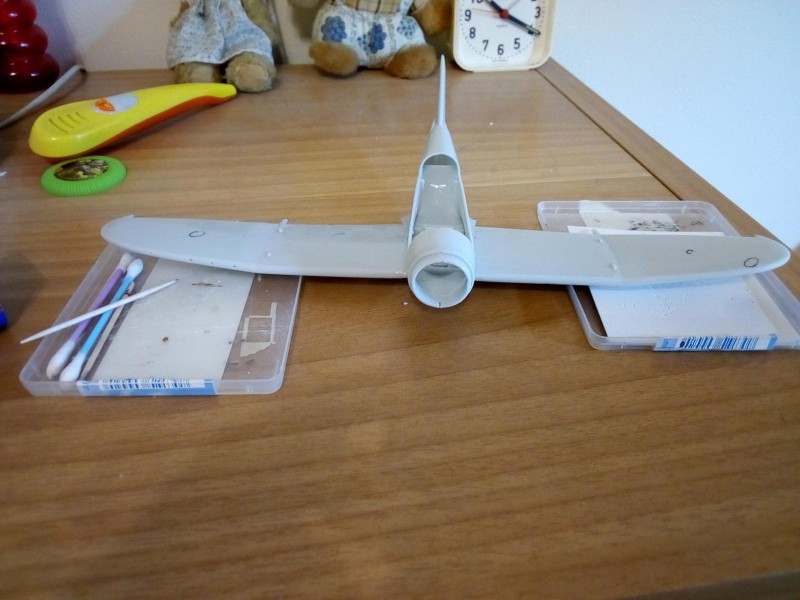
    Glued the wings to the fuselage. Fit was very good.

    As you can see, the two mounting lugs protrude well enough inside the empty area.

    They will be used as supports for the cockpit floor I will attempt to construct.

    After reading build reviews (the three excellent Paul's @yellow10, Marvin's @marvin and Roland's @rosachsenhofer among the few others)...

    ...and also after browsing extensively at the net (info and photos), I came to the conclusion that the Jake cockpit will look NOT very different than the Val cockpit.

    Indeed, given the fact that they were both Aichis with broadly (ok...very broadly...) similar roles, designed and developed at broadly the same time frame, can lead someone to think that there will be quite a few similarities with the two cockpits.

    Given the fact that no way this canopy will be open, I felt happy to conclude that trying to replicate a Val cockpit in the Jake might be passable under a closed canopy.

    So, with the (previously built) Hasegawa Val instruction sheet at hand, I am off to my leftover kit bits dungeon to see what similar "bits and pieces" I will find.

    I am sure a suitable "floor" will be found.

    For the walls, i will use my sons' party dishes flat parts...ooops! sorry!...meant sheet styrene! (lol!) augmented with stretched sprue.

    Ok, off to my leftover parts now...

    ...how about this Mach2 Do-26 console-ish attempt? O tempora! O mores!

    All the best, Great EoJ GB!

    I love your works!

  • Profile Photo
    Louis Gardner said 4 years, 5 months ago:

    What a fantastic posting... You have definitely made some wonderful progress. I am very curious to see what you come up with for the cockpit. Does anyone make any resin replacement cokpits for the Aichi D-3A Val ? If so that might be an easier alternative.

    However, should you decide to scratch build a new cockpit, that would be great fun too. I like what you have done with the engine...

    Either way you will have fun with this and that is the objective. You never know, you son may actually want to help you and construct this using his party plates... I mean sheet styrene.

    All the best my friend.

  • Profile Photo
    Spiros Pendedekas said 4 years, 5 months ago:

    Thanks my friend Louis @lgardner!

    I still feel the urge to scratrchbuild, knowing that the outcome will be a ficticious approximation at best!

    Being it a closed canopy will even more "approximate" the above ficticious approximation (lol).

    So, I took the "let's have some fun and see how it will turn out" path.

    I am embarased to post the following pic, but, here is the first batch of finding possible bits and pieces that may be used in the cockpit after heavy modifications:

    Of course, many more parts and auxillary pieces will have to be scratchbult from styrene.

    Let's see how this mad-and-not-recommended approach will turn out.

    All the best!

  • Profile Photo
    Erik Gjørup said 4 years, 5 months ago:

    Aaaahhh - the wierd and wonderful world of scratch. . .

    Let’s see how this mad-and-not-recommended approach will turn out.

    Well - with the QC taking part this will be yet another Pendedekas Family Plane (PFP works?)!

  • Profile Photo
    Spiros Pendedekas said 4 years, 5 months ago:

    PFP is fantastic, great! And is officialized!
    Thanks my friend @airbum!

  • Profile Photo
    Louis Gardner said 4 years, 5 months ago:

    I like where the PFP is headed... Brilliant idea for scratch building the cockpit. Now you have inspired me to dig into my spare parts bins to see what might be available for use. I have several Tamiya P-47M kits that came with a secondary set of parts to build the earlier versions. They are most likely too big to even think about using for a "Jake", but would work to use several of the smaller parts as you have shown here.

    This is getting good... real good. Thanks for the inspiration.

  • Profile Photo
    Spiros Pendedekas said 4 years, 5 months ago:

    Thanks Louis @lgardner!

  • Profile Photo
    George Schembri said 4 years, 5 months ago:

    Wow Spiros! Great subject and a classic kit and things are looking great. Can't wait to see the next post and looking forward to see the completed project.