Douglas B-26K Counter Invader in 1/48th

Started by Chuck A. Villanueva · 125 · 4 weeks ago
  • Profile Photo
    John vd Biggelaar said 3 months, 3 weeks ago:

    The tri-color looks really nice, Chuck @uscusn

  • Profile Photo
    Chris Ballard said 3 months, 3 weeks ago:

    Nice one Chuck. I'm watching this one with interest as I have the same kit for part of my "Project NKP"...err project. There is a very good video about this one on you tube. The nose length is irritating, not sure currently what could be done, I think there is something available. Nice job of a quirky bird.

    If this helps anyone..
    thanks Chuck, you reminded me this needed ordering...

    https://www.neomega-resin.com/a-26bb-26k-invader-corrected-8-gun-nose-and-wing-air-intakes-1113-p.asp

  • Profile Photo
    Chuck A. Villanueva said 3 months, 1 week ago:

    Spiros & John, thanks,it was pretty much a steady paint job, no clogging of paint, nice session that about 3 hours to finish the initial scheme. Another hour to back over tighten up the demarcation lines and overspray.

    Thanks Chris, I did see that video your referring too. I disagree about the part where you cannot drop the flaps. It was rather an easy task. I used the Vector resin nose to replace the awful one in the kit. I also used the Vector resin props as well. Hyperscale have the correct wheels which are excellent and easy to use.

  • Profile Photo
    Chuck A. Villanueva said 3 months, 1 week ago:

    After cleaning up the overspray and tighten up the demarcation line. I airbrushed Future for the clear coat.

    Not very many decal, this scheme did not carry national markings. So started with the tail with the squadron codes and serial numbers. I used a combination of the kit decals Aeromaster set for the B-26K.

    Mighty Mouse nickname on both nacelles. Also the propeller warning strip also applied on both sides of the nose.

    The black walkways are from the kit decals.

    I use Tamiya Lt tan and Smoke for the exhaust trails

    Vallejo Flat Clear is use to seal the decals and the final flat coat on the overall airframe.

    I was happy that there was no silvering on any of the decals. Especally the codes on the tail.

    Next up de-mask the clear components and start on the lower details.

    More to follow.

  • Profile Photo
    Spiros Pendedekas said 3 months, 1 week ago:

    Awesome looks so far, my friend @uscusn!

  • Profile Photo
    John vd Biggelaar said 3 months, 1 week ago:

    Looks beautiful, Chuck @uscusn

  • Profile Photo
    Chuck A. Villanueva said 2 months, 1 week ago:

    Thanks Spiros & John, it turned out well after a couple of hours of applying the decals. They performed as advertised, and not much in markings or stencils.

  • Profile Photo
    Chuck A. Villanueva said 2 months, 1 week ago:

    Getting back to the Counter Invader, with all of the airbrush work completed, time to remove the masks. Starting with the canopy, the Eduard's kabuki masks perform as usual and easy to remove though I did apply a bit too much pressure on a corner when removing the top LH mask.


    The rear compartment windows were next.

    Next to paint and assemble the Hypersonic resin wheels and tires.

    The wheels are painted Vallejo Aluminum, tires are painted Testors Rubber out of the small bottle.

    The wheels came off the resin blocks very easily, in fact easier than removing the wheels of a plastic sprue, And the fit is perfect as the nose wheel snaps into the tire quite easily.

    The main mounts as well. Very easy to work with resin parts. They also really good when assembled.

    The back side of the wheels as well are flawless, very nice defined details in the braking system used on the "K"

    The set ready to install.

    Next up to assemble the main and nose gear struts and the landing gear doors.
    More to follow.

  • Profile Photo
    John vd Biggelaar said 2 months, 1 week ago:

    Those resin wheels do look amazing, Chuck @uscusn
    So does the rubber look created with Testors rubber paint.

  • Profile Photo
    George R Blair Jr said 2 months, 1 week ago:

    Really coming along well, Chuck (@uscusn). Camo looks great, and I am glad I am not the only one who manages to nick the canopy when removing tape. I am really learning to like resin wheels with separate hubs. They make the painting so much easier.

  • Profile Photo
    Spiros Pendedekas said 2 months, 1 week ago:

    Excellent job so far, my friend @uscusn! The wheels look awesome!

  • Profile Photo
    Chuck A. Villanueva said 1 month, 1 week ago:

    Thanks John, I have used Testors Rubber in the small bottle for years, though mostly for more modern tires, I use Tamiya Tire Black or Gunze for the Korean War and older era aircraft. However, the Hypersonic wheels are really nice and easy to work with and paint.
    Thanks George, rarely happens, trying to lift a corner, Tamiya masks are normally easy to remove. Just one got a bit stubborn. I love the SEA camo schemes in the Vietnam era.
    Thanks Spiros, they were fun to assemble and paint.

  • Profile Photo
    Chuck A. Villanueva said 1 month, 1 week ago:

    This session will assemble and install the landing gear, starting with the nose unit.


    Having built the ICM B-26C, they have so far held up to the weight, they do wiggle if you bang the shelf so still care is the word here when assembling the nose and main gear. The nose has the main strut, retracting acuator and the scissors. The Oleo is painted with a Molotow chrome pen.

    The strut is assembled and ready to insert into place in the nose gear bay.

    Nose gear assembly is placed into the nose wheel bay. The contact point is not the greatest.
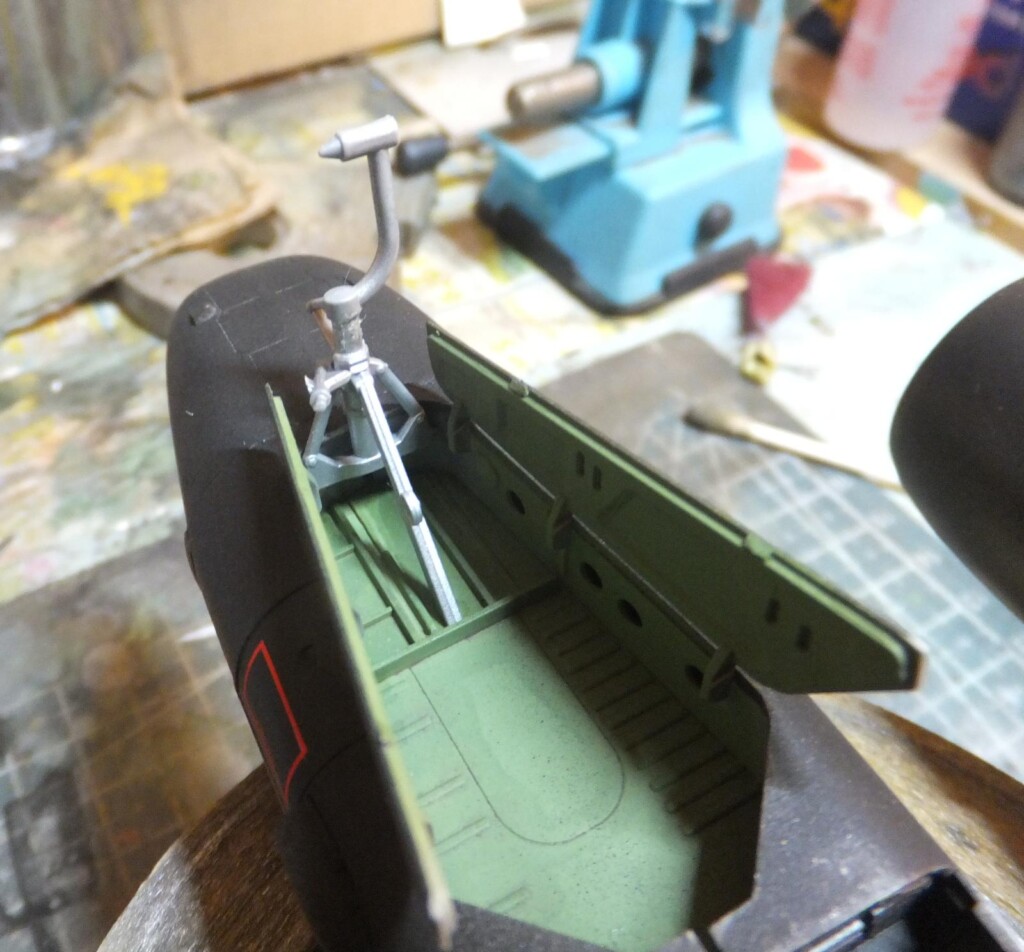
    Next the main landing gear.

    The main struts are a bit sturdier but not as chunky and detailed as the Monogram main gear struts. They are assembled and put aside for now.


    First to install the main gear doors.

    I left these off while assembling the nacelles, as they are easy to attach after all the handling, painting & decaling is done.

    Next up is to install the main gear struts into the wheel bays. The contact points here are much better and secure.

    Next up are to intall the wheel assemblies. Starting with the nose wheel. Cyano cement is used to attach the wheels.

    Now the main wheels are attached to the struts, again with Cyano cement.

    Though super glue dries instantly, the landing gear may still be setting so will leave on her back overnight. All the wheels installed.

    Next to load her up with some hardware...
    more to follow.

  • Profile Photo
    John vd Biggelaar said 1 month, 1 week ago:

    Excellent progress on the landing gear, Chuck @uscusn

  • Profile Photo
    Spiros Pendedekas said 1 month, 1 week ago:

    Excellent job on the landing gear, my friend @uscusn!