Kit review: 1/48 Tamiya Messerschmitt Bf-109 G6, Part 1 of 2
This article is part of a series:
Once I saw that Tamiya was going to be releasing a new 1/48 scale kit of the Bf-109, I knew that when it arrived at the nearest Hobby Store I had to purchase it. This is a kit that I have been waiting for a while now. After opening the box, I think it was worth the wait.
I wanted to do an in depth review, and give the reader a decent idea of what to expect, good or bad. So I took a LOT of photos. This way the reader can make an educated purchase. Because of the large number of photographs that will be used in this review, there will be two parts.
The first part will cover mainly the written instructions, and decals. The clear plastic parts are also included in this first review.
The second part will cover the remaining plastic parts. This will be written in a manner very similar to my other recent kit reviews on the ICM Ju-88 A5, He-111 H-3, and Do-17Z-2, (all in 1/48 scale).
If you have any comments about this kit, good or bad, please feel free to post them. My primary goal is to provide an honest and in depth review. Your honest feedback will make this an even better review for all of us. So please do not hesitate to post a reply.
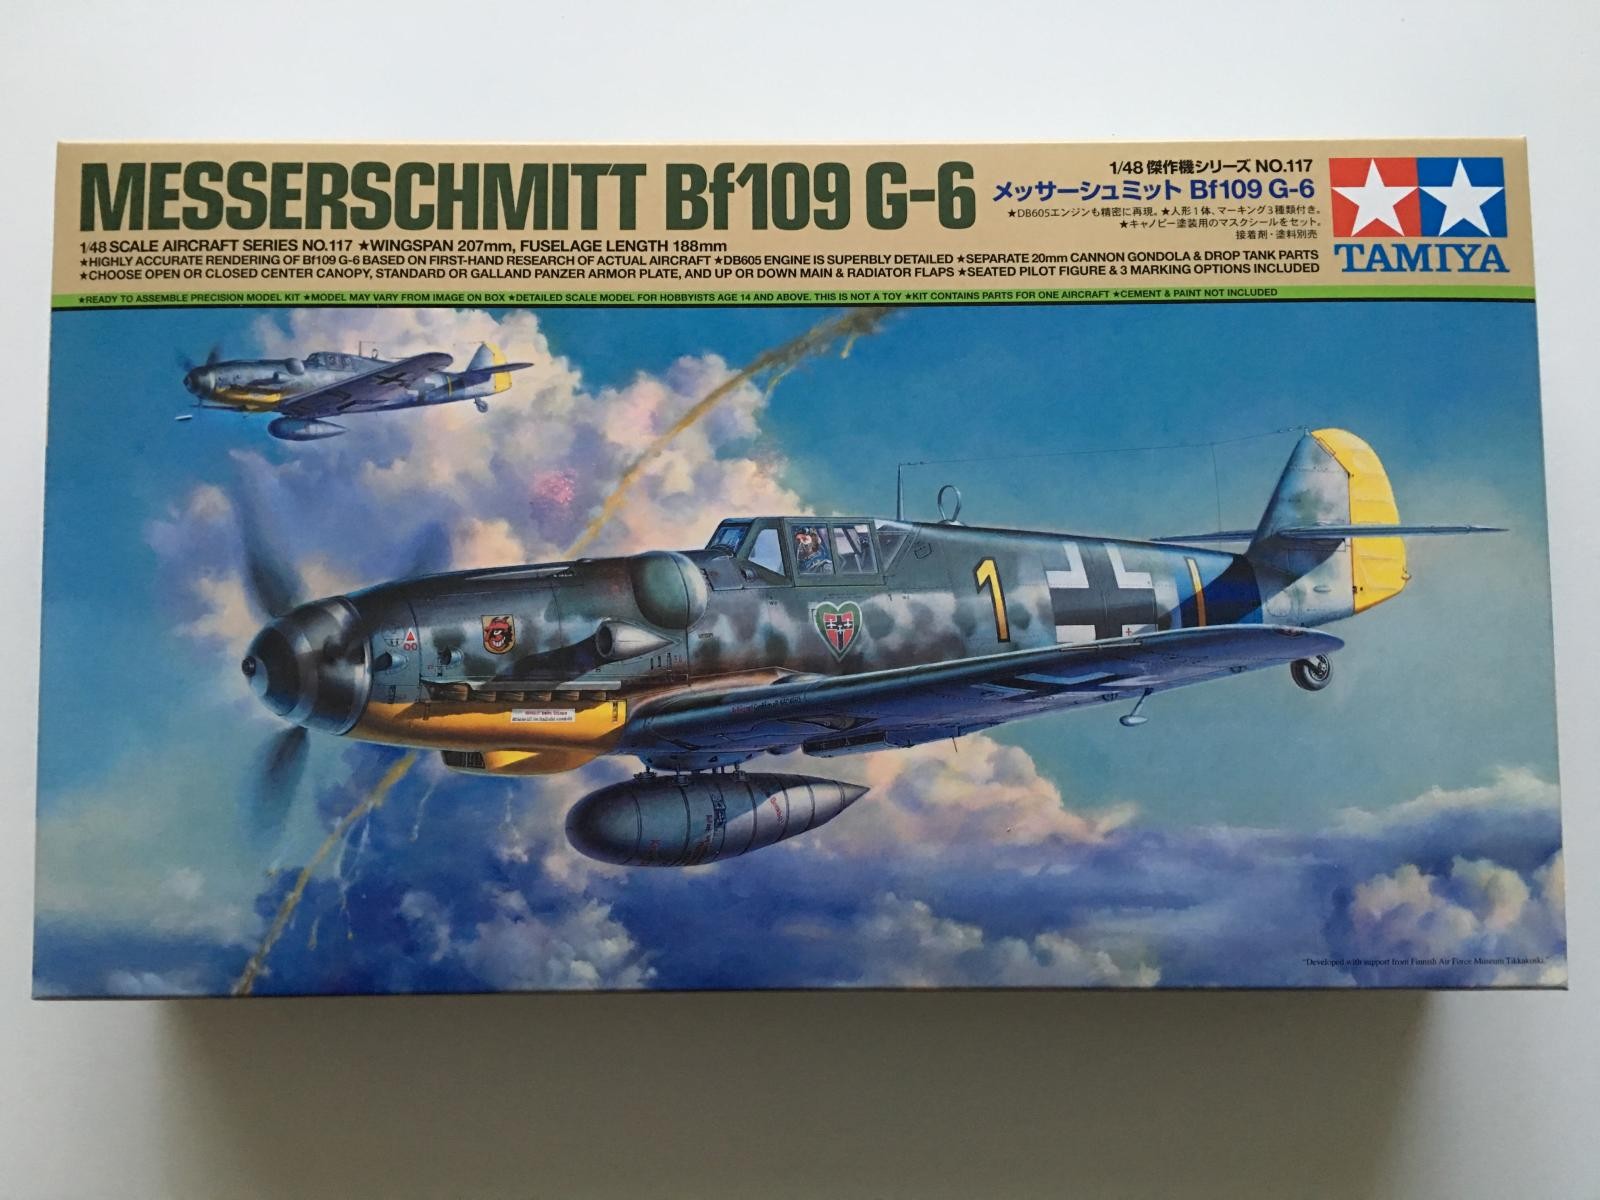
To begin with, there is some pretty neat art work on the box cover of a 9. JG 54 plane "Yellow 1" and his wing man. There is a trail of debris and smoke plummeting earthward... It reminds me of my childhood days when all of the kit manufacturers had pictures like this on the box cover.
This photo shows the box end and corresponding kit number information.

The box also has illustrations of the other two planes that can be built right out of the box using the kit supplied decals.
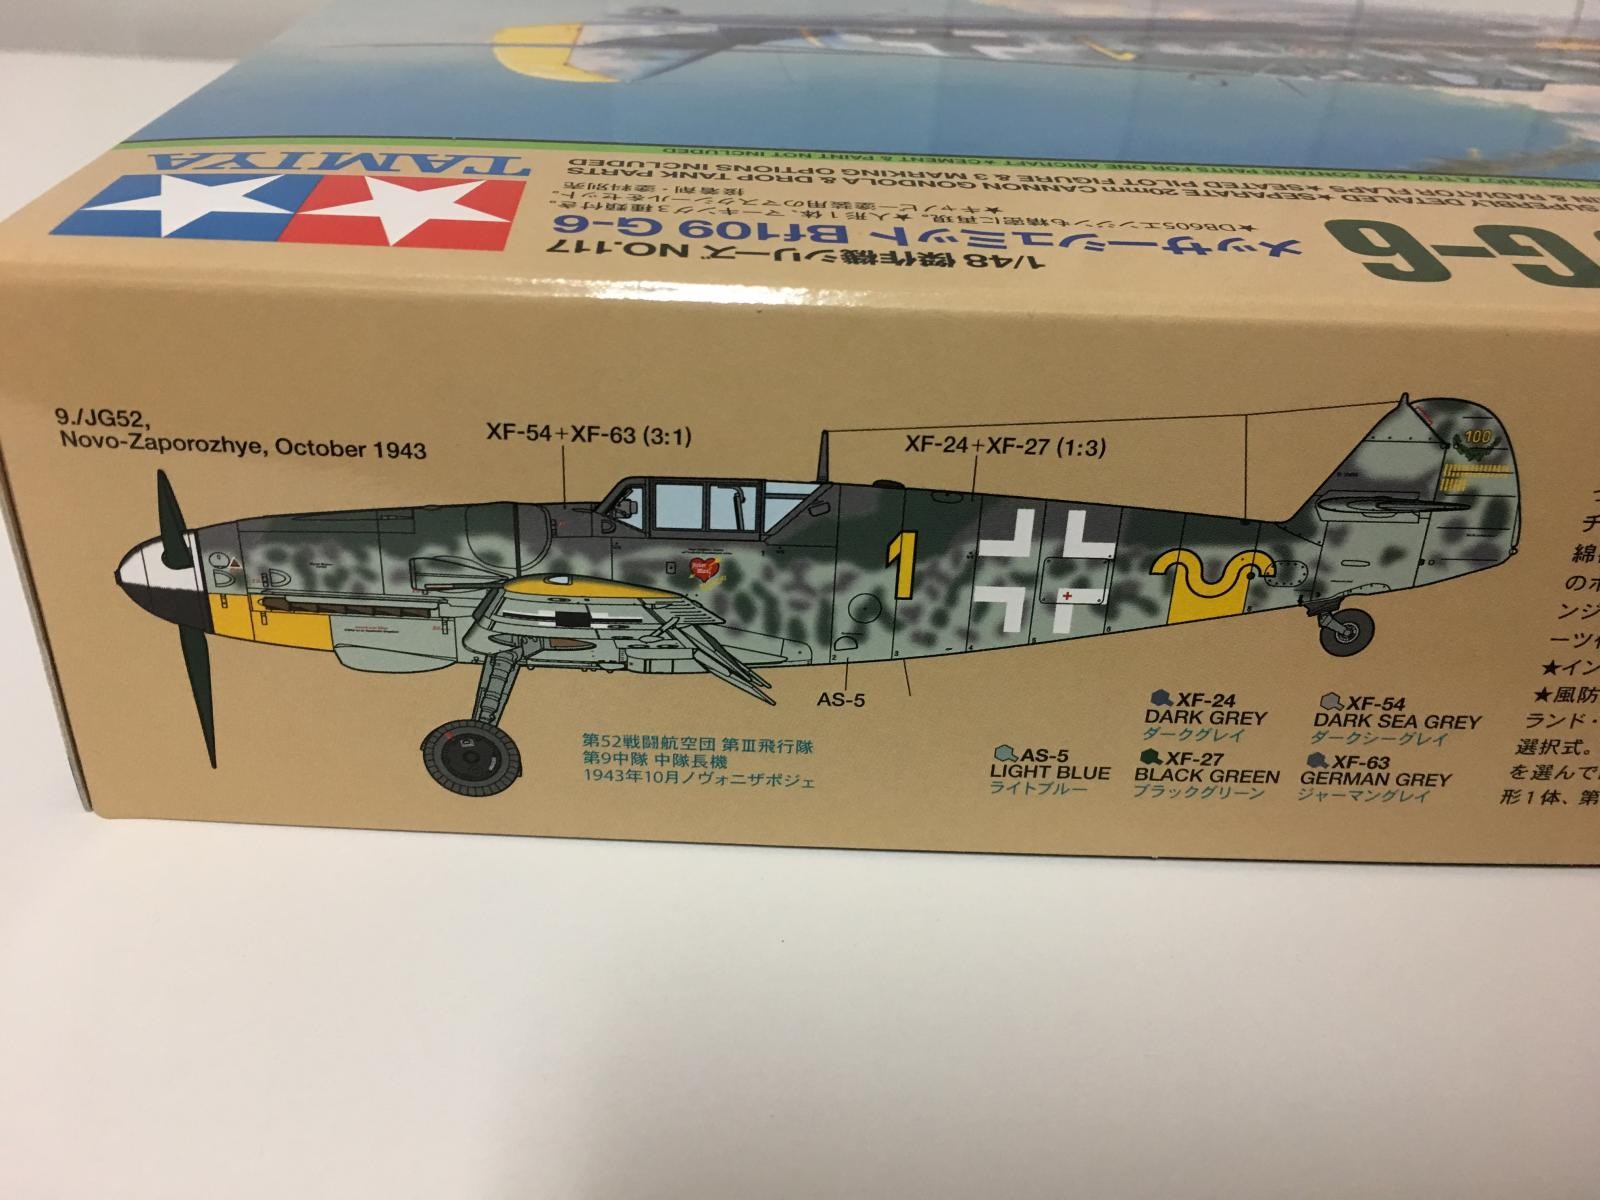
First up is a plane that most 109 fans will easily recognize, "Yellow 1" flown by Erich Hartmann of 9. JG 52, as flown in October 1943
The other plane is from 7. JG 27 and is flown from Crete in December 1943.

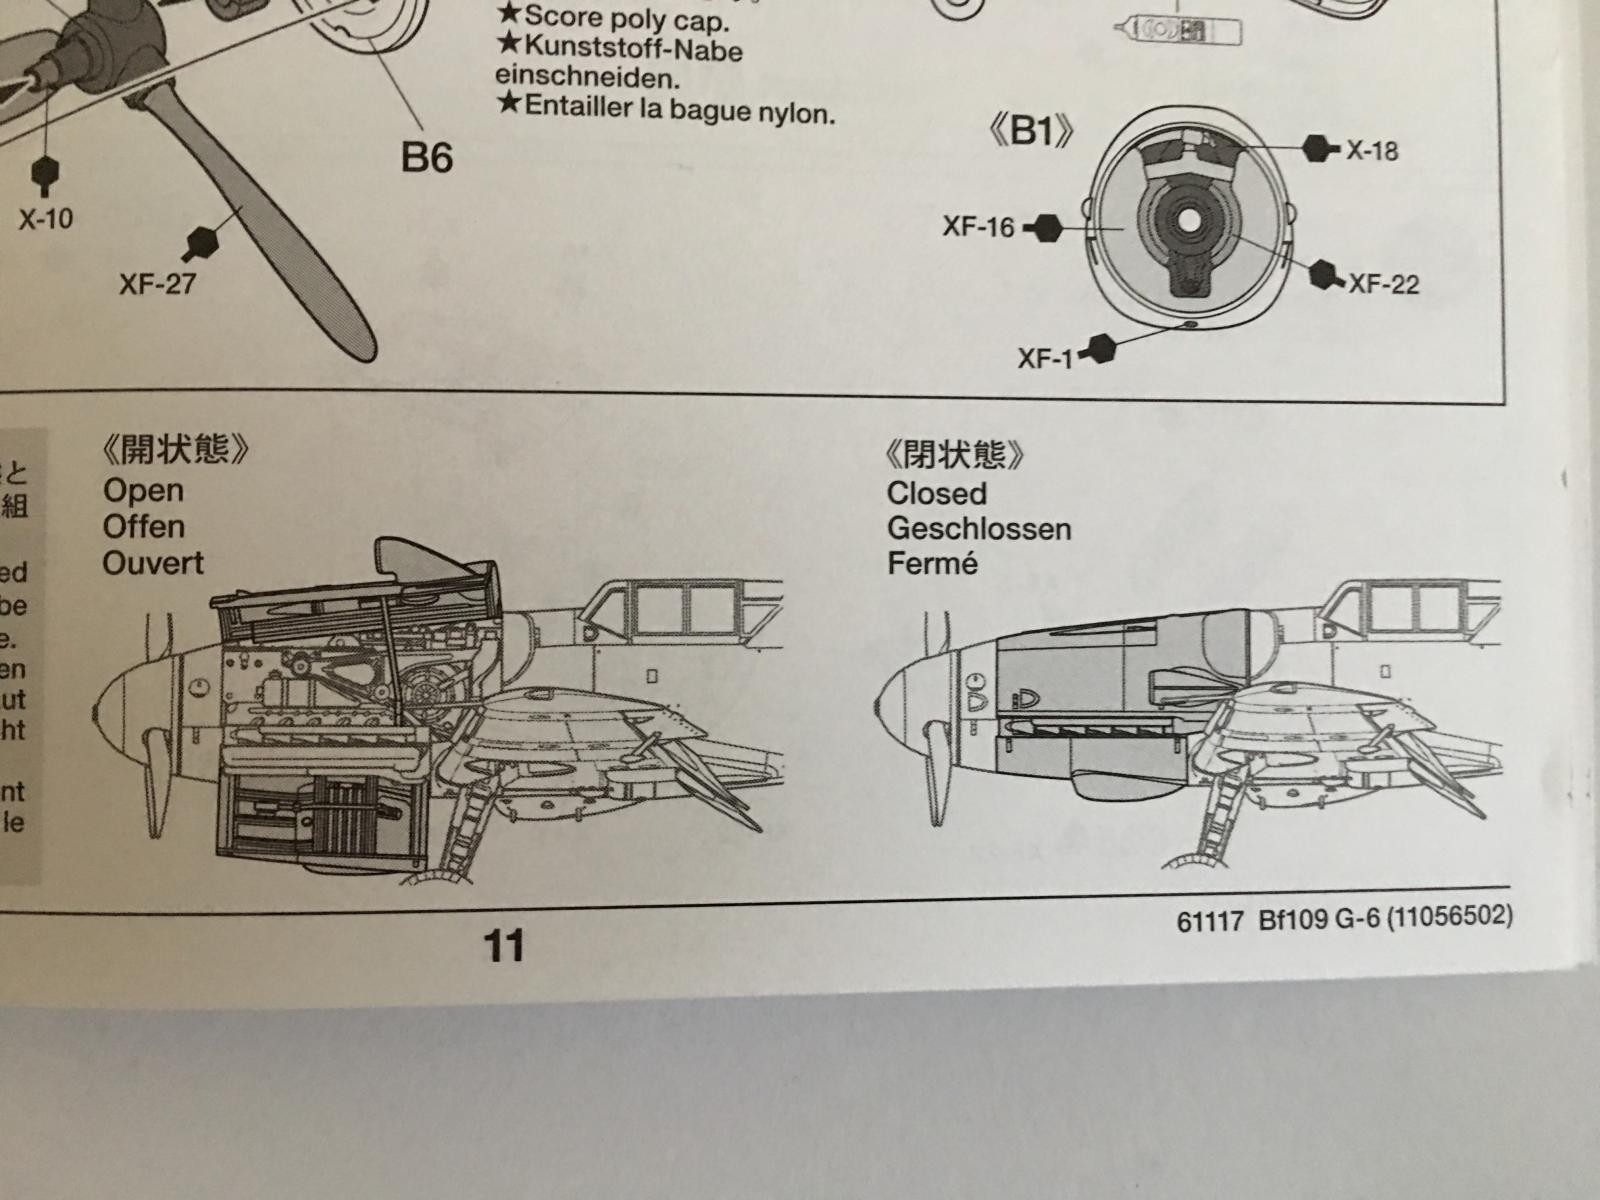
There is also an illustration showing how the engine can be displayed with the cowling panels opened up...

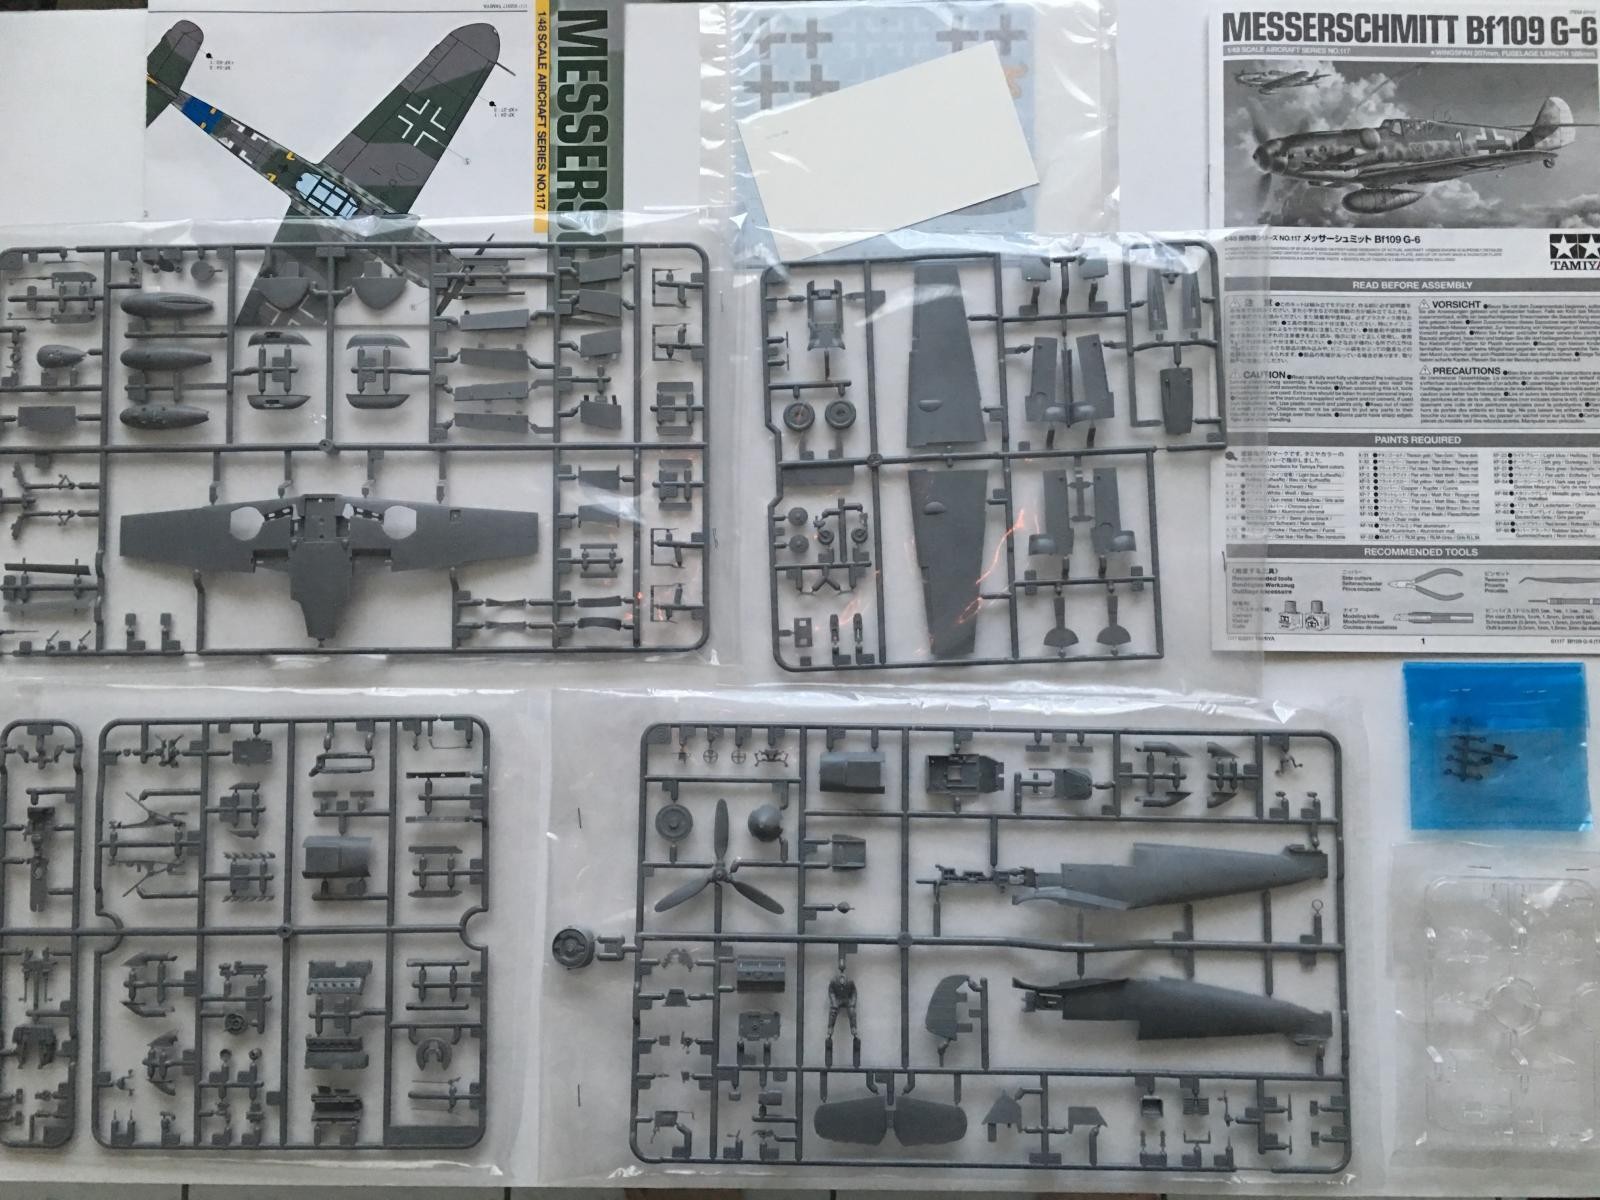
Once you open the box, this is what you will find inside. Each parts tree is individually wrapped in it's own plastic bag. There are 4 gray plastic trees, and one clear tree. The decals are in a separate small bag. The canopy masks are in the bag with the decals.
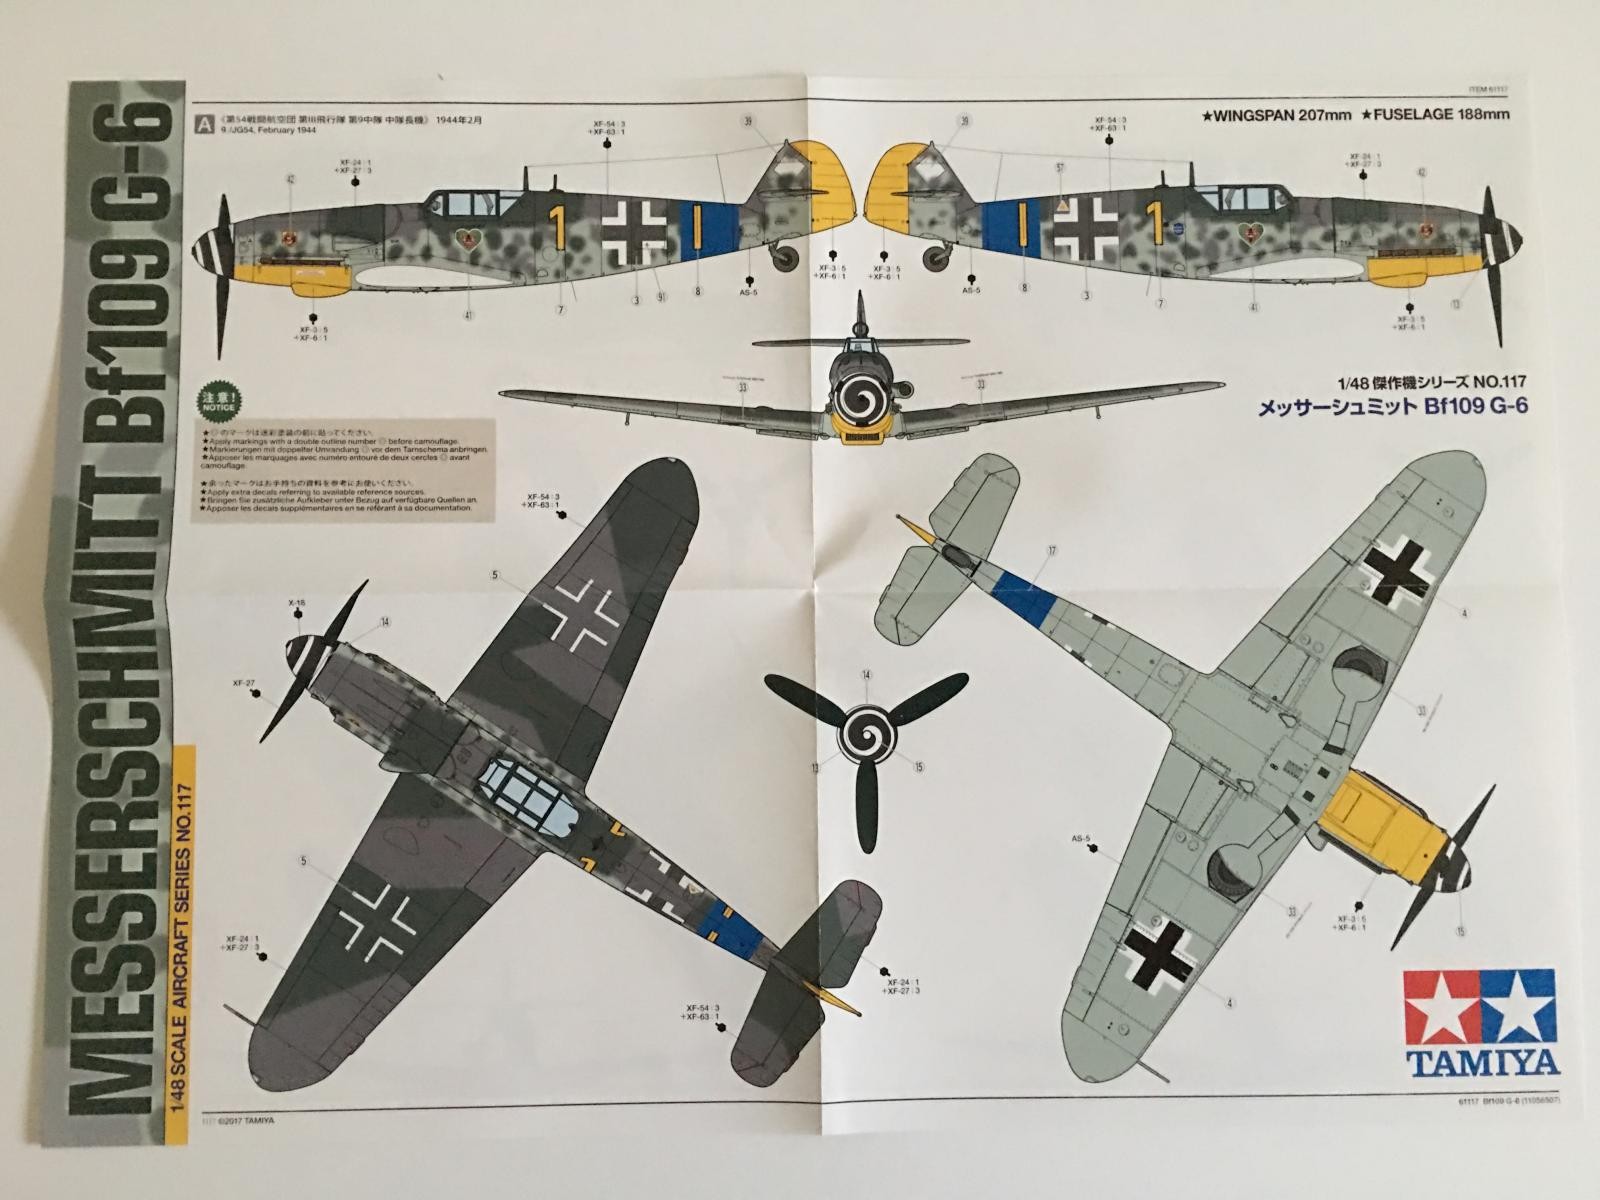
There is an awesome two sided color illustration provided that is to be used as a painting guide and for decal placement. This 1/48 scale color illustration is for the 9. / JG 54 plane that is illustrated on the box cover.
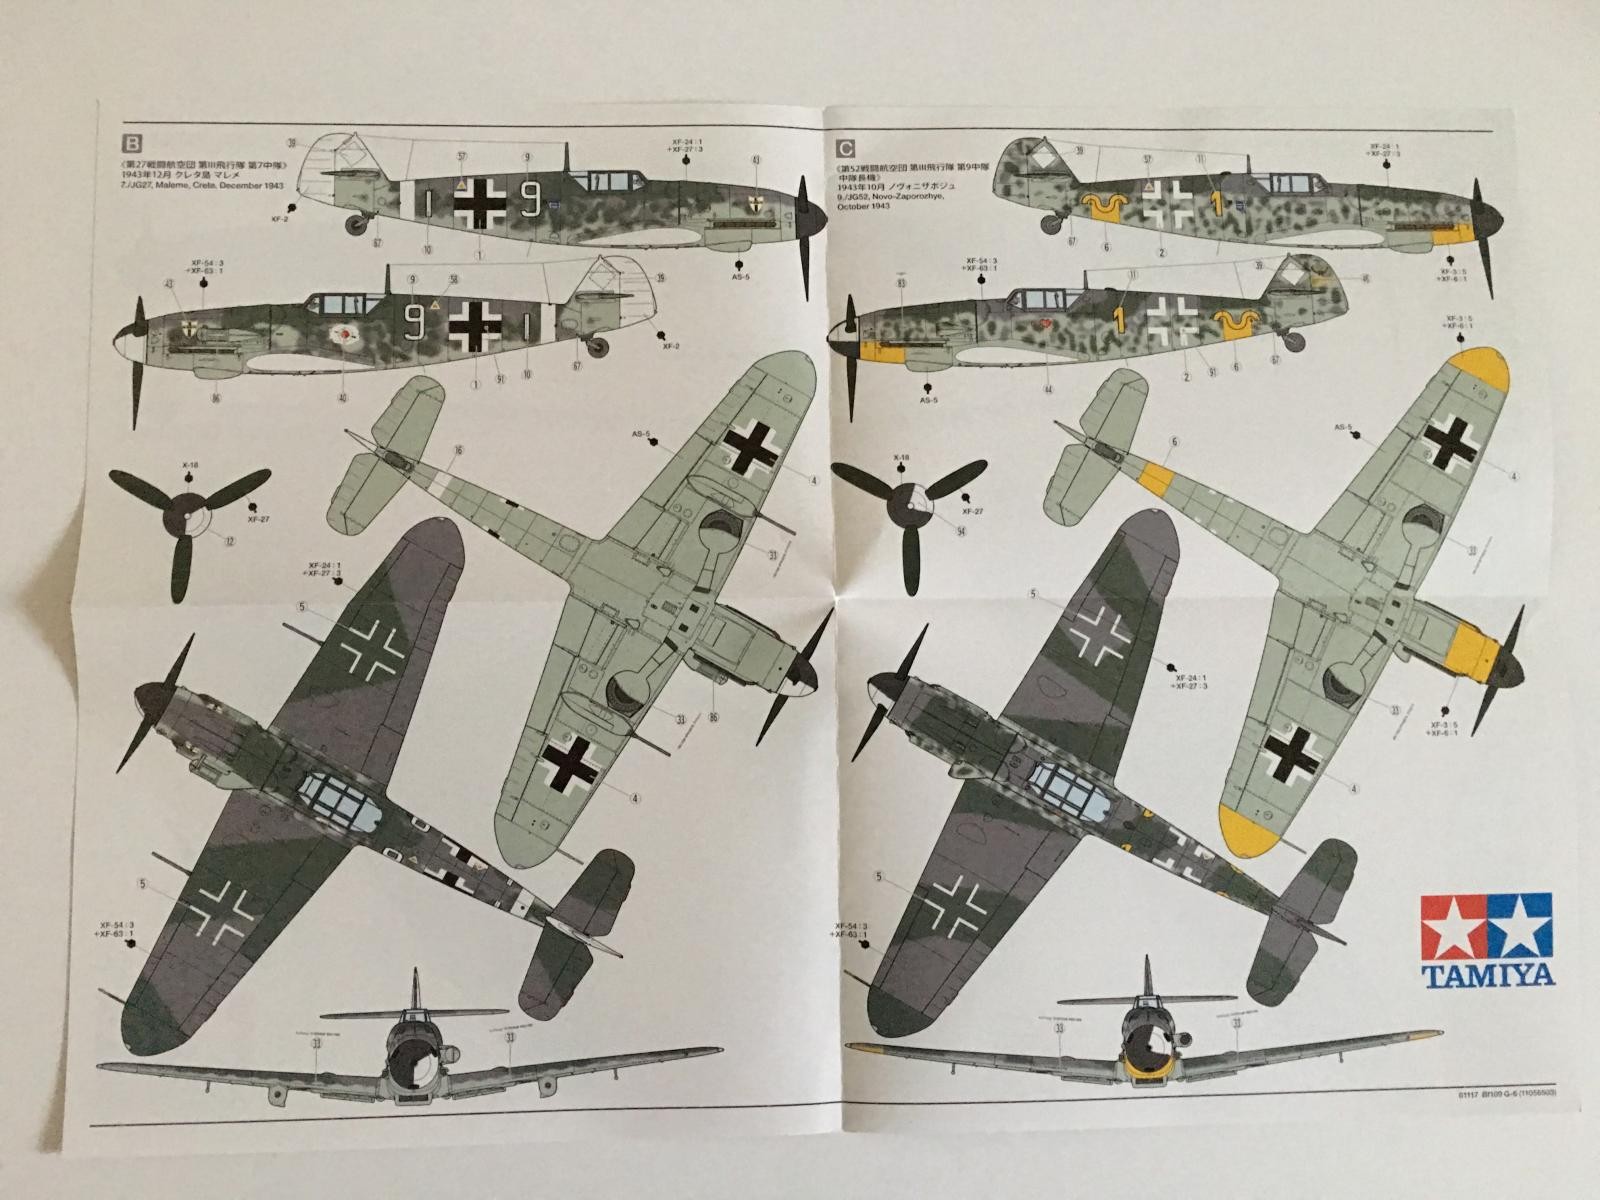
The other side of the color illustration has the other two planes on it. These are a little smaller in size and are not in 1/48 scale. But they give you a good idea of the colors used and the decal placement.
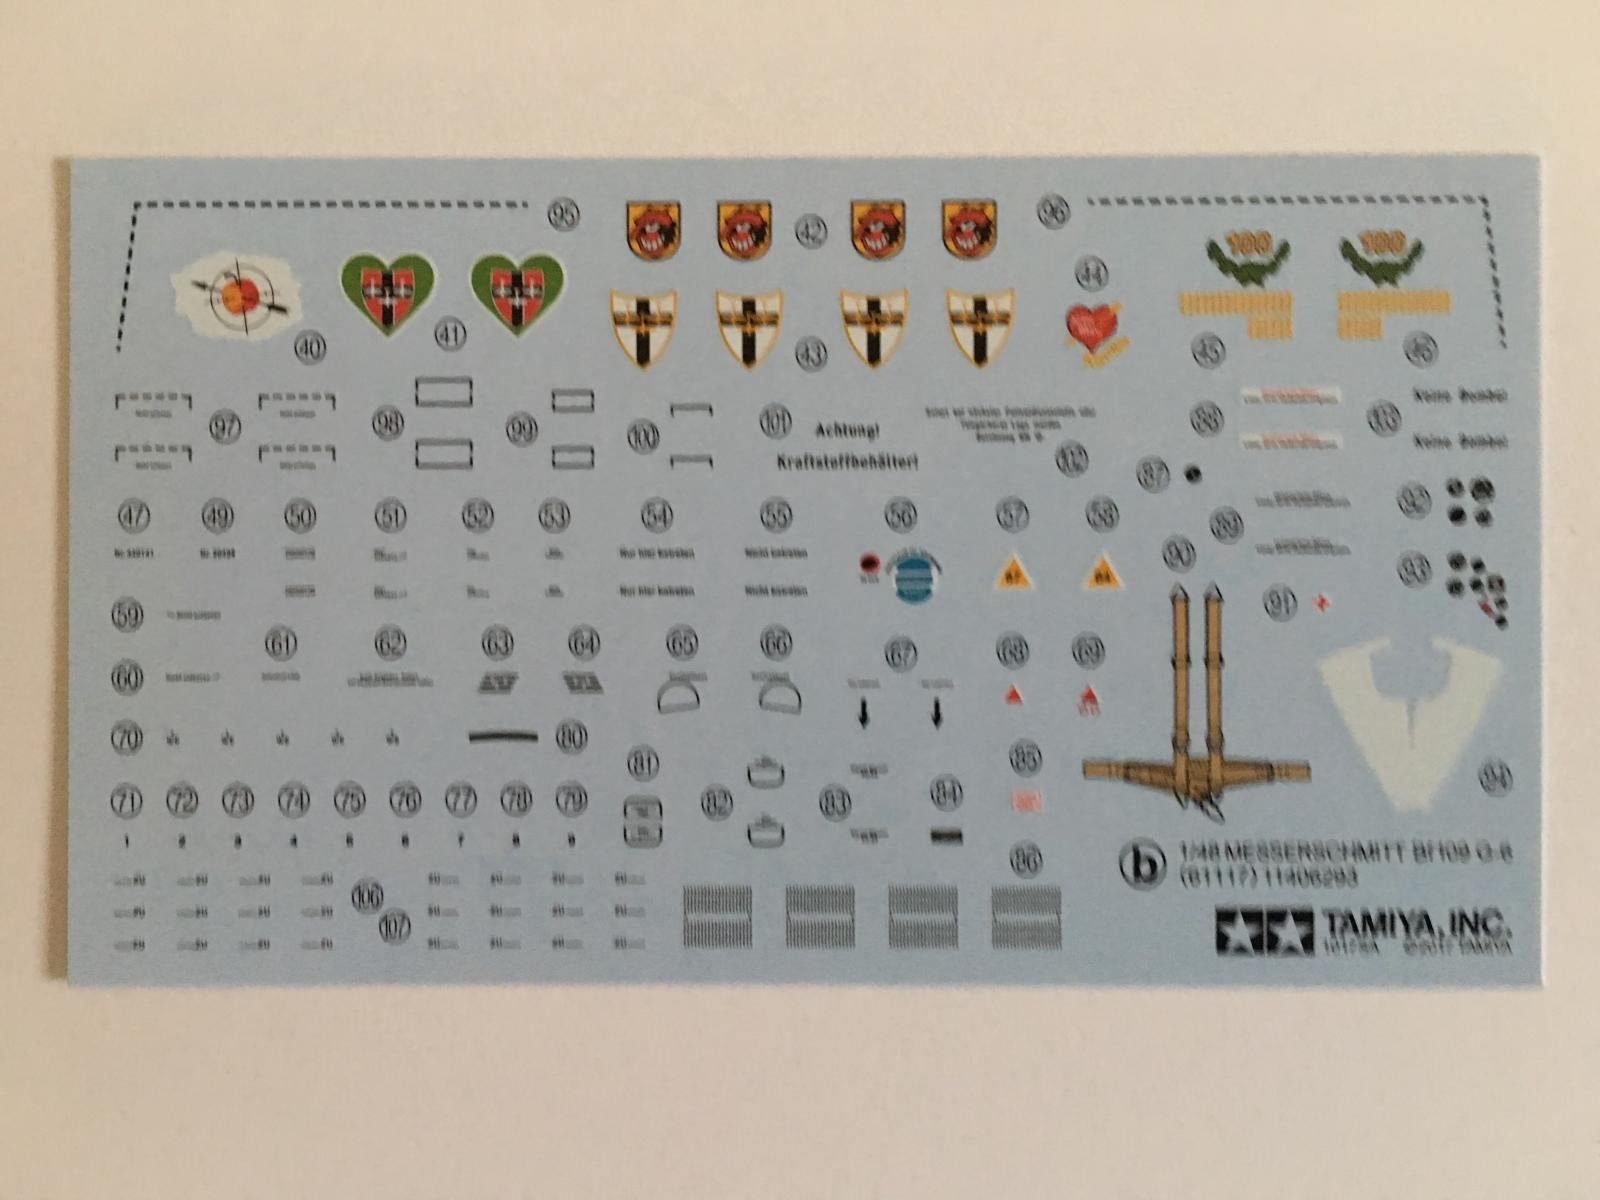
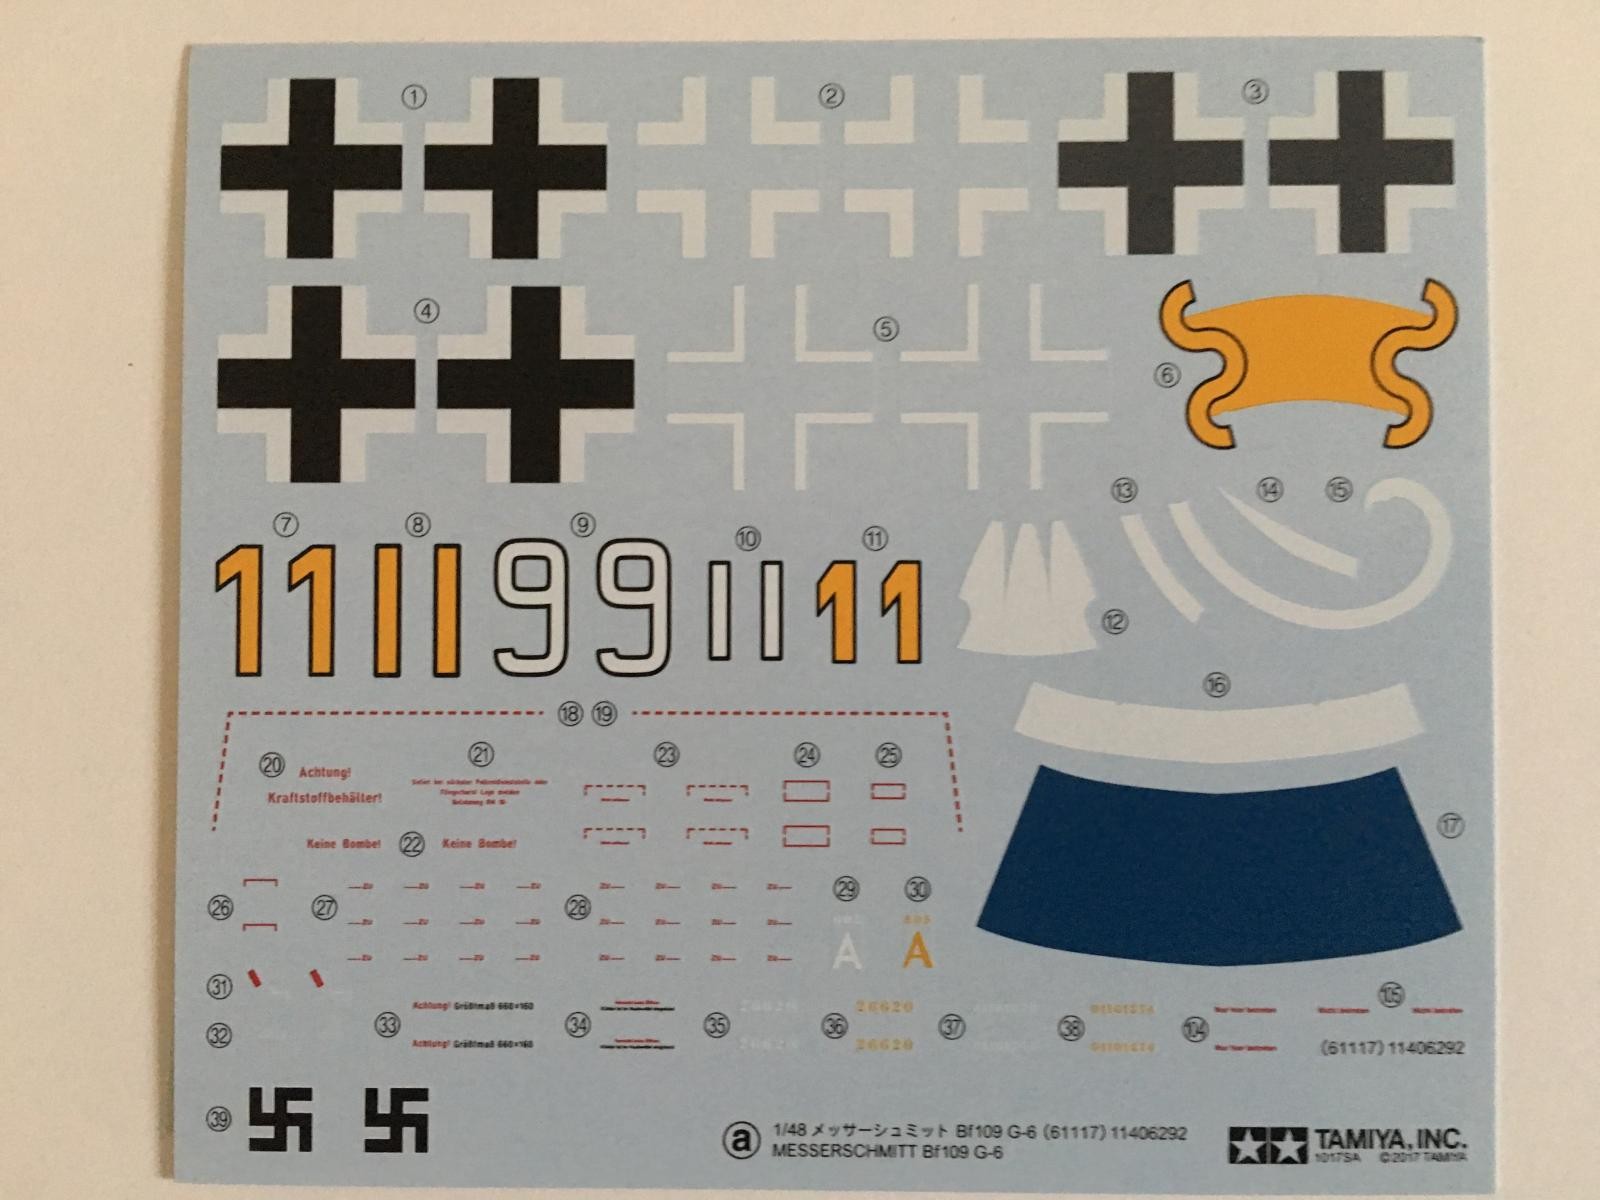
Since we are talking about the decals, here they are. They come in two separate sheets. One sheet has the insignia and fuselage "number" markings. A set of Swastikas is included, so you will not have to scrounge up a set from the decal dungeon or an aftermarket set. Some stenciling is included on this sheet.
The other small set of decals include the unit insignia, a seat belt harness, and the remaining stencils. The decals look to be in perfect register and are nice and thin, with a flat finish. The white looks as it should and is not dingy or yellowed.
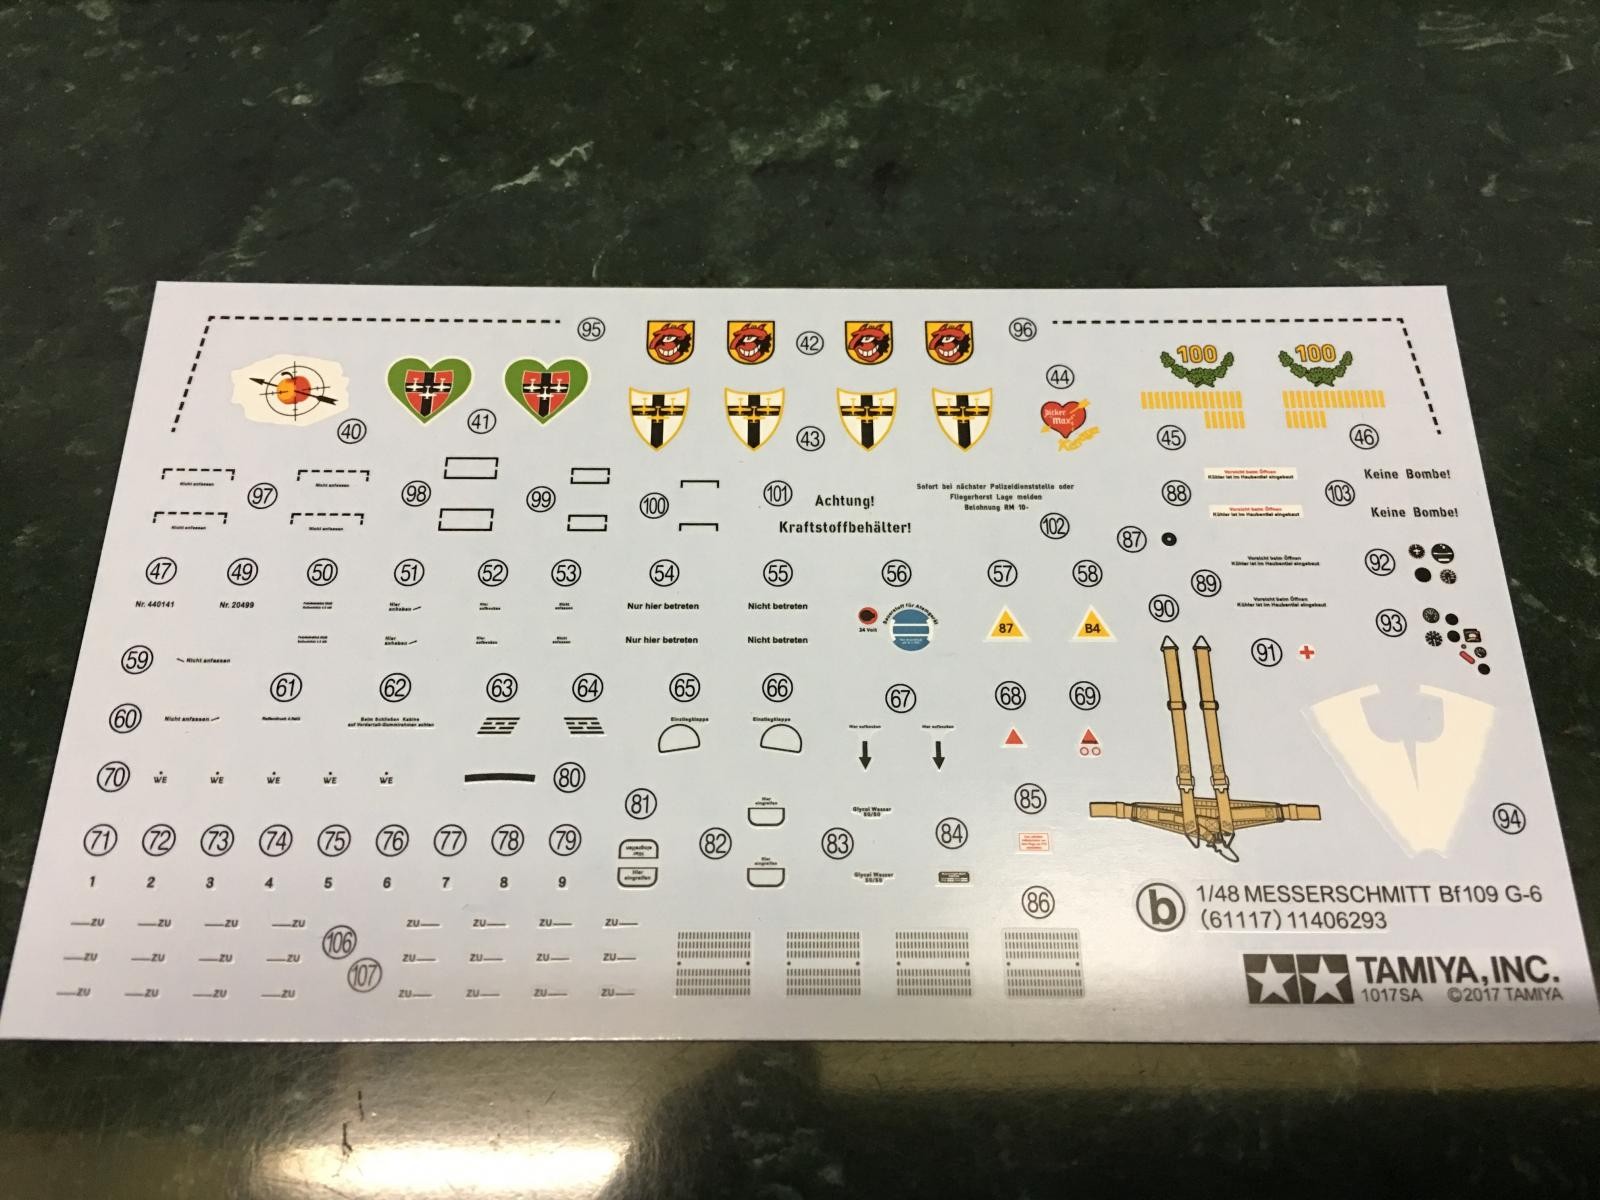
with a close up of the instrument decals and pilot's harness, should you want to use these.

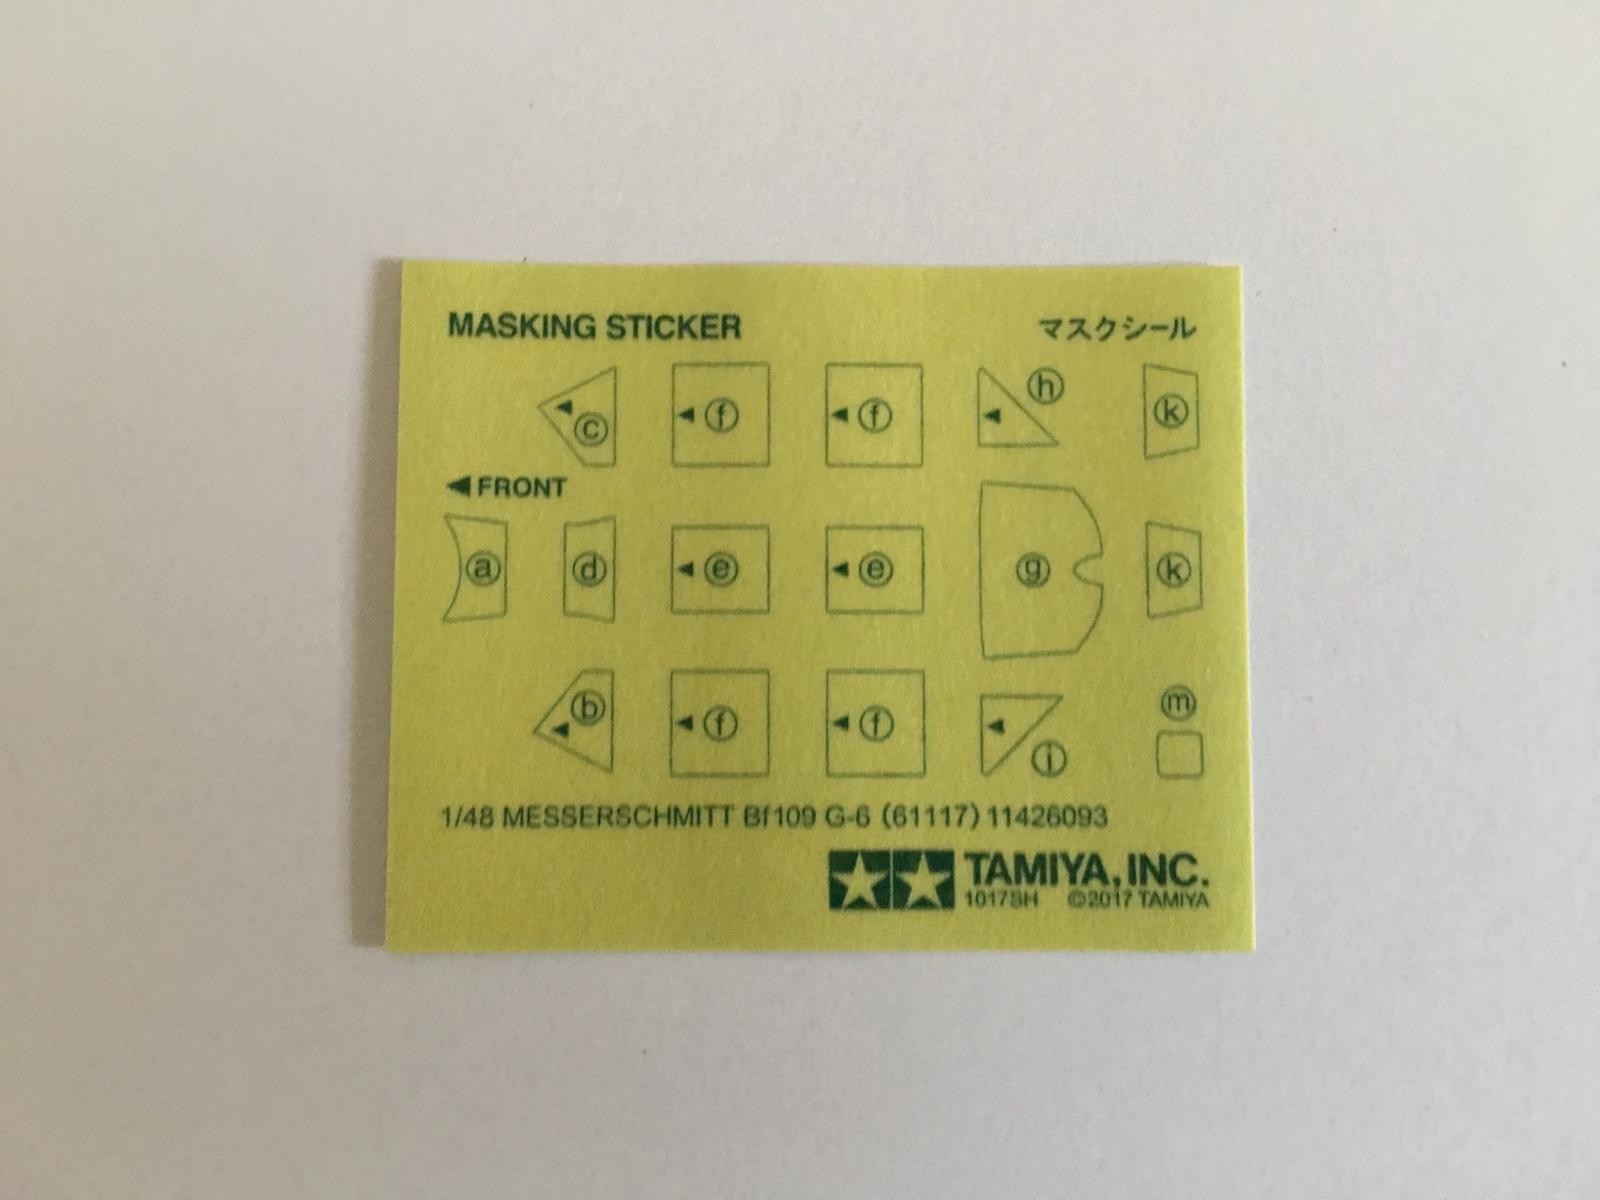
The kit even includes a nice set of canopy masks. These are packaged in with the decals. A thin sheet of protective paper separated the decals from the canopy masks.
The small blue plastic bag contains a small set of flat washers, two magnets and your typical Tamiya poly caps.
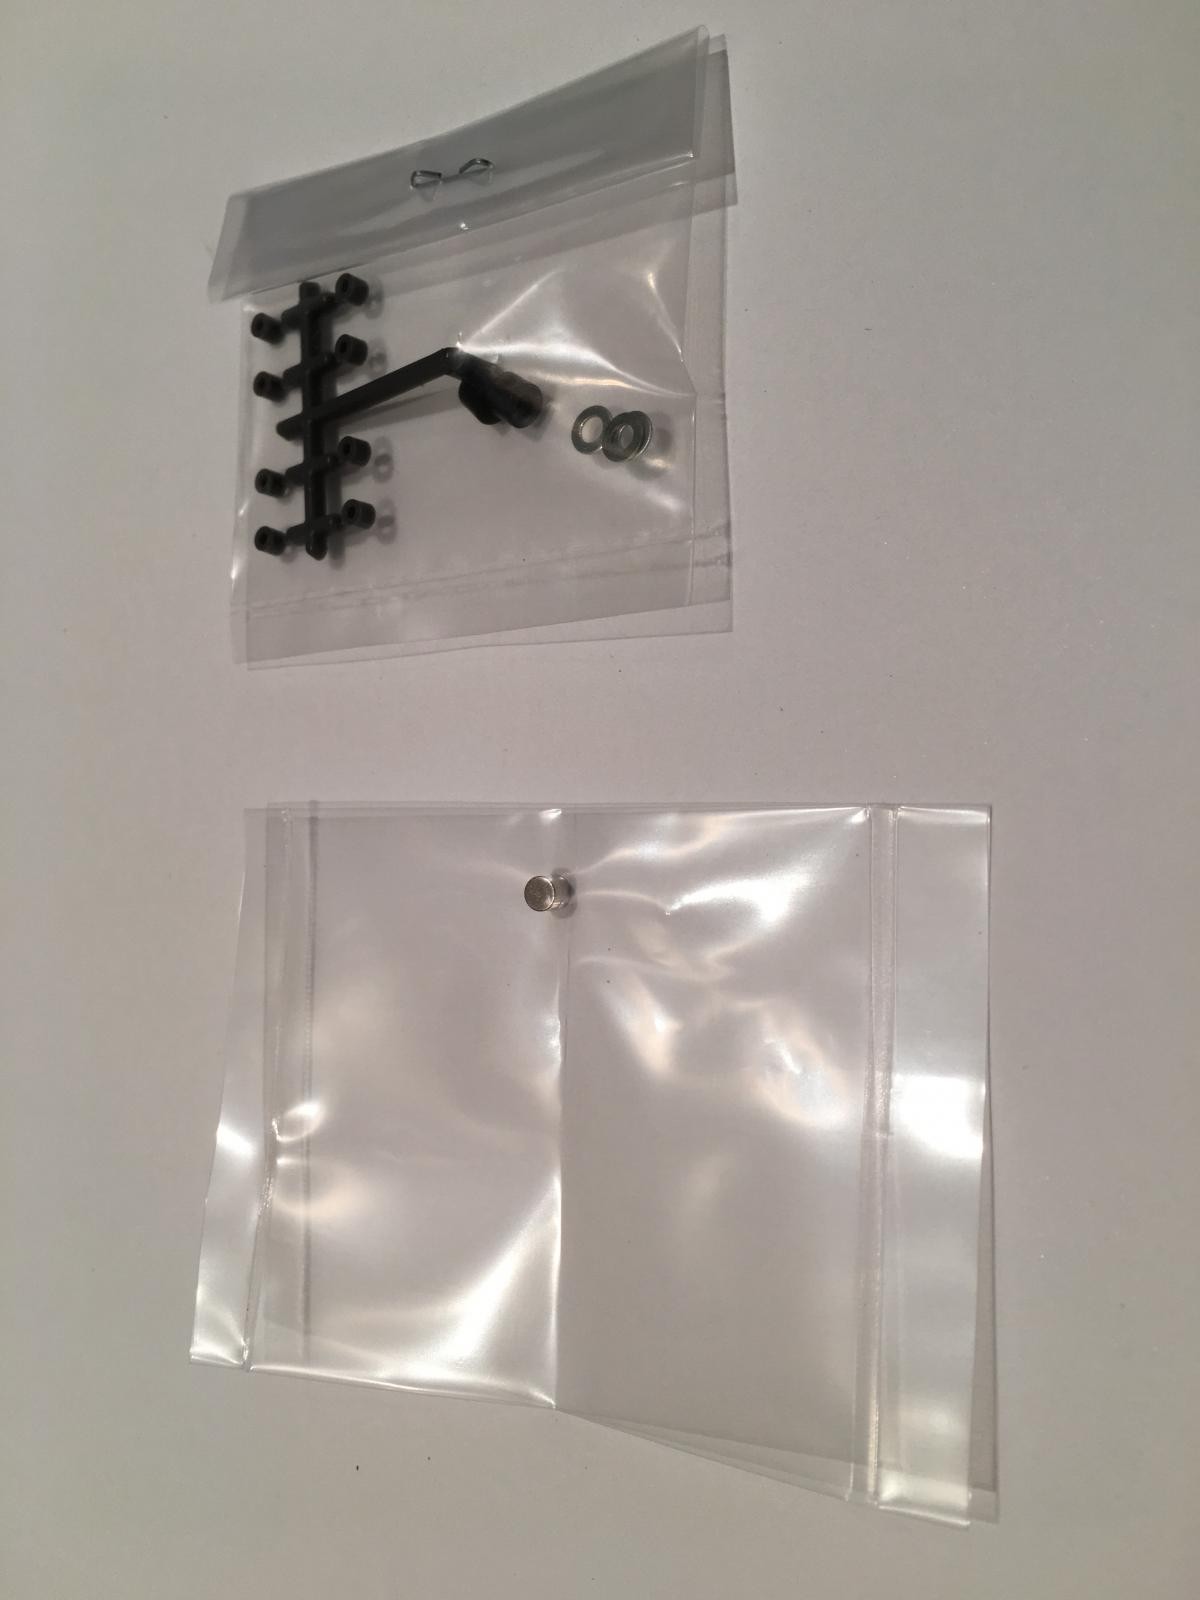
The magnets will allow you to swap out the engine cowlings to pose your plane with the engine displayed or closed rather easily. These parts can be quickly interchanged as you like.
You can also display your plane with a drop tank or not. A poly cap holds the tank in position. This kit has had a lot of thought put into it as it was designed. The propeller is also held in place with a poly cap.
This model uses a unique method on the pilots wind screen. The wind screen and forward portion of the upper fuselage deck is molded as a single unit. This part is held in place with two small tabs that fit into a small recess along the sides of the forward fuselage just above the wing fillet.
There are two front wind screens supplied. There is a minor difference between the two windscreens. One has a larger air vent located in the lower corner. The other windscreen has the same vent, but it is much smaller in size.
The clear parts are molded very nicely. The parts are very thin and transparent. There are several gun sights provided, (that can be seen in the top of this picture)

and several types of pilot's head rest armor plates included too. The canopy can be posed open or closed.

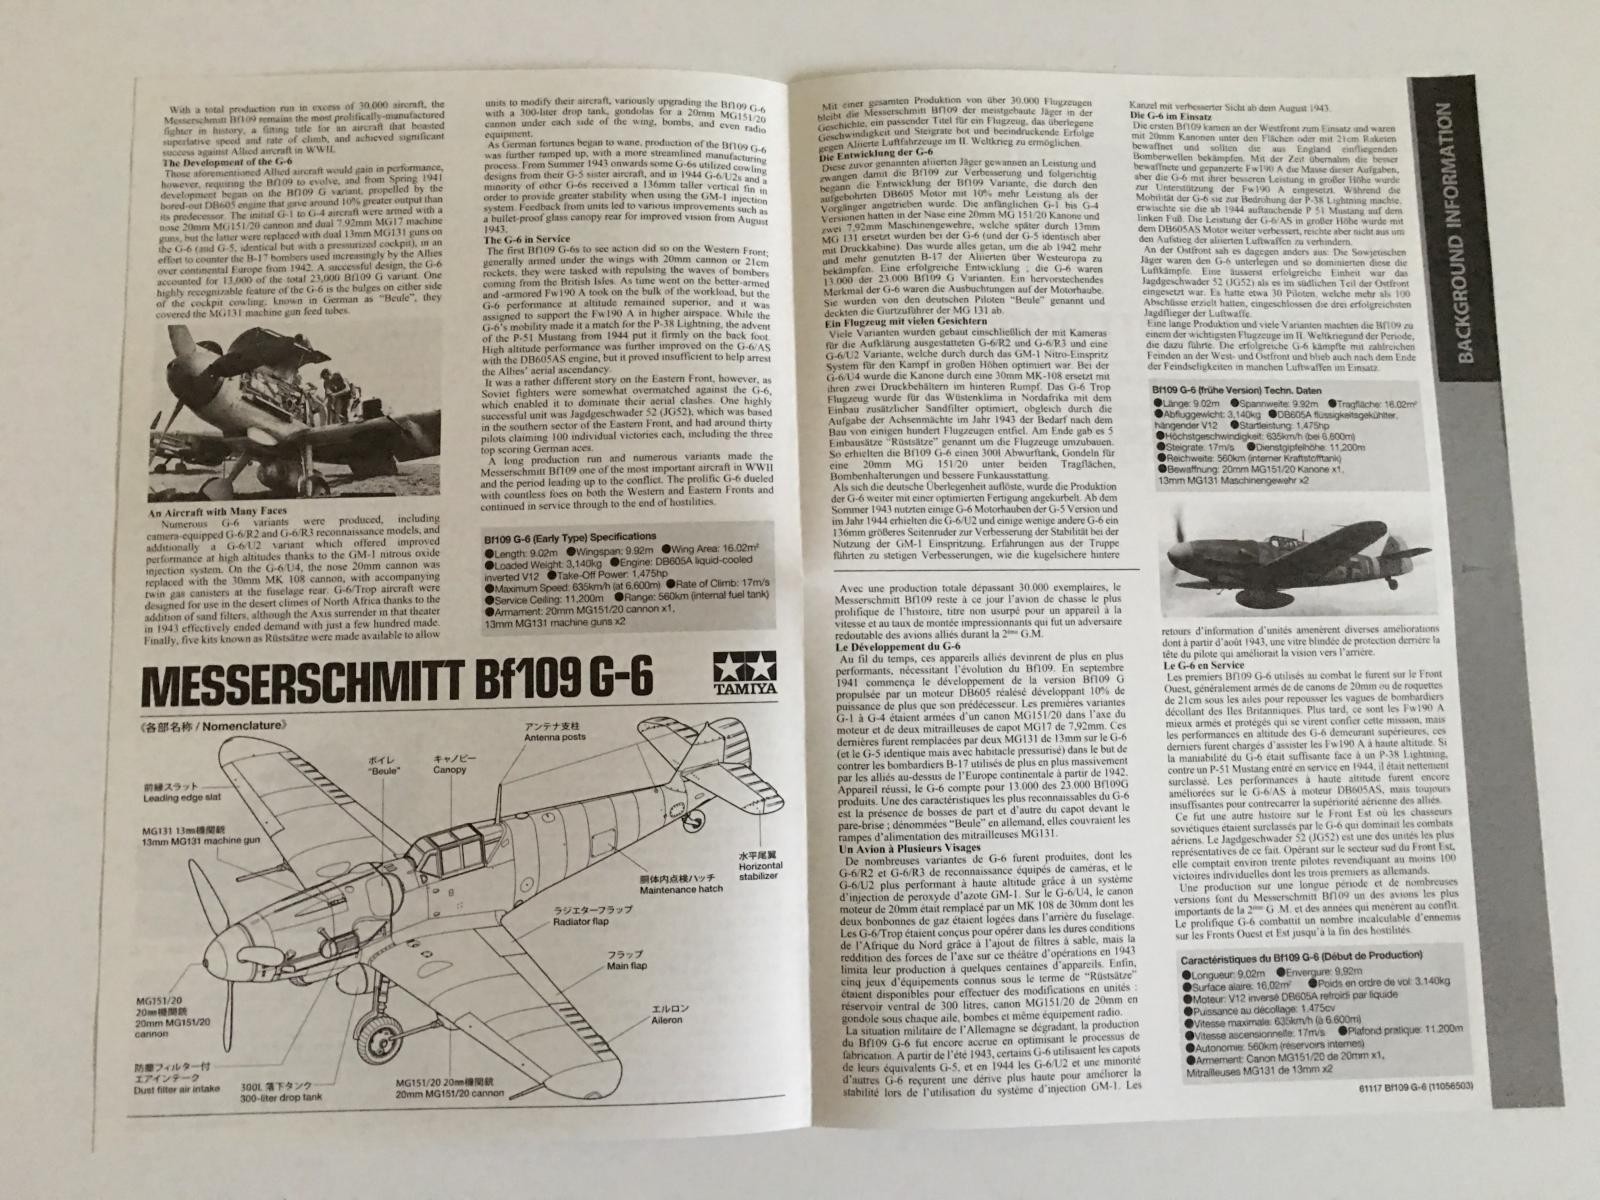
There is a separate sheet of paper included that goes over the background information on the plane. On one side, it is written in Japanese language. The other side is written in English, German and French. Several black and white photographs and an illustration are included.
Next up I will go over the kit instructions. They are printed in a typical Tamiya fashion. The instruction booklet is 16 pages long. The construction sequence is broken down into 37 steps and is well illustrated.
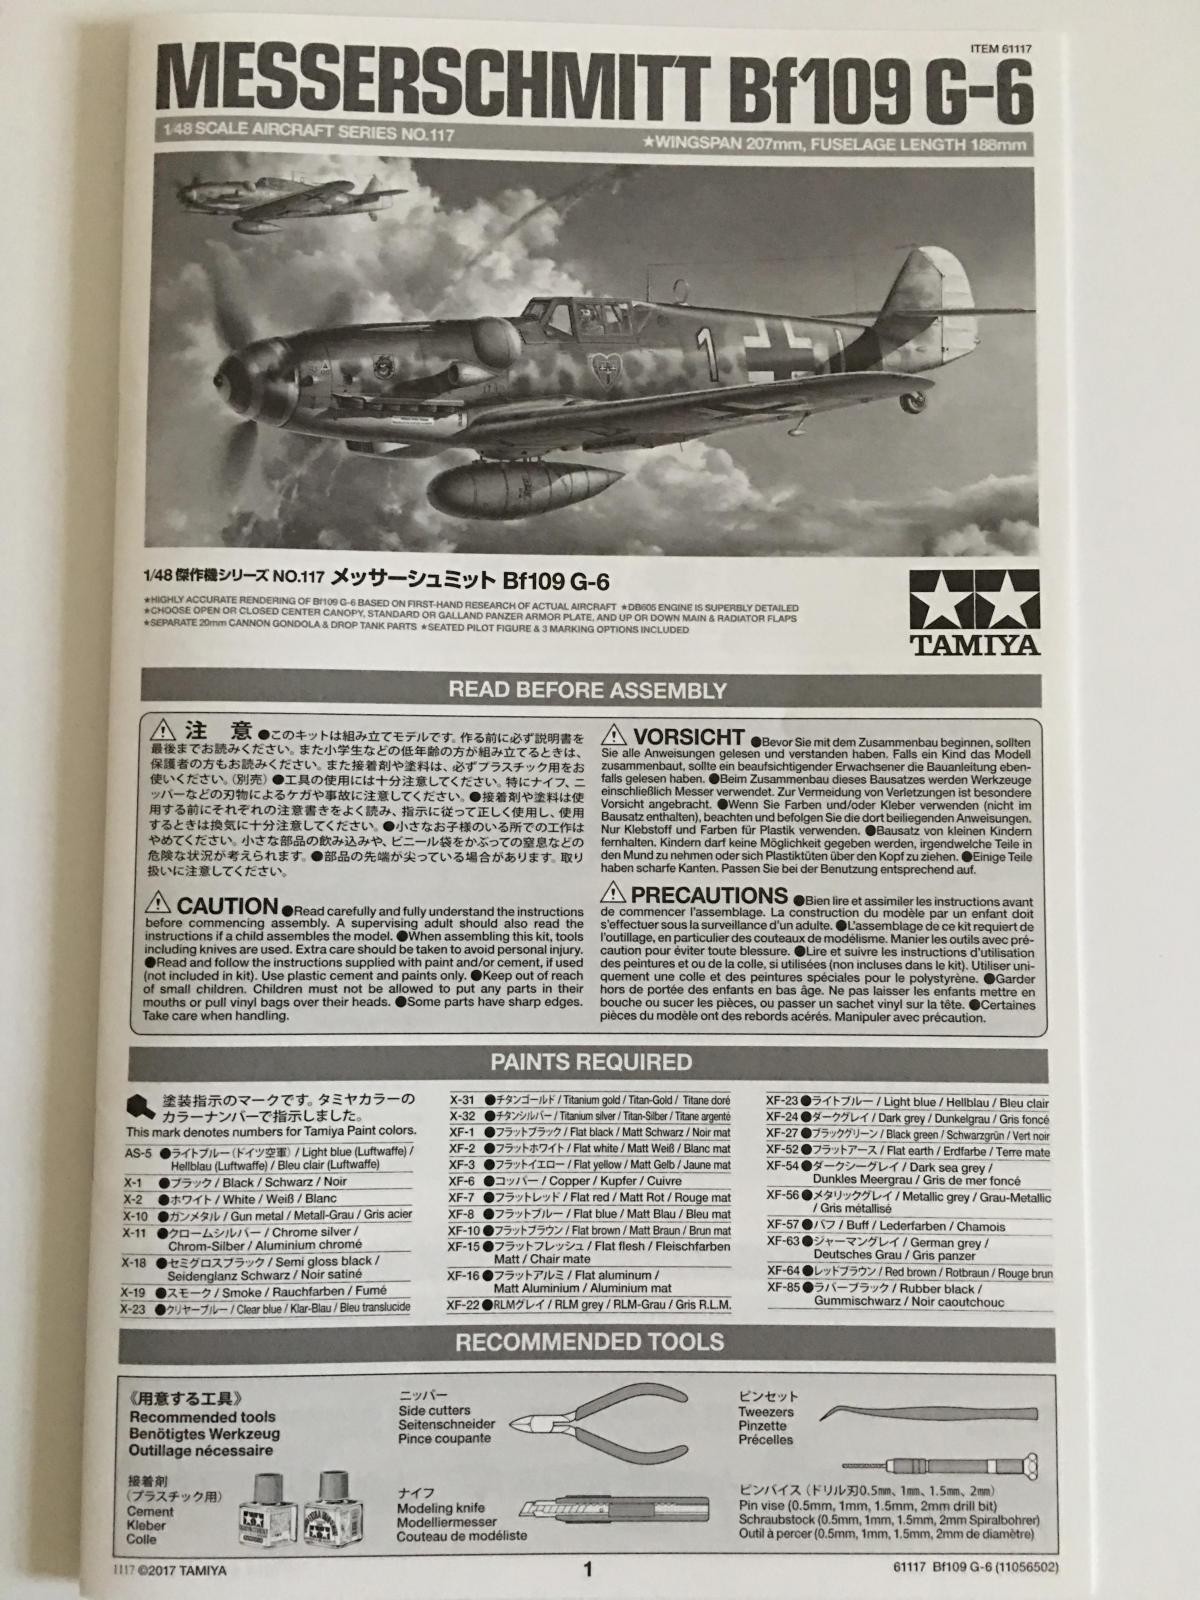
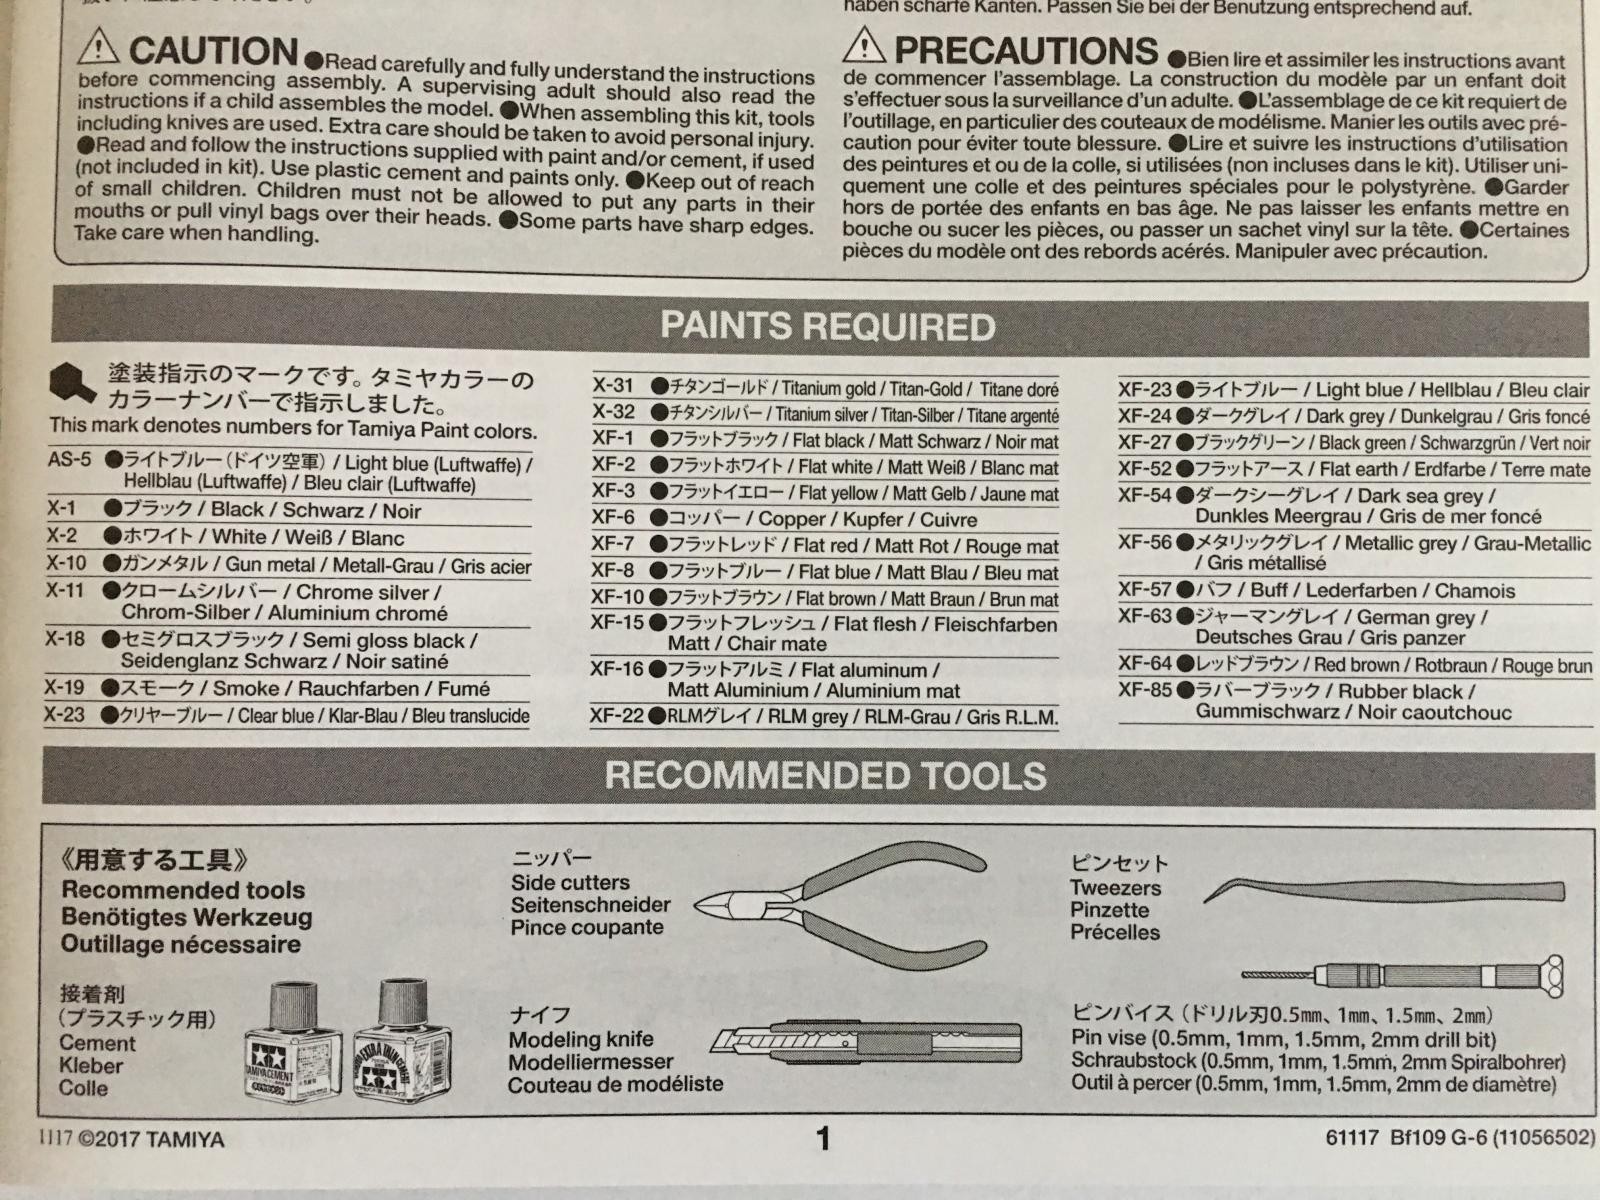
At the bottom of the cover page, the paint colors recommended for the build are listed. The paints listed are from the Tamiya color range.
The construction starts with having you fill in a few panels with putty, that were not used on the G-6 variant. Having to use filler here isn't too appealing to me, but it looks to be a fairly simple modification. I understand the reasoning behind this, and that is for the ease of manufacturing and a simple method to cut production costs of this kit. This tells me that Tamiya is planning on releasing more 109's in the future. This becomes more obvious later on, as we examine the plastic parts in more detail.
The next steps are building and painting the cockpit side walls. The fuselage is glued together now.
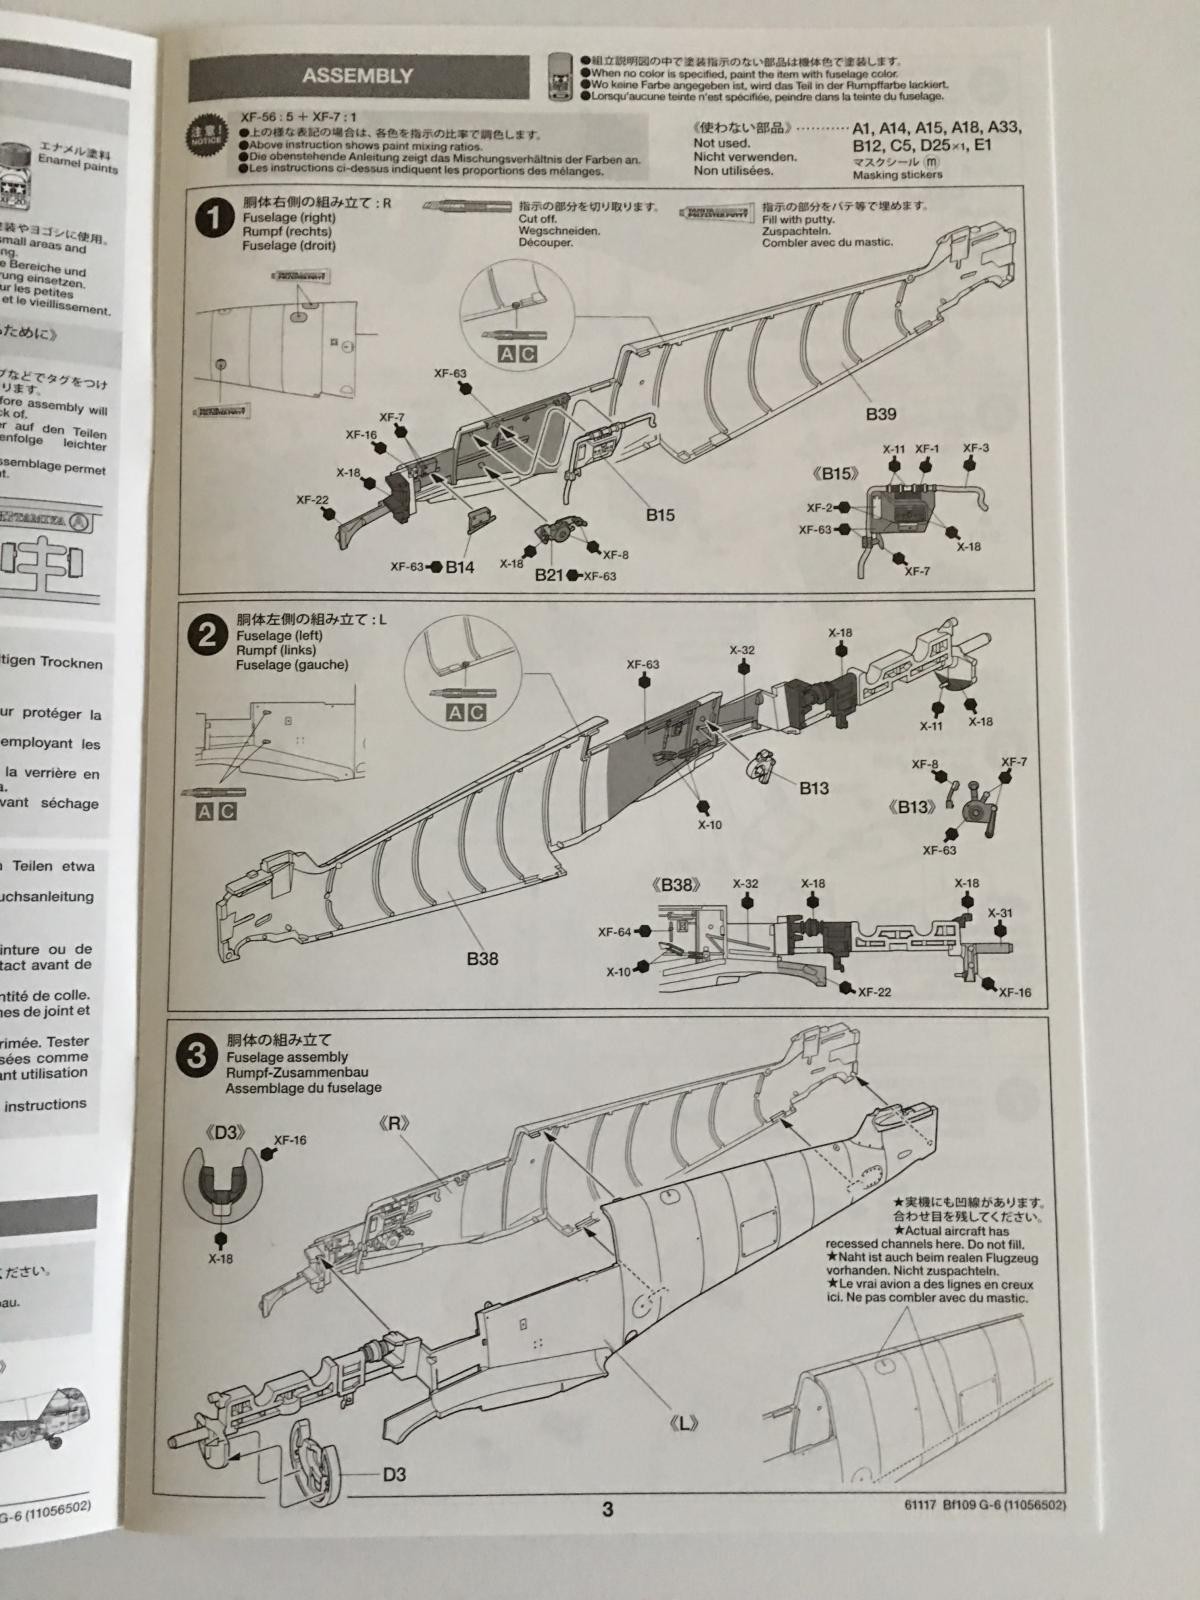
Next you will be building the cockpit, and painting the well detailed pilot.
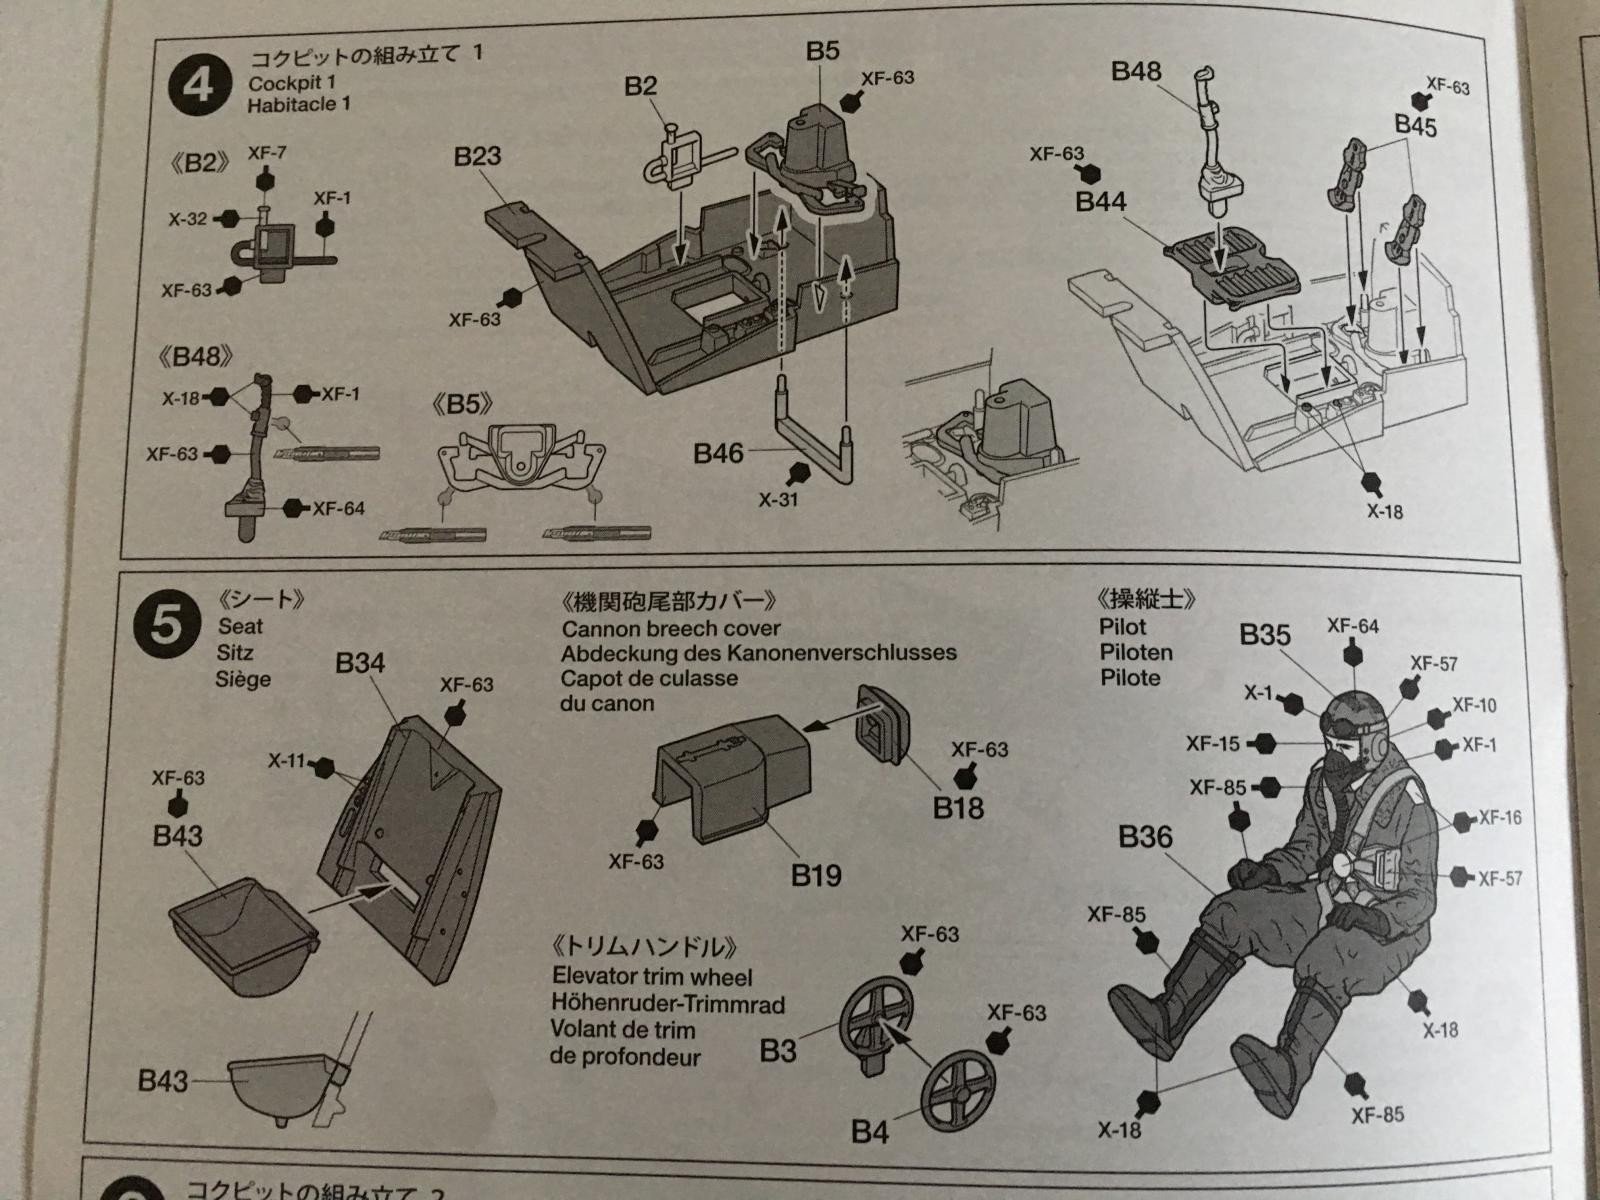
The engine is the next step. It is represented very well, with very nice exhaust and exhaust shields. A separate turbo charger is included. A decal is even provided for the serial number of the engine block.
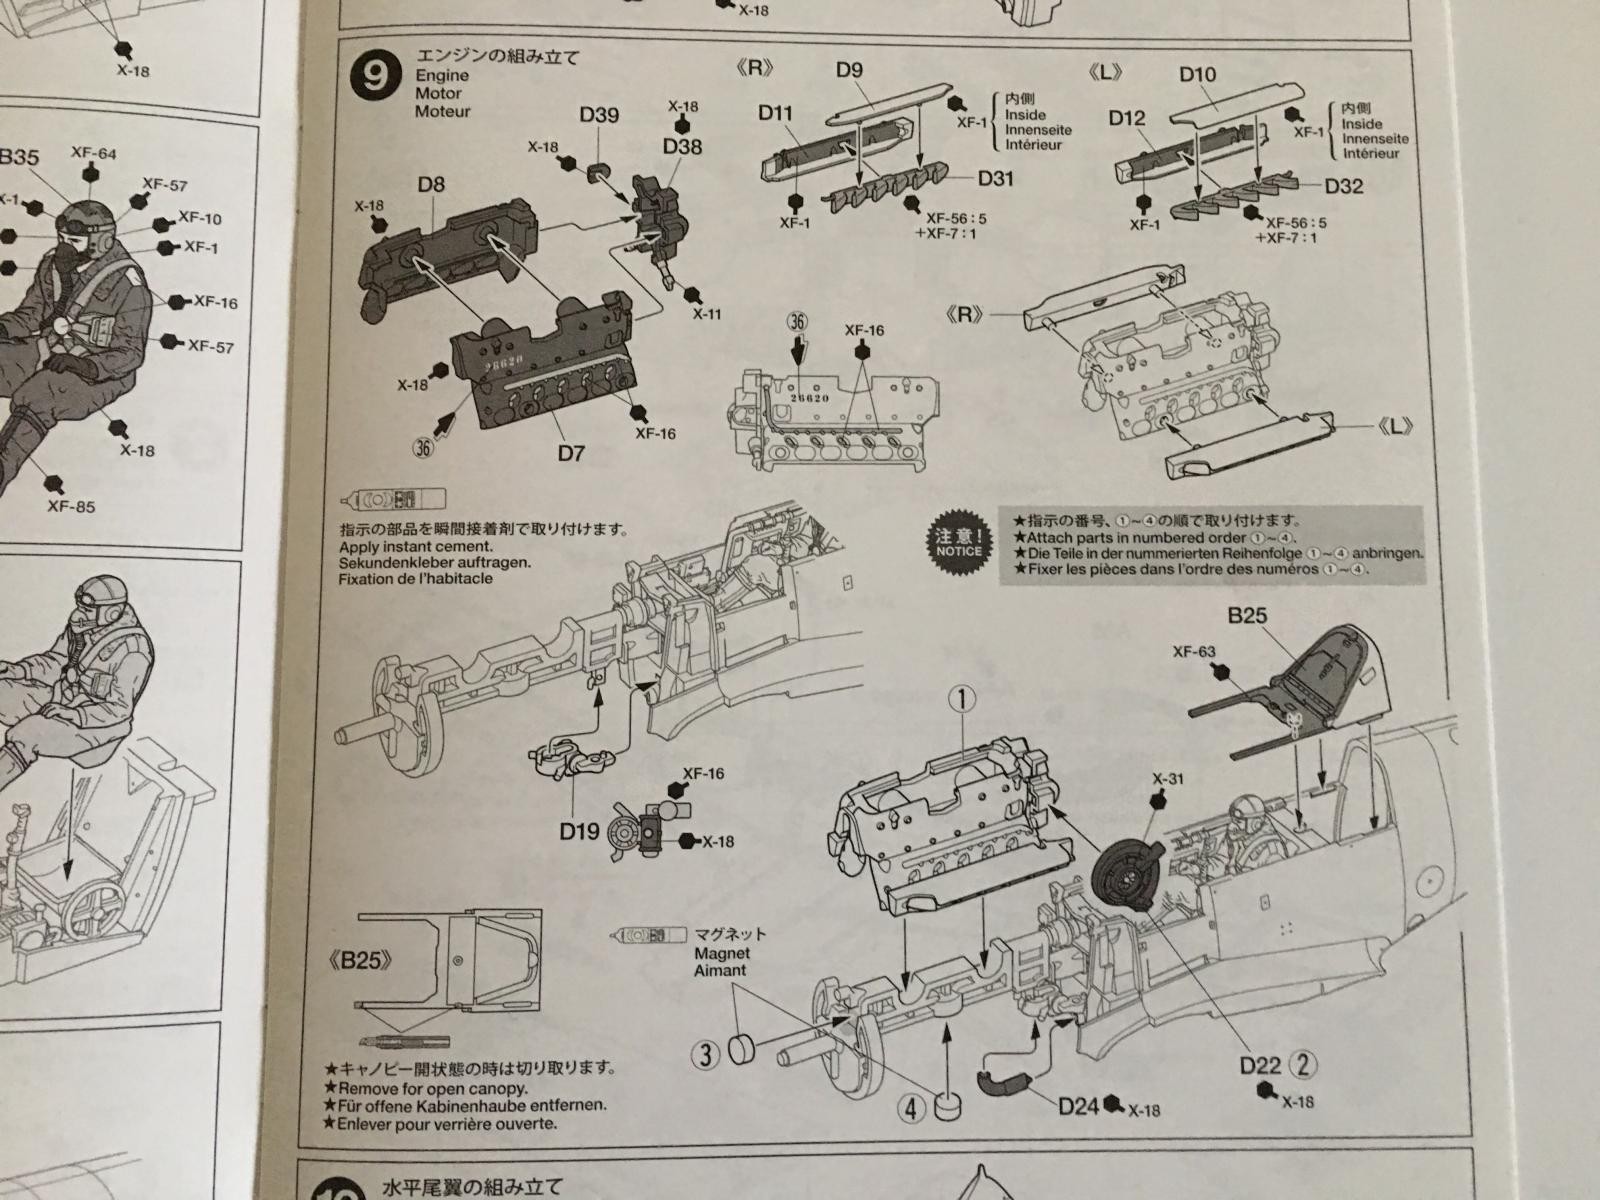
Now is when they have you install the magnets. These magnets will allow you to interchange the cowling. You will be able to pose your plane with the cowling open or closed. This is a very cool feature.

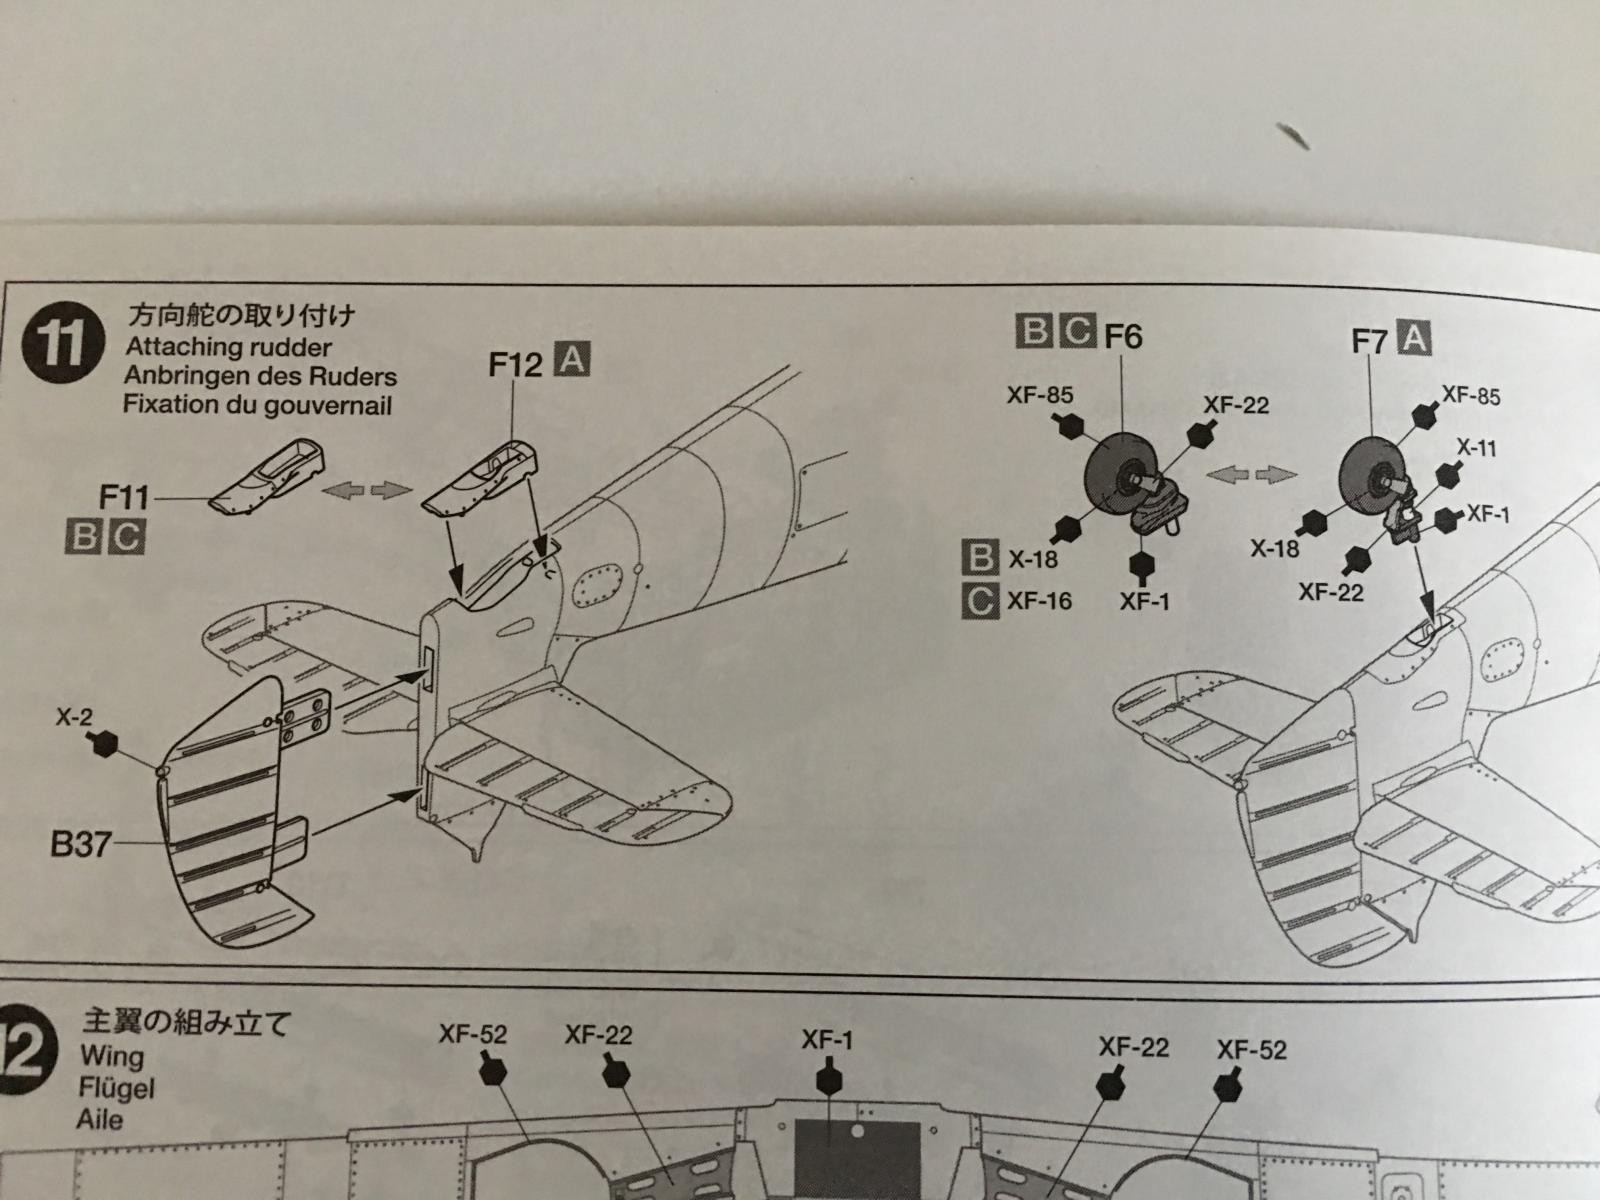
This next step is a telltale giveaway. The vertical fin is molded as a separate part. This tells me that Tamiya is planning ahead for a version with the "Taller Tail" which was built using primarily wood as construction materials. A separate rudder is also included. This is another indication, since I believe there were three different types of rudder used in the 109.

Here you can see how the "tail feathers" are attached. If you look closely, you will see that two different types of tail wheel strut are provided. So you will have options, and some left over goodies for the spares box. The rudder is a separate part, but it looks like it will be centered once installed. I'm sure you could "pose" the rudder with a little work.
Next stop: The landing gear wheel wells. Tamiya has molded them using separate parts as a liner for the main gear wells. There are some nice details molded into the under side of the upper wing half. This will represent the upper portion of the main gear well once the wing is assembled.
Here is also when you need to decide if you are building a plane with the underwing mounted 20 MM cannons. This is when you open the holes that allow you to attach these 20 MM underwing "Gondola Cannons".

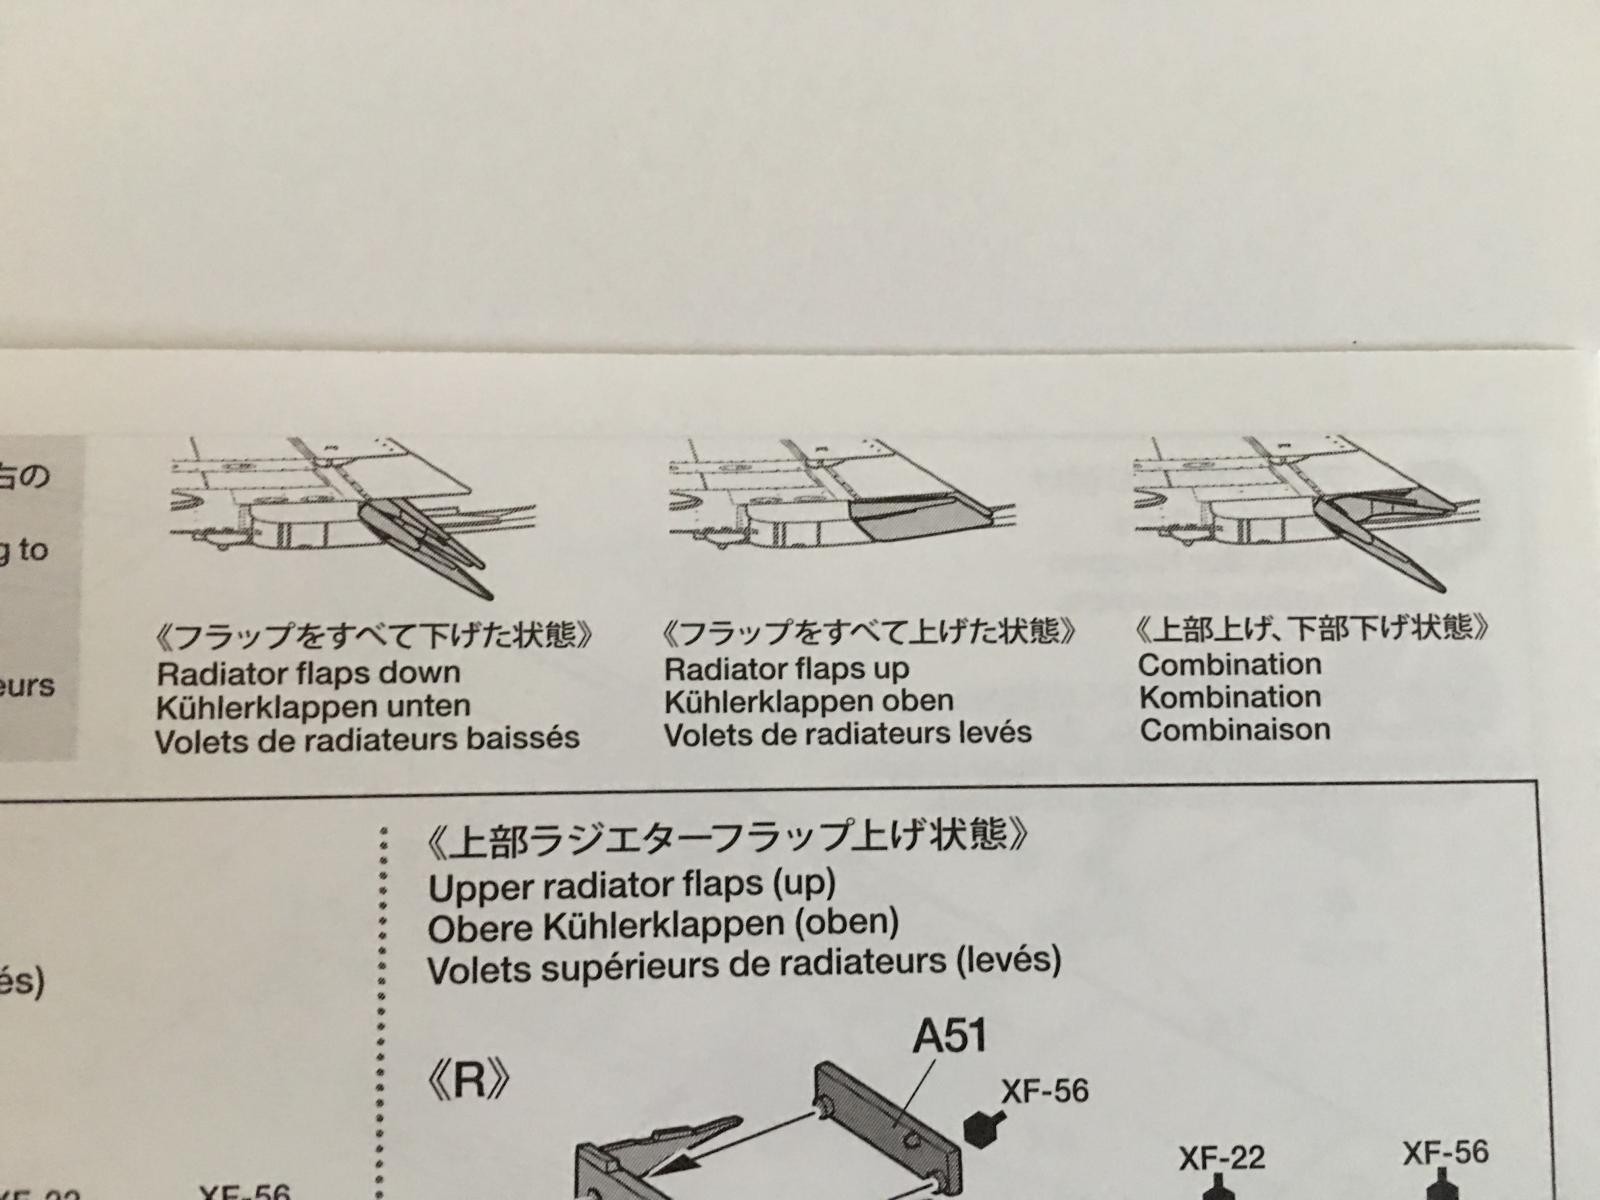
You will be building the under wing radiators next.
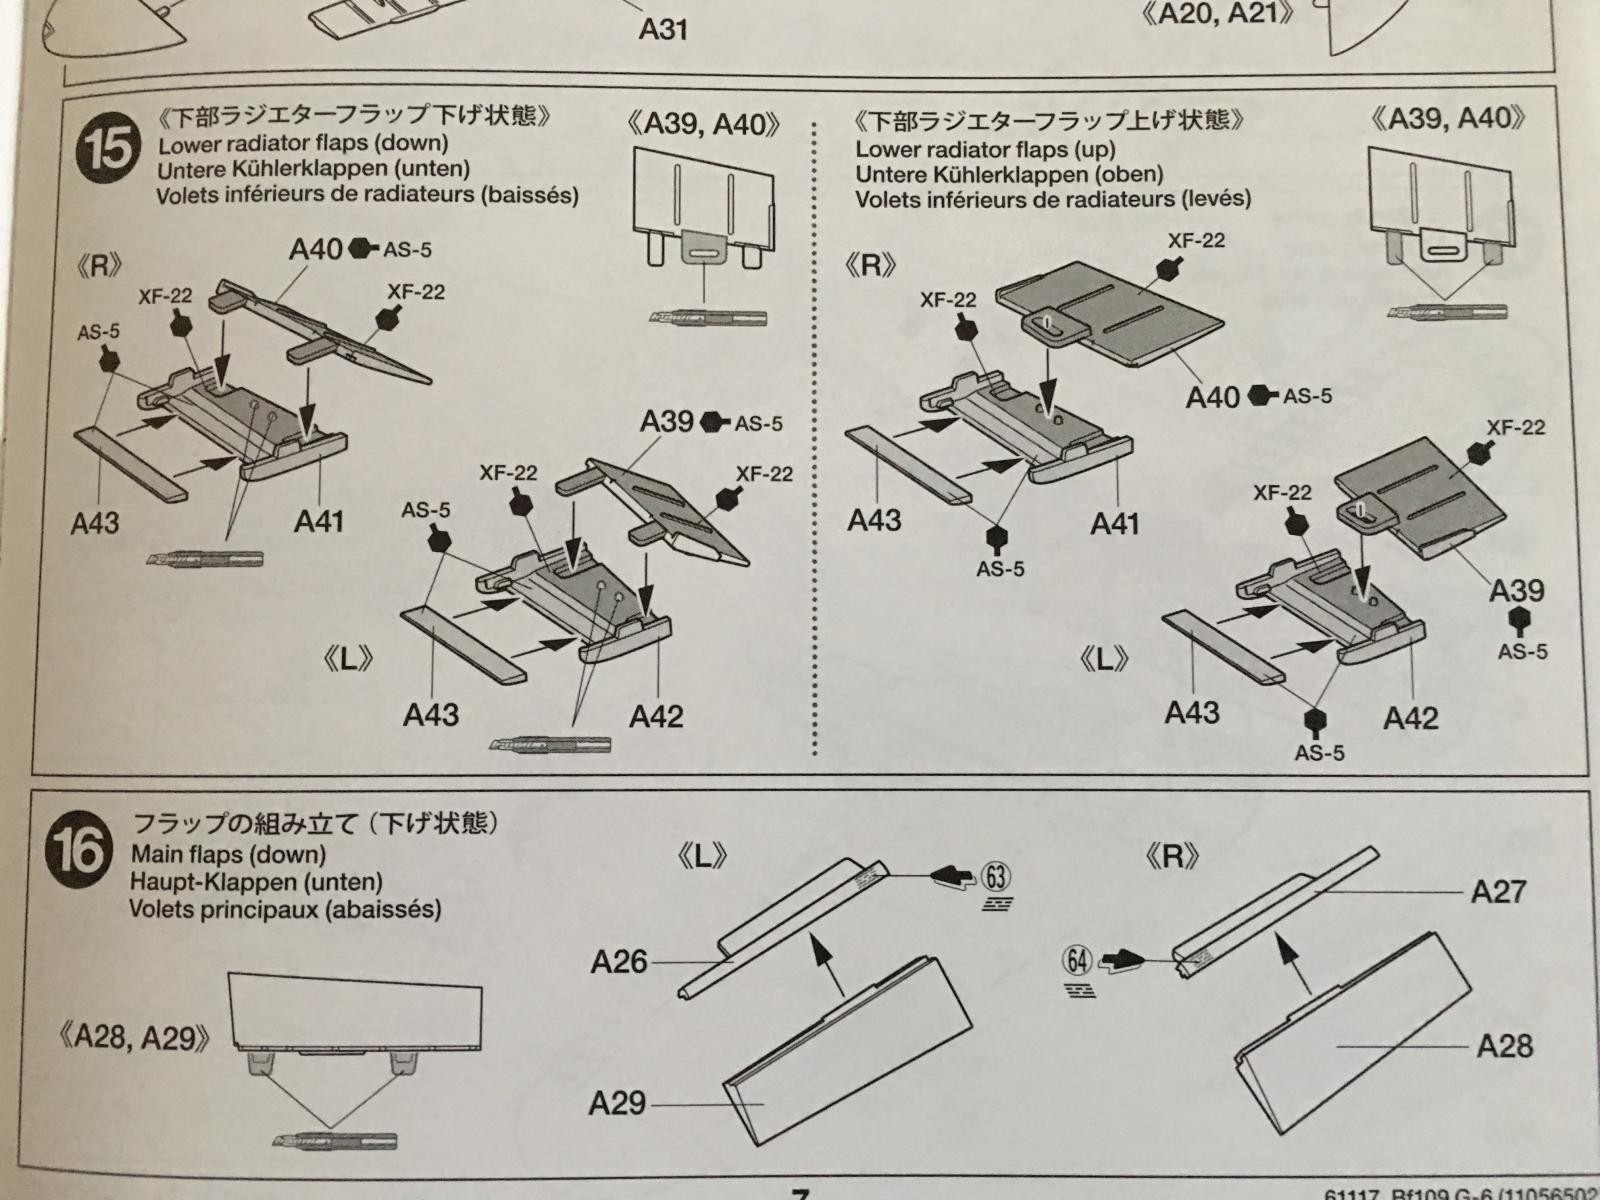
The flaps can be built "posed" in several configurations...
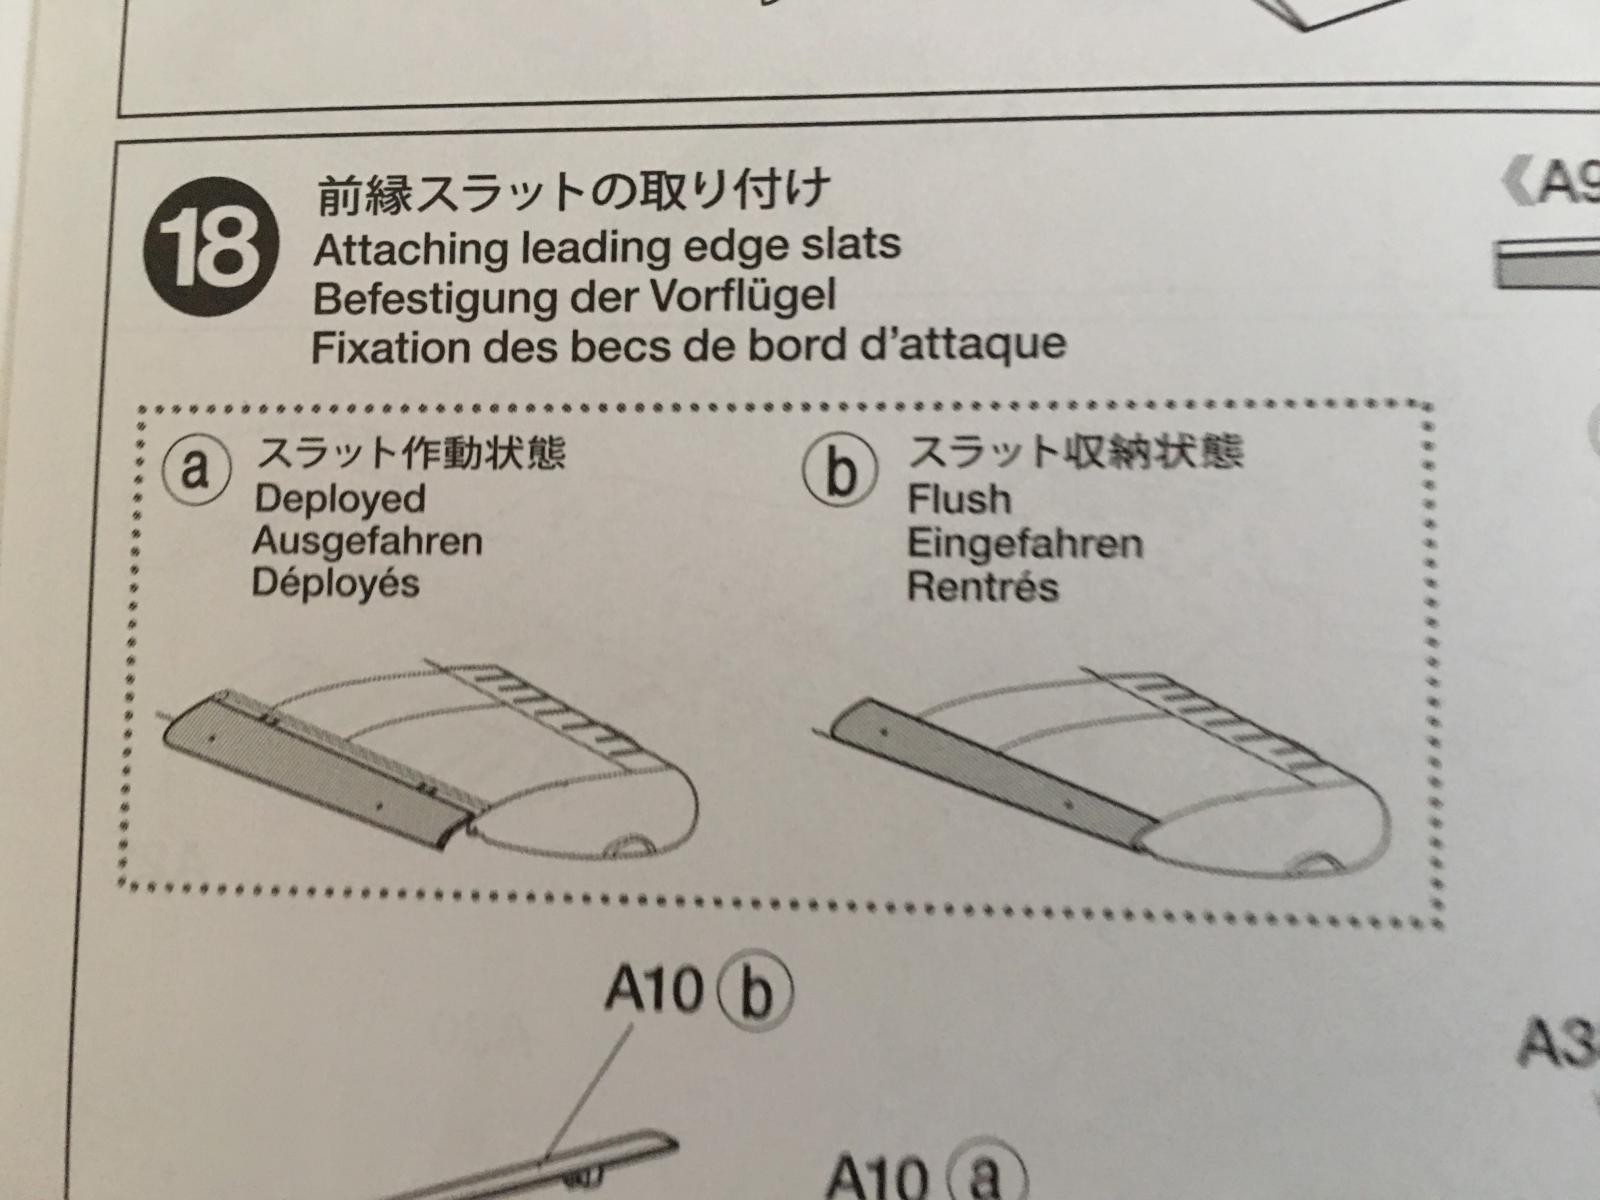
...as can the leading edge slats.These slats were open when the plane was sitting on the ground. Once the plane built up enough speed, wind resistance closed them. They were automatically deployed in flight as dictated by wind speed generated against them.
The ailerons are a separate part too. I don't know if these can be posed or not just yet. I will find out during construction. There is a separate wing tip. I don't know how this will work just yet. I am not a big fan of having these parts molded separately, as there is often an alignment issue where the part connects to the main portion of the wing. Time will tell on this part. The jury is still out on this decision.

Now is the time they have you join the wing to the fuselage.

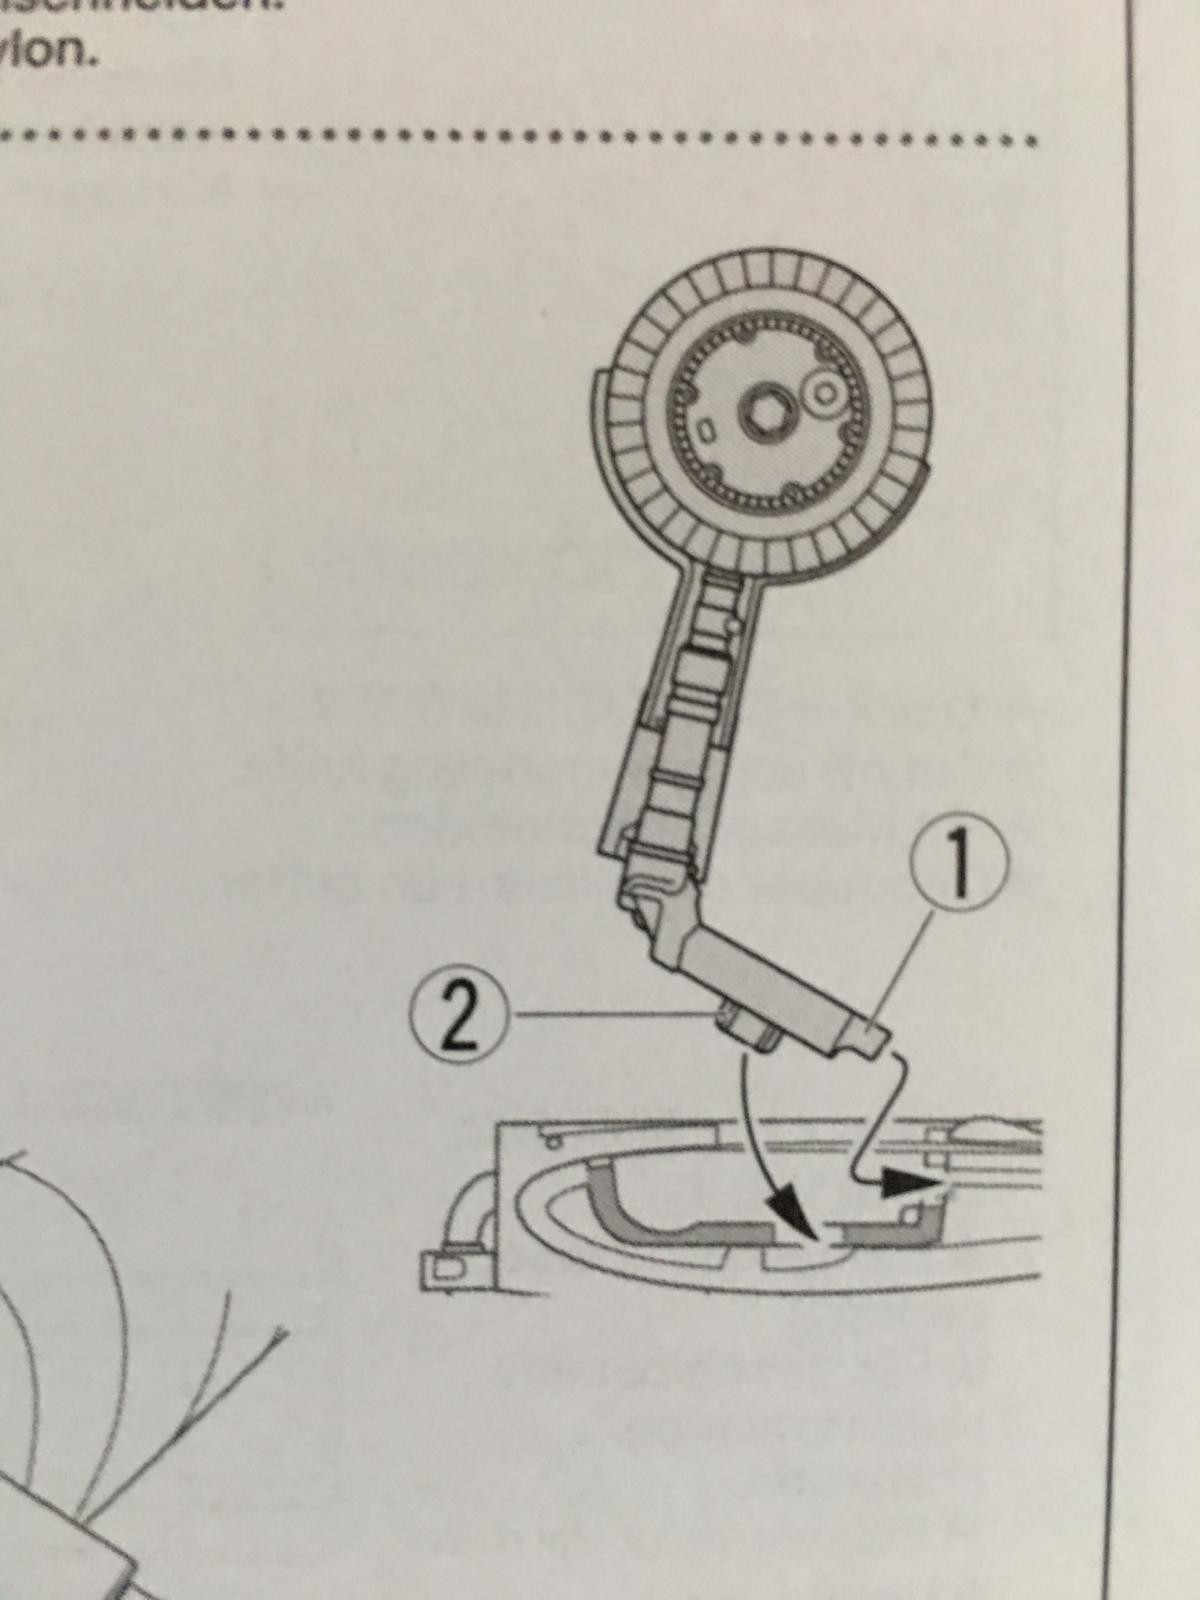
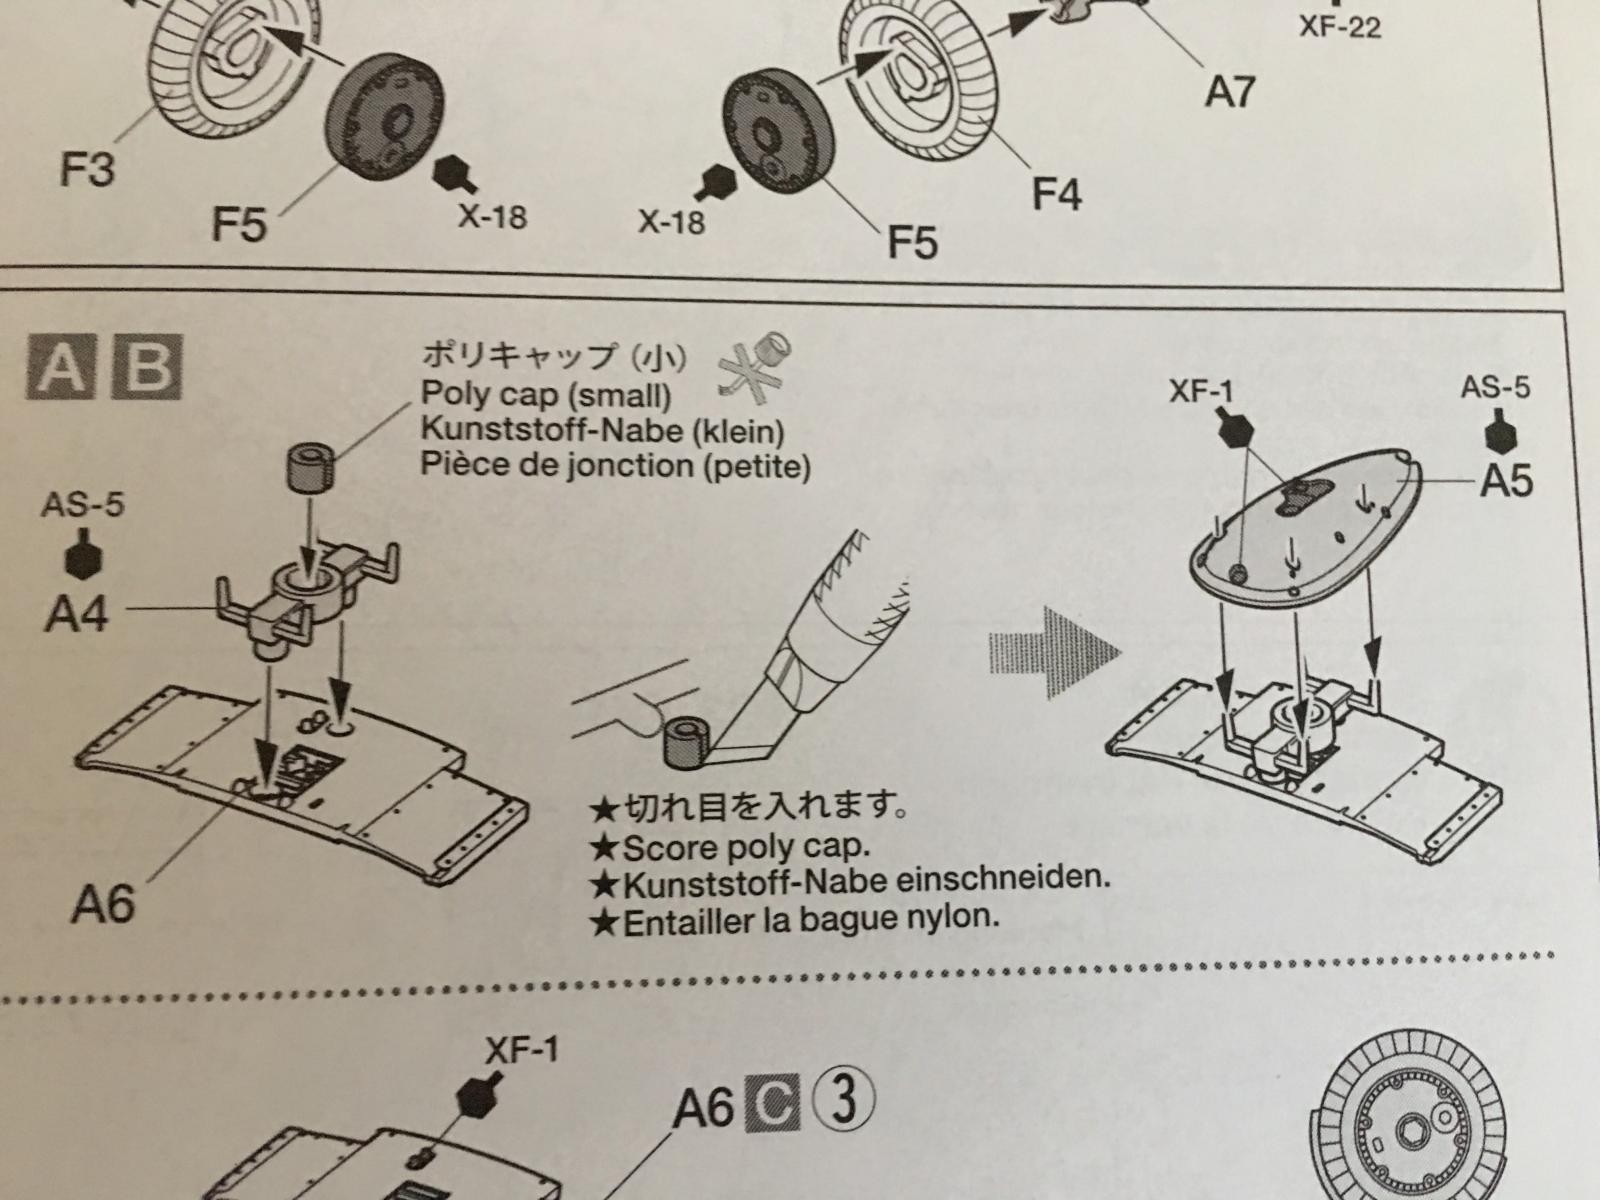
One thing that is often done wrong when someone builds a 109 is the landing gear. The 109 has a look all to it's own. The main gear is canted, and the wheels have a camber to them as well. It looks like Tamiya has taken notice of this and engineered the kit to help alleviate this problem. The main gear legs have two locks, which should help prevent from building the model with the main gear out of whack.
Now here's a cool feature. The drop tank can be installed and removed, since it is held in place with a poly cap.
You will also have the option of building your plane with the 20 MM under wing canons in separate gondolas. Two are provided and the details on them are excellent.

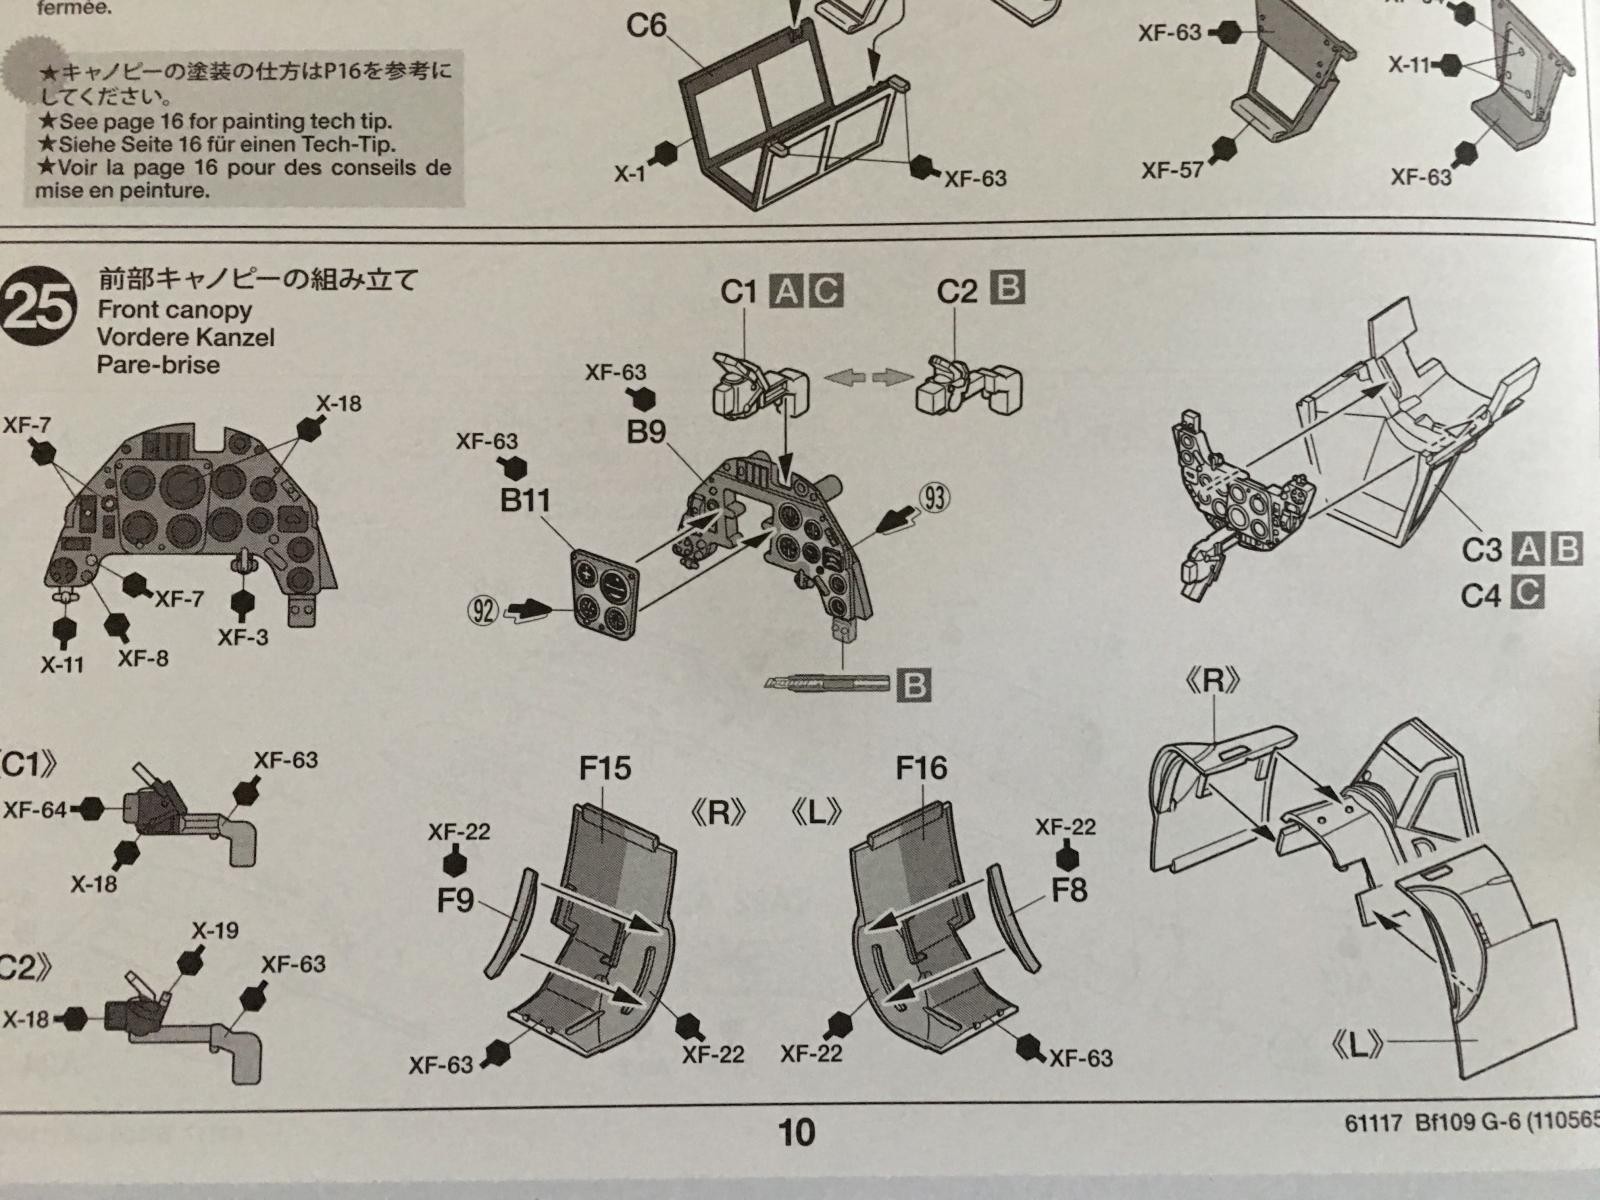
Now we are up to step #24. This is where you will be painting the clear canopy sections. There are two style of front glass, two styles of head rest armor, and the canopy can be posed open or closed.
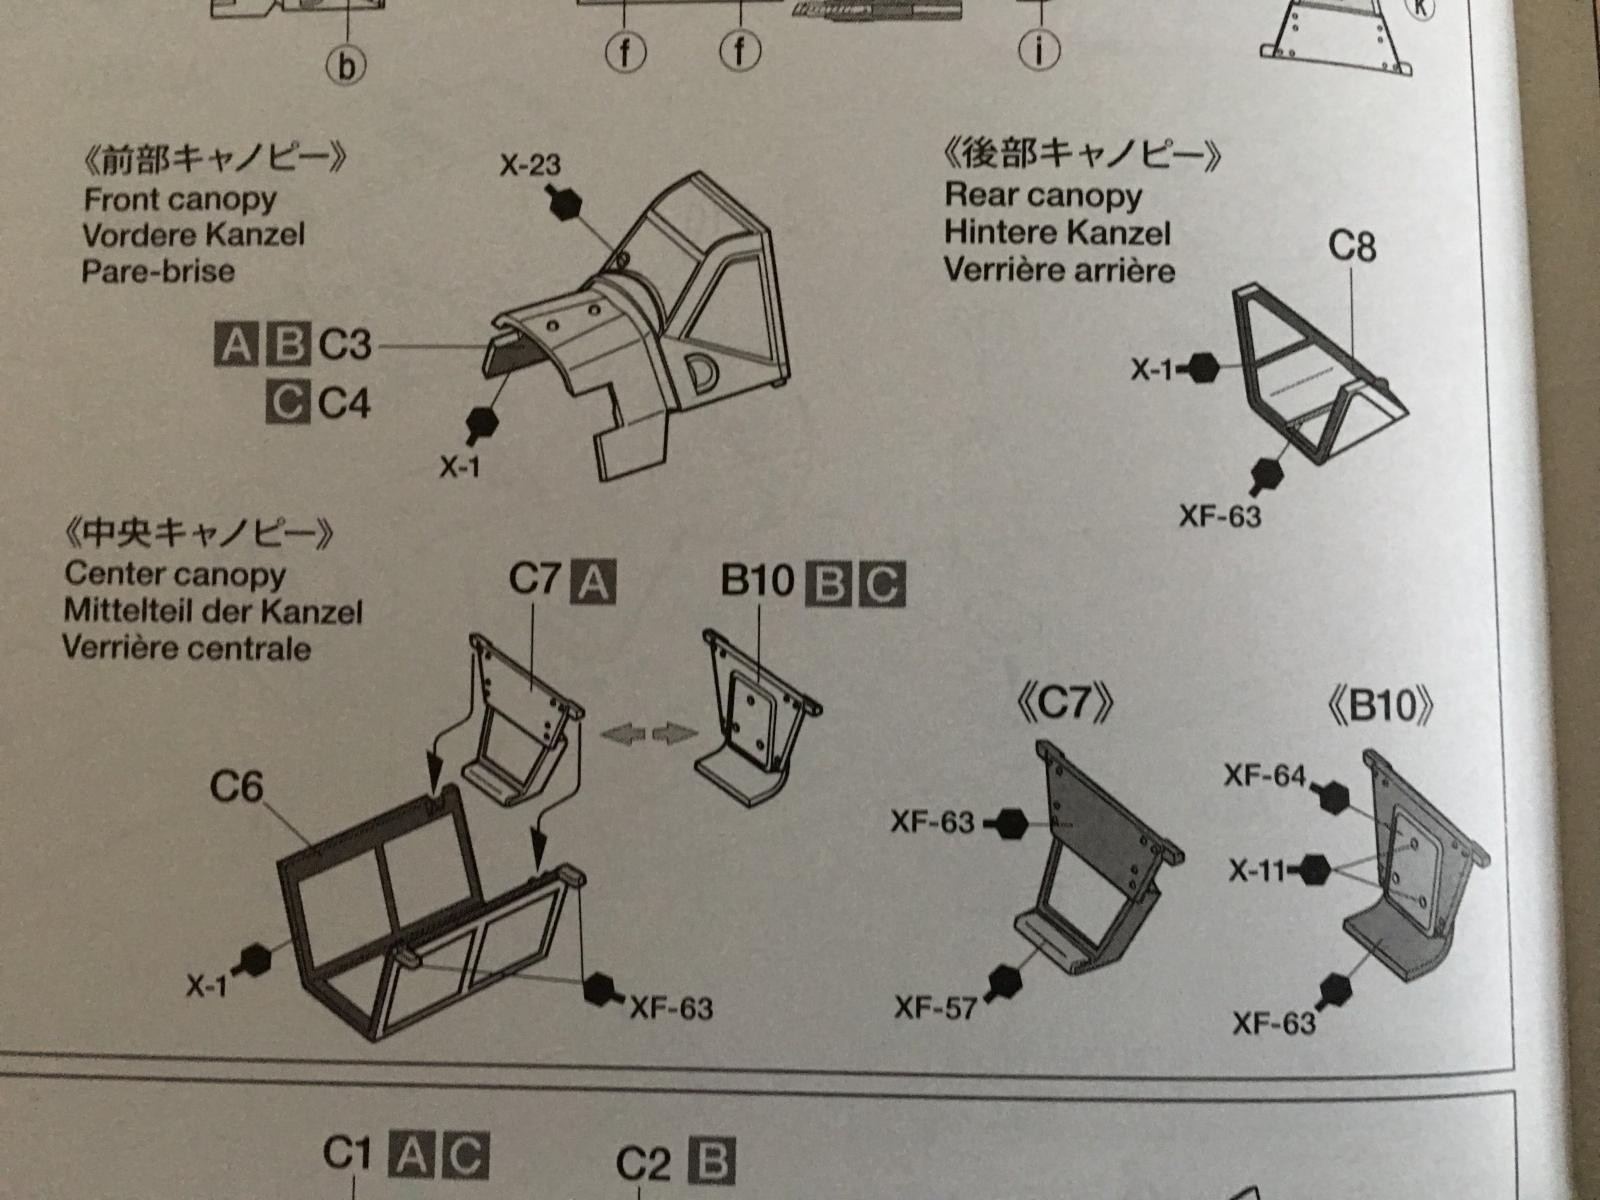
One neat thing here is that Tamiya has molded the windscreen into the forward "upper" part of the fuselage. This will eliminate any gaps when the windscreen is installed.
This part is not glued in position. It is merely a snap in fit.

The instrument panel is glued to the front windscreen. Now is the time Tamiya has you paint and install this part.
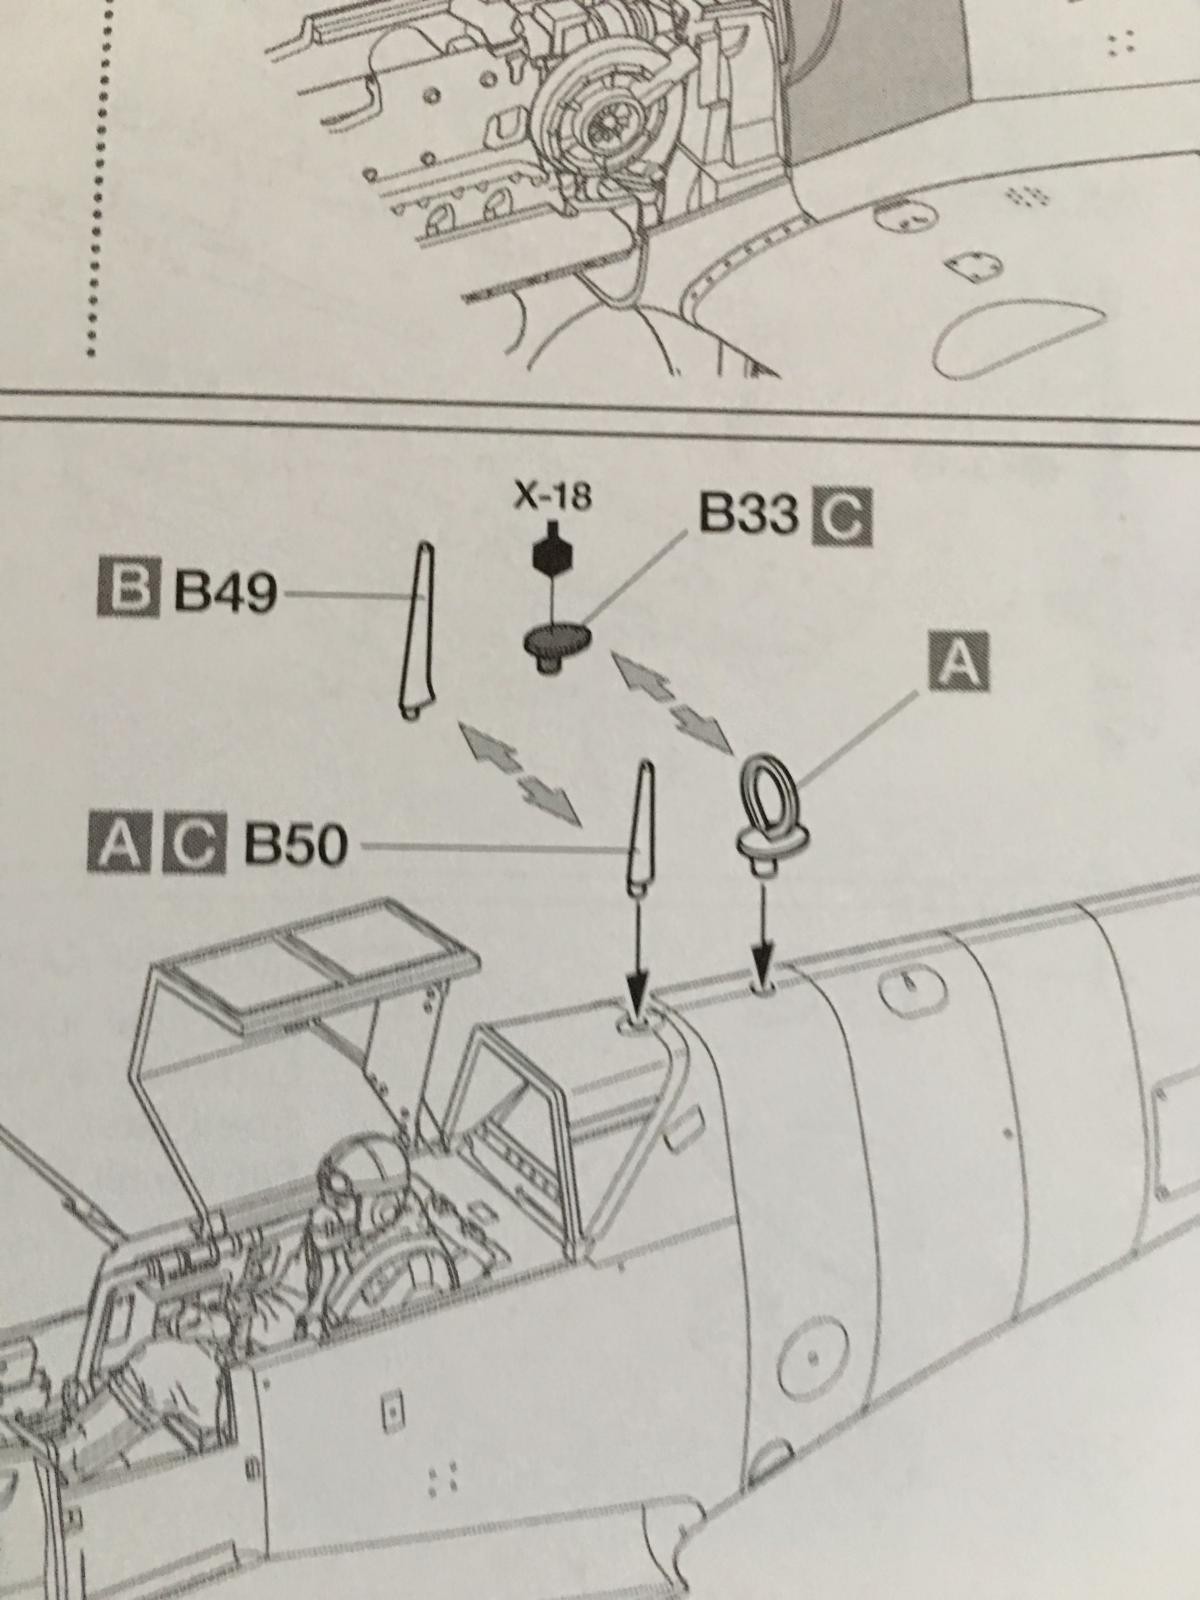
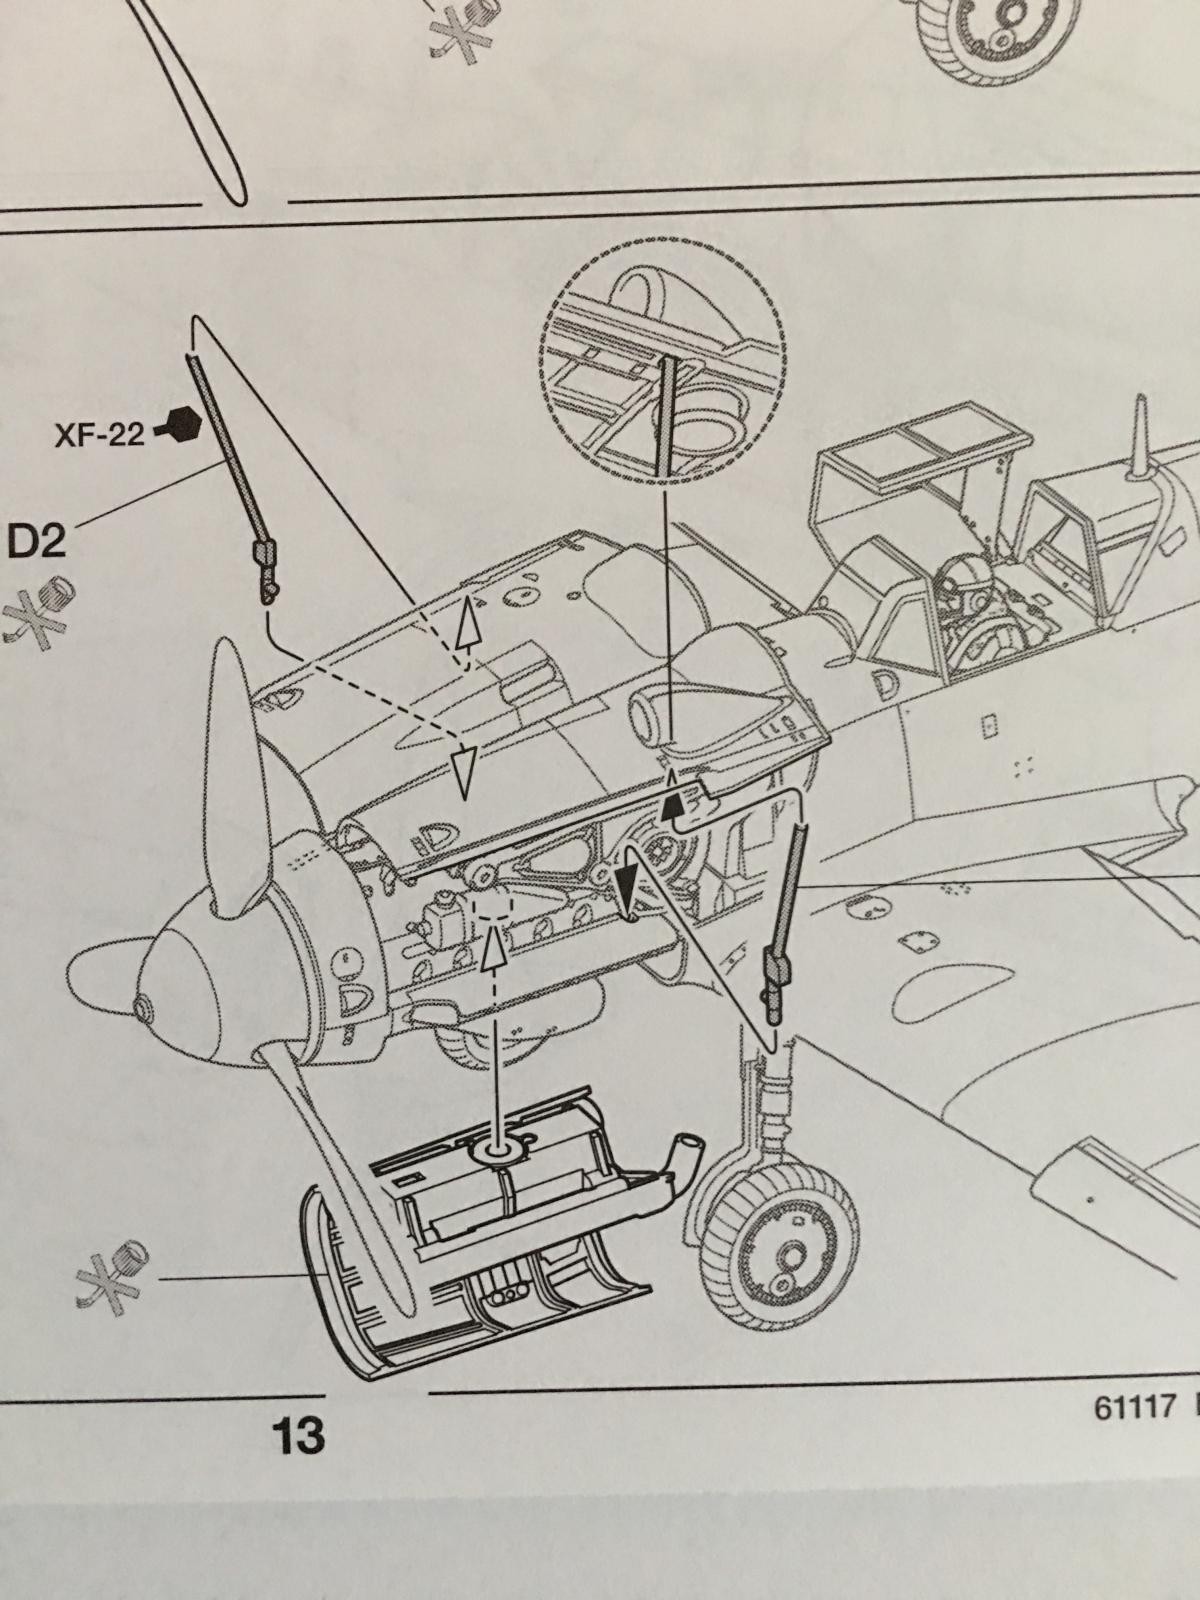
There are several options available as far as the radio antennae masts are concerned. It looks like three separate styles have been included with the kit. This will give you more choices, and some more leftover parts for the spares box.
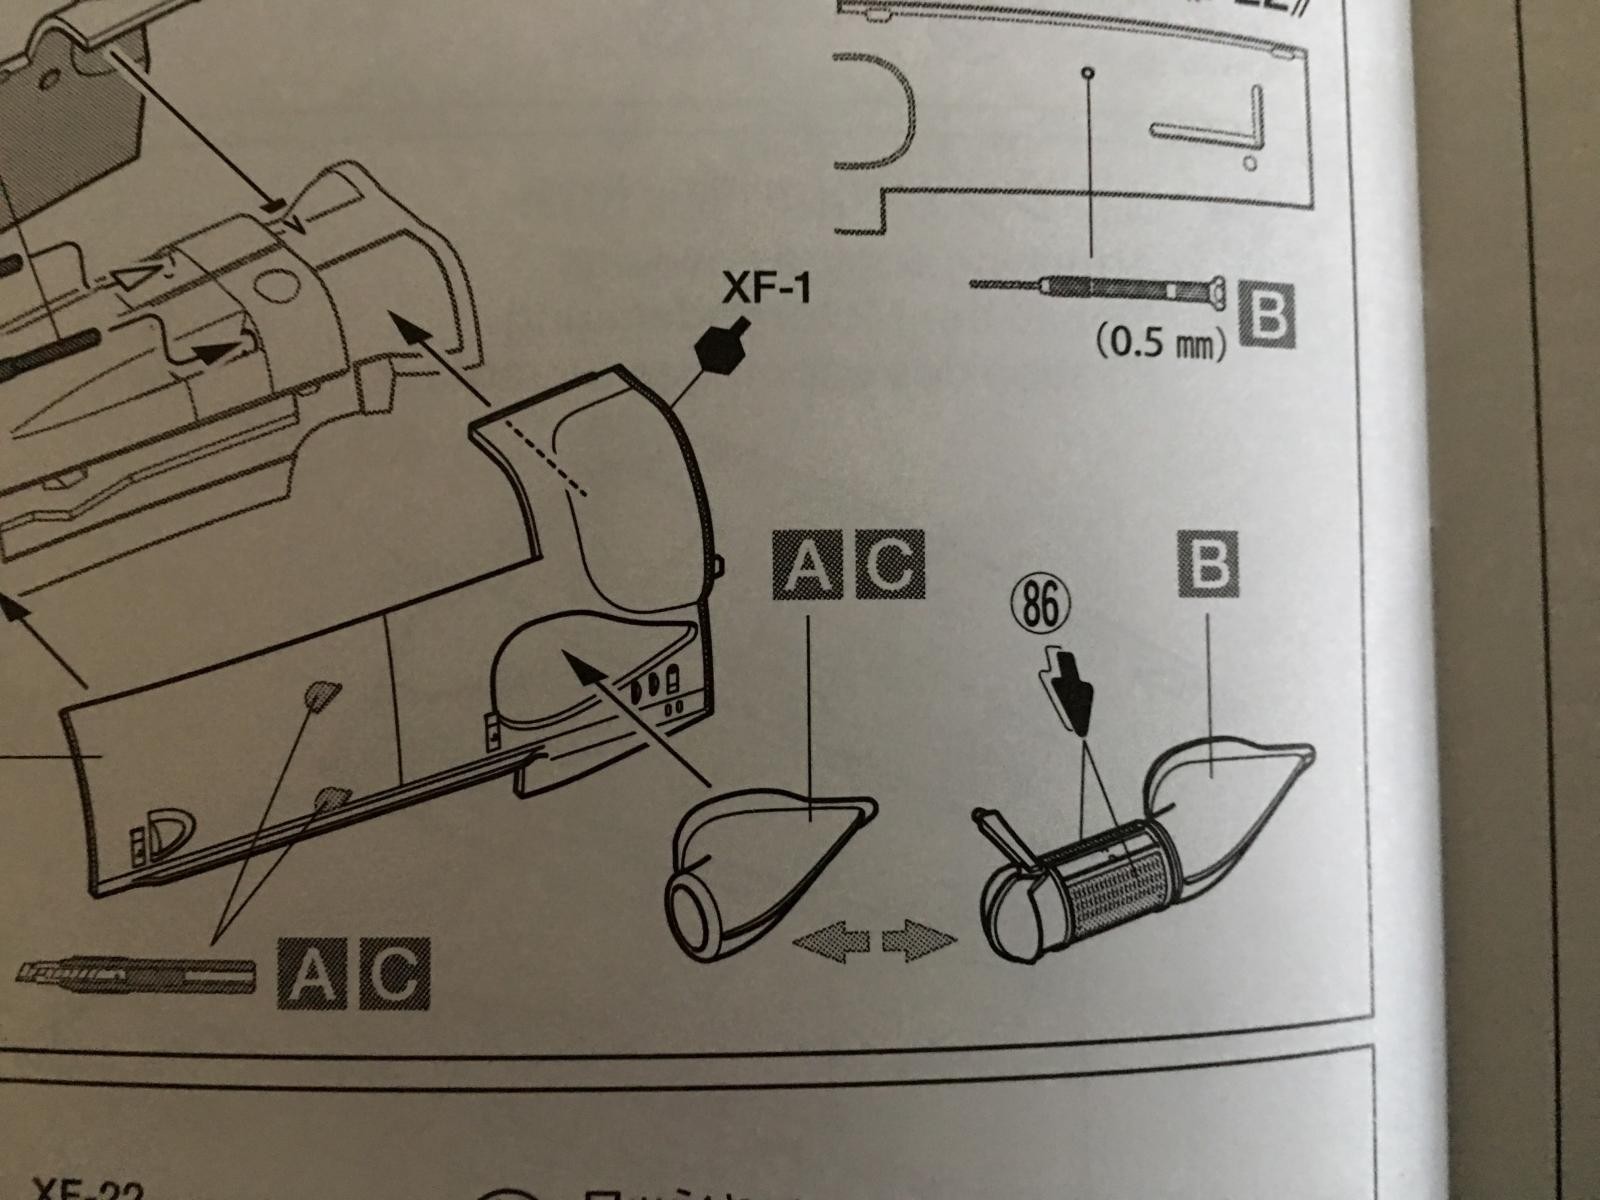
You will have the option of building your plane with either the standard air intake or a "tropicalized" version, as both have been provided.
Remember the magnets I mentioned earlier?
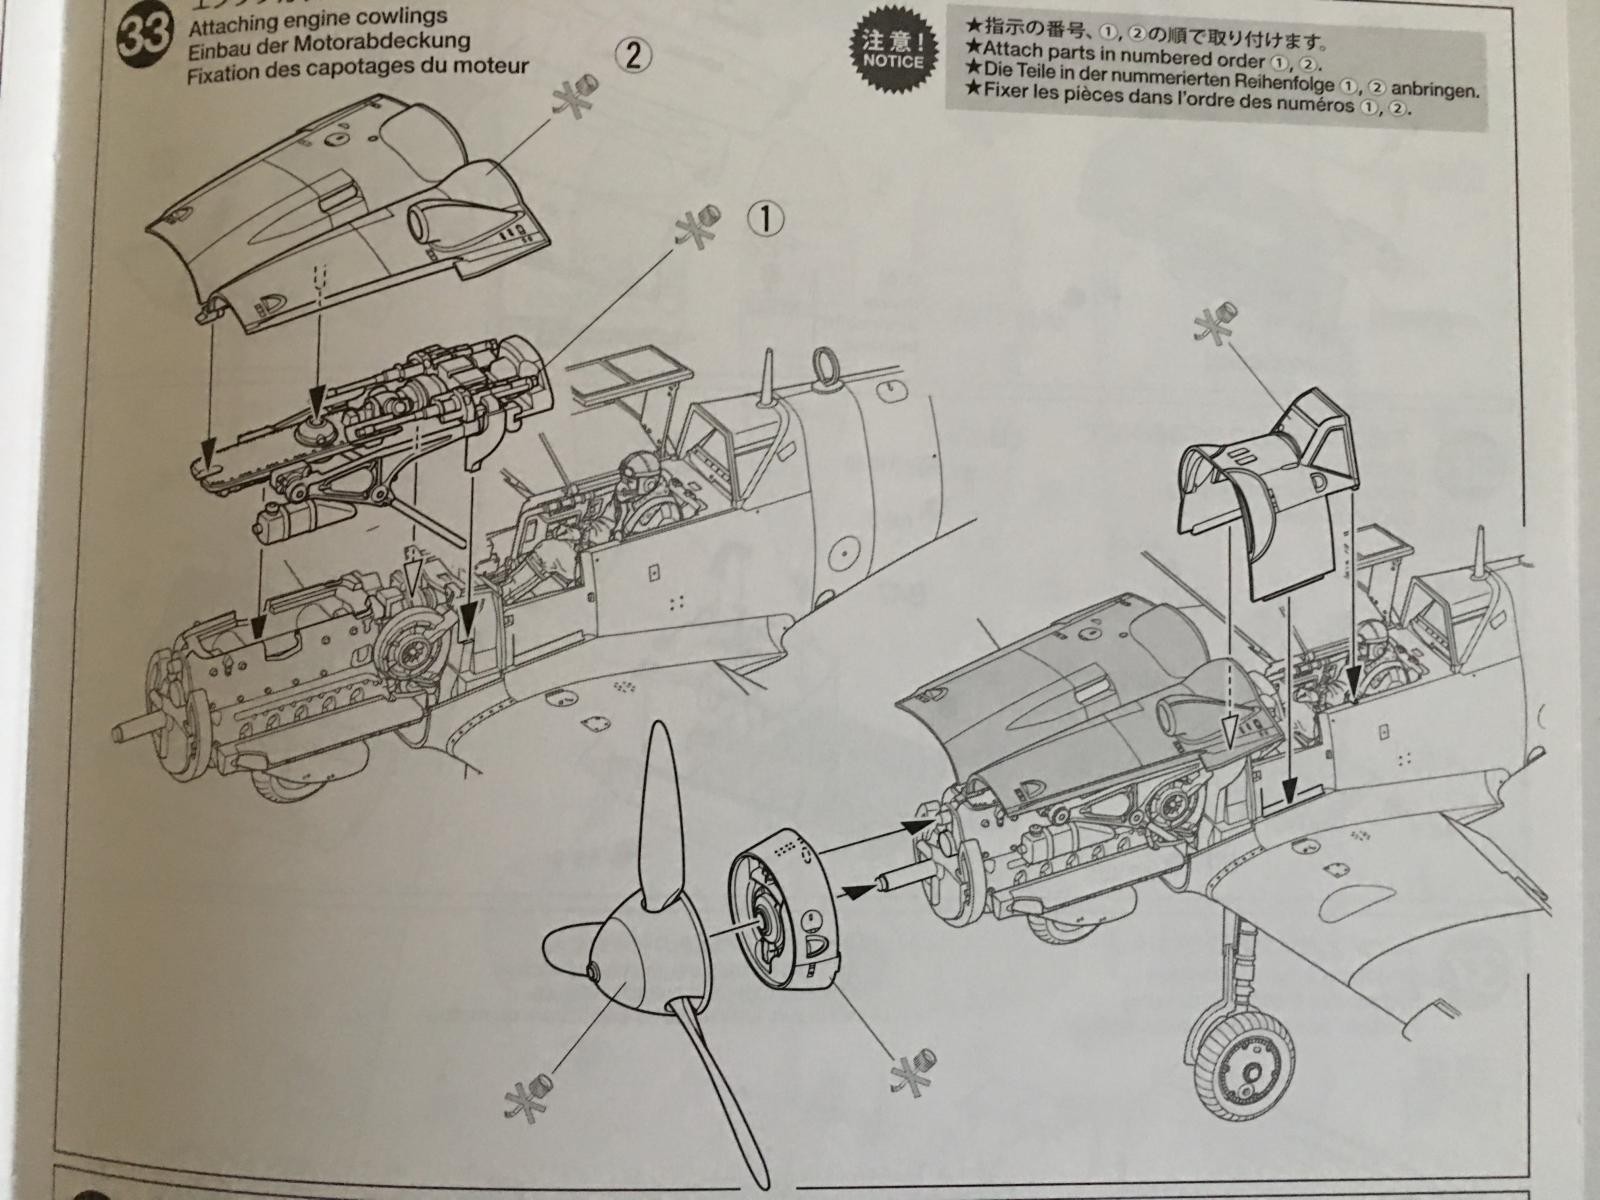
Now is the time when they get used. This is when you have the option of posing your plane with the engine cowling opened, which reveals the very nice DB engine
as seen from the front, with the supporting jury rods
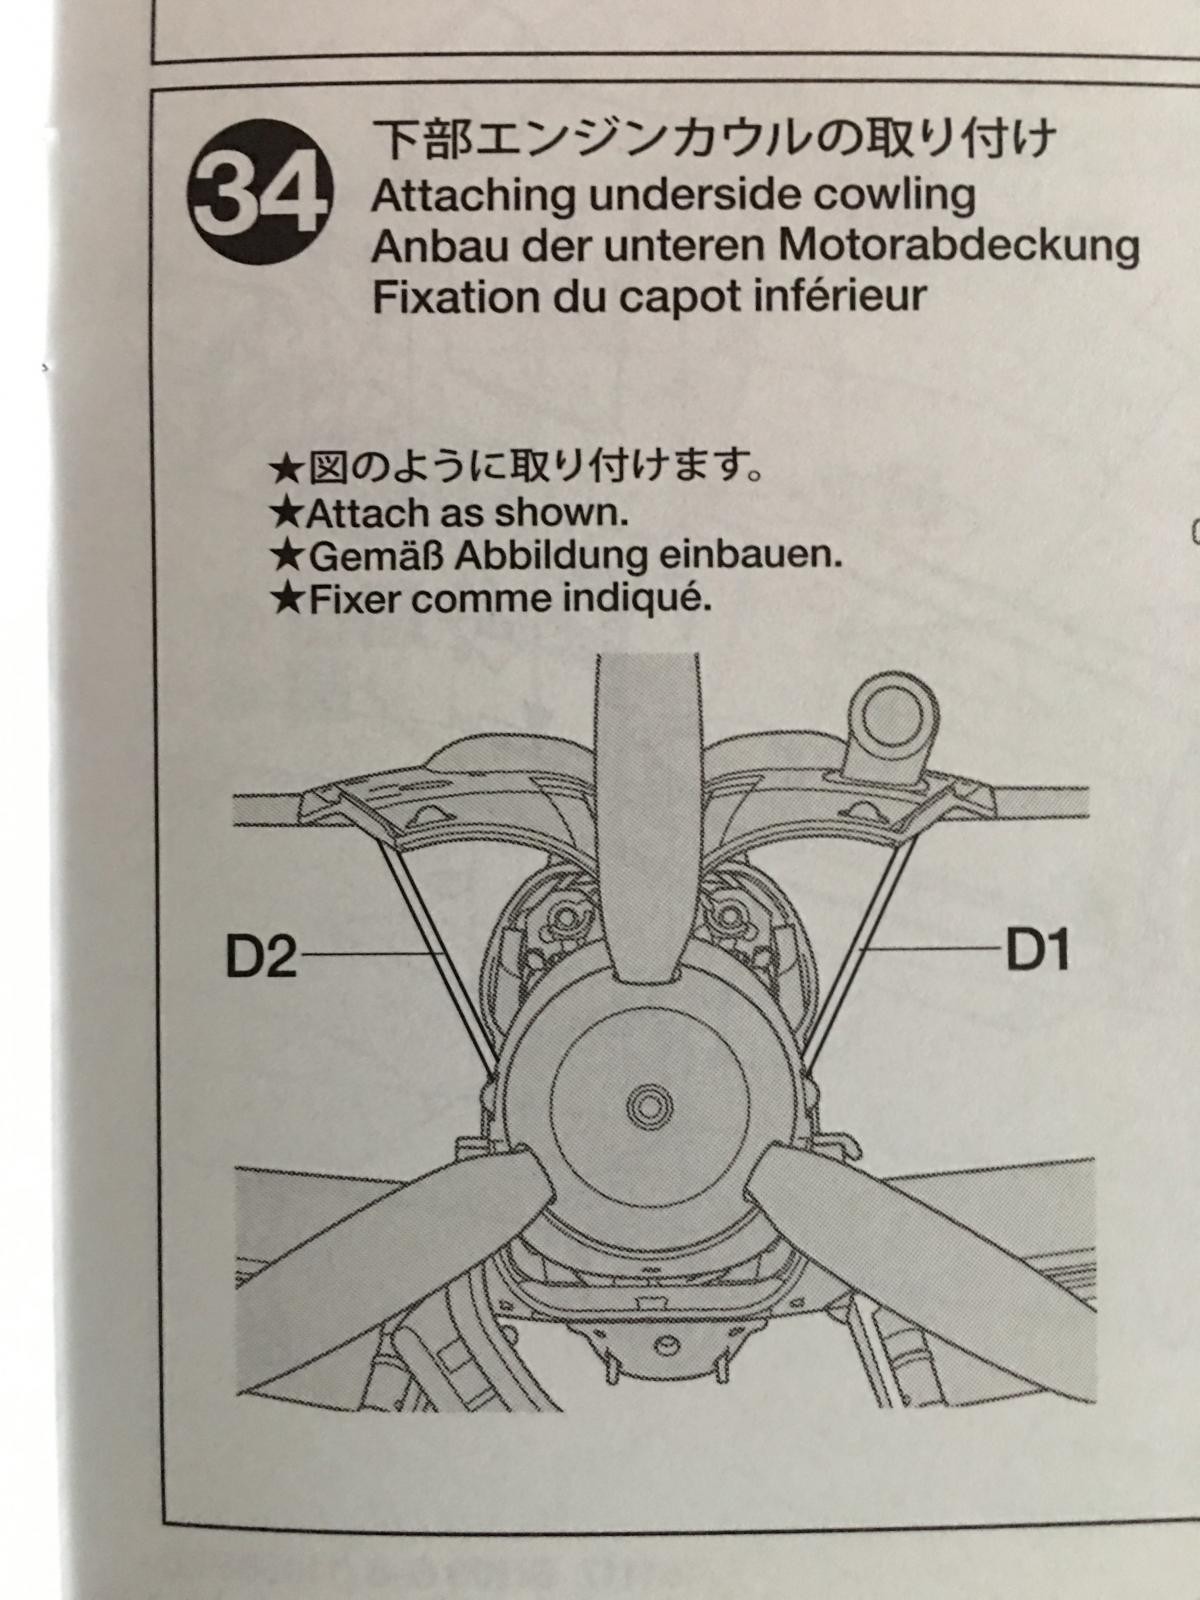
and you can pose the lower radiator hosing open, letting it hang off to one side...
...or you can simply close things up.
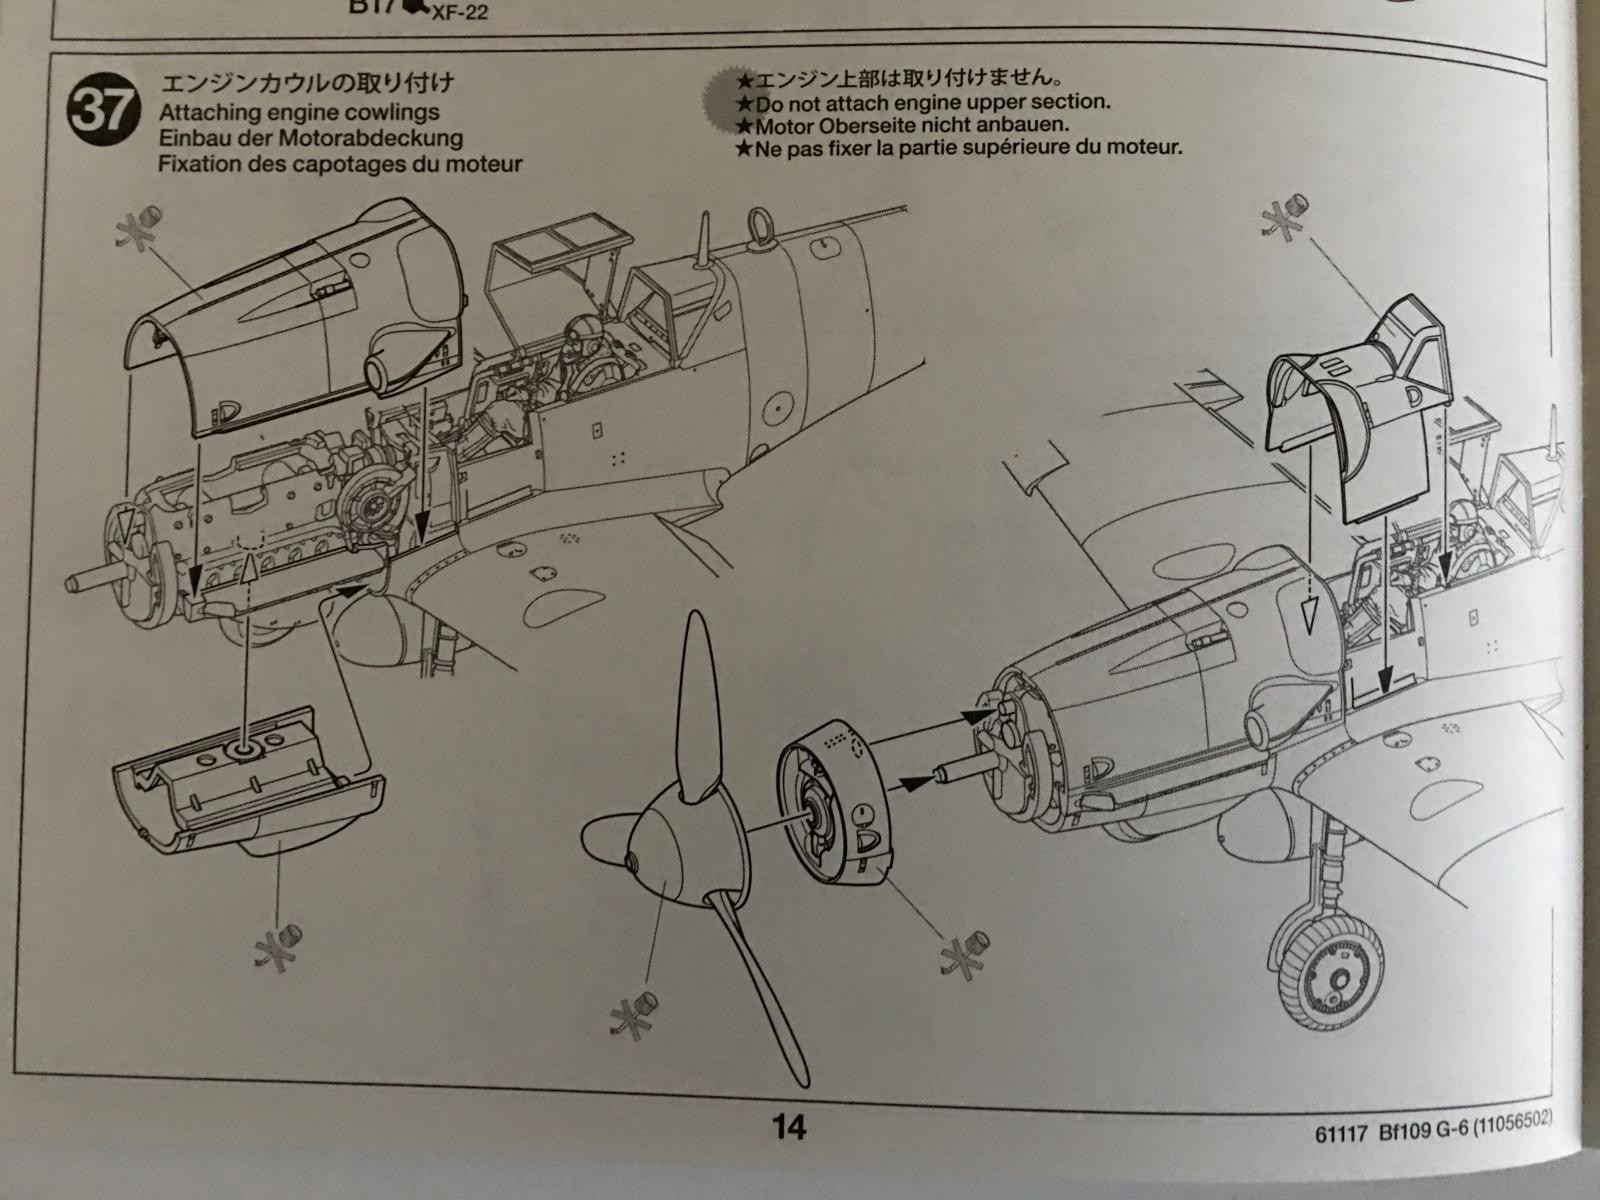
If you get bored with your 109, you can alternate back and forth. This is a very cool little feature.
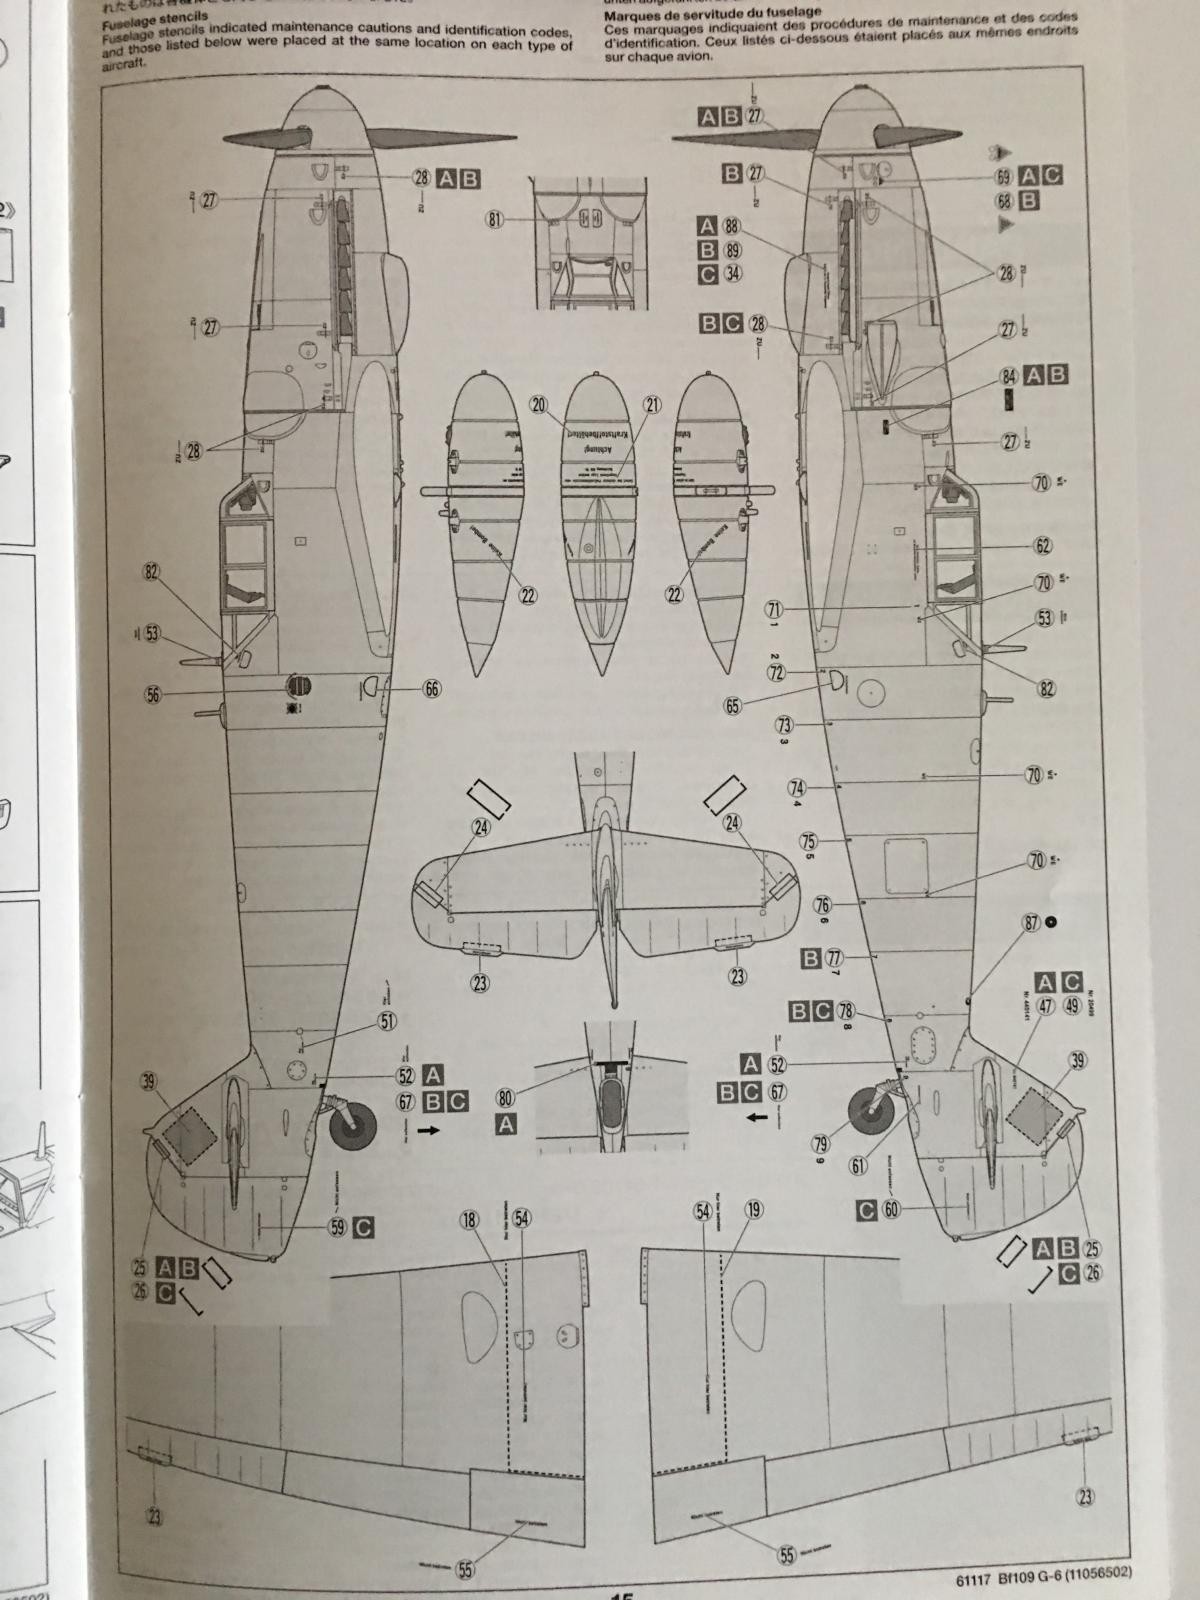
By now you will have picked out you choice of color scheme and markings. To go along with the stencil sets provided with the decals, Tamiya has included a very nice stencil placement guide. Please keep in mind, that often in the field, when the plane was repainted or just touched up, these stencils were often painted over. So check your references.
But at least you will know where they go.
Now I know a lot of people are saying (or thinking to themselves), "Do we really need another 109?"
Probably not, as Hasegawa has the 109's nailed down pretty good.
There are other manufacturers such as Zvezda (and the Revell re-boxing of this kit) that are molded with engines.
But to see a main stream manufacturer release one is very nice indeed. Especially when you see hints of things to come with future releases, engineered and molded into the current new tooled kit.
So I asked myself this very question ( with me being a "109 ohilic" and all). And I promptly looked at my display case as it currently looks like this...
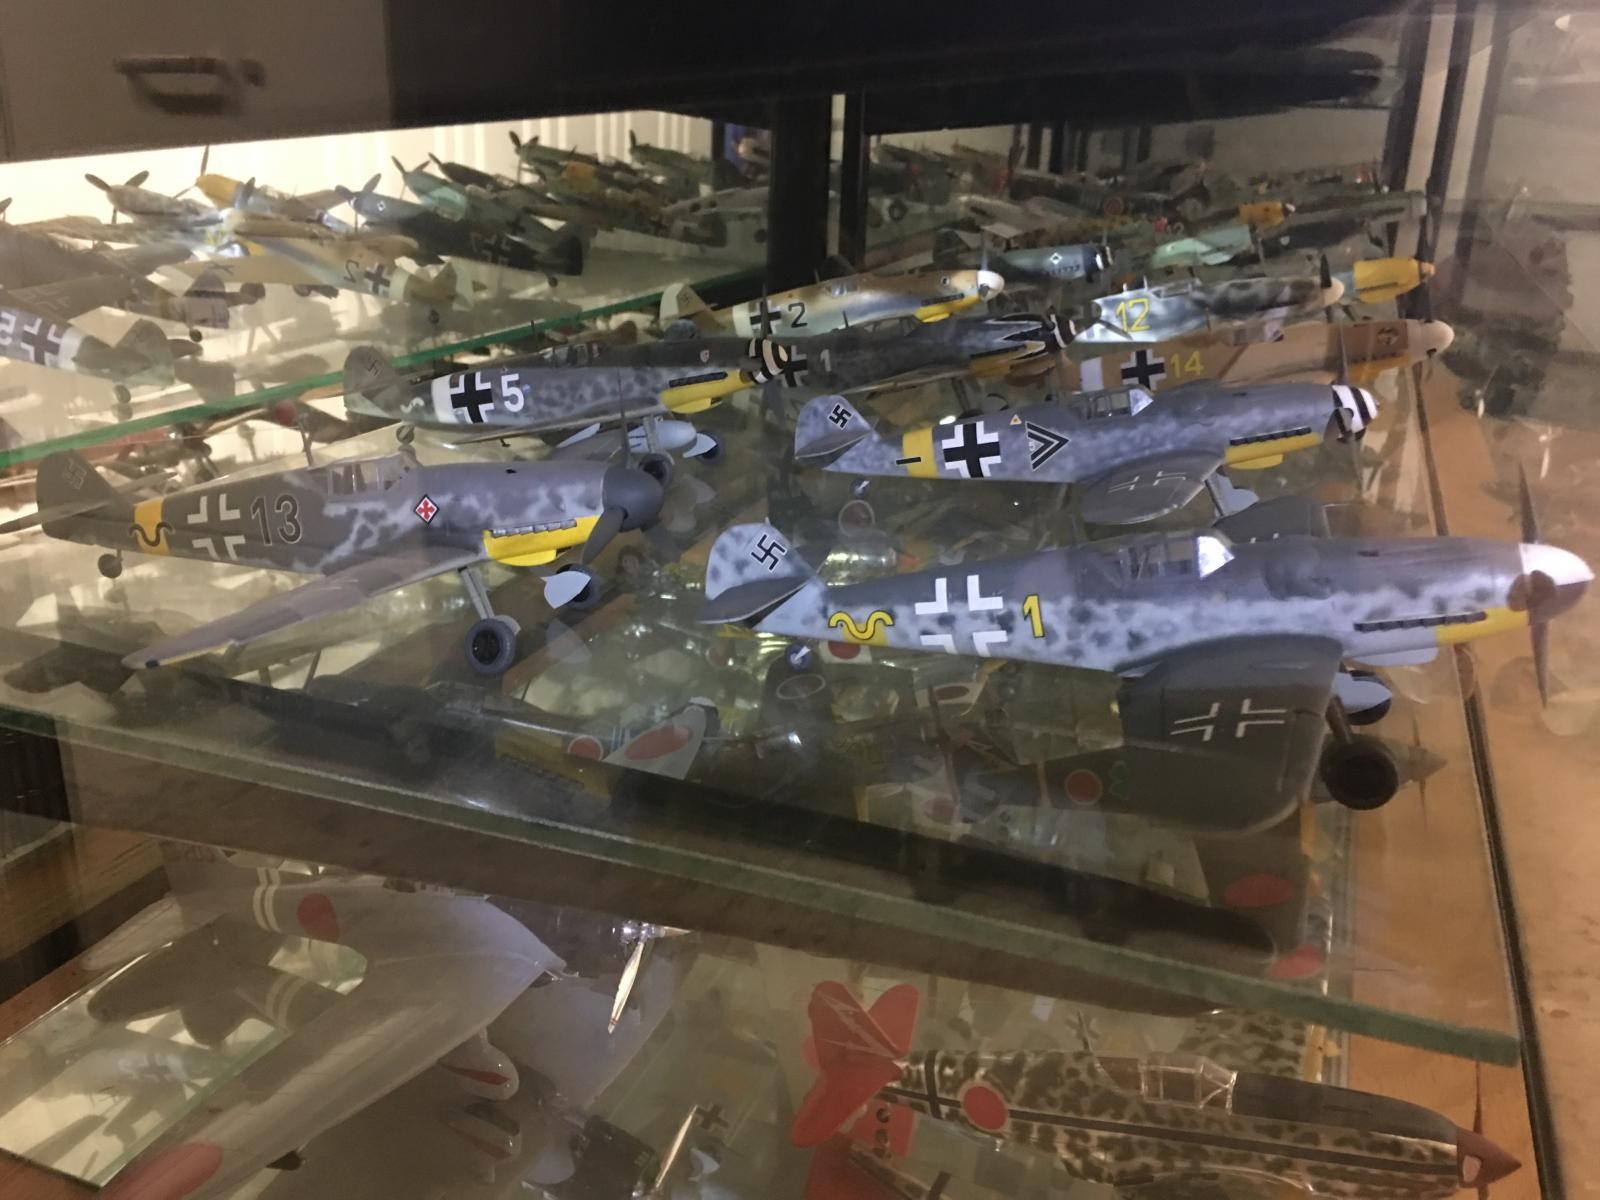
and decided definitely Yes! We do need another 109
 Thanks Tamiya. We do live in the "Golden Age" of plastic modelling.
As usual, comments are encouraged.