Building The 48th Scale Stearman PT-17…Big Bang For Your Buck
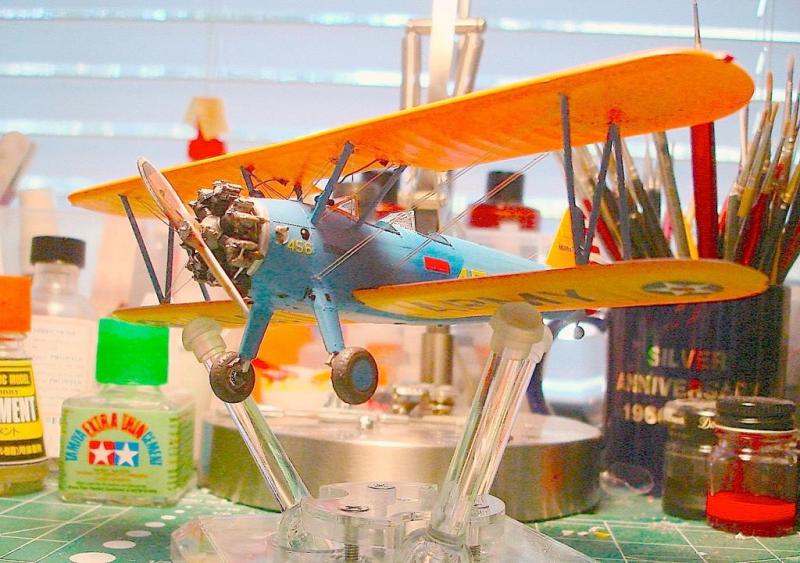
Built in the 1930s, this aircraft became the primary trainer for the military to train pilots for WWII.
This new kit from Revell is a fun build, and is easy on your wallet compared to most new kits today. The Lindberg kit was the only kit of this aircraft until now, and this new Revell offering sells in the same price range. Decals are for both the Army and Navy schemes.
This is a good project to try your hand at rigging a bi-plane.
I used a no. 9 guage guitar E string for my rigging as it is easier to work with than sprue or fishing line. These guitar strings are available in several gauges at any music store. The only issue I had with the kit was the decal for the wood grain prop was not a good fit. Fortunately, I had two kits and was able to do some patch work. The kit comes with two props, the alternate representing the aluminum version, which I will use on the other build. The rest of the decals worked fine.
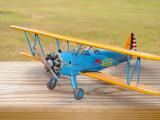
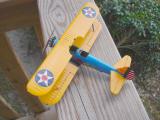
I chose the Army scheme and found that I liked Tamiya's French Blue and Camel Yellow to get the colors I wanted. I researched the color for this aircraft on Google.


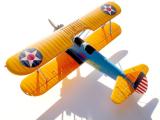
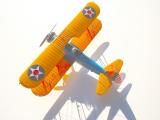
Jack...it seems I was composing a new post just as you were putting yours up. It wasn't my intention to "blow you off" the front page (sorry).
I tuned in this mornin' and saw Jamie's post still there, so I figured it was safe to post a new headline.
Your Stearman looks great and so do your photos. Nice build - I like it.
Thanks Craig…..no problem. Glad you liked it.
Hello Jack,
I’ve been very interested and fascinated with your modeling for quite some time. I wanted to ask if it was possible if you could build me a PT-17 stearman just like this one that you’ve made. I could pay you for the labor if that works for you. If you’re not interested and just don’t have the time, that’s ok too!
Cheers,
Karl
Hi Karl,
Might I ask why you want a model of the PT-17?
Well Jack, I find them more interesting than the AT-6 Texan. I’ve always wanted to fly a trainer like the stearman and own one of course. I’m also a fan of the early Army Air Force colors and the red dot in the middle of the Star. I don’t call myself an expert at modeling but I do enjoy it a lot. So much to the point where I sometimes choose modeling over my homework. Once again I’m not the best around and that’s why I’ve come to you.
Give me a reply if you’re interested and we can work a plan out.
Karl
I mean, I probably could build the model myself. But I lack the self confidence of painting the model.
Well I could probably send you this one but I am concerned on how to ship it. Where do you live?
I live in Northern Virginia an hour away from D.C which is exceptionally far from Florida. I guess I should just build the model myself and give it a shot. I’m just worried about painting the cockpit which I may just buy a premade eduard sheet of parts. Rigging could always be a nightmare as well. I’ll tell you what, I’ll build the kit and tell you how it went and what I could improve on. Until then, what paint do you usually use for the interior of military planes? I’m just curious on your preference.
Nice Stearman Jack, love the rigging, i hope, that Revell will release this one in Europe too.
What a beauty Jack. The Stearman looks awesome in the yellow and blue finish. Well done!
Good looking Stearman, Jack! Do you happen to know which engine is represented in the kit?
Worked on a few of those a long time ago.
I'm not sure Jaime, the kit instructions do not call out the the engine model. I suspect it is one of the Continental R-680 series engines. The push rods are in the back of the cylinders as is the wiring harness if that is any help.
Sparkling model. I flew out in one of these on my 60th a few years ago - they're noisy in the air but landings were feather-light.
Beautifully finished Stearman John. I think your color choices are just right.
A stunning build Jack. At first glance I thought I was looking at one of those metal signs you put on the wall. Whatever lighting it used it brought out all the backgrounds colors of your work bench.
Really nice clean work on an iconic aircraft Jack. I have this kit but it keeps getting put back because of the Group builds I get myself involved in. Not just here but in the different clubs I belong to.
I know what you mean Al. I belong to 4 clubs, 3 of which have club projects going. I have decided that I can't build that fast and enjoy the hobby, so I pick and choose carefully.
Hi Jack. I have heard good reviews on that kit and I may take your advice to use it as a test bed for my first try at rigging. I assume the guitar string gives some rigidity (is that word?) compared to thread but is more flexible than stretched sprue? It would take a lot of pressure to actually bend it out of shape or to break it. Thanks for the advice.
Just a tip Alan, pre-drill holes will make things go easier. This kit shows you where the wires anchor on the wings. Give some thought as to the order you will place the rigging, as space gets a little tight and tweezers are a must. You may have to spend some time on Google for visual reference as the kit instructions for the rigging leaves a little something to be desired. You may want to add the fuel lines that run from the top wing to the fuselage.
Strong work! That really is a gem of a kit.
Blue and yellow usually look good together and this is no exception. Very attractive model, Jack, and it's refreshing to see something a little different in the aircraft world. Your tips on rigging are likely to encourage others as well.
I hope so George. It is hard to find a quality 49th scale kit in this price range today. I hope they sell a ton of them to encourage manufacturers to produce more kits like this. Most kids can not afford today's kit prices.
Great work Jack, I like it mate.
The paint job is wonderful.
Well done sir.
Very nice model - I keep seeing very nice models here that make me want to try them...
On the subject of guitar strings, I have bought and worn out many many of them, they lose their tone and deaden after when they are worn out, but will still serve for model purposes. I have not tried rigging a bi-plane but can attest a .009 or .010 light gauge E, or 1st string will also make a nice whip antenna for a tank. The heavier bass strings are wound in bronze usually, they are stiffer but could be used as model cables or hoses.
If you know anyone who plays guitar (or banjo or mandolin) as lot, just ask them to save their old ones for you when they replace them. That should last you a long time and you won't have to buy a them, although if you can find a music store that sells them individually they aren't too expensive. The phospor-bronze would ones can be costly. You want steel strings, not classical, which are nylon.
that is gorgeous
Thanks Bob…….