Tamiya 1 48 Sherman Firefly IC Since the...
Tamiya 1/48 Sherman Firefly IC
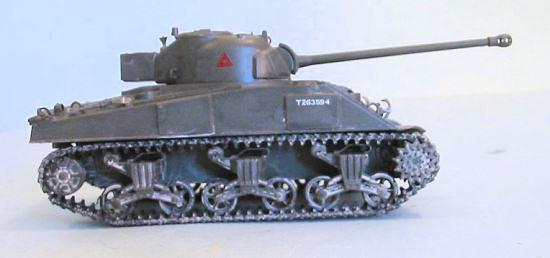
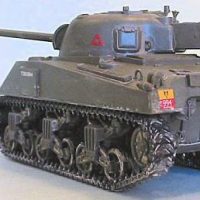
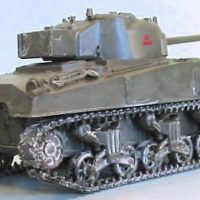
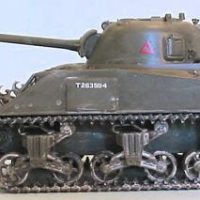
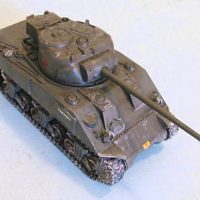
Since the first two armor articles have been well-received, here's another from back in 2006: the Tamiya Sherman Firefly IC.
The British and Commonwealth forces first received the M-4 medium tank in 1942,in time for use at the Second Battle of El Alamein. At the time, the tank did not have a popular name. The British had already begun the practice of naming American tanks after American Civil War generals, and so gave the M-4 the name General Sherman after Union General William Tecumseh Sherman, which was usually shortened to Sherman. The US Army later adopted the name and began the practice of naming tanks after generals, which continues to this day.
British and Commonwealth use of the Sherman in the Mediterranean and European Theaters was widespread. The Sherman replaced the M3 Grant and Lee tanks and was the major tank used by British armored units by 1944. The British largely used M4 (Sherman Mk. I), M4A1 (Sherman Mk. I Modified), M4A2 (Sherman Mk. III, and were later the primary user of the M4A4 (Sherman Mk. V). The Sherman Firefly variant was converted from M4 (Firefly I) and M4A4 (Firefly V) Shermans, and was to add anti-tank capability. A 1944 British armored squadron - equivalent to a US company - had one Firefly per troop (platoon) of 4 Shermans. Later when the Sherman was replaced in some British units by the Cromwell, the Firefly was retained until the introduction of the Comet which carried the 77 mm HV, a shortened version of the QF 17 pounder.
The Sherman Firefly was a British variation of the M4 Sherman tank, fitted with the more powerful 17 pounder main gun. The quick-firing 17 pounder which was the main armament of the Firefly had first shown its value in North Africa in 1943 as a wheeled anti-tank gun, where it proved to be an effective weapon against German tanks. With the APDS round developed for the 17 pounder, the Firefly's performance was increased again. Plans were devised to modify the Sherman IV, but only the Sherman I and V were used in the end. The turret was altered to fit such a big gun by moving the radio to a new bustle on the turret rear and by turning the long-recoiling anti-tank gun on its side. The distinctive overhang at the back of the turret gave space for the recoil. The bow machine gun position was sacrificed for storage for the long shells.
The Firefly became operational in British armored divisions in 1944, as they prepared for the Normandy invasion. The Firefly was among the few Allied tanks that could successfully take on the Panther and Tiger tanks. While the Firefly was no more well-armored than other M4 versions, the 17 pounder AT gun offered far better performance than the standard 75 mm gun, which had been chosen for the infantry support role. Using the regular APC round, the gun could penetrate the front armor of a Tiger I at over 1,000 meters. With the more advanced rounds such as the APCBC and APDS that became common towards the end of war, it could penetrate a Tiger at over 2,000 meters.
The Firefly became so effective that German tank crews were instructed to eliminate Fireflies first before dealing with the regular M4s. In an attempt to prevent identification on the battlefield, some Fireflies had the end of their 17 pounder gun painted sky-blue on top and brown on the bottom to give the illusion of a shorter gun barrel, though the actual effectiveness of this was questionable. An alternative was to point the gun over the rear of the tank and conceal it under camouflage, with a shorter wooden dummy gun mounted on the rear of the turret and pointing forward. This tactic was never used in combat.
The majority of Fireflies were converted from the Sherman V, the M4A4 Sherman. Some 600 Fireflies were produced during 1944 and were highly effective during the campaign in northwestern Europe between D-Day and V-E Day.
This Firefly IC is the third Sherman released by Tamiya in their 1:48 series. This kit is essentially similar to the earlier M4 Early production (kit 32505), with the addition of a new sprue G that has the Firefly turret parts and additional hull parts of the Firefly IC, including all the appliqué armor which are typical of the Firefly IC - these features are the easiest way of picking the IC from the other Firefly marks.
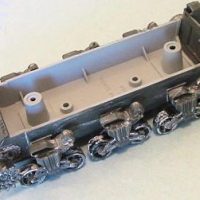
The kit consists of 137 parts in olive drab plastic and a lower hull in cast metal, with poly caps for the drive sprockets and gun elevation.
The overall standard is typical Tamiya with cleanly molded parts that have only a few shallow pin marks on the inside of the hatches. Everything scales out precisely when compared to the 1:48 plans in the Hunnicutt Sherman bible, especially the barrel which I have learned has been a issue with some Firefly kits. The tracks are the T48 rubber chevron tracks in link and length plastic, with very good detail for this scale.
The decal sheet is typical Tamiya: well-printed markings but thick carrier film. Markings are provided for four vehicles: B Squadron, East Riding Yeomanry, 33rd Armoured Brig., January-February 1945 in the Ardennes; 23rd Hussars., 11th Armoured Div., Putanges, France, 1944; 4/7th Royal Dragoon Guards, 8th Armoured Brigade in Holland, 1944; and 3/4th County of London Yeomanry, 4th Armoured Brigade, Rotenberg, Germany, 1945.
I have a system for assembling these Tamiya tanks.
First I assemble the hull and turret separately, other than the items like tools and such that will go on later. Then I paint the model, including all the road wheels and suspension parts and tracks on the two A sprues. Then I apply the decals. Following that, I give a wash, and then weather the road wheels and track with mud or whatever. Then I return to assembly, construct the suspension and road wheels and attach them, then attach the tracks. I then attach the upper hull to the lower hull, then glue on the jacks, shovels, and whatever else goes on the hull, then I attach the turret. The system works perfectly with every one of these, and is very easy.
As far as specifics are concerned, there are no problems during assembly, since the typical Tamiya fit eliminates any hassles. The upper and lower hulls are screwed together with two self tapping screws with the fit between the front hull and the transmission cover being exact. Be careful not to over-tighten the screws, since they can easily strip the thread since they are screwed into the plastic stem, as opposed to the other kits where you screw into the metal hull mounting. The turret goes together without problems with excellent fit of parts.
The one-piece upper hull has separate crew hatches and rear plate. As with the other Shermans, it has indented weld seams. I chose to leave thee alone, but a modeler could add their own weld beads from thin sprue, laying it out in these engraved seams.
Also like the other Shermans, the upper hull has open sponson undersides which give the model a see-through look at the sides and rear hull overhang. I solved this by cutting and attaching strips of evergreen sheet plastic.
Be careful during assembly that you insure you are attaching the right parts. The kit includes old parts for the standard Sherman, as well as the new parts for the Firefly, such as the new rear hull plate without the molded-on tools which were not carried here on British Shermans. I managed to use the wrong rear hull plate at first, but realized my mistake before the glue had set and rectified it.
Additional parts specific for the Firefly include the add-on armor for the driver's hoods and the hull machine gun plug, as well as the appliqué armor for the hull sides. The crew hatches have basic detail on the insides, and a modeler can add additional detail such as the hatch springs and periscopes if they choose to open these up - which would also involve scratchbuilding some interior to be seen.
The turret is where the most changes take place for the Firefly. The upper shell and lower ring are separate, with separate gun and rotor shield, pistol port, lifting eyes and Commander's split hatches, along with the distinctive square loader's hatch. The turret shell has the armored radio box at the rear.
The distinctive gun shield includes the .30 cal coaxial machine gun as part of the shield, while the gun tube is one piece with half of the muzzle brake separate, which leaves a minor molding seam and small join line on the muzzle brake to clean up. No .50 caliber machine gun is included, but wartime photos show this wasn't often carried.
Fitting the track is easy. The upper run attaches to the pin on the front return roller, which insures everything lines up correctly. The links should be glued to the return rollers, idler wheels and a couple of road wheels to ensure they stay in place. The small pin marks on the inside of the tracks are not noticeable once the tracks are assembled.
I call these Tamiya armor kits “weekend models.” I don't mean that in a bad way. They are well designed and go together easily over the course of an evening. One can then spend the rest of the modeling time available over a weekend painting and weathering (of course, this is a “weekend” that doesn't include lots of “honey-do's” or “daddy-can-we's” - but even with those, it's not a long-term project). Out of the box, the models look very nice. With the addition of Tamiya figures, one could do a very nice diorama with any of them. Those who want to super-detail the kit can have fun with it too. Highly recommended.

Thanks for sharing the history and nice Sherman. I've always been curious as to why the tank was called the Firefly of all things. After doing some research I discovered that the name came from the massive muzzle flash of the 17 pounder.
@themturtles - you have discovered something I didn't know! Thanks! 🙂
Nice build!
Very nice model, @tcinla!
Loved the review building details.
可愛的小戰車
Nice work. The firefly is my favourite Sherman.
Thanks again for the history lesson. Earlier today I watched a you-tube rerun of a tank show about Canadian tank units approaching the Rhine. In the CGI video the Shermans looked much like yours, marked with a blue triangle on the turret sides and maybe a small white star on its lower starboard rear corner, facing rear. Opposite where your red and yellow marking is.
In the show they were taking repeated friendly fire from Typhoons, both cannon and rocket fire. The Shermans fired yellow smoke to show they were friendlies but it didn't help, the Typhoons kept coming around and attacking from above and behind.
Now I know hindsight is easy but it seems to me a white star somewhere on top of these Shermans might've prevented this? Just a guess but I doubt this was an isolated incident.
Anyway, another nice viewing with this Sherman. Liked of course.
Most allied vehicles, whether US or other, did have white stars on upper surfaces for that very reason.
A good approach to modeling very humourous ..I'm luckier than most as don't have ANY domestic /Family iss to deal with ! Semi retirement has allowed me to catch up with model projects ! 1 35 /20mm and some 28mm really need to get some troops .. INFANTRY to SPT the ARMRD fmns! ... constructed and based ..working on US AIRBORNE 28mm A TAC note on "WHITE" Allies stars ...in reality ..it was a double-edged sword ! AFVs need BTLFLD ID !? German FJR and WERMACHT troops CLEARLY stated that "WHITE"stars /MRKGS ...we're great AIMING pts ...for their PZRFAUST etc and ARTY :PAK 40s etc US 1st ARMY had M4 black /OD CAMMO effect on ARMRD fmns ! Late war '44 OPS such as OP MKT GARDEN and beyond ... WHITE Stars were either painted OUT! or over ..OR BLK or dark green STARS! Particularly on AFV hull sides! PHOTOS are out there to source ...there is a great model M4A3E8 or "Easy 8 " on Bastogne highway on this website ARMOR a great visual for we MODELLERS to check out ! THE disparity of ARMOUR effectiveness ref ALLIED v AXIS tanks is well historically documented!