Eduard 1:48 F6F-3 Hellcat
It had been way too long since I'd built a USN plane in the four-color scheme, so I went with the Eduard kit that's been sitting in my stash for quite a few years. I've done two 1:48 Hellcats in the past: a Hasegawa F6F-3 many years ago that I don't remember enjoying, and an Eduard F6F-5 that I liked a lot better. I remember struggling to eradicate the circumferential seams where the Hasegawa lower wing assembly meets the fuselage, and I didn't like the look of the "grin" and so replaced the front cowling. The Eduard kit had a few quirks as well, but I liked the surface detail and the PE cockpit pieces. Approaching this build, I was surprised to find that the majority of posters to the forums I frequent seem to prefer the Hasegawa kit; and I must say I found some of the engineering a bit clunkier than I remembered. Still, with a few tweaks and replacements, I think it makes up into a really nice model.
The Profipack boxing provided PE and masks, but I did make a few aftermarket replacements: prop blades/spinner and main wheels from Ultracast, and cast brass gun barrels from Master Model. I used the Eduard gun inserts that are glued inside the wings, but I cut off the barrels and drilled out the inserts to provide seating for the brass barrels. I also shortened the main gear struts by about 1.5mm. I found what I think is a small engineering glitch in the engine cowling, which is molded in two pieces: without modification, the assembly is enough off center to create a noticeable step on one side. I fixed this by scraping and filing away some of the plastic from the flange of the cowling and from the mating areas on the front fuselage. Another head-scratcher is the way Eduard engineered the support straps for the drop tank: they have the straps molded around the lower half the the tank and provide strips of PE to go from the tank to the fuselage. It's ridiculously fiddly, and even if one gets the PE properly in place, it doesn't look very convincing. This time around, I filed off the molded straps and made new ones from thin strips of .005" styrene that I glued to the tank and the fuselage after the tank was in place. It was still fiddly, but I think it looks better.
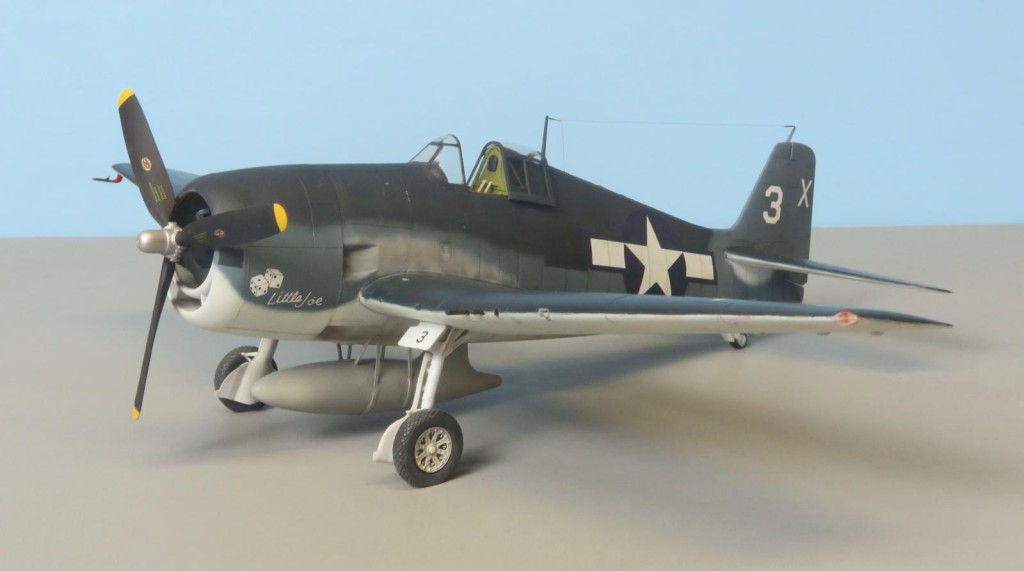
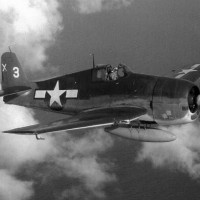
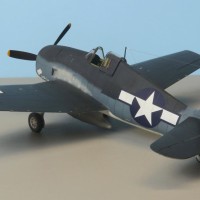
On to the painting and markings, which for me were the most interesting part of this project. Although Eduard provides markings for a good number of planes, I wasn't sold on their national insignia, the blue of which looked much too light to be barely distinguishable from the Sea Blue. I therefore invested in a sheet from Techmod. I had some misgivings because of their somewhat checkered reputation, but the insignia looked right. When the sheet arrived, I discovered it provided markings for "Little Joe" of VF-51 aboard USS San Jacinto in 1944. I was pleased to find a photo of the very plane in Jim Sullivan's wonderful In Action book, and I also found the same photo online. A closer look at the photo revealed a number of interesting things: 1, the demarcation between Sea Blue and Intermediate Blue was quite ragged and sloped quite steeply down the fuselage, unlike the straight demarcation often shown in diagrams. 2, the drop tank showed as definitely darker than the under surface white, so I figured Light Gray, which seemed a bit surprising in 1944. 3, there are clearly rectangular patches of darker paint (I went with fresh Sea Blue) just ahead of the fuselage national insignia and just aft of the cowling front edge that seemed to indicate painted over plane numbers. 4, the paint, while obviously not factory fresh, was still in pretty good shape, and one can still discern the sheen of the Semigloss Sea Blue on the wings.
Now it came down to choosing the specific paints. For better or worse I used the color chips in John Elliott's "Offical Monogram US Navy & Marine Corps Aircraft Color Guide" Volume 2 as my standards. After comparing all the bottles of Sea Blue in my paint stash, I arrived at Model Master enamel Non Specular Sea Blue and Floquil Military Colors Sea Blue. I decided to use the Floquil for the Semigloss Sea Blue on wings and horizontal tails, and Model Master, made slightly bluer and lighter with a small amount of Intermediate Blue, for the fuselage. I found Model Master Intermediate Blue a dead match for the Elliott chip, and I chose Mr. Color Character White (very slightly creamier than "pure" white) for the under surfaces.
After applying the white on the bottom and the Sea Blue on the wings, I airbrushed the camouflage demarcations freehand using a Paasche VJR-1. I masked the rectangular areas and applied Model Master Sea Blue straight up. At this point, the Floquil Sea Blue on the wings looked more different from the Model Master mix than the two Elliott chips look from each other, so I applied a highly thinned coat of the Model Master mix to the wings to bring the color a little closer to that of the fuselage. I faded the Intermediate Blue by applying a light mottle of Aeromaster enamel over the Model Master, and I faded the fuselage and wings slightly using a lightened version of the Sea Blue.
Once I was satisfied with the paint job, I applied the decals. Much to my pleasant surprise, the Techmod decals were superb, some of the best I've ever used. They had to be handled with care due to their thinness, but they settled down beautifully over surface textures with virtually no need for decal solvent. This was especially true of the fuselage insignia with all the overlapping panels. Stencils came mostly from the Techmod sheet as well as a few from the kit sheet.
Once the decals were all on, I used Tamiya black Panel Line Accent on the white and Intermediate Blue areas, and I airbrushed the light gray exhaust stains using some Light Gull Gray. I then went over the stains with various gray pastels brushed on to make them a little less stark. The last finishing step was to apply Mr. Color GX clear flat to the fuselage and under surfaces, and Mr. Color clear semigloss to the wings and horizontal tails.
The final assembly procedures were mostly straightforward. I removed a small segment from each main gear strut and reattached them using a small length of straight pin for strength. Both the Ultracast spinner and wheels had to be drilled out to fit the kit shafts, and the kit prop shaft had to be shortened considerably. The canopy pieces fit very well, and Eduard provides an alternative piece to pose it open. The radio antenna wire is invisible mending thread with some Alclad Stainless Steel rubbed on with a micro-brush. The spring and insulator are polyimde micro-tubing painted steel and white respectively.
Hope you enjoy, and thanks for letting me ramble on!
Cheers, Pip
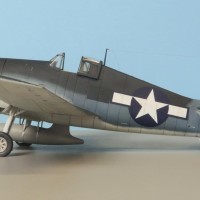
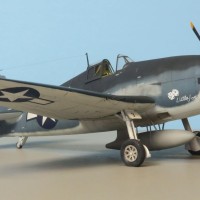
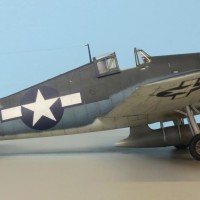
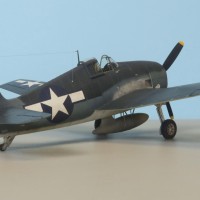
I enjoyed reading through your detailed write up about this build. This Hellcat turned out exquisite. Great job!
Thanks very much, GT. I'm glad you liked it.
WOW Pip, what a fine Hellcat you have there. That's some excellent airbrush work and a good choice of markings. I enjoyed your detailed description of the build and all the extra things you did to produce that fine Hellcat model. My compliments to you for a building job well done.
Thank you Jim! You know how much I value your comments.
Beautiful "Cat" Pip. Excellent paintwork and a great narrative to go along with your photos. Two thumbs up.
Thanks very much, Clark. It's great to have a place where one can tell the story, especially in these times of virtual club meetings.
Amazing model, Pip! Excellent painting and really great, detailed writeup!
Thanks very much Spiros! Much appreciated.
Fully agree on the above comments, Pip @seawinder
If you would take a picture in black/white it will be hard to distinguish if it is the real one or your model.
Thanks very much John! It was a luxury to have such a good photo to work from.
People who think the Hasegawa Hellcat is better than the Eduard kit probably think the Hasegawa Zero is better than the Eduard kit.
Very nice result with this. Nice work recreating the photo.
"Liked"
Thanks much for the nice comments, Tom.
G'day Pip (@seawinder),
This is a great build.
I built a FAA Hellcat Mk. I 9 years ago (time flies!) and I remember it as an enjoyable build, too (and posted here).
I like your attention to detail with the colour scheme and repainted areas - though I didn't understand the "four colour" reference until you mentioned that there is a difference between semi-gloss and non-specular sea blues.
One day I'll build myself a four-colour Hellcat and hope it turns out as good as this one.
Liked!
Thank you very much, Michael. I appreciate your comments.
Very cice Hellcat Pip, congratulations. I like esp. the profile.
Thank you Andreas!
Good looking Hellcat Pip. Really enjoyed reading your critique of this kit as well as your methods you used to determine the paint scheme. Nicely done.
Thanks Tom, much appreciated!
Really good write-up, and your care in building and painting has resulted in an excellent model.
Thanks George, I'm glad you liked it.
Lovely Hellcat. The paint work turned out great. Well done!
Thanks for the comment, Greg.
First class work Pip!
Many thanks, Dale!
Great work Pip!
Thanks David! Hope we can Zoom soon.
Under the heading of better late than never, I just came across this Hellcat Pip @seawinder. Man, it turned out great! The photos are very well done too, and really do emphasize the brutish look of the Hellcat. I was fortunate to see one taxi past me from about 50'. I should say I felt one taxi past as that big engine was just throbbin'! Great scale modeling here!
Thank you very much, Gary!