Mosquito Mk. IV, 1/48, just done!
Greetings From Virginia, Friends!
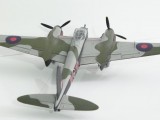
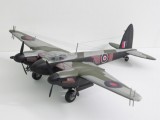
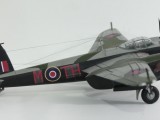
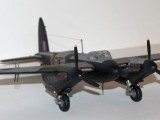
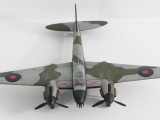
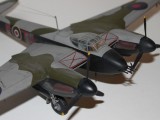
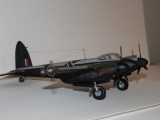
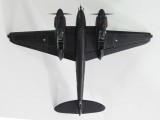
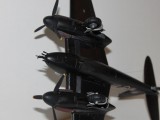
Here is my just completed Revell, 1/48 Mosquito Mk. IV.
Seeing as how the instructions for this kit were pretty vague on some things and self-contradictory on some, I decided to take a little artistic license with the paint scheme so I do not claim this to be an accurate replica of the night fighter option the kit offered, an RCAF plane. The big letter decals on the side were so opaque, I wished I had tried to paint them by hand, they may not have been as straight and square but would not have included the large glaring area in between them. So I did paint the no-step 'X' areas on the wings by hand to avoid that.
I used Krylon flat black spray for the underside, and was pleased with it. It is just as flat and black than the spray for models, which costs twice as much for half as much - I guess I'll need to build another night-fighter to use that big can up! Using a mechanical pencil for the underside panel lines and rubbing it on the rivets seem to work well.
This was fun, and a departure from my usual Pacific Theater U.S. planes. I have accumulated some stash kits now (while no one was looking) including a couple of Japanese planes, so it's back to the Pacific next...
Thanks for letting me post!


I didn't realize krylon works this well. I wonder if all the colors work as good?
Doug, I don't know, haven't tried others. The range of colors available is not well suited for airplanes I like to build, but if I were modelling cars, I would sure try it, you get a lot more paint for your money. I also got a large can of primer spray at the auto parts store for about $3.50, it works great.
Hi Ralph, nice Mosquito ! Got this one in my stash too, how does it go together ?
Bernd
Bernd, thanks. Generally it went together very well. You have to cut the front section of thefuselage off to put the nose cone on for this night-fighter version. The cut lines inside are good and easy to follow but of course that opens the possibility of a big seam mis-match, so you have to be careful cutting and joining up the nose cone. I tried to add some struts to the landing gear I saw in some photos, was pleased with the result until time to put the gear in the wings, my additions made the fit cramped but I made it work. There was lots of flash in my kit, and note what I said about the decals above. Good luck with yours.
PS - one reason I opted for the night fighter was becasue the bomber version canopy comes in two halfs that must be glued together. I could just picture the mess I'd make of that!
Very very nice. 🙂 Great colour choice.
Thank you Paul - I agonize over the colors some because I can never find the exact ones called for -
Lovely Mossie Ralph. One of my fav WW2 planes.
I did the Tamiya version a while back, as a F/B VI .
Their build meant that you had a separate front end of the fuselage. That made for some alignment fun.
Well done Ralph.
Nice Mossie Ralph is this the Monogram moulds? Revell did a new tool BIV a few years back but didn't have the option to build a fighter from it.
Mossie's look good in any scheme. Yours definitely looks the part.
Don't take this as criticism just a comment & a question. Your problem on the fuselage decals look like an extreme case of silvering. Did you gloss seal the paint before applying them?
We don't seem to see many Mosquitoes built up, this one looks great, thanks, Ralph.
Really nice looking Mossie Ralph. Good info on the Krylon spray paint. I've used Krylon's bottled craft paint for years. Please don't take this as a criticism of your work, but having battled Revell's decals before, you might be able to get the side codes to lay down tight by either drenching them in Solvaset, then CAREFULLY heat the decals up with a hair dryer followed with pressing the down with a damp towel. Another thing that has worked is getting a syringe with a thin needle, eg for diabetes, and inject Future under the silvered areas.
Look forward to seeing more of your models.
Thanks for the compliments folks.
Al & Rick, no worries about 'how I take' it - I take it as HELPFUL ADVICE :)...
I have limited cool products available locally here,. I use Testors 'Decal Set' I think its called, and follow instructions, but it really seems to do little or nothing. I may have to order something, I just wish there was a store around here that sold more helpful products. I put Future on them too, with limited success. Other Revell kits I've had were not this bad, I think this box has been on the shelf for years.
Ralph, the hair dryer trick might work with the Testors Decal set. The thing you have to be careful about is getting the decal hot enough to soften it up without getting the plastic underneath so hot it deforms. Asks me how I know...;-(. If you have some left overs from the Mossies decal sheet you fouls experiment on those first. If you can get Tester's Acryl Clear Gloss, you can try making small slits in the silvered areas and apply the gloss with a pointed brush and let it wick into the slits. Do small areas at a time no rush.
I had a RoG Rafale and the decals about drove me nuts trying to get them to lie down.
In the above; "fouls" should be could. Auto-correct and an Arkansas education get me every time
Ha ha! - My spiel-cheeker don't work too good too!
Ralph,
I agree, a very nicely done Mosquito. Great job.
Ralph,
Very nice job on a classic "Monogram/Revell" kit of one of my favorite aircraft, the DH Mosquito. Those kits keep giving, at a modest price, hard to believe these days. I liked the use of the mechanical pencil, something I have used several times. Thanks for sharing!
Nice clean build.