Ki-Tech Cutlass
The Vought F7U Cutlass has always been one of my favorite airplanes, but getting a nice one in 48th scale is tough; the choices are limited, with the Hobbycraft kit, with all its faults, probably being the best one. I realize that there is a rather pricey resin upgrade available, but this piece of aftermarket kit is not for me...I would rather scratchbuild than pay through the nose for something I can make myself.
In the event, I used the Ki-Tech "knockoff" of the Hobbycraft kit to make this model...I figured pain is pain, so just move forward. The Hi-Tech kit is exactly like the Hobbycraft kit (I think the molds are the same); every feature of both kit is alike, except for the decals, both of which are poor.
Perhaps the weakest aspects of this Ki-Tech/Hobbycraft Cutlass are from the wing forward; the radome needs reshaping, the cockpit has little detail, the seat is a fantasy, the nose gear strut is inaccurate, but the most difficult thing is the intakes. The intakes are woefully undersized, and lack the gun gas vents that are a prominent feature,
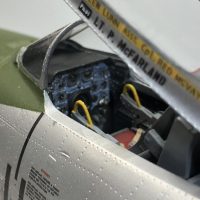
I first tackled the cockpit by scratchbuilding a new instrument panel and side consoles, using a Waldron punch set, and Evergreen plastic. The seat was entirely scratchbuilt, too, using, in addition to sheet plastic, some brass sheet metal, and green stuff epoxy putty. The brass was used for the unique headrest feature, while the putty was used for the straps and cushion. After this, I glued the fuselage together, and joined it to the aft section.
With the fuselage together, I was able to work on the intakes...as mentioned, the intakes are undersized and do not have "bulk" to them. The intake hole needs to be more "D"-shaped so I built this shape by adding sheet plastic on the edges that mate to the fuselage. This was complicated by the fact that there are boundary layer louvers (or fins) along the top where the upper part of the intake meets the fuselage. I took me a long time fitting thin, sheet plastic to get this louvered are right. After this, I had to add the gun gas purge vents to the upper part of the intakes. This was tough because the intake are thin and the vents needed to show some depth; I handled this by building-up the outside of the intakes with super glue and sanding. Once done, I scribed the vents in the superglue and mucked then out with a Dremel. It seemed that every one of the vent holes was a different size, so another modelling challenge was overcome, through persistence, obstinence, and perhaps, stubborness (or was that stupidity? Maybe both!).
Anyway, once the above tasks were finished, the rest of the kit was a piece-of-cake. The paint is Model Master gull grey over white, and the decals are mostly from the kit. I like the VX-4 markings of white stars on a dark blue field, but the blue on the kit decals was too light. I finally painted the blue portions and edged the with red stripes. The stars came from spares box sheets, and were punched out using the Waldron set and then applied.
The landing gears had some brake lines added, with some detail added to the gear bays, as well.
Overall, this Ki-Tech/Hobbycraft kit of the F7U-3M was a challenge, but it's done, and now sits in my display area.
As a surprise to me, this Cutlass also took "Best 40's and 50's jet fighter" special award at the OHMS show last September, held at the superb Evergreen aviation museum, located in McMinnville, OR. Thanks, Naplak.Com for sponsoring the award!
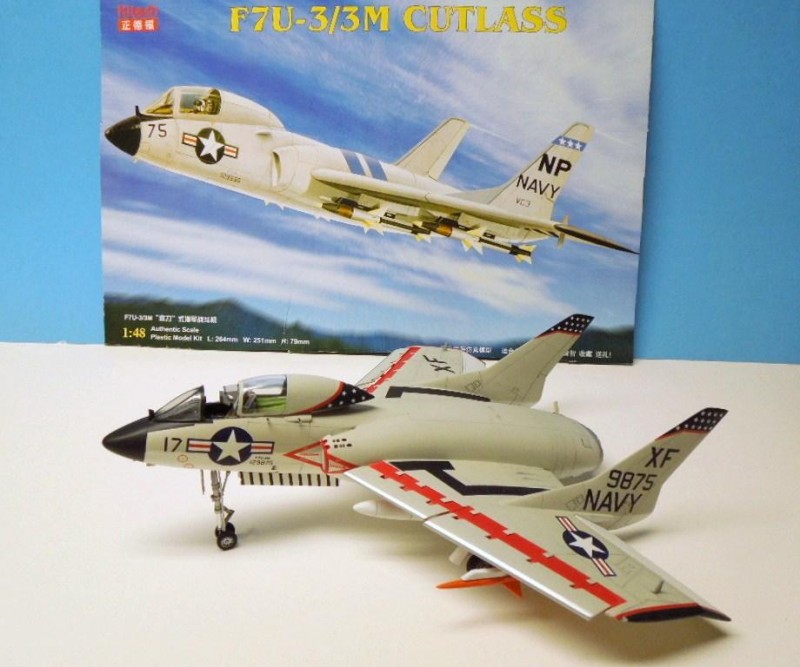
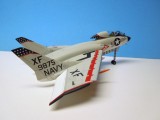
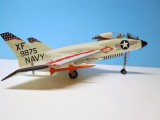
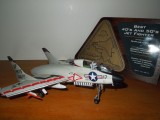

Despite all of its' "shortcomings", you did a bang-up job, Marvin - looks great. And...a tricycle-geared airplane model that doesn't need nose weight..or DID it?
Craig, thanks for the compliments!
Yes, I did have to add some weight to keep the nose down. I recall that I had forgotten to add weight and found this out when I sat the plane on its landing gear for the first time...it sat on its tail! Another challenge!
Fortunately, there is a round panel just in frnt of the forward gear bay. I drilled this panel out, using a rather large Craftsman drill bit, just large enough to fit in some small, round fishing weights. I figured out how much weight I needed, then put enough weights through the hole, followed by a bunch of super glue and accelerator...the nose sure got hot, but it didn't melt! I closed up the hole, again using super glue, and once painted, the hole was covered with a round decal, that represented some kind of electronic radome panel.
Thanks again!
Well, considering what's in the box, this is truly exceptional work. Bravo.
Considering what garbage I know that kit is, your work on it is really tremendous, and you certainly deserved the award it won.
Thanks, Nicola and Thomas...I really appreciate your kind comments. Merry Christmas!
Marvin, you've done a great job on that build! I love the Cutlass, and often have wished there was a better kit available. You showed what can be done when a great modeler tackles what's there. I just love the jets of the early 50s, especially the Navy birds. Designs knew no limits, and some of the wildest planes resulted. ie. the Cutlass, Skyray and Demon to name a few. Thank you for this!
Gary
Very good effort on this odd-looking airplane.
Thank you very much...I appreciate your warm comments.
Happy New Year!
Marvin ... your F7U Cutlass is a remarkable example obviously as you said.. persistence ..not too many Cutlass built nowadays ... GREAT result .. "we" had a pilot bring in a Cutlass at the old Olathe NAS, Ks and sat in a hanger for awhile in 1956 ...never knew where it came from ... I always thought it was a weird looking bird, compared to "our" usual F9F Panthers, and Cougars .. all yours needs now is a refueling, and pilot !
Ray: Thanks so much for your wonderful comments...I really appreciate them. The Cutlass is one of my favorite airplanes, and I really wish a manufacturer would take up the challenge and make a new-tool 1/48th kit for us. I think it would sell. Maybe Kitty Hawk, or Kinetic, or HobbyBoss...who knows?
Thanks again.