Tamiya Lockheed F-117 Stealth Fighter, 1/48th scale USAF

Started by Chuck A. Villanueva · 53 · 3 years ago
  • Profile Photo
    Chuck A. Villanueva said 3 years, 9 months ago:

    I will start with the F-117 Stealth Fighter, first time ever building one of these ever in any scale. The challenge is creating a finish on this that is not just a "Black finish" but to show a level of wear on the airframe that was used quite often in the desert environment. Though the air force did keep these as clean as possible, but not perfect, but cleaner and under cover.

    1 attached image. Click to enlarge.

  • Profile Photo
    Spiros Pendedekas said 3 years, 9 months ago:

    Hi Chuck @uscusn.

    This is a great subject. I have finished an Academy one 15 years ago (Col Whitley's plane) and found it very good (apart from the usual - back then at least - Academy decal issues...).

    I was always wondering what the promising Tamiya looks like and how it builds.

    I will be more than happy to watch your build thread, eagerly enjoying your usual excellent build quality and superdetailed presentation.

  • Profile Photo
    Erik Gjørup said 3 years, 9 months ago:

    This will be interesting! I'm tuned in.

  • Profile Photo
    Louis Gardner said 3 years, 9 months ago:

    I'm interested too... I have the old school Monogram kit with the PE parts. What is surprising to me is just how big these jets are !

  • Profile Photo
    Jeff Bailey said 3 years, 9 months ago:

    Add me as an interested onlooker!

  • Profile Photo
    Chuck A. Villanueva said 3 years, 9 months ago:

    Erik, the stealth fighter is quite a unique looking jet.
    Louis, I have never seen what is inside the Monogram kit compared to the Tam kit. I have had this kit in the stash since 1999.
    Jeff your always welcomed.

  • Profile Photo
    Chuck A. Villanueva said 3 years, 8 months ago:

    Let see what is in the box. Large box for a large unusual shaped aircraft. Molded in black and white plastic and smoked clear parts.


    The wedge shaped upper air frame section is kept in a wrapped packaging to keep it from getting any scratches and damage the nose pitot tubes.

    Typical Tamiya fold out A4 size instruction booklet, Tamiya paint callouts and standard exploded view assembly process.

    Tamiya wiil have you build the Stealth in 17 steps. The kit has decals for 2 Desert Storm birds in overall black finish.

    A history profile page insert is also provided in Japanese.

    As far as I know this may be the first kit that Tamiya provides a masking set for the canopy.

    Eduard's PE zoom set for the cockpit.

    The first sprue has just the lower hull of the F-117. Well defined panel lines and detail. The center bomb bay and wheel well openings are well defined. The rear duck tail edge.
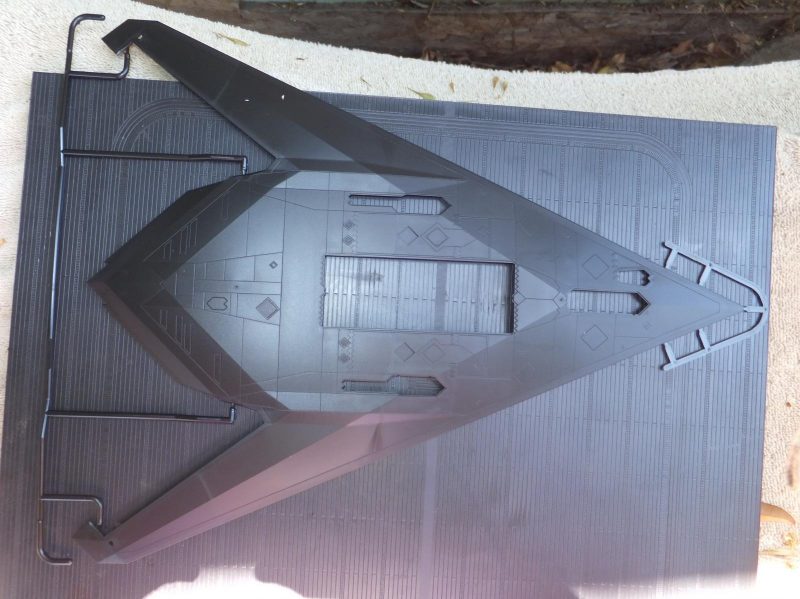
    Sprue A contains the main and nose gear struts, the FLIR sensor and housing. The gear bay doors, instrument panel. Nose wheels. As well as the grille plates for the intakes.
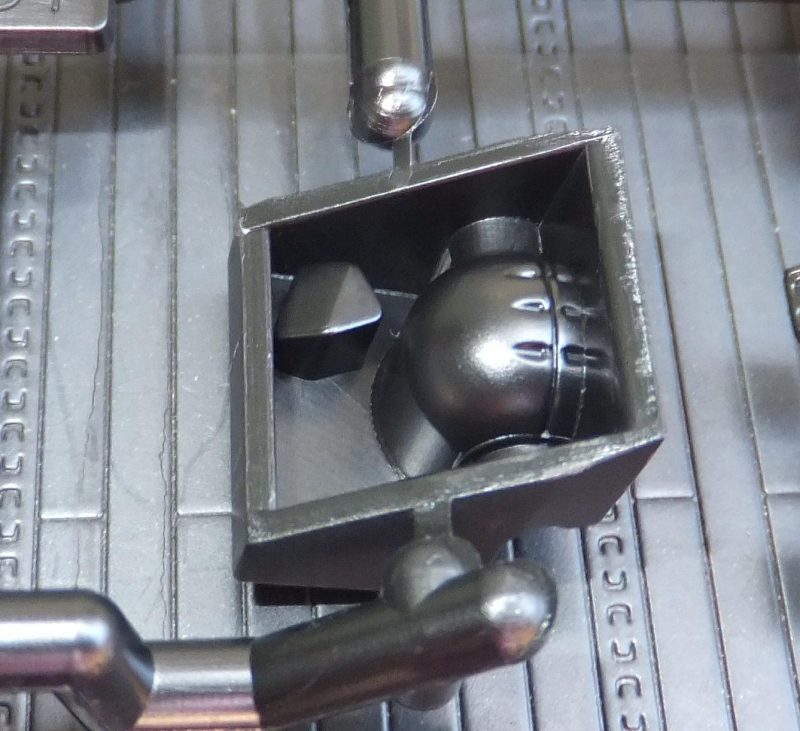
    The gear bay doors interiors have great details. The nose wheel is well done.

    The next sprue in white, which there are 2 of them, holds the 2000lb GBU-paveway bombs. Main wheels, Bomb bay components.

    GBU-10 bombs, main wheels and bomb bay rails

    The next sprue, contains the V-tails, elevons, bomb bay doors, the bomb bay, main and nose wheel bays and cockpit tub.

    The seat cushion and headrest is accurate for the Stealth fighter, will use this just add the belts. Cockpit tub with side lower side console details molded in. Whats missing are the side upper consoles. The Eduard's PE set will solve that.
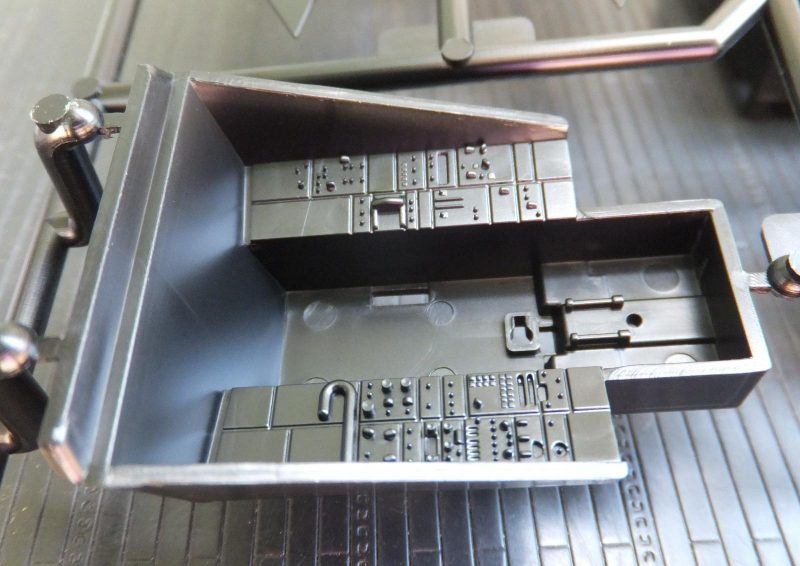
    The bomb bay and wheel bays have decent details here, just probably need to add hoses and conduit to enhance them a bit more.
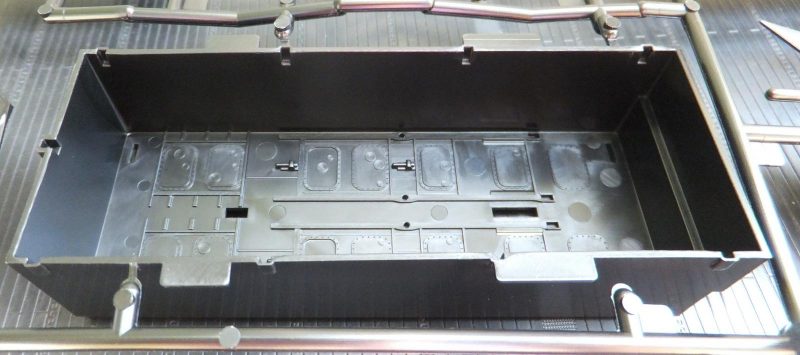
    The elevon looks like they may be able to pose. The bomb bay does have a set of side panels to install inot the bomb bay.

    The clear parts are in a smoke tint. The canopy and various lamps and bay windows are provided.

    Amazing that this aircraft has been retired over 10 years now. Despite older air frames still in service (B-52,F-15, F-16,) Well at least not all of them. This is really the first time I have really looked into this kit, not many have been built. In 48th scale I believe only Monogram and Italeri have also produce an F-117. Despite it's short time in service, it has been quite effective. The issue is that it was high maintenance. Like the Tomcat, it was tough to maintain, being careful around the surface of the skin, unique systems, and was not an easy plane to fly.
    Next up...some prepainting before cutting plastic.

    more to follow

  • Profile Photo
    Spiros Pendedekas said 3 years, 8 months ago:

    Looks nice in the box, Chuck @uscusn!
    Thanks for nice presentation!

  • Profile Photo
    Erik Gjørup said 3 years, 8 months ago:

    That is some nicely detailed sprues! I shall be looking forward to see this build.

  • Profile Photo
    Chuck A. Villanueva said 3 years, 8 months ago:

    Thanks Spiro's it does now to start getting it together. Funny so used to building WWII stuff lately, a change of pace for a fast jet in the works.
    Eric was always fascinated with the F-117, seen them at a distance even when one was at airshow on display it was under heavy security and could not take pics. Those in theatre were kept in shelters never exposed to the Saudi desert sun.

  • Profile Photo
    Chuck A. Villanueva said 3 years, 8 months ago:

    As my usual process, before any assembling, I pre-paint some of the interior components while on the sprue. Starting with the Dk Ghost grey interior bits. Seat rails, instrument panel, canopy lift arms and cockpit tub.

    Next the gloss white bays. Wheel wells, bomb bays, gear doors and wheels.

    Gear bay doors very nice detail.

    Nose wheel.

    This is just preliminary painting with the gloss white. A much better coat will be applied later on the build.

    More to follow.

    1 additional image. Click to enlarge.

  • Profile Photo
    Spiros Pendedekas said 3 years, 8 months ago:

    That's good progress, Chuck @uscusn!
    I also paint as many parts as I can while attached to the sprues, a habit I have developed through the years. Make modeling life unbelievably easier.

  • Profile Photo
    Erik Gjørup said 3 years, 8 months ago:

    Chuck, lately I have been doing the same. It makes it a bit easier to do the full coating later on, but as you know, soem scrabing is needed to make the glue stick depending on the type of glue and paint used. This intermediate stage brings promises of sub-assemblies soon 🙂
    The pre-painted sprues also makes the details stand out - looks like the details are very good on this one.

  • Profile Photo
    Chuck A. Villanueva said 3 years, 8 months ago:

    Spiros, Erick, doing this process is something I have always done as a youngster starting in the 60's . With brush painting the parts on the sprue instead of holding the part with my hands and getting more paint on my fingers than the part.

    Step 1 starts with the seat.

    The rails are Dk Ghost Grey, 36320, seat frame is black.

    The seat cushion is OD, the headrest is black.

    Next is the upper pack place over the headrest frame.

    The canopy lift cylinders are attached to each side of the seat. Rather unusual configuration.

    The PE lap belts are attached.

    Then the shoulder harnesses. The kit seat is not bad.

    More to follow as more details will be added to the seat after it is installed.

  • Profile Photo
    Erik Gjørup said 3 years, 8 months ago:

    Please remain seated. . .

    Nice bangseat!