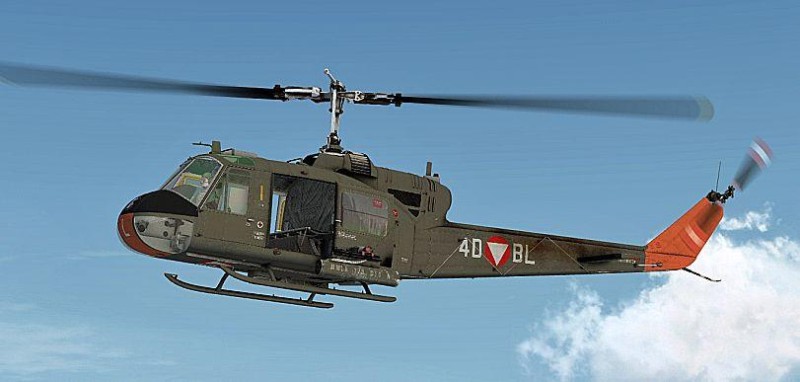
Monogram 1/24 UH-1B

Started by Spiros Pendedekas · 120 · 2 years ago · 1/24, AB-204, Bell, Helicopters, Monogram, Revell, UH-1B
  • Profile Photo
    Spiros Pendedekas said 2 years, 6 months ago:

    Hi everyone!


    Having too many ongoing projects, it was still impossible to resist the temptation of entering a build to this wonderful GB, created by our friend @coling!
    So, here is my Monogram 1/24 UH-1B, that I intend to finish as an AB-204 of the Österreichische Luftstreitkräfte, which is the Austrian Air Force!

    Bell designed its Model 204 in response to a 1955 United States Army requirement for a utility helicopter. The 204 was a giant step forward in helicopter design, being one of the first to be powered by a turboshaft. The turboshaft engine radically improved the practicality of the helicopter due to its light weight and high power-to-weight ratio, lower fuel consumption, and lower maintenance and operating costs. The use of a turboshaft in the 204 allowed it to carry a useful payload over respectable ranges and at reasonable speeds, which resulted in the 204 and subsequent 205 becoming the most successful western helicopter series in terms of numbers built.

    The Monogram kit first appeared in 1969 and is regularly reissued. It is a big scale kit with relatively good details. My copy is the 1992 reissue

    Here's what is in the box... Here's a look at the sprues...
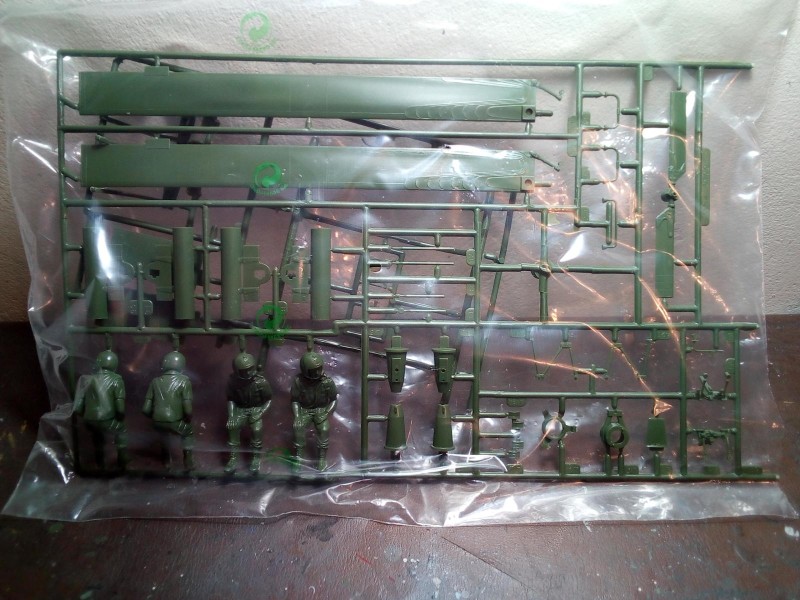
 Instructions are typical Revell, nice and clear... Decals look (and are!) very old, I hope they are still useable...
    I am considering a kick-off start, in order to gain some momentum, then taking steady progress steps, as this build will have to coexist with my other ongoing projects.
    Cheers, HeloGB!

  • Profile Photo
    Colin Gomez said 2 years, 6 months ago:

    This looks like a very nice kit, Spiros and a welcome addition to the Helo GB. I am impressed by how much molded in detail there is in the two fuselage halves. Nice engine too. It should look almost complete as soon as it the interior is done and the main parts are glued together. Nice not to have to deal with a lot of sub-assemblies - in the case of the Mi-6, they are a pain to get properly aligned even in test fitting. I actually didn't know there were 1/24 scale helicopter kits around, let alone this particular one. I thought my 1/32 Lynx was big, but the 1/24 Huey must take up quite a bit of shelf space. Good to see there are good decals for the instruments, which is a plus for interior detailing. Thanks BTW for the peek at the parts and instructions. Seeing the quality of the kit for your photos, I might pick up a Vietnam version of the 1/24 Huey one day should they ever reissue that one. The decals and instructions for the AB-204 look like Revell Germany quality and lay out.

    Really looking forward to seeing this completed to your usual high quality standards.

  • Profile Photo
    Bob Torres said 2 years, 6 months ago:

    Nice, your model kit is giving me flash backs, back to 1969. I received this kit as a Christmas gift and it was then the Huey Phantom Chopper. I was 9 at the time, my father helped me with the build. My father really enjoyed the build. It had an electric motor to make the main and rear rotors turn. Plus it made the chopper noise. Later on the phantom part was replaced with a solid normal kit look and it still builds up to a very impressive build.

    Looking forward to your build.

    2 attached images. Click to enlarge.

  • Profile Photo
    Spiros Pendedekas said 2 years, 6 months ago:

    Thank you my friend @coling!
    Yes, the decals are 1992 Revell of Germany, with good registration, only hoping they will not disintegrate upon application. I tested a decal I will not use and, though it would not tolerate a lot handling (as it started to disintegrate upon messing with it), it looked like it could be carefully applied and remain intact...we will see...

  • Profile Photo
    Spiros Pendedekas said 2 years, 6 months ago:

    Thank you my friend @v1pro!
    Those are some amazing pics you added! Those were the days!

  • Profile Photo
    Bob Torres said 2 years, 6 months ago:

    On my last few builds I had to use Microscale liquid decal film….Sometimes called decal saver….the few times that I did not use this the decals pretty much dissolved or fell apart into little pieces once they were wet. Each time I was pretty annoyed at myself for not using the liquid decal film. It does work but a bit more work is needed when applying the decal with recessed lines underneath.

  • Profile Photo
    John vd Biggelaar said 2 years, 6 months ago:

    A great entry and addition to your growing activities, Spiros @fiveten
    The molds do indeed look nicely detailed.
    Looking forward to the progress on your copter entry.

  • Profile Photo
    Spiros Pendedekas said 2 years, 6 months ago:

    Thanks for the good advice, my friend @v1pro : I seriously think of using this product, never used it before...

  • Profile Photo
    Spiros Pendedekas said 2 years, 6 months ago:

    Thanks my friend @johnb : the molds look well detailed indeed; and they are massive!

  • Profile Photo
    Spiros Pendedekas said 2 years, 6 months ago:

    Starting off!


    I first added as many lead weights as I could at the recession under the central console... ..."securing" them with liquefied styrene...
    Then started to assemble the cabin... , the seats, the power section and the swash plate mechanism. Here they are...
    Fit is not bad, however a lot of ejector marks are evident, not all easy to remove ...
    This is a BIG model!
    Thanks for stopping by!

  • Profile Photo
    Colin Gomez said 2 years, 6 months ago:

    Nice work so far, Spiros. Will you be convering up the ejector pin marks after assembly somehow or will you just tolerate them? They don't actually look like they shouldn't be there in the floor. Thanks for the demo on adding weight in the forward fuselage. I never thought about a helicopter being a potential tail-sitter but of course it would. I will approach this carefully with my Lynx.

  • Profile Photo
    Spiros Pendedekas said 2 years, 6 months ago:

    Thanks my friend @coling! Luckilly, most ejector pin marks will be invisible after assembly, while I will try to remove this ones that will show.

  • Profile Photo
    John vd Biggelaar said 2 years, 6 months ago:

    Good progress, Spiros @fiveten
    The idea of securing lead with LqS is very helpful.
    This LqS will make sure the weight will not get loose.
    And with 1/24 it will indeed be big.

  • Profile Photo
    Spiros Pendedekas said 2 years, 6 months ago:

    Thanks my friend @johnb! LqS indeed is handy for securing stuff like weights. One issue night be if a hefty portion of it stagnates behind a visible surface area, as it will shrink it, as it happened with my 1/72 Mistral...
    Yes, it is big!

  • Profile Photo
    Spiros Pendedekas said 2 years, 6 months ago:

    Construction continues...


    Some gaps at the front frame were treated with liquefied styrene...
    The swash plate mechanism is gradually assembled...
    ...and the transparencies were added to the fuselage halves and cargo doors. Their fit leaves a lot to be desired, so some seriousblending job lies ahead...
    Just for fun, please check the size of the cabin inner structure, compared with a 1/72 AB-205 fuselage... Thanks for stopping by!