1st up, Revell 1/48th Messerschmitt Me-262 1A

Started by Chuck A. Villanueva · 74 · 2 years ago
  • Profile Photo
    John vd Biggelaar said 2 years, 11 months ago:

    Great progress, Chuck @uscusn
    Your paintwork looks beautiful, especially since you did this freehanded.
    Looking forward to the decal part.

  • Profile Photo
    Spiros Pendedekas said 2 years, 11 months ago:

    Wow, great freehand results, my friend @uscusn!
    Brownviolet looks good!

  • Profile Photo
    Chuck A. Villanueva said 2 years, 10 months ago:

    Thanks John, just keeping in practice, still a work in progress to improve every time out.
    Thanks Spiros, sometimes when the coat is first applied it goes on wet darker than you think, but as it dries then the color looks closer to what you hoped it would be.

  • Profile Photo
    Tom Cleaver said 2 years, 10 months ago:

    @uscusn: Where are you getting Gunze aqueous?

  • Profile Photo
    Chuck A. Villanueva said 2 years, 10 months ago:

    Decal time, using Xtra Decals set for the Me262-1a fighter. Will go with yellow 5.


    The clear coat has set and dried over the week. As normal the national marking are applied first under and on top of the wings at 4 points.

    The Red/Black checker board patterned ID band that wraps around the rear of the fuselage has a notation that it was not completed on the RH side. Only the Black portion was completed with the Red portions incomplete. Which adds appeal to the scheme. The band fits perfectly on the Revell kit though I'm not sure it was not designed for this particular model. I was a bit worried about that but turned out it worked perfectly.


    Using the tried and true Micro Scale system of applying the decals worked perfectly with the Xtra Decals. Though thin they did not break while moving some of the larger markings around to set in place.

    There is a bit of stenciling on the 262, as not all were used on this airframe.

    The decals settled nicely over the raised details, no silvering.

    Most of the stencils were under the air frame.

    Once the decals dried, Vallejo Flat Clear Coat is airbrushed over the air frame.

    Then the masks are removed from the canopy.

    Looks good underneath as well.

    Next up get her on her feet with the gear and some final details.
    More to follow.

  • Profile Photo
    Chuck A. Villanueva said 2 years, 10 months ago:

    Tom, lately from a gent named jackrabbit9820 on Ebay, great prices and reasonable shipping as well. He is in Ohio.

  • Profile Photo
    John vd Biggelaar said 2 years, 10 months ago:

    Very nice decalling, Chuck
    The checkerboard does indeed give this scheme something extra.

  • Profile Photo
    Paul Barber said 2 years, 10 months ago:

    Well Chuck, I haven't been on here at all, and turn up to find this one pretty much done! Lovely, unique plane - the checkers especially make it stand out. That a side it's looking brilliant for the build quality alone!

  • Profile Photo
    John Healy said 2 years, 10 months ago:

    This turned out great, Chuck.

  • Profile Photo
    Spiros Pendedekas said 2 years, 10 months ago:

    Looking marvellous, my friend @uscusn!
    The half finished checker board indeed adds even more appeal to this scheme!

  • Profile Photo
    Chuck A. Villanueva said 2 years, 10 months ago:

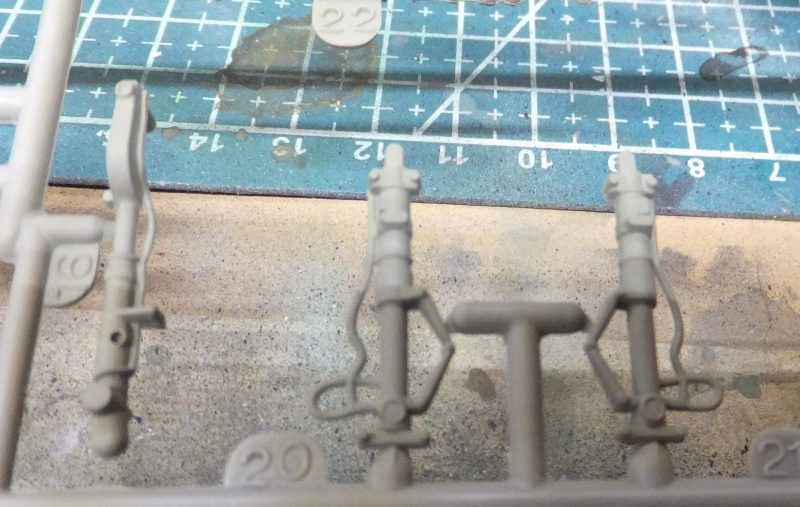
    The final chapter. This is quite a simple fighter, no bombs, rockets or drop tanks to hang. Just mount up the landing gear. First with the wheels, True Detail resin wheels will be used to finish this Me-262.

    The wheels are painted black, and the tires Dark grey.

    The struts are RLM02. And nice with the brake lines molded into each strut. Monogram really did add some nice bit of details in their molds.

    The gear doors are painted RLM02 inside.

    The brake lines are painted Testor's rubber and using the Molotow Chrome pen for the oleo's. The nose rectraction actuator.

    Then the nose gear strut assembly is inserted into the nose gear bay. Positive and sturdy contact point here.

    Next the main gear struts. These are strong and sturdy and will last for years on the shelf. The model despite being a fighter is heavy. Typical Monogram/Revell plastic, with the added nose weight and bondo, and even without those add ons, it is still hefty.

    The strut and retraction arm are both inserted in each main gear well. Again the contact point is strong and sturdy here as well.

    All 3 struts are installed and set. And the 262 sits as intended on the nose, not on her tail.

    Then the wheel assemblies are attached with Gorilla cyno glue.

    The molded pitot tube has survived the many times I hit it without breaking it off.

    Starting at the nose, now to attach gear bay doors. This attaches ok in front of the nose strut.

    The nose side main door also has a good positive contact point as well.

    Now working on the main gear doors. The center door is moulded as one piece and that will need to be scored at the center line and fold into shape.
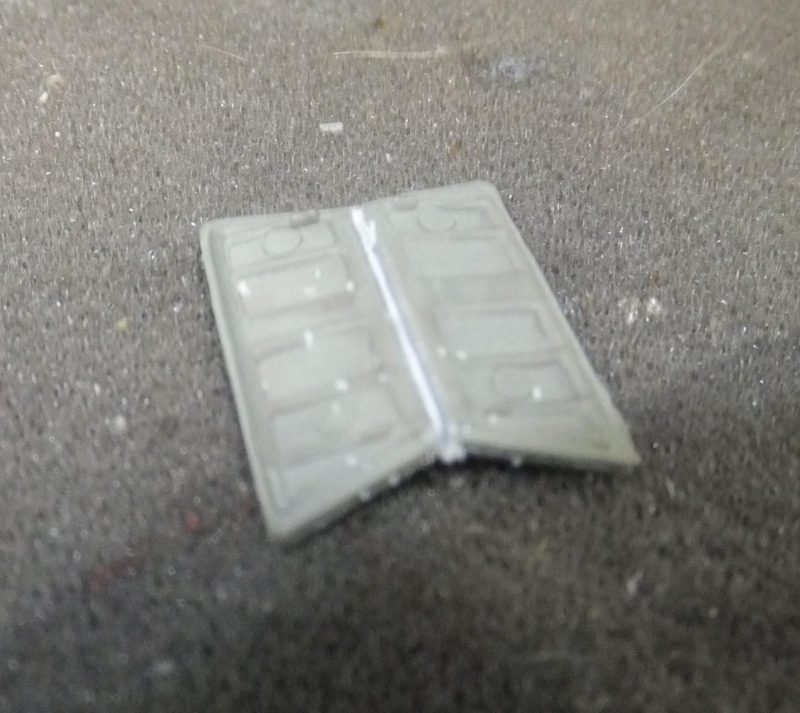
    The wheel cover doors are then attached to the struts.

    Then the upper gear door covers are attached to each strut which partially overlays over the top edge of the lower wheel cover doors.

    That's it, she is finished. Only other bit was the loop antenna attached to the spine.

    Thats a wrap...

    1 additional image. Click to enlarge.

  • Profile Photo
    John vd Biggelaar said 2 years, 10 months ago:

    Great looking, Chuck @uscusn
    Very detailed landing gear.
    On her feet she looks awesome.

  • Profile Photo
    Spiros Pendedekas said 2 years, 10 months ago:

    What a super job, my friend @uscusn!
    Loved all the landing gear details, good for Monogram that they had brake lines molded.
    Congratulations on your Schwalbe!

  • Profile Photo
    Erik Gjørup said 2 years, 10 months ago:

    Great finale! Love the AM wheels Chuck!