OK, here we go.
This following update has a LOT of photos. I'm posting them up in hopes it will help you if you are building one of these. Some places are a little bit tricky, so these should help.
Let's start out with the decal choices for this one. The kit has 10 different choices, and one is a FAA bird in camouflage. I can definitely see myself building one of those some day.
Because of the childhood memory I have watching one of these dogfighting overhead as a kid, and the very simple one color paint scheme, I'm leaning towards building this one. It looks somewhat close to how the Wildcat did that I watched overhead many years ago. It's close but not exact. Good enough for me...
I suspect the markings on the real plane I photographed all those years ago were not authentic, but I could be wrong too. It simply could have been wearing markings for another plane from another aircraft carrier group, that's all.
I have been wanting to build a Corsair with very similar markings, and they would look really good sitting next to each other... like this one built for the JS group by Tom Bebout.
What do you think ?
This one here is also a strong contender. Ralph Elliot was the leading FM-2 Ace with 9 kills. This one sounds good too.
This next one with the Shamrock on the wings and tail surfaces also caught my eye.
This last one rounds out the overall Gloss Sea Blue schemes using the kit supplied decals. I plan to get a few Over tree kits in a few months.
Which leads to this... these are the exhaust inserts. There are 3 different styles, and you need to pick out which one you will use. The choices are dependent upon which decal option you decide to build. They are not the same for each plane, so do a little reading before you start gluing these parts in place.
Remember the Hobby Boss "Kindergarten" I mentioned earlier ? Here is the HB version of the FM-2. It's a lighter Gray color plastic, and I laid it next to the darker color Gray Eduard parts to show the similarities.
This shows the differences between the vertical fin. I tried to line up the parts as best as could when I took these pictures.
Notice the difference around the cockpit opening. You can also see the differences around the exhaust panel openings.
This is the back of the engine. This part gets glued in place on the front of the engine mount assembly. Eventually the assembled engine will be mounted to this part.
I'm going to wait until after everything is painted before I do this however.
UPDATE :
THE TURBO ORIENTATION IS WRONG.
IF YOU ASSEMBLE YOUR TURBO PIPES LIKE THIS, THE TUBES WILL BE TOO LOW. IT WILL NOT ALLOW THE LOWER FRONT FUSELAGE COVER TO FIT LATER. SEE THE NEXT PAGE FOR WHAT I'M TALKING ABOUT.
-
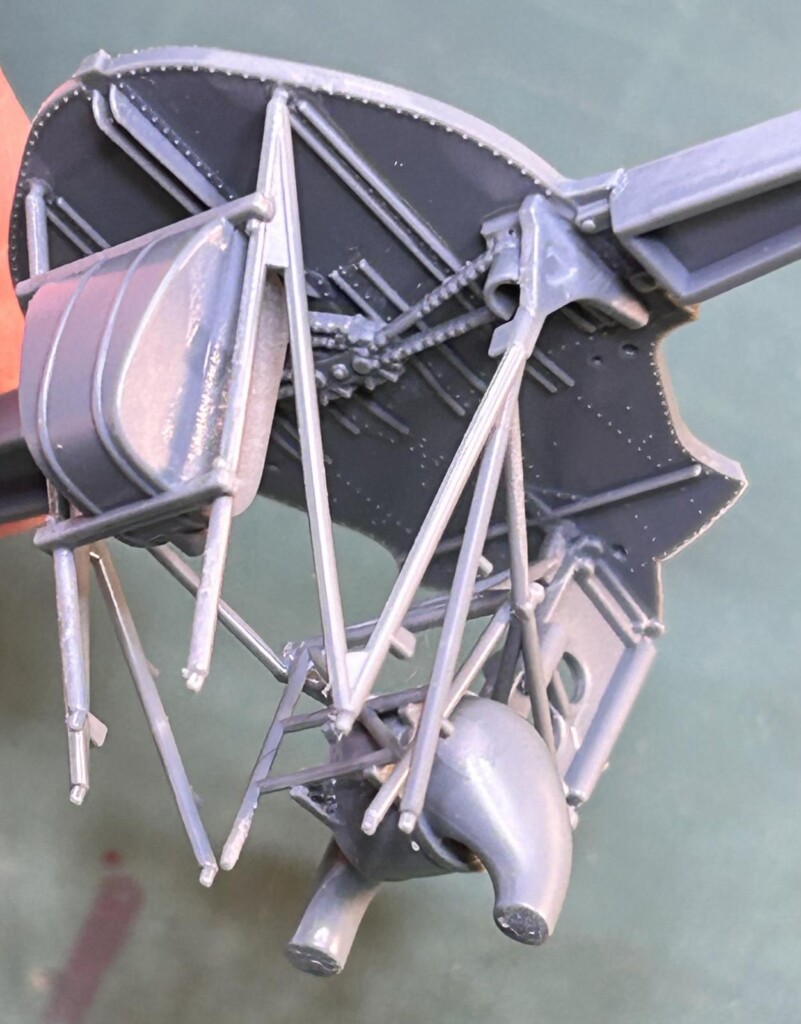
1. Turbo orientation is wrong.
2. Tubes are too low
-
1. Turbo orientation is wrong. Tubes are too low.
-
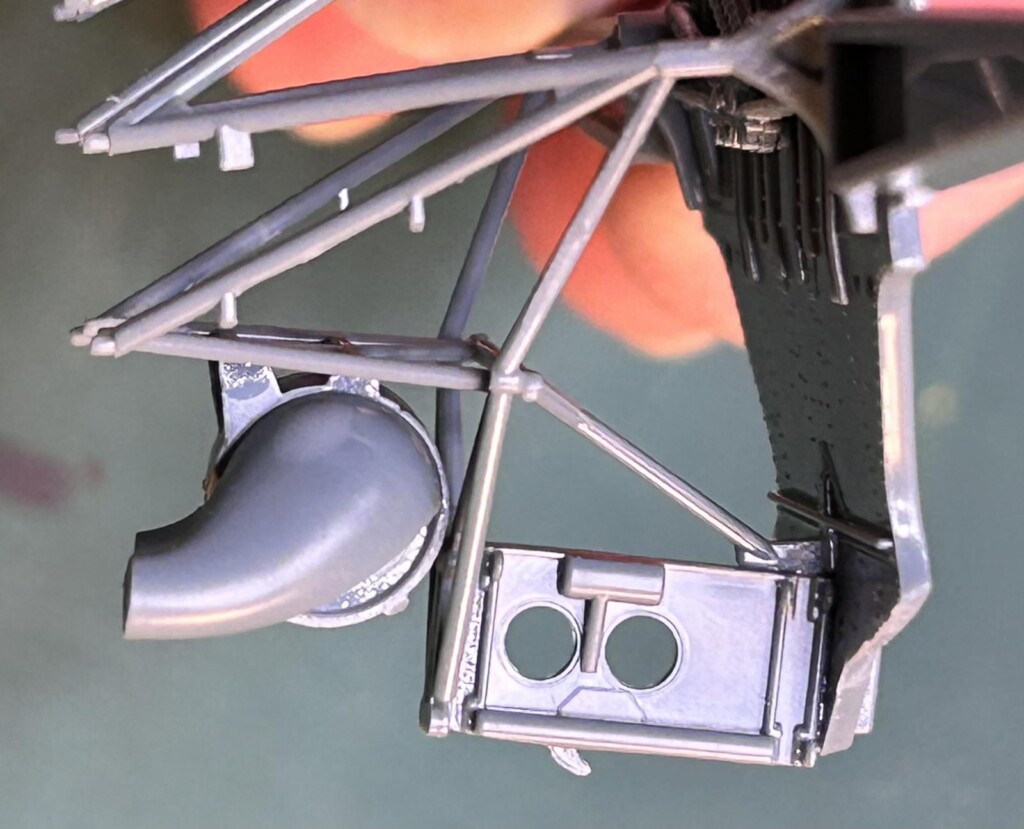
1. Turbo charger assembly
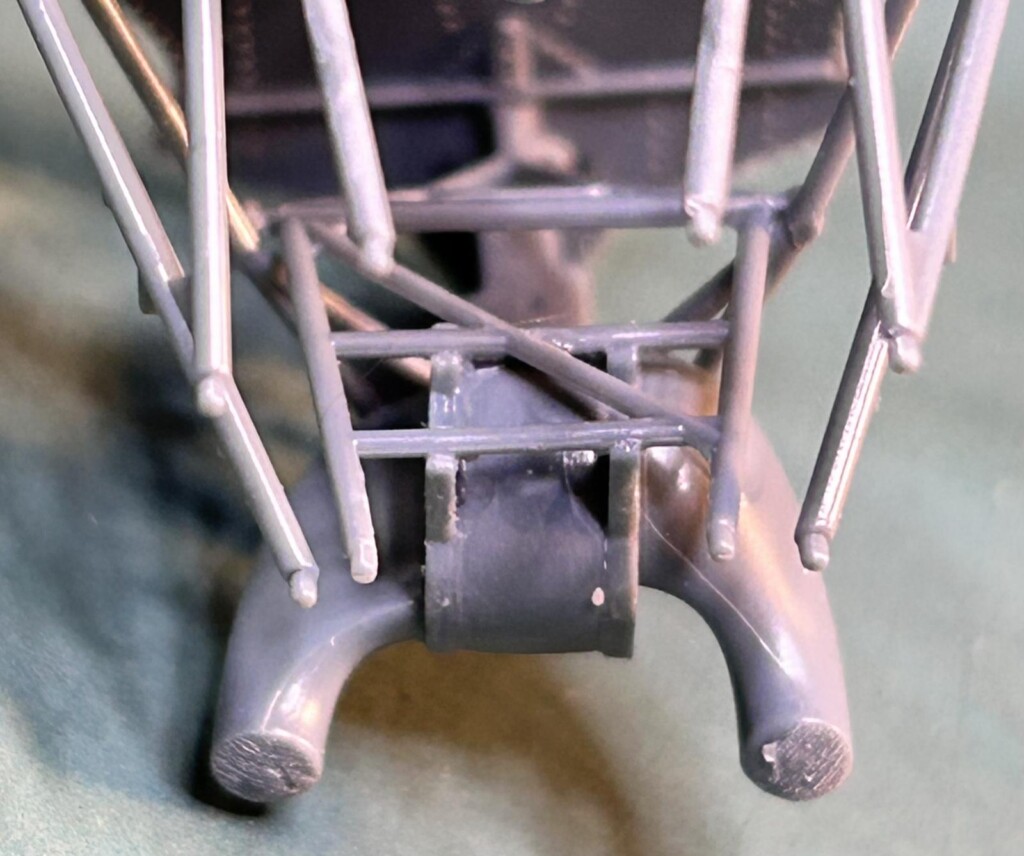
These photos show the alignment of the engine mount. They also show how the turbo charger is installed on the lower engine mount tubing and landing gear braces.
The oil tank is mounted to the top of the engine mount.
The drive chains used to manually crank up the landing gear are glued in place to the firewall. The chains are painted a Steel color.
Everything else (except for the oil tank and center of the turbo) is supposed to be painted using the same colors as used on the rest of the underside.
I'm going to be spraying these soon, and picking out the details afterwards.
-

1. This part should be located here. It popped out before I took the picture.
The rear lower cockpit bulkhead is not exactly where it should be in this photo. There is a small square depression on the lower edge of the fuselage half where the bulkhead clicks into place when it's properly located. It must have popped out of the correct position before I snapped this picture. I drew an indication line pointing / showing where it should go.
These are the previously assembled rear cockpit section with the seat installed. I wanted to show you how the angles looked in these pictures.
The front half of the cockpit was assembled too. This shows how it looks before painting and the PE parts are added.
I decided not to glue the front and rear sections together just yet. I will wait until after all of the little details and painting has been taken care of first.
While the glue was not completely set up, I temporarily placed the cockpit into a fuselage half. I wanted to make sure it all fit properly.
It fits great !
Take your time here and make sure all of the little attachment points are taken care of, and you will end up with a nice fitting model.
Next I slipped the front and rear cockpit sections together to take photos for you guys. This shows how it all looks
once assembled.
I did not glue the front and rear sections together yet. That will happen later.
This was done only for taking pictures.
This part gets glued in place just ahead of the rudder troughs.
Tonight I hope to start painting these internal parts. Then hopefully tomorrow I can glue the fuselage together.
This is a GREAT kit... I'm really enjoying this one so far.
Now once again I need to go find a piece of wood and knock on it for I have again jinxed myself...
as always, comments are encouraged.
Thanks for stopping by.