Now to build the glass nose section. Been looking forward to this part of the build.
The center lower panel and floor of the bombardier station.
The floor and lower panel are assembled. The PE floor enhancement piece is also attached.
-
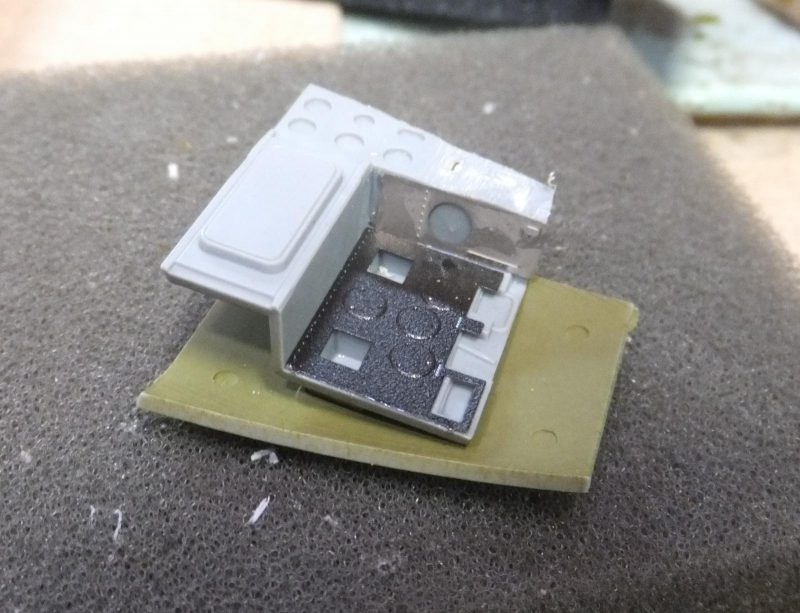
1. Eduard's PE floor insert
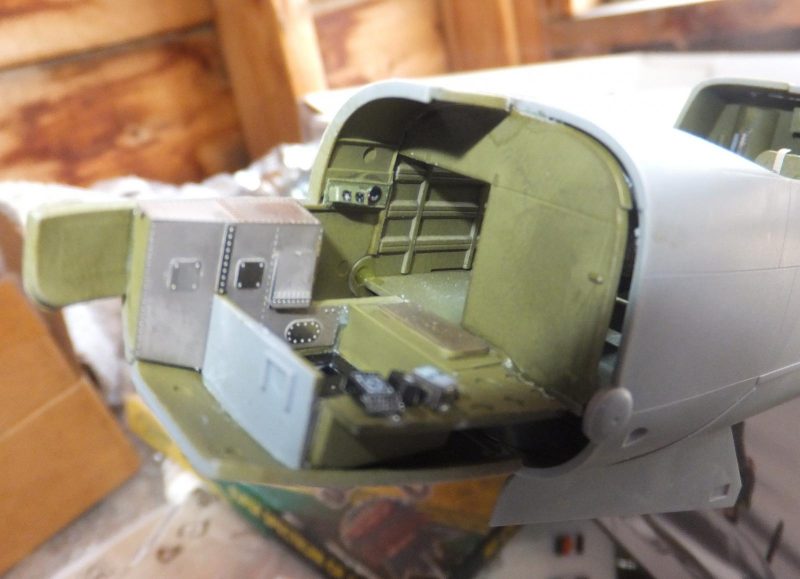
LH side wall and console panel.
-
1. LH side wall and console
Interior Green is painted over the LH side console with one of several PE electrical boxes installed.
ICM uses a step by step approach in assembling the nose station. Similar to how the new Airfix instructions are set up.
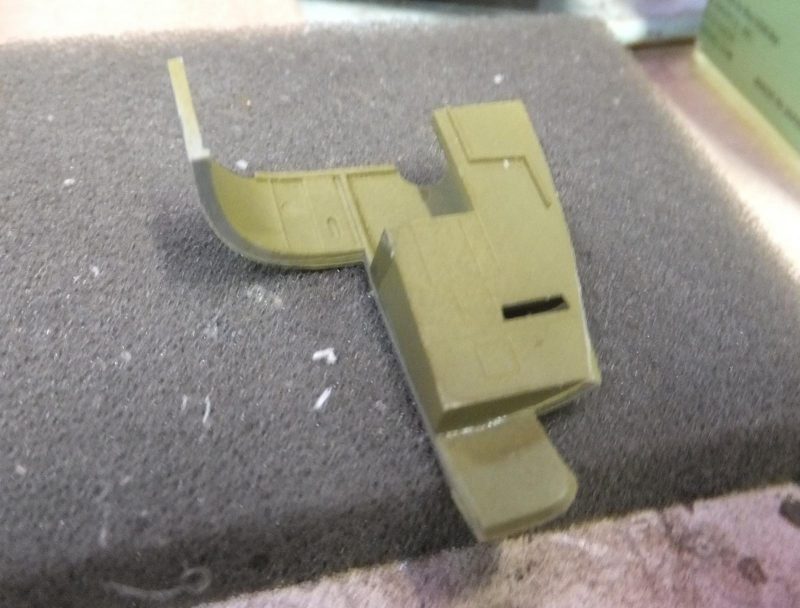
The fuselage nose bulkhead is attached into the main fuselage.
-
1. Fore ward bulkhead
2. This gap will be an issue
The Rh side wall and console is assembled and the PE bits as well.
The completed floor section is then attached to the RH side panel. The seat is painted Khaki Drab and the rest is Interior Green.
-
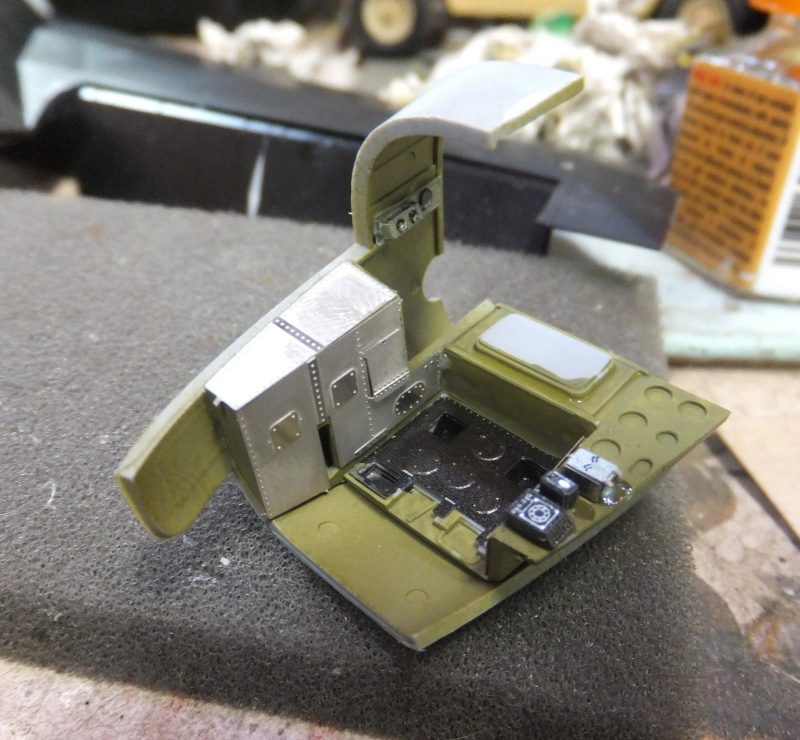
1. PE panels
2. Electrical boxes/dials
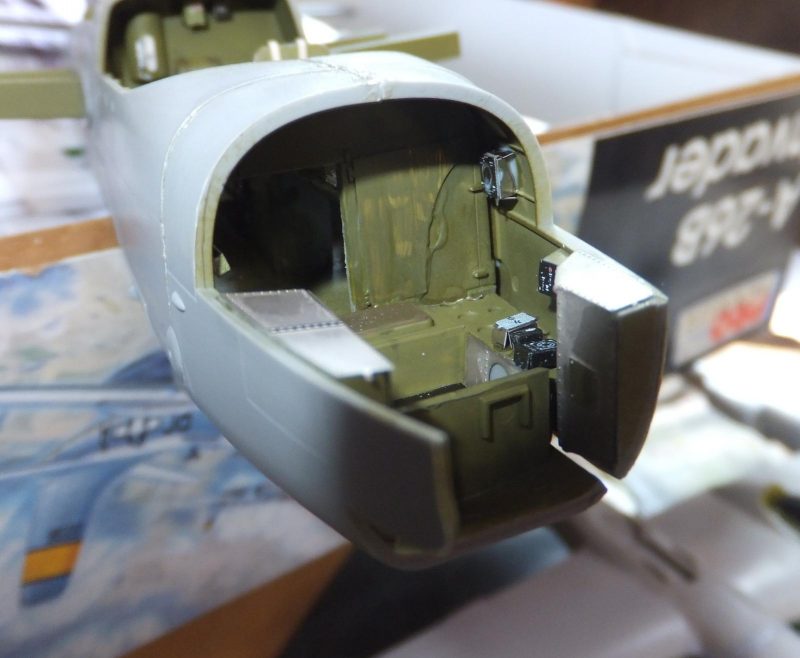
Then the foreward armored plate is attached.
Next up is the bombsight.
The LH side panel and console is assemble and PE bits installed as well.
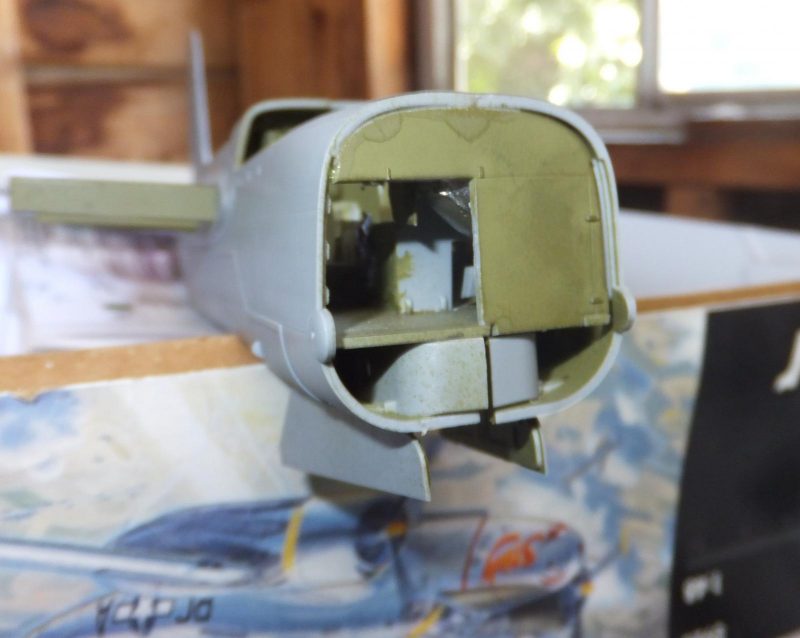
Now to attach the completed assy to the nose of the fuselage. First attaching the RH side panel and floor and let it set and make adjustments. Not the best fit and will need some filler.
-
1. RH side panel and floor attached to the main fuselage. Fit is ok,
Next the LH side wall is attached at the rear first and work my way forward. The initial fit was awful.
Leaving a wide chasm at the front edge. Scary at first and had to sit back and take a breath. And work on something easier.
-
1. LH side attached
2. Big ole gap Grand Canyon in fact yikes!!!
-
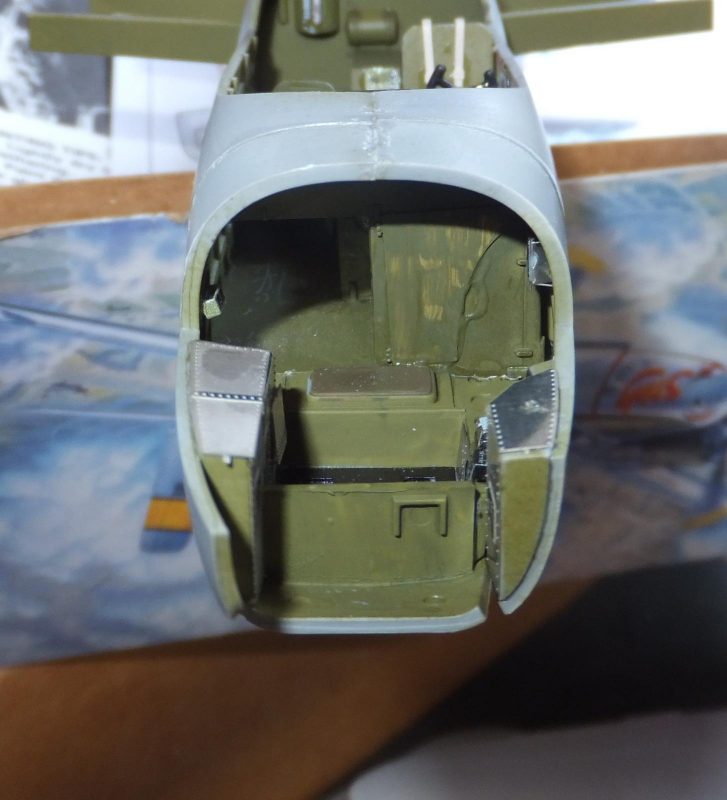
1. Though ugly, it was easy to remedy
I will show it in the next series. In that the ICM plastic not being brittle and a bit flexible in nature, I was able to fix that by simply just closing the gap and hit it with quick drying cement and then hold it with some clamps with out breaking anything and let it sit over night. Whew...
Next up the wings, more to follow.