Modelsvit F-82G Twin Mustang, 1/48

Started by Chuck A. Villanueva · 97 · 12 months ago
  • Profile Photo
    George Williams said 2 years, 4 months ago:

    Looks like a great kit, Chuck@uscusn, love reading about your methodical way of working.

  • Profile Photo
    John vd Biggelaar said 2 years, 4 months ago:

    Not only detailed but also very detailed parts, Chuck @uscusn
    Love the way you are proceeding.

  • Profile Photo
    gary sausmikat said 2 years, 4 months ago:

    Great start, Chuck!
    Not being familiar with the history of markings/schemes on the F-82 during the war, is black the only option? Are you doing black?
    Looking forward to seeing this one to the end. Good luck my Friend!

  • Profile Photo
    Chuck A. Villanueva said 2 years, 4 months ago:

    Thanks Spiros, it's steady as she goes.

    Hi George, Happy New Year, I am normally methodical in at this point of the build especially with the cockpit, but this kit is quite a good challenge. So far I am totally satisfied with that fact. And look forward to each step.

    Thanks John, this is one kit that is not a quick build.

    Hi Gary. as far as I know all the F-82G's that operated in theatre were in black. I will be doing this build in black I am also reading up the history of the Twin Mustang. Will look into if any of the other variants participated in the war. If so then these were more likely natural metal.

  • Profile Photo
    Tom Cleaver said 2 years, 4 months ago:

    It's an easy question on what served where. The only Twin Mustangs in the Korean War were the F-82Gs of the three squadrons. The only ones that weren't black were the F-82Es and F-82Hs (winterized Es). They'll be in the next kit.

    Do make sure all of you who have this kit read my review in Modeling Madness on Jan 6 because the wing is the source of potential problems, depending on how fast your wing sprues were pulled from the mold. Getting the wing straight is the "cornerstone" of getting everything else to come together.

  • Profile Photo
    Chuck A. Villanueva said 2 years, 3 months ago:

    This session will finally get the pilots cockpit assembled. But first lets start on the LH side interior panel.

    The LH is more decal, PE and one plastic part to attach., The clear coat has been set to accept decals. The Mission Models Interior Green gets blotchy with a coat of future.

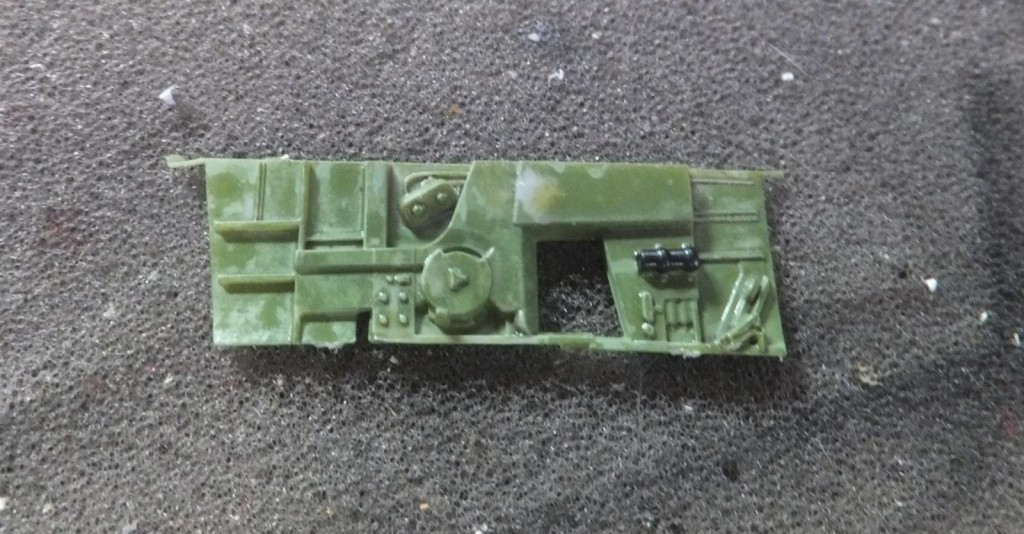
    3 PE discs painted Gloss Black are first attached to the interior panel.

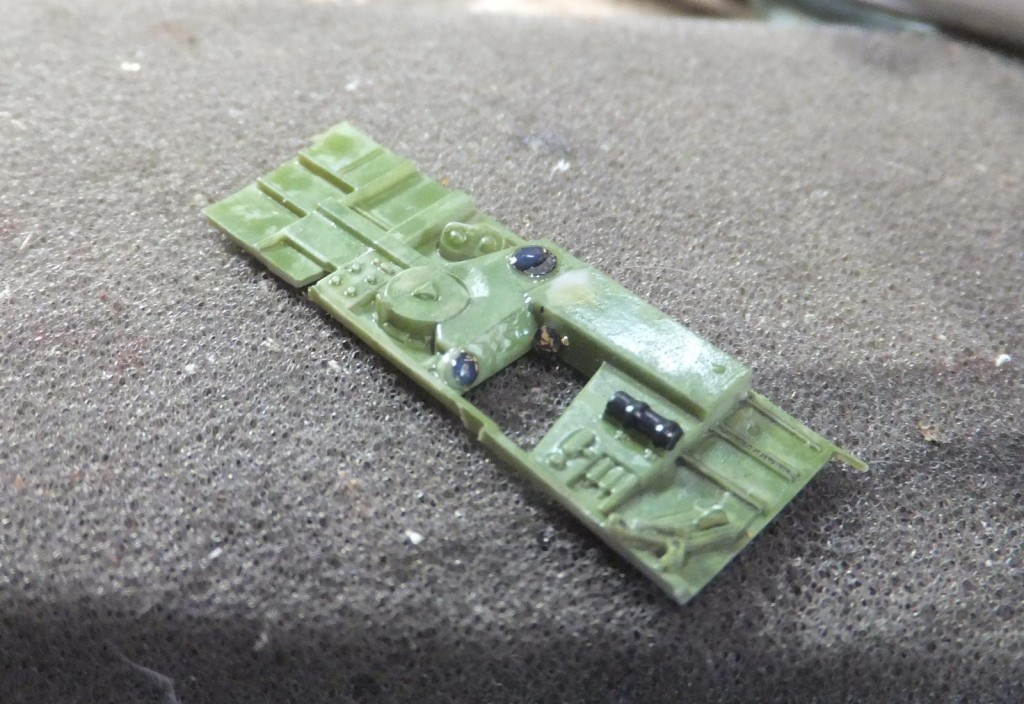
    That's it for the PE bits, now some decals. First a panel is applied and a dial is applied on PE disc1. Also the control indicator is attached.

    Next the only plastic bit is attached right above the lever panel.

    At this time a drop of Micro set is applied to each decal to let it settle into the nooks and crannies.

    Both side panels are completed. Now to start to assemble the pilots cockpit.

    Starting with the cockpit floor. Already highlight with wear points with silver pencil and a wash. The control stick boot is painted Khaki Drab.

    Next is the rudder pedals. Nicely detailed with the N. American emblems on the pedals. Nice touch, hard to see.

    Next is the forward bulkhead. Before attaching a wash is applied

    Now the LH side panel is attached aligning with the front bulkhead.

    Now to attach the rear bulk head. Again aligning the floor and LH side panel. And always test fitting with the LH fuselage half.

    Right before I assemble the RH side panel, I paint the control stick ZCG and a gloss black grip.

    Now the RH side panel is attached. So far so good. Nothing falling off, being careful with the handling. Also the rear seat armor plate and headrest is installed as well. The upper plate is Nato Black with a Brown headrest.

    Finally the control stick is installed. And the next step is to assemble the Instrument panel and install it.

    More to follow.

  • Profile Photo
    Spiros Pendedekas said 2 years, 3 months ago:

    Cockpit looks great, my friend @uscusn!

  • Profile Photo
    John vd Biggelaar said 2 years, 3 months ago:

    Great results on the interior, Chuck @uscusn

  • Profile Photo
    Blue Centurion said 2 years, 3 months ago:

    Appreciate this build which is the first I have found online. I too have the kit and will build it over the next year...I hope.

    Your use of Mission Models paint shows some of the same troubles I have had with the brand name including the wear and tear on painted surfaces during the build. I also noted that you did not use a primer? Priming that stuff is very important when using MM paints...just use a lacquer primer NOT the Mission Models stuff. Even with the lacquer primer, I had too many troubles which made me get rid of over 20 colors of that stuff.

  • Profile Photo
    Eric Berg said 2 years, 3 months ago:

    Looking good Chuck. I'm impressed that you managed to get that cockpit tub together without getting attacked by the carpet monster with all those tiny parts like that tiny lever.

  • Profile Photo
    Blue Centurion said 2 years, 3 months ago:

    Hey Tom. Mine looks so far so good with tape.

    2 attached images. Click to enlarge.

  • Profile Photo
    Louis Gardner said 2 years, 3 months ago:

    Chuck, @uscusn
    Any updates on your F-82 build ? I really enjoy reading your build journals. You put forth such a great effort to show us the good things about your builds. The pictures you post are also a good way to convey what you are describing. They say a picture is worth a thousand words...and I believe it. Thanks !

  • Profile Photo
    Chuck A. Villanueva said 2 years, 3 months ago:

    Thanks Spiros, great patience attaching not only fine detailed plastic and PE, but the well done decals as well really do enhance the kit provided parts. Don't recall the last time not using any aftermarket parts.

  • Profile Photo
    Chuck A. Villanueva said 2 years, 3 months ago:

    Thanks John, this is just the pilots cockpit, the radar operators side is just as detailed,

  • Profile Photo
    Chuck A. Villanueva said 2 years, 3 months ago:

    Hi Blue, thanks and welcome. I have been using MM paints for a few years now. I have not really encountered any bad experiences other than the occasional uplifting trying to unmask a sharp edge. I do use primer but not always. For the most part I am satisfied with the performance of Mission Models paint and will continue to use it as they have some awesome color choices. But it is not my primary choice, my go to basic is Tamiya and Gunze acrylics. Vallejo for the metallics. Your temporary tape job does show that the F-82 will assemble with little trouble.